H
H
1
8
Start Up
ENGLISH
• Read, understand and apply the safety
warnings on page 5.
• Make sure the container is empty before operating the
vacuum cleaner as a blower.
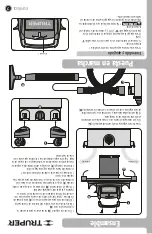
• Remove the hose from the vacuum port and connect it to
the blower port.
• Hold the end of the hose firmly.
• Turn on the vacuum cleaner.
Blowing
WARNING
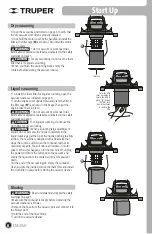
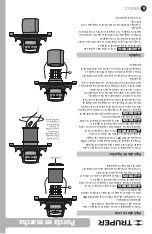
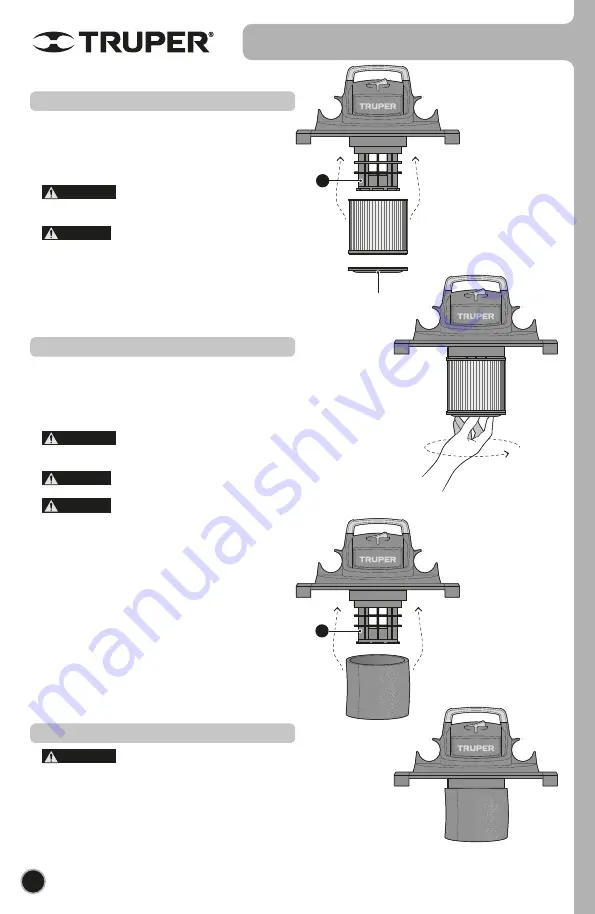
• To install the foam filter for liquid vacuuming, open the
vacuum cleaner as indicated on page 6.
• Turn the engine cover upside down and place the filter in
the filter cage (
H
1
) as shown in the image.Then put the
engine cover back in place.
• Do not vacuum or work near toxic,
flammable or explosive materials as indicated in the safety
warnings on page 5.
• For liquid vacuuming, do not use the
cloth filter for dry vacuuming.
• When vacuuming large quantities of
liquids, do not immerse the nozzle completely in the
liquid; leave a gap at the tip of the nozzle opening to allow
air flow. The machine is designed with a float valve that
stops the suction action when the container reaches its
maximum capacity. You will notice an increase in motor
speed. When this happens, turn the machine off, unplug
the power cord from the outlet, open the vacuum and
empty the liquid from the container into a receptacle or
drain.
• At the end of the vacuuming job empty the container,
clean and dry the inside. Remove the foam filter and install
the cloth filter in place before storing the vacuum cleaner.
Liquid vacuuming
CAUTION
CAUTION
WARNING
• Open the vacuum as instructed on page 6 to verify that
the dry vacuum cloth filter is properly installed.
• If not, hold the motor cover by the handle and install the
filter in the filter cage (
H
) as shown. Then install the motor
cover in place.
• Do not vacuum or work near toxic,
flammable or explosive materials as indicated in the safety
warnings on page 5.
• For dry vacuuming do not use the foam
filter that is for liquid vacuuming.
• When you finish the vacuuming work, empty the
container before storing the vacuum cleaner.
Dry vacuuming
WARNING
CAUTION
Filter cap
Turn the filter
cover clockwise to
secure the filter in
place. To remove
the filter, turn
counterclockwise
to remove the
filter
Содержание 101509
Страница 10: ...10 Notes ENGLISH...
Страница 15: ...ESPA OL 10 Notas...

