


Montaje de mango antiderr
apante
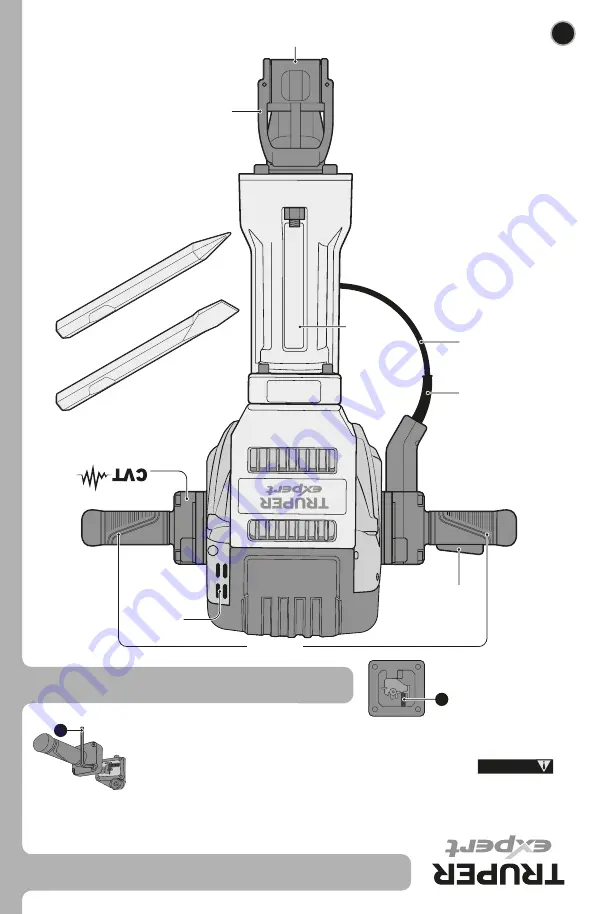
Partes
Mangos
antiderrapantes
Cabezal de
aluminio
Palanca de
retención
Interruptor
Sujetador
de herramienta
Protector
del cabe
Cable de
alimentación
6
ESP
AÑOL
Cincel plano
Cincel de punta
Ranuras de
ventilación
Verifique que se incluyen las siguientes par
tes:
• Mango antiderrapante.
• 4 Tornillos cabeza allen
• 1 Llave allen
Antes de iniciar con el ensamble
verifique que el resorte del control de vibración se
encuentre correctamente ensamblado; tome como
referencia la siguiente imagen (
A
).
ATE
NCIÓN
Una vez confirmado el número de accesorios y el
correcto ensamble del resor
te del control de
vibración, proceda al ensamble del mango
antiderrapante contra el martillo demoledor
.
Haciendo coincidir los 4 barrenos de la periferia
del mango antiderrapante con los barrenos de
fijación en el martillo demoledor, coloque y
apriete los tornillos con ayuda de la llave allen
(incluida) (
B
).
A
B
Con
trol de V
ibración
TRUPER