Page 3 of 4
Step 3. Cleating & Setting the Sink
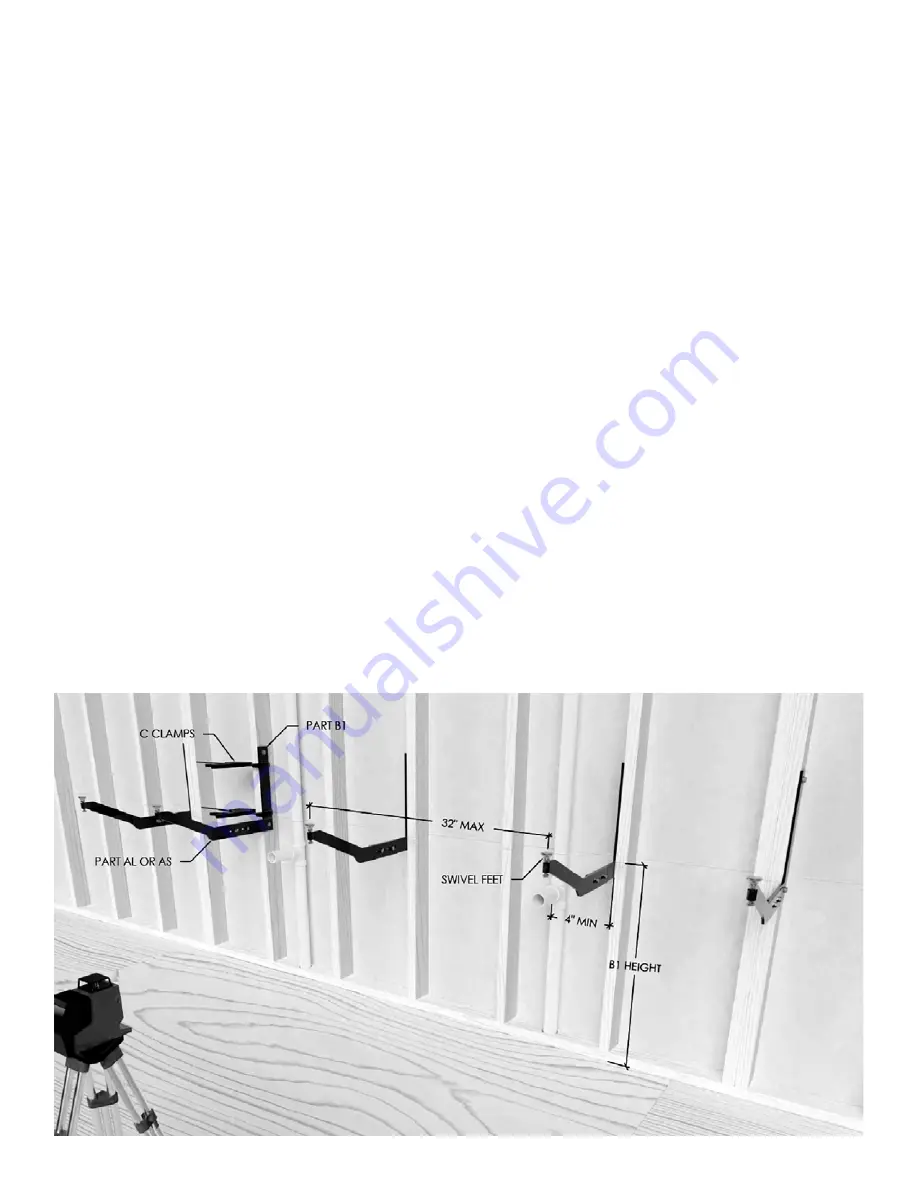
Step 2. Attaching & Setting the Supporting Arm (AS or AL)
1.
Cleating is optional but recommended. Once the wall has been closed-up, you may install horizontal cleating
on the back wall (and side walls, if applicable) between brackets at 1” below the height of the finished sink.
Ensure the distance between any side wall cleat and a bracket does not exceed 32”
.
2. When the heights and measurements of all components are verified, apply silicone to all contact
points (top of swivel feet and top of each cleat [if applicable]). The sink is now ready to be set.
3. When setting the sink, the swivel feet will make contact with a built-up surface underneath the front of the
sink apron (either by plywood or concrete). Note that your sink will arrive with this surface already prepared.
4. Ensure that all all swivel feet are making contact with the underside of the sink, and
use the 9/16” socket to
adjust the swivel feet height as necessary to level the sink.
1. Attach Parts AS or AL slightly less than hand-tight to Part B1 using the 5/16”-18 nuts and bolts so you can
adjust their final location.
2. Set the distance from the center of the swivel feet to the finished wall, which is determined by subtracting
1-3/4” from the overall counter depth.
3. Use the 1/2" socket and 1/2” box wrench to tighten the hardware.
Due to the tolerance between the bolts
and the slots, it is important to apply slight downward pressure on the swivel foot during this step. The top
surfaces of Parts B1 sand AL or AS should be flush.
4. When all brackets are complete, the swivel feet should be level with each other and approximately 2 1/4”
below the finished sink height when the leveling screws are midway between the top and bottom positions
with room for adjustment in both directions.


