


U N D E R B A R R E F R I G E R A T I O N
U N D E R B A R R E F R I G E R A T I O N
truemfg.com
TEC_TM_114 | REV. A | EN
04/26/2021
Page 18 of 28
TEC_TM_114 | REV. A | EN
04/26/2021
Page 19 of 28
truemfg.com
Cabinet Operation (cont.)
To minimize draft beer problems, always follow the recommended
instructions for temperature and CO₂ pressures from your beer
supplier.
Flat Beer
Foamy head disappears quickly. Beer lacks usual zestful,
brewery-fresh flavor.
• CO₂ turned off when not in use.
• Contaminated air source (associated with compressed air).
• Greasy glasses.
• Not enough pressure.
• Pressure shut off during night.
• Loose tap or vent connection.
• Sluggish pressure regulator.
• Obstruction in lines.
False Head
Large soap-like bubbles, head dissolves very quickly.
• Dry glasses.
• Improper pour.
• Pressure required does not correspond to beer temperature.
• Coils or direct draw beer lines warmer than beer in keg.
• Small lines into large faucet shanks.
• Beer drawn improperly.
Wild Beer
Beer, when drawn, is all foam and not enough liquid beer.
• Beer drawn improperly.
• Faucet in bad or worn condition.
• Kinks, dents, twists or other obstructions in line.
• Traps in beer lines.
• Beer too warm in kegs or lines.
• Too much pressure.
• Creeping gauge causing too much pressure.
Cloudy Beer
Beer in the glass appears hazy, not clear.
• Dirty glass or faucet.
• Beer over-chilled.
• Beer temperature variance in keg (beer may have warmed
up at some time).
• Hot spots in beer lines.
• Cutting beer through faucet.
• Beer line in poor condition.
• Dirty lines.
• Beer that has been frozen.
Bad Taste
• Dirty faucet.
• Old or dirty beer lines.
• Failure to flush beer lines with water after each empty keg.
• Unsanitary conditions at bar.
• Foul air or dirt in lines.
• Oily air; greasy kitchen air.
• Temperature of package too warm.
• Dry glasses.
Draft Beer Problems & Troubleshooting
Cabinet Operation (cont.)
Changing CO₂ Gas Cylinder
CAUTION
– Always follow these instructions when you replace
a CO₂ gas cylinder:
Procedure
1.
Close cylinder valve
A
.
2.
Remove tap head
D
from the barrel. Pull the pressure release
ring on the body of the tap to release pressure remaining in
the line (
DO NOT
close regulator shut-off
C
).
3.
Remove or loosen regulator key
B
by turning counter
clockwise.
4.
Remove the regulator from used cylinder at outlet
E
.
5.
Remove the dust cap from new gas cylinder at outlet
E
and
clear dust from the outlet by opening and closing valve
A
quickly using appropriate wrench.
6.
Attach the regulator to the new cylinder at outlet
E
(use new
fiber/plastic washer, if required).
7.
Completely open valve
A
.
8.
Close valve
C
.
9.
Adjust regulator key
B
by turning clockwise to set pressure.
Check setting by opening
C
and pulling and releasing the ring
F
on the pressure release valve on the body of the tap.
10.
Tap the barrel at
D
with valve
C
open.
NOTE:
• Don't lay CO₂ cylinders flat.
• Don't drop CO₂ cylinders.
• It requires 1/2 lb. (0.23 kg) of CO₂ to dispense a half-barrel of
beer at 38˚F (3.3˚C) with 15 psi (1.03 bar) of pressure on the
barrel.
Pressure Adjustment on CO₂ Regulator
Increasing Pressure
1.
Close regulator shut-off
C
.
2.
Turn the regulator key
B
clockwise and adjust setting.
3.
Tap the gauge for an accurate reading.
4.
Open regulator shut-off
C
and draw beer.
Decreasing Pressure
1.
Close regulator shut-off
C
.
2.
Untap the barrel at
D
and to bleed line, activate the tap
handle. Leave it in the open position.
3.
Slowly open regulator shut-off
C
and simultaneously turn
regulator key
B
counter-clockwise to zero reading.
4.
Close regulator shut-off
C
and set pressure by turning regulator
key
B
clockwise. Check the setting by opening and closing
valve
C
.
5.
Close the tap head
D
(put in
OFF
position).
6.
Tap the barrel at
D
and open regulator shut-off
C
.
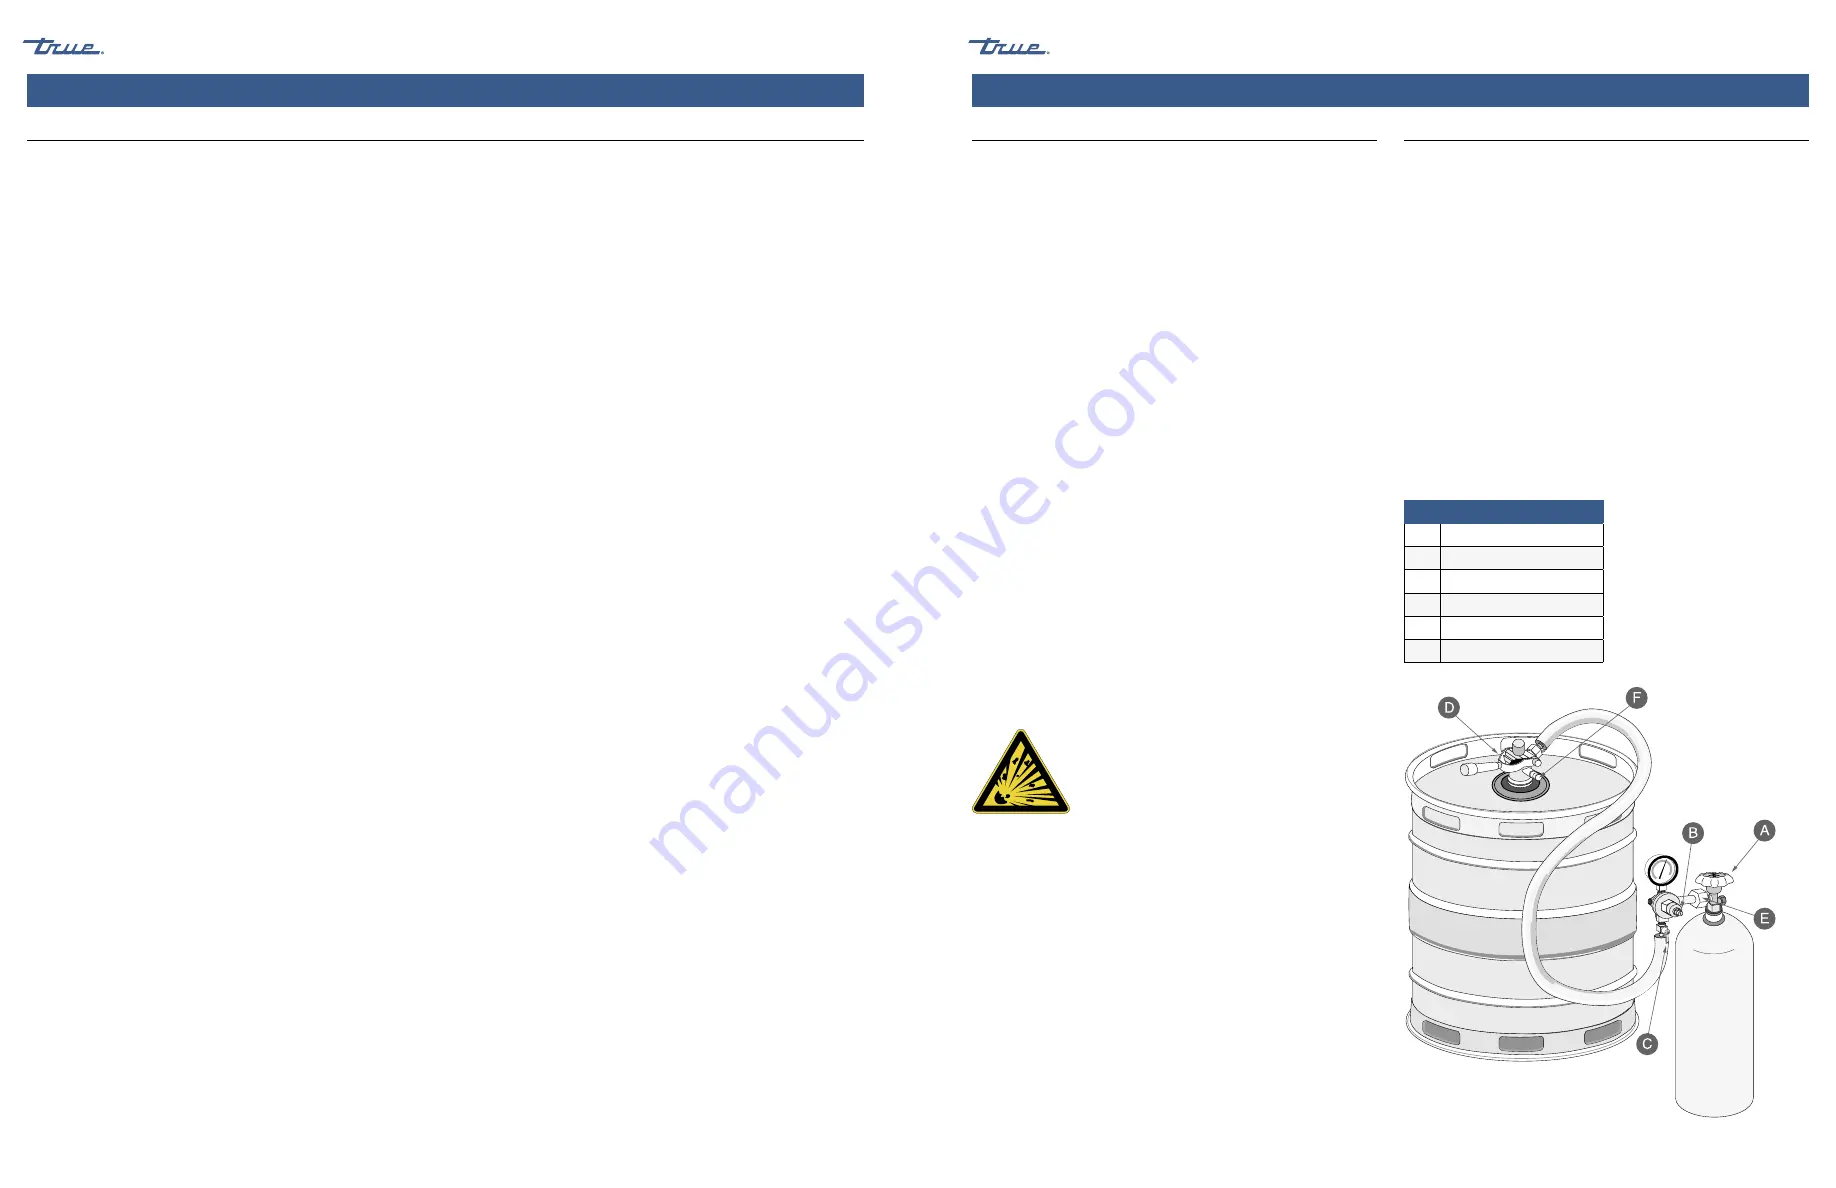
Parts Key
A
Cylinder Valve
B
Regulator Key
C
Regulator Shut-off
D
Tap Head
E
CO₂ Cylinder Outlet
F
Ring
WARNING
– Contents under pressure. Take
care when handling filled CO₂ tanks. If unfamiliar
with using CO₂ tanks and/or regulators, seek
information from your local distributor or brewer
representative before proceeding.


