


4–
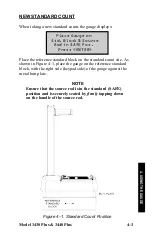
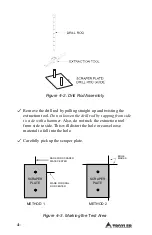
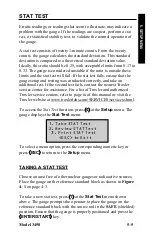
Figure 4–2. Drill Rod Assembly
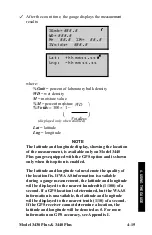
✓
Remove the drill rod by pulling straight up and twisting the
extraction tool.
Do not loosen the drill rod by tapping from side
to side with a hammer.
Also, do not rock the extraction tool
from side to side. This will distort the hole or cause loose
material to fall into the hole.
✓
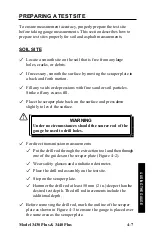
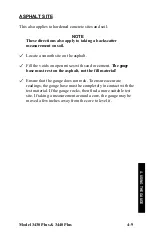
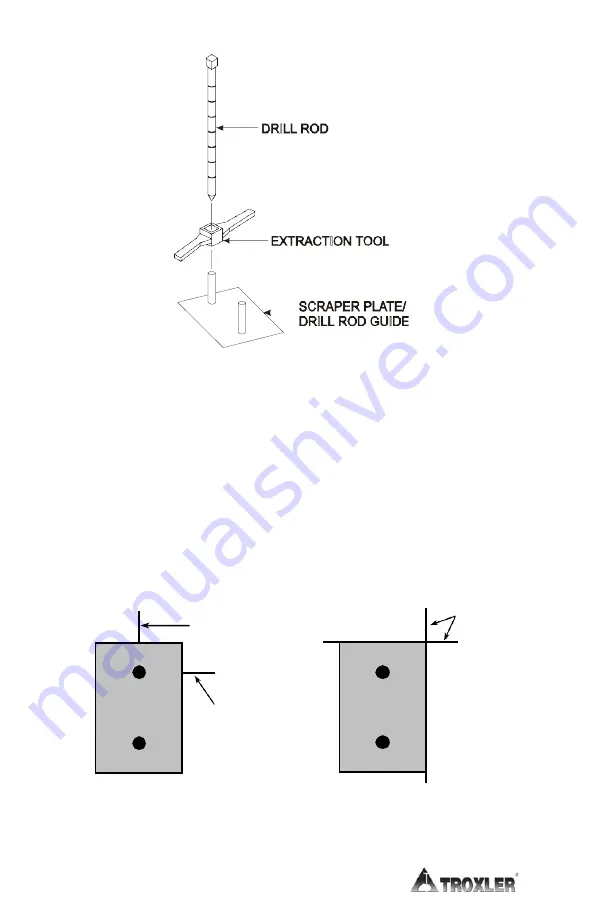
Carefully pick up the scraper plate.
MARK FOR SCRAPER
PLATE CENTER
EDGE
MARKS
MARK FOR DRILL
ROD CENTER
METHOD 1
METHOD 2
Figure 4–3. Marking the Test Area
SCRAPER
PLATE
SCRAPER
PLATE
Содержание 3430 Plus
Страница 3: ...Model 3430 Plus 3440 Plus iii ...
Страница 7: ...Model 3430 Plus 3440 Plus vii NOTES ...
Страница 10: ......
Страница 14: ...Model 3430 Plus 3440 Plus xii NOTES ...
Страница 16: ...xiv NOTES ...
Страница 30: ...2 6 NOTES ...
Страница 64: ...4 NOTES ...
Страница 98: ...7 NOTES ...
Страница 122: ...9 NOTES ...
Страница 142: ...Appendix A 20 NOTES ...
Страница 167: ...Model 3430 Plus 3440 Plus Appendix C 21 Figure C 4 Base Assembly Part Number 110015_XXXX C TROUBLESHOOTING ...
Страница 170: ...Appendix C 24 Figure C 5 Scaler Assembly Part Numbers 110791 3430 Plus and 110876 3440 Plus Continued ...
Страница 178: ...Appendix D 2 STANDARD COUNT LOG Gauge Serial Number Date MS DS Date MS DS ...
Страница 180: ...Appendix D 4 STANDARD COUNT LOG Gauge Serial Number Date MS DS Date MS DS ...
Страница 190: ...Appendix F 8 NOTES ...
Страница 194: ...Appendix G 4 NOTES ...
Страница 200: ...Appendix H 6 NOTES ...
Страница 215: ...Model 3430 Plus 3440 Plus Index 11 W Wide Area Augmentation System WAAS 2 Y YES key 3 4 INDEX ...
Страница 216: ...Index 12 NOTES ...
Страница 217: ...Model 3430 Plus 3440 Plus Warranty 1 NOTES WARRANTY ...


