5.3.4 Installation opening
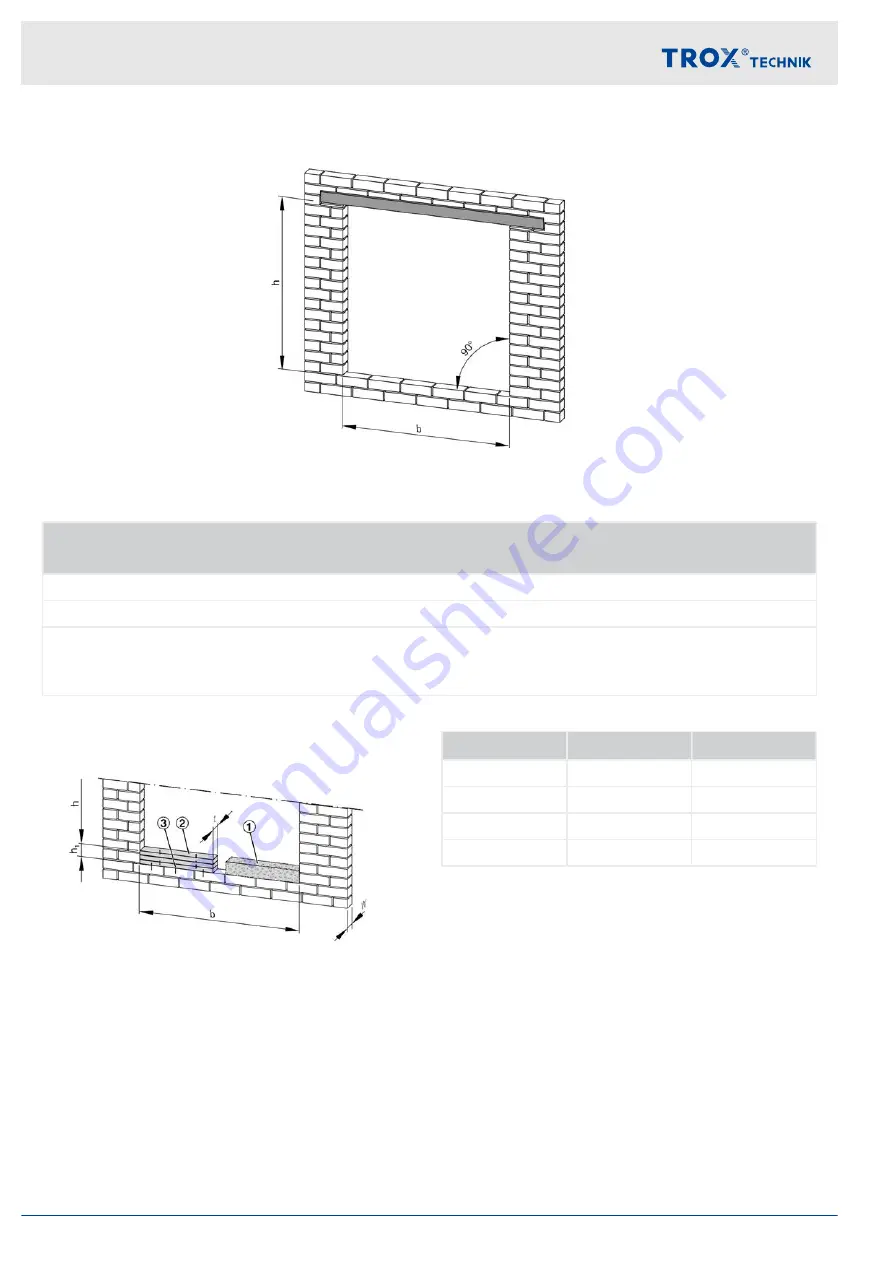
Fig. 8: Ideal installation opening
in
Solid wall, shaft wall or solid ceiling slab
b = [B + 100 mm] + 100 mm
h = [H + 100 mm ] + 100 mm
[nominal size + damper casing]
Total gap:
100 mm = (50 + 50 mm)
Adapting the installation opening in solid walls and
shaft walls
Fig. 9: Installation opening with concrete or calcium sili-
cate boards for height adjustment
t = W (100 mm min., 250 mm max.)
h1 See Table
To adapt the height of the installation opening you can
fill in concrete (Fig. 9/1) or calcium silicate boards
Be sure to attach the boards to each other and also to
attach them to the brick structure. To do so, use glue or
screws (Fig. 9/3); screws should be at
≤
200 mm from
each other.
Boards
Thickness [mm] h
1
[mm]
Promatect MT
40
40 - 200
Promatect LS
35
35 - 210
Promatect H
25
25 - 200
Promatect H
10 - 20
10 - 100
Glue: Promat K84
Additional information upon request.
5.3.5 After installation
Remove the transport protection device (in case of
mortar-based installation, do this after the mortar
has cured)
Clean the smoke control damper.
Connect the smoke extract duct.
Make electrical connections.
Installation
General installation information > After installation
Smoke control damper Type EK-EU
14
Содержание EK-EU
Страница 35: ...Smoke control damper Type EK EU 35...


