


10
EN
luxmeter BF06WP
Generating a report
The reports generated in the MultiMeasure Mobile app are short
reports providing a fast and simple documentation. Proceed as
follows to generate a new report:
1. Press the
Reports
button (35).
ð
The reports overview opens.
2. Press the
New report
button (36) to create a new report.
ð
An input mask for entering all the relevant information
opens.
3. Enter the information via the input mask and save the data.
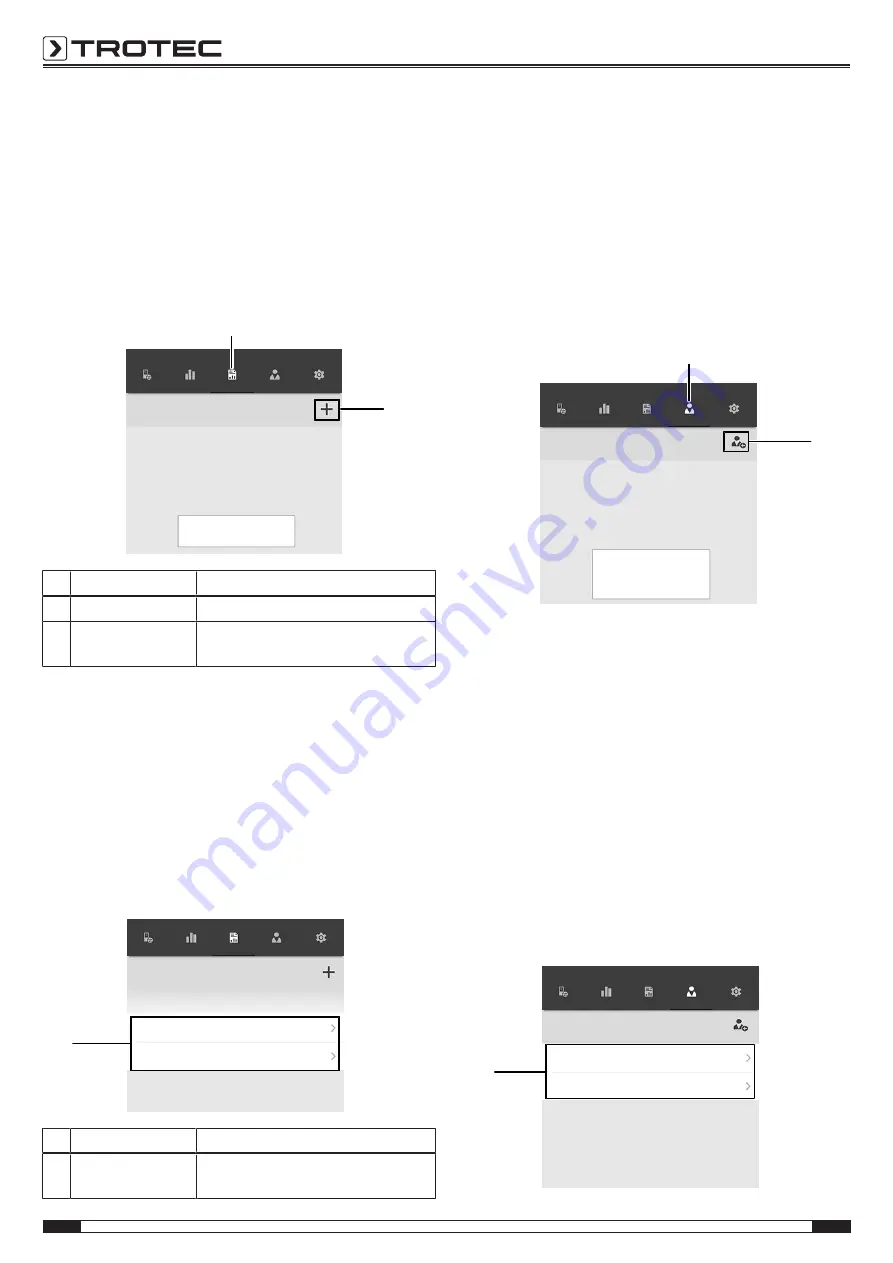
Reports
Tap on "+" to generate a new
report.
35
36
Sensors
Measurements
Reports
Customers
Settings
No. Designation
Meaning
35
Reports
button
Opens the overview of saved reports.
36
New report
button Creates a new report and opens an
input mask.
Info
The customer can acknowledge the report directly in
the integrated signature field.
Calling up a report
Proceed as follows to call up a created report:
1. Press the
Reports
button (35).
ð
The reports overview opens.
2. Press the corresponding button (37) to display the desired
report.
ð
An input mask opens in which you can view and edit all
the information.
Reports
03/26/2019
report 01
report 02
37
Sensors
Measurements
Reports
Customers
Settings
No. Designation
Meaning
37
Display reports
button
Opens the selected report.
Creating a new customer
Proceed as follows to create a new customer:
1. Press the
Customers
button (38).
ð
The customers overview opens.
2. Press the
New customer
button (39) to create a new
customer.
ð
An input mask for entering all the relevant information
opens.
3. Enter the information via the input mask and save the data.
4. Alternatively, you can also import existing contacts from
the phone book of the terminal device.
Customers
Add a customer from your address
book / contacts or enter the details
for a new customer.
38
39
Sensors
Measurements
Reports
Customers
Settings
Info
You can perform a new measurement directly from the
input mask.
Calling up customers
Proceed as follows to call up an already created customer:
1. Press the
Customers
button (38).
ð
The customers overview opens.
2. Press the corresponding button (40) to display the desired
customer's details.
ð
An input mask opens in which you can view and edit all
the information for the selected customer as well as
directly start a new measurement.
ð
The
New customer
button (39) changes. In this menu it
can be used to delete the selected customer data record.
Customers
40
Test customer_A1
Test customer_A2
Sensors
Measurements
Reports
Customers
Settings


