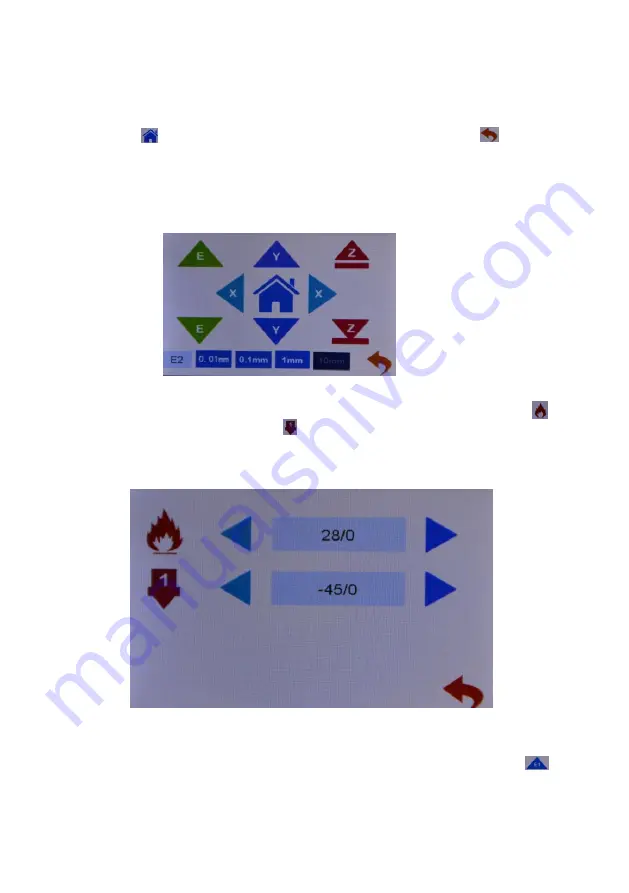
3.1.2 Click on the E1 icon, and the E1 icon changes to show E2. Click on
the E2 icon againto show E1, as shown in figure E1E2. Click on the
switch state.When displaying E1,click icon E to start extruder 1; when
displaying E2, click icon E to start extruder 2.
3.2Click the preheat icon, as shown in the figure, to set the heating
temperature of the machine extrusion head and the hot bed, the icon
hot bed heating and the icon hot head heating, and click the icon
on the right and left direction to adjust the setting temperature heating.
Use the heating function when replacing filaments.Click the digital icon
to directly switch to the preset temperature.
Set the heating temperature, the temperature reached, click the icon
to return the material.When installing the consumables, insert the
consumables directly into the feeder hole
After clicking, the dark color is displayed, such as icon 10mm, indicating
that each click of motor stroke moves 10mm.
Click the icon and the machine returns to the origin.Click back
to the parent menu.
3.3Click the icon of loading and unloading filaments to indicate
preheating.Remove the filaments to warm up before pulling them out
Содержание X6-2E
Страница 1: ...Model name X6 2E Instructions 深圳市创星元科技有限公司 SHENZHEN TRONXY TECHNOLOG CO LTD ...
Страница 4: ...Gantry bracket The base X axis platform 2 Machine Introduction Touch screen 1 Front view ...
Страница 5: ...FT card slot USB Y polished rod Right feeder 2 Right view The right material shelf ...
Страница 6: ...the left material shelf Adjusting nut left feeder 3 Left view 110V 220V selection port ...


