6
4. Enclosure Installation
5. Enclosure Configuration
90°
EARTH
GROUND
5.1 Adding or Removing Front and Rear Doors
5.1.1 Removing Doors
A
B
1
2
3
4
A
4
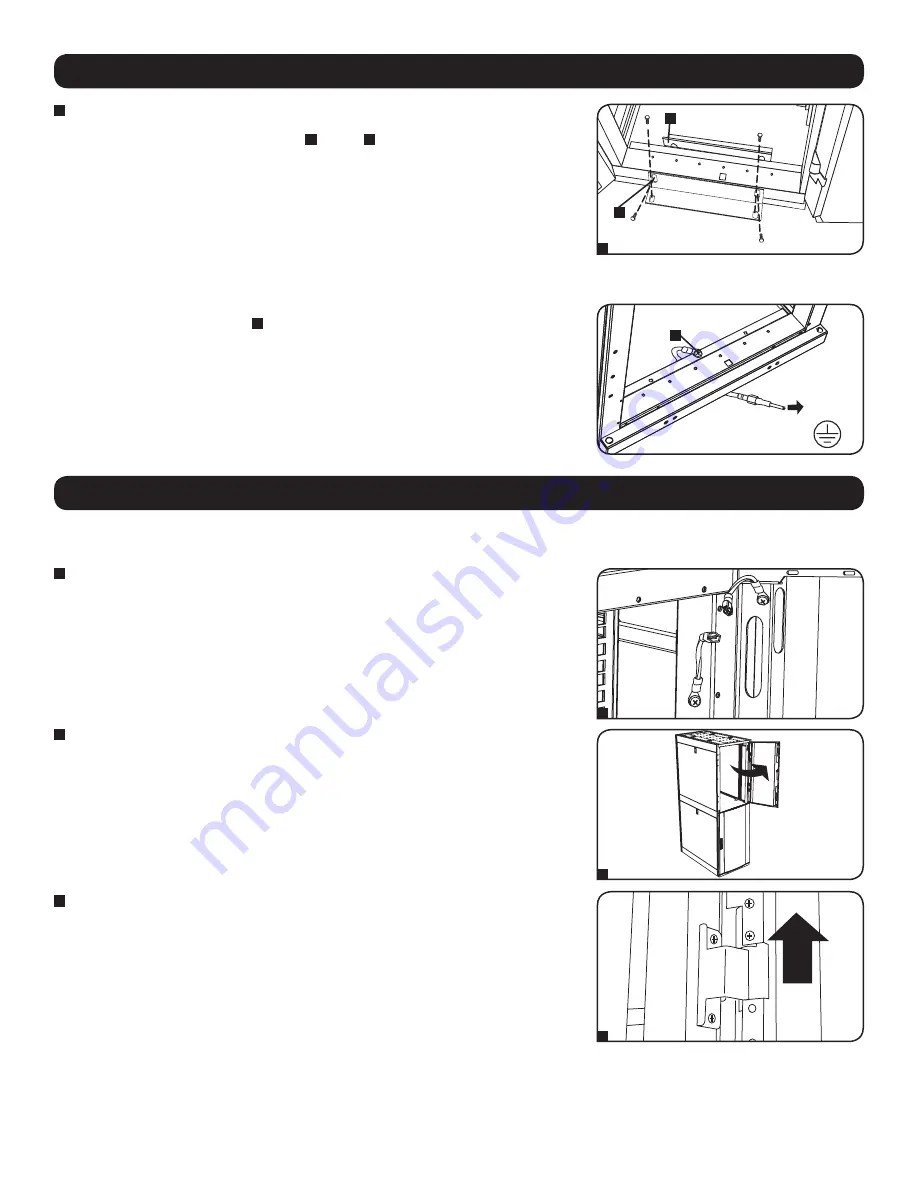
In order to secure the cabinet to the building structure for stability, attach the 2 shipping brackets
using the hardware that attached the enclosure to the shipping pallet. Use a 13 mm open-end
wrench to connect the brackets to the outer
A
or inner
B
bracket mounting points of the
enclosure. Attach the brackets to secure mounting points in the floor using user-supplied hardware
or Tripp Lite's SmartRack Bolt-Down Kit (Part # SR331).
All the parts of the enclosure should be grounded to the frame of the enclosure. Use the enclosure's
front or rear threaded grounding point
A
and an M6 screw (not included) to connect the frame of the
enclosure directly to your facility's earth ground connection with an 8 AWG (3.264 mm) wire (not
included). Route the ground wire under the enclosure's frame to ensure unhindered door operation.
WARNING: Attach each enclosure to earth ground separately. Do not use the enclosure
without an earth ground connection.
4.5 Ground Connection
1
Disconnect the door's ground wire.
2
Open the door until it is perpendicular (90 degrees) to the front of the enclosure.
3
Lift the door from the hinges and remove it from the enclosure.
5.1.2 Reinstalling Doors
To Reinstall Doors, Reverse Steps 1-3
(Optional)
If the enclosure is joined to another enclosure, turn the door back toward the enclosure as you lift it from the hinges.


