3
Installation
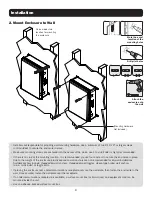
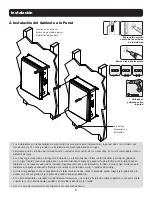
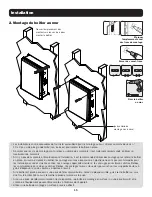
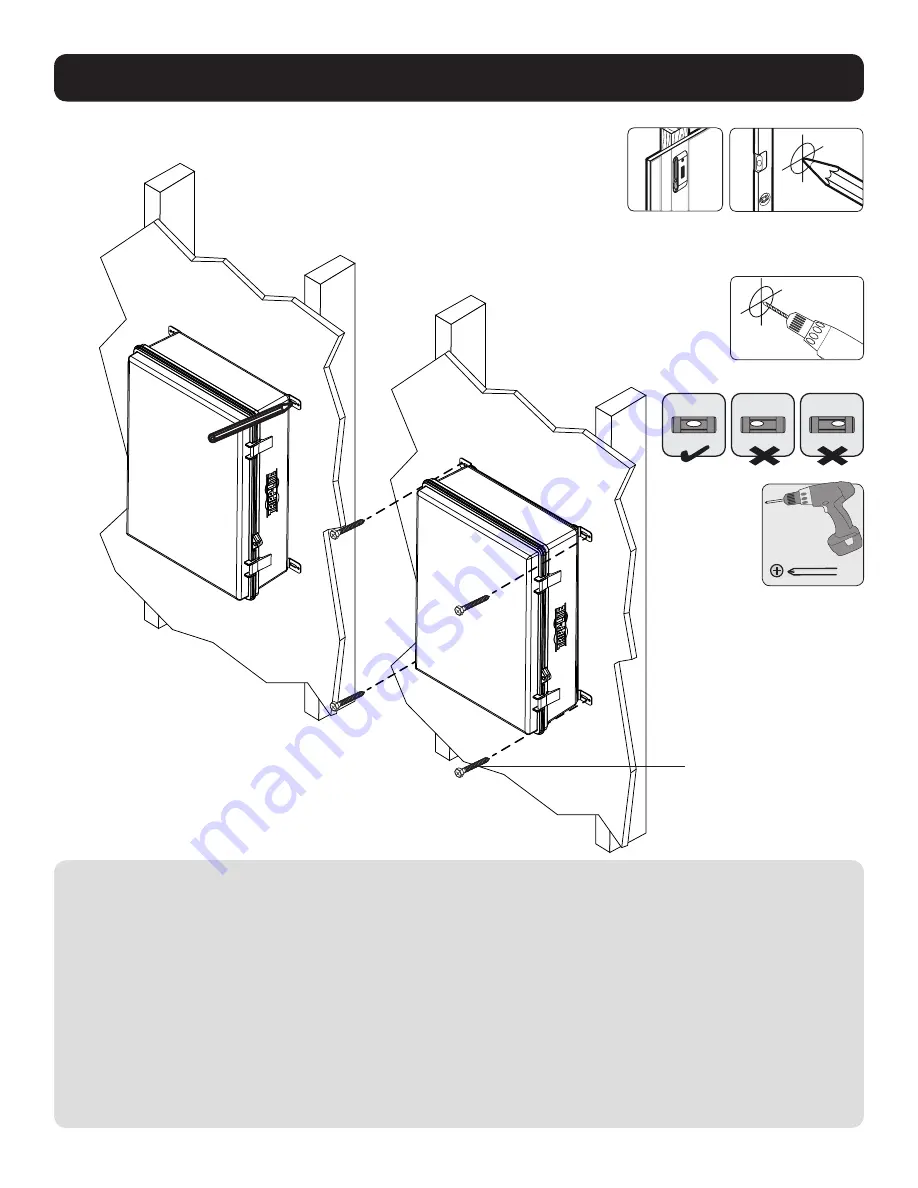
• Installers are responsible for providing wall-mounting hardware. Use a minimum of two #10 x 2” or larger screws
(not included) to secure the enclosure in place.
• Make sure mounting screws are anchored into the center of the studs. Use of a stud finder is highly recommended.
• If there is no stud at the mounting location, it is recommended you use four anchors to secure the enclosure in place.
Due to the weight of the enclosure, plastic expansion wall anchors are not recommended for drywall installations.
Suitable anchors include: threaded drywall anchors, threaded drywall toggles, sleeve-type hollow wall anchors
(a.k.a. molly bolts) or toggle bolts.
• If placing the enclosure over a telecommunications receptacle, remove the wall plate, then fasten the enclosure to the
wall. Once secured, fasten the wall plate over the receptacle.
• If no telecommunications receptacle is available, a surface mount box (or biscuit jack) and equipment cord can be
mounted inside the unit.
• Use an adhesive-backed surface mount box.
2. Mount Enclosure to Wall
Mark the exact
location of the
mounting holes
Attach the
enclosure onto
the wall
Drill pilot holes
Find a wood stud
location for mounting
the enclosure
(Mounting Hardware
Not Included)
Содержание EN1511N4LATCH
Страница 20: ...20 www tripplite com support 1 4 2 2 1 4 4 1 1...
Страница 21: ...21 10 x 2 2...
Страница 22: ...22 3 4 NEMA...
Страница 23: ...23 5 5a Cisco AIR AP BRACKET 2 5b Aruba AIR AP BRACKET 2 Cisco...
Страница 24: ...24 6 5 5 Tripp Lite 1111W 35th Street Chicago IL 60609 USA www tripplite com support 19 08 129 93 37F8_RevB...

