


1
2
3
3
4
5
7
8
8
7
Hardware Setup
continued
• If the following conditions occur, unplug the device from the wall outlet and bring it to
qualified service personnel for repair.
—The power cord or plug has become damaged or frayed.
—Liquid has been spilled into the device.
—The device has been exposed to rain or water.
—The device has been dropped, or the cabinet has been damaged.
—The device exhibits a distinct change in performance, indicating a need for
service.
—The device does not operate normally when the operating instructions are
followed.
• Only adjust those controls that are covered in the operating instructions. Improper
adjustment of other controls may result in damage that will require extensive work by a
qualified technician to repair.
Rackmount Installation
Using the included rackmount hardware, attach the rackmount brackets to the KVM switch.
Depending on whether you want to mount the KVM switch to the front or back of the rack,
install the rackmount brackets to the front or back sides of the KVM switch. Using user-
supplied screws, fasten the rackmount brackets to the rack.
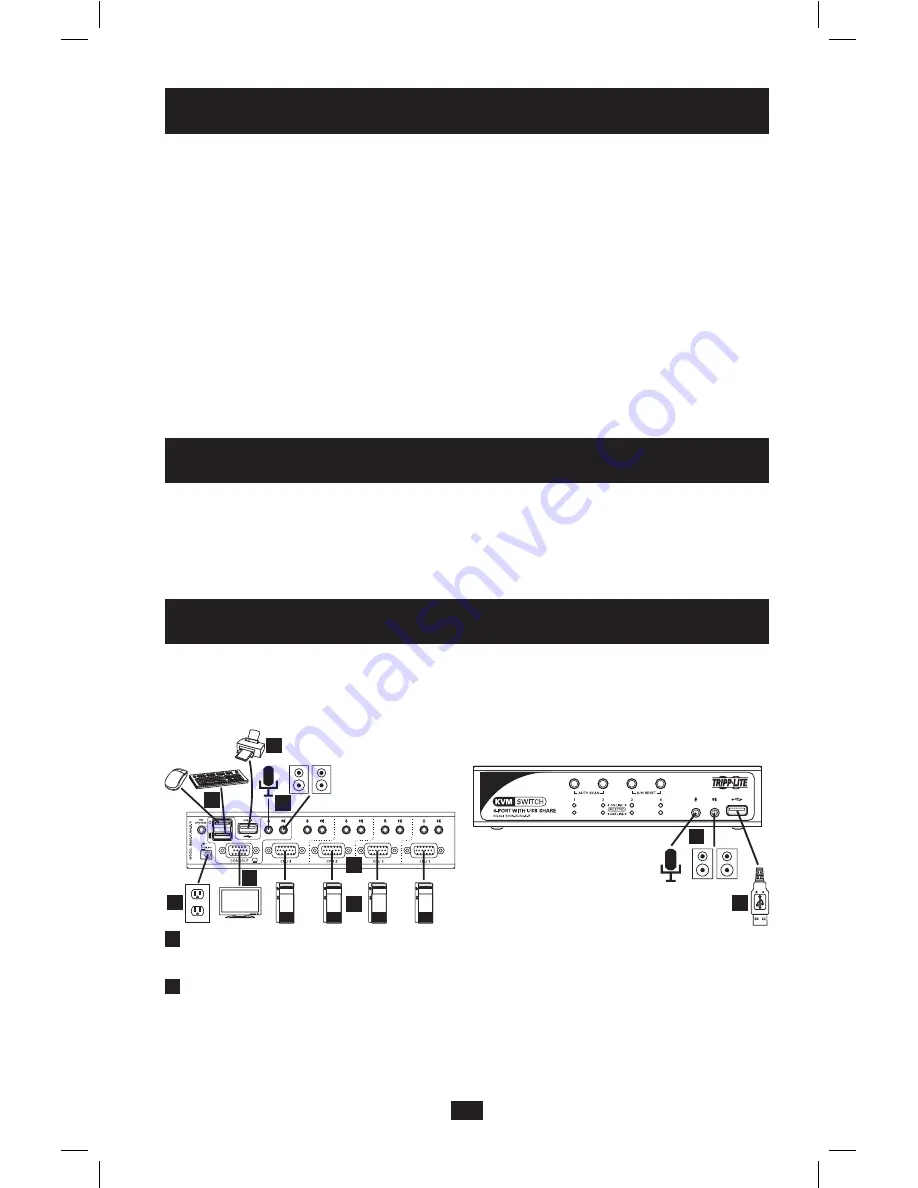
System Installation
Refer to the steps and diagram to set up your KVM switch installation. Note: Before making any
connections, make sure that power to all devices being connected to the KVM switch is turned
off. Unplug the power cords of any computers that have the Keyboard Power On function.
1
Connect your monitor to the HD15 Female console port on the back panel of the KVM
switch.
2
Connect your USB keyboard and USB mouse to the corresponding USB console ports
on the back of the KVM switch. If you have a PS/2 keyboard and/or mouse, connect the
included USB to (x2) PS/2 adapter cable to one of the USB console ports on the back of
the unit, and then connect your PS/2 keyboard and/or mouse to the corresponding PS/2
connector(s) on the adapter cable. You can connect any combination of keyboard and
mouse; USB – USB, PS/2 – PS/2 or USB – PS/2.
201004198 93-2947.indd 7
4/23/2010 3:26:53 PM


