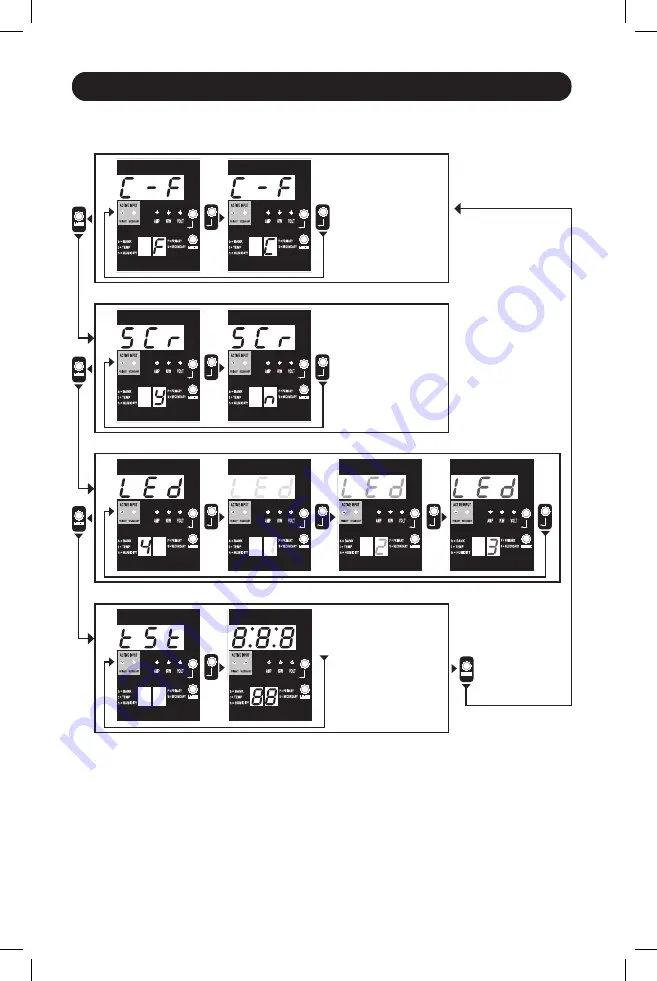
LED Diagrams
HOLD
HOLD
HOLD
HOLD
HOLD
TIME OUT
HOLD
HOLD
HOLD
HOLD
18
Control Modes
Celsius or Fahrenheit Configuration
(Only Shown if EnviroSense Connected)
Note 1:
Press Mode button to go to the next Display mode (vertical movement on this document). Note the Amps, kW or Volt
sub-mode will be remembered.
Note 2:
Press and HOLD Enter button for 2 seconds to change the configuration. Whatever configuration is shown is what the
unit is configured for (horizontal movement on this document).
Note 3:
The Active Input LEDs will always show the present source powering the load.
Note 4:
Press and hold both Mode and Enter buttons for 2 seconds to show the IP address of the connected SNMP card.
Note 5:
Press and hold MODE button for 2 seconds to switch to Display modes (this will go to the FIRST Display mode).
Note 6:
C-F display allows the unit to be configured to display Celsius or Fahrenheit. This mode will be omitted if EnviroSense is
not connected (changes will be remembered in NVR).
Note 7:
SCr Auto scroll enable or disable. When set to y (enabled), the unit will automatically scroll through Display items (See
Display modes on page 10 for details). When set to n, the unit will not automatically scroll (changes will be remembered in NVR).
Note 8:
LED brightness control – Set this to 1-4 for the desired illumination intensity (changes will be remembered in NVR).
Note 9:
tSt LED Test control – Press and hold Enter button for 2 seconds to initiate an LED test where all LEDs will be illuminated
for 6 seconds.
Auto Scroll Enable/Disable
LED Brightness
LED Test Control


