THE INTEGRAL LEVELLING ADJUSTMENT
It is essential that the material being cut is held
securely in the cutter during the cutting process.
There are two silicon cords on the underside of
the cutter bar and one in the base to assist with
this.
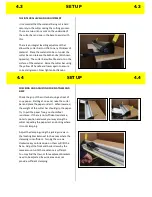
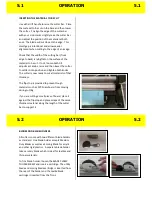
There is an integral levelling adjustment that
allows the cutter bar to sit flat on any thickness of
material. Place the material to be cut under the
cutter bar and release the both knobs (RH shown
opposite). The cutter bar will settle and sit on the
surface of the material. Raise the cutter bar using
the yellow lift handle and lower again to ensure
correct alignment. Now tighten both knobs.
CHECKING AND ADJUSTING FOR FLATNESS AND
GRIP
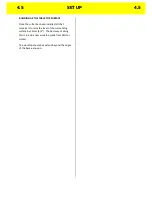
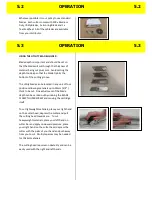
Check the grip of the cutter bar using a sheet of
copy paper. Starting at one end, raise the cutter
bar and place the paper under it. When lowered,
the weight of the cutter bar should grip the paper.
Try to pull the paper free, you should feel
resistance. If there is not sufficient resistance,
note its position and work your way along the
cutter repeating the paper test and noting where
it is not clamping.
Adjust the clamping using the jacking screws in
the locating brackets next to the areas where the
clamping is insufficient. Turning the screws
clockwise as you look down on them will lift the
base. Adjust the front and back screws by the
same amount until the resistance is sufficient.
You may find that two or three adjacent brackets
need to be adjusted if a wide area does not
provide sufficient clamping.
4.3
SET UP
4.3
4.4
SET UP
4.4


