background image

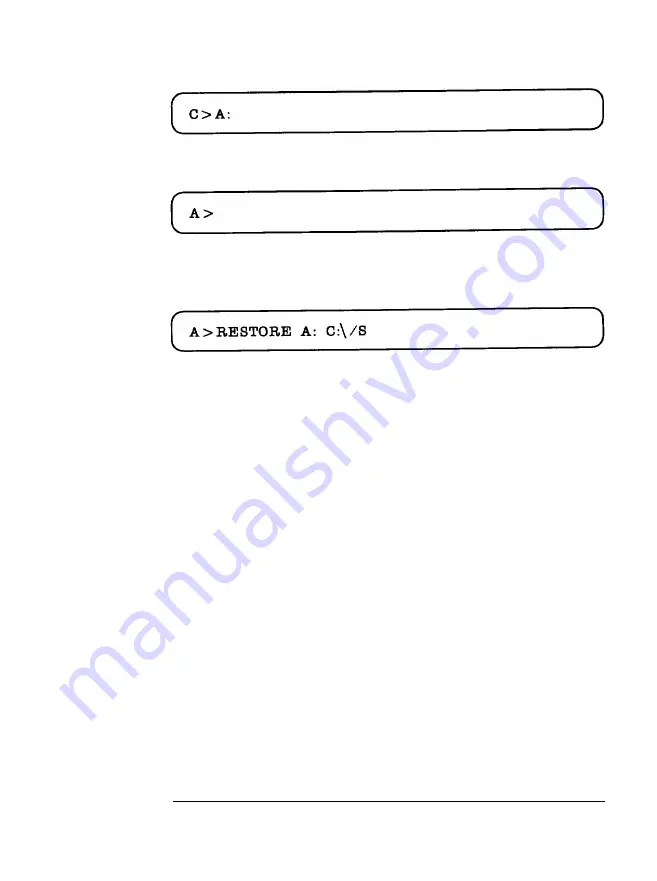
Now set the system default drive letter back to drive A by

entering:

The computer will respond by displaying:

Make sure your MS-DOS Install diskette is inserted into the A

drive. Enter the following command:

The RESTORE command file will be read from the MS-DOS

Install diskette. The A: C:\ in the command tells MS-DOS that

you will be restoring files from diskettes in the A drive to the

hat-d disk root directory. The /S switch tells MS-DOS that you

want to restore the subdirectories as well as the root directory

files.

Using Your Hard Disk

6-21

Содержание CW3S20A Canadian Product

Страница 1: ...SX386E OPERATIONS GUIDE...

Страница 2: ...erpr fung der Serie auf Einhaltung der Bestimmungen einger umt TriGem Inc 4 NaengChun Dong Seodaemun Ku Seoul Korea English translation We hereby certify that the TriGem SX386E complies with the RFI s...

Страница 3: ...the specifications of the product described within this manual at any time without notice and without obligation of TriGem Computer Inc to notify any person of such revision or changes COPYRIGHT NOTIC...

Страница 4: ...rk of ATI Technologies Inc HP LaserJet Series II is a product of HewlettPackard Inc MS DOS and GW Basic are trademark of Microsoft Corporation Windows is a trademark of Microsoft Corporation Seagate i...

Страница 5: ...quipment off and on the user is encouraged to try to correct the interference by one or more of the following measures l Reorient or relocate the receiving antenna l Increase the separation between th...

Страница 6: ...e blocked or covered Don t use this product on a bed sofa rug or other similar surface This product should never be placed near or over a radiator or heat register This product should not be placed in...

Страница 7: ...ower outlet does not exceed 15 amps Unplug your computer from the main electrical power outlet before cleaning Do not use liquid cleaners or aerosol cleaners Use a damp cloth for cleaning Do not use t...

Страница 8: ...e covered by the operating instructions Improper adjustment of other controls may result in damage and may require extensive repair work to restore the product to normal operation Unplug this product...

Страница 9: ...alimentation et puis enleve le couvercle Once removed the cover must be replaced and screwed in position before the power supply cord is plugged back in Apres le couvercle a enleve visse le couvercle...

Страница 10: ...nd um berhitzung zu vermeiden m en diese ffnungen unbedingt freigehalten werden Betreiben Sie das Ger t nie auf Betten Sofas oder anderen wiechen Unterlagen Stecken keine Gegegenst nde Schraubenzieher...

Страница 11: ...benutzen Wartung des Computers Wenn der Computer nicht ordnungsgem arbeitet d rfen Sie nur die Finstellungen vomehmen die im Handbuch genannt werden Andere Einstellungen oder Ver nderungen k nnen den...

Страница 12: ...rschraubten Haube ist unbedingt folgendes zu beachten Das Netzkabel mu aus der Steckdose gezogen werden und zwar bevor Sie das Ger t ffnen Die Haube muss wieder monitert und verschraubt werden Erst da...

Страница 13: ...the Serial Interface l 9 5 Connecting the Power Cord 1 11 6 Connecting the Keyboard 1 12 Adjusting the Keyboard Angle 1 13 7 Turning On the Computer 1 13 The Command Prompt 1 17 8 Copying System Disk...

Страница 14: ...ettes 3 14 Making Backup Copies 3 15 Using a Single Diskette Drive 3 16 Using the Hard Disk Drive 3 17 Chapter 4 Using MS DOS With Your Computer MS DOS Diskettes 4 2 Disk Drive Letters 4 2 Starting MS...

Страница 15: ...3 The FORMAT Command 5 4 Option Switches 5 6 Copying Files 5 10 Wildcards 5 12 Chapter 6 Using Your Hard Disk What is a Hard Disk Drive 6 1 Care of Hard Disk Drives 6 2 Preparing Your Hard Disk 6 2 Ch...

Страница 16: ...autions 7 6 Opening and Closing the Cabinet 7 8 Installing Circuit Boards 7 10 Disk Drive Compartments 7 14 Internal Hard Disk Drive 7 15 Appendix A Specifications Computer System A l System Motherboa...

Страница 17: ...Appendix C Connector Pinouts I OPorts C l Expansion Slot Connectors C 5 Contents xvii...

Страница 18: ...ystem Motherboard an on board IDE interface and built in serial and parallel interfaces Your computer comes with MS DOS the operating system by Microsoft In addition to the introduction to MS DOS prov...

Страница 19: ...tion Chapter 3 covers some general operating procedures including how to use and care for your disks and disk drives Chapter 4 provides basic instructions for using MS DOS with your computer Chapter 5...

Страница 20: ...stalled in the computer any time options are added or changed 1 Unpacking As you unpack the different parts of your computer system be sure to inspect each piece If anything is missing or looks damage...

Страница 21: ...on Select a spot that provides the following A large sturdy desk or table that can easily support the weight of your system including all of its components Make sure the surface is hard and flat Soft...

Страница 22: ...her peripherals If it has the appropriate power cord you can plug your monitor into the auxiliary power outlet on the back panel of the computer reducing the number of wall outlets you need The curren...

Страница 23: ...multi frequency monitor with an analog connector you can connect it to the computer s built in VGA port See Using the VGA interface below If you have any other type of monitor see Using a Display Adap...

Страница 24: ...may have a permanently attached cable 4 Examine the connector end of the monitor cable and position the plug to match the orientation of the monitor port Then insert the plug into the port the connect...

Страница 25: ...a Display Adapter Card If you are using a non VGA monitor you ll need to install a display adapter video card in one of the computer s option slots before you can connect the monitor Your dealer may h...

Страница 26: ...ny switches or jumpers on the card are set properly For example you may need to change a switch setting to select color or monochrome See the documentation that came with your monitor or video card fo...

Страница 27: ...ace Using the Parallel Interface The parallel interface on your computer is Centronics compatible and uses a 25 pin connector To connect a parallel printer to your computer you need an IBM compatible...

Страница 28: ...an electrical outlet Using the Serial Interface If you have a serial printer modem mouse or any other peripheral with a serial interface you can connect it to the serial RS 232C port on the back of t...

Страница 29: ...Serial Ports Setting up the serial port for a printer If you are using a serial printer but your software does not support a serial printer you must do two things before you can print Set up the data...

Страница 30: ...C inlet on the computer s back panel as shown below To avoid an electric shock be sure to plug the cord into the computer before plugging it into the wall socket Figure 1 7 AC Power Connections 2 Plug...

Страница 31: ...main system unit s rear panel This connector is designed to prevent insertion if the pins don t line up so it may be necessary to rotate the cable connector until the mark on the connector is pointin...

Страница 32: ...lowing safety rules to avoid accidentally damaging the computer or injuring yourself Do not unplug cables from the computer when the power switch is on Never turn off or reset your computer while a di...

Страница 33: ...ower supply cord must be unplugged before the main system unit cover is removed Separe le cordon d alimentation et puis enleve le couvercle l Once removed the cover must be replaced and screwed in pos...

Страница 34: ...o perform an internal self test This is a series of checks the computer completes each time you turn it on to make sure everything is working correctly If anything is wrong an error message appears on...

Страница 35: ...un the Setup program described in Chapter 2 For now press the Fl key on the upper left comer of the keyboard to acknowledge the message and continue If you cannot see the screen display clearly use th...

Страница 36: ...A and the hard disk is drive C If you have an optional second diskette drive MS DOS identifies it as B 8Copying System Diskettes Perform the following procedure only if your system is configured with...

Страница 37: ...hould be on the screen If not type C and press Enter 2 Type the following and press Enter The screen displays this message 3 Insert the MS DOS diskette in drive A as shown on the next page Hold the di...

Страница 38: ...ollowing 5 Remove the MS DOS diskette and insert a blank diskette which is to be the target diskette in drive A Then press any key If the diskette is not formatted the DISKCOPY program formats it Then...

Страница 39: ...prompt C After you have copied the MS DOS diskettes be sure to label them carefully so you know which one is which Write on the labels before you attach them to the diskettes in order to prevent dama...

Страница 40: ...ny time you RESET your computer the memory will be cleared This will erase any software programs loaded into the system RAM You may lose important data or have problems using your software after the s...

Страница 41: ...the CMOS memory As soon as the host is turned on the power on diagnostics routines check memory attempt to prepare peripheral devices for action and offer you the option of pressing DEL to run Setup...

Страница 42: ...ory test you will get the following prompt on the screen depending upon the type of BIOS you have Hit DEL key to get into the Setup Mode If you hit DEL key a menu appears on the screen giving you the...

Страница 43: ...ere no errors detected the computer tried to load MS DOS from the floppy disk drive before you have inserted the MS DOS main system diskette For now ignore this message Entering SETUP To enter the set...

Страница 44: ...n the screen will be replaced by the following This screen is the SETUP MENU This lists the parameters you can change with the SETUP program A solid cursor bar highlights the parameter currently avail...

Страница 45: ...e PgUp or PgDn keys to select the appropriate value for the month date and year The procedure for setting the time is similar to that of setting the date The time here is 24 hour time so don t be alar...

Страница 46: ...m performance Display Type Setup The next option is primary display selection The options are as follows Type of Display Allowed Monochrome Color 40 X 25 Color 80 x 25 VGA or EGA Not Installed Keyboar...

Страница 47: ...se shadow RAM l Shadow Use this parameter to copy the system BIOS and Video BIOS into RAM l Remap This parameter will be available only when you use 1MB or 2MB using 2ea 1MB SIMM system memory You can...

Страница 48: ...IDE l On B D FDC System has on board FIX which is enabled disabled automatically depending on the existance of option board FDC The FDC has on chip analog data selector that operates up to lMB s and...

Страница 49: ...sage If you have made any mistakes press N for No then move the cursor back up to the beginning and verify each parameter making any corrections necessary When you are satisfied with the option settin...

Страница 50: ...0MHz the computer performs all tasks faster and almost all programs may be run at 20MHz However some option cards and application programs require the slower speed See your option card or application...

Страница 51: ...ted on the MS DOS diskette supplied with the system You can find the detailed description of TGSS COM in your MS DOS User s Guide Special Keys on your Keyboard Certain keys on your keyboard serve spec...

Страница 52: ...lternate character codes or functrons Moves the cursor back one space deleting the character to the left of the cursor Ends a line of keyboard input or executes a command may be called the Return key...

Страница 53: ...spreadsheets Turns the Insert function on and off in some application programs Del Deletes the character at the cursor position The Num Lock Scroll Lock and Caps Lock keys work as toggles press the ke...

Страница 54: ...ular operation however you may need to reset the computer as described in a previous section Caution It is best not to turn off the computer to stop a program or command If you have created new data t...

Страница 55: ...and dirt A hard disk stores data the same way that a diskette does but it works faster and has much larger storage capacity All disks are divided into data storage compartments by sides tracks and se...

Страница 56: ...disk drive to store and retrieve data on a disk There is one head above the diskette and one below so the drive can write to both sides of the diskette To write to a disk the computer spins it in the...

Страница 57: ...use single sided 160KB or 180KB diskettes These diskettes contain 40 tracks per side 8 or 9 sectors per track and hold up to 360KB of information which is approximately 150 pages of text With 8 sector...

Страница 58: ...size as the drive but have different capacities The following tables summarize the possiblities and limitations 5 inch drive diskette compatibility Drive type Diskette types it can read from and writ...

Страница 59: ...rives Follow these basic precautions to protect your diskette and avoid losing data Do not remove a diskette from the diskette drive or turn off the computer while the drive light is on This light ind...

Страница 60: ...e if it has been damaged Carefully label your diskettes Attach labels firmly but gently and only along the top of a diskette next to the manufacturer s label Do not stick several labels on top of one...

Страница 61: ...to protect it from dust Inserting and Removing Diskettes To insert a diskette into the drive hold it with the label facing up and the read write slot leading into the drive as shown below Figure 3 4...

Страница 62: ...up until it is horizontal and the edge of the diskette pops out Carefully pull out the diskette place it in its protective envelope and store it in a proper location such as a diskette container If y...

Страница 63: ...can read it and copy data from it but you cannot store new data on the diskette or delete any files it contains If you try to change data stored on a write protected diskette MS DOS displays an error...

Страница 64: ...lide the switch toward the center of the diskette so the hole is covered Making Backup Copies It is important to make copies of all your data and system diskettes Copy all diskettes that contain progr...

Страница 65: ...t normally require two diskette drives Usually MS DOS recognizes the first diskette drive the top drive as drive A and the second diskette drive as drive B If you have only one diskette drive MS DOS r...

Страница 66: ...re all your frequently used programs and data files on the hard disk eliminating the inconvenience of inserting and removing diskettes to access different files The added storage capacity makes it eas...

Страница 67: ...tion of backing up hard disk files in Chapter 6 Preparing the hard disk for moving Before you move the computer you need to secure the read write heads inside the hard disk drive Securing the read wri...

Страница 68: ...new location The TGSHIP command should be run whenever you are going to move the main system unit This command moves the read write heads inside the hard disk drive to a safety zone where they won t a...

Страница 69: ...ting system is a collection of programs that allow you to control all the elements of your computer When booting up the MS DOS command file is copied from the MS DOS main disk into your computer s mem...

Страница 70: ...nd turning your computer on Disk Drive Letters The various disk drives on your computer are assigned letters As you work with MS DOS you will see that these letters are used to identify which drive is...

Страница 71: ...slot with its label facing up and the write protect notch to the left When the diskette is all the way in close the drive door by turning the door latch handle down To remove a diskette from a floppy...

Страница 72: ...ve Close the disk door and turn your computer on Remove the Install disk and insert the Select disk Press ENTER Remove the Select disk and insert the Install disk Press ENTER The Welcome screen appear...

Страница 73: ...e words Command Prompt are highlighted by a solid bar This is a DOS Shell option that allows you to work directly with MS DOS Your computer system is now running under DOS For now press ENTER to run t...

Страница 74: ...tware often uses the cursor as well allowing you to use the cursor control keys to move the cursor around on the screen MS DOS Commands DOS commands instruct your computer to perform tasks such as dis...

Страница 75: ...arity but you may enter them either way For example both of these commands will generate a directory listing of a diskette and Function Keys and MS DOS As mentioned earlier MS DOS uses several of your...

Страница 76: ...it F6 key Places an end of file marker when you copy from the monitor to a disk file ESC key Cancels the current command line without changing the buffer INS key Inserts characters into the command l...

Страница 77: ...any times as necessary to erase the typing mistake then type out the command correctly For instance type the following but do not press ENTER Press the BACKSPACE key twice to erase the I and the R Ret...

Страница 78: ...ive is currently the default drive Unless you specify otherwise MS DOS will direct any disk activity to the A floppy disk drive You can easily change the default drive with an internal DOS command For...

Страница 79: ...l drive present The BIOS pretends there are two disk drives present It routes all commands intended for the B drive back to the A drive This feature is intended to allow owners of single drive systems...

Страница 80: ...ow you how to make backup copies of your MS DOS master diskettes on both single and dualdrive systems Copying on Single Drive Systems MS DOS uses the external command DISKCOPY to copy entire diskettes...

Страница 81: ...e following message will appear When the drive indicator light goes out remove the MS DOS master diskette from the floppy disk drive Insert a new blank diskette into the drive This is the TARGET diske...

Страница 82: ...et Set it aside for a moment making sure that you don t mix it up with the second blank diskette Put the original master MS DOS main system diskette back into the floppy disk drive then press the SPAC...

Страница 83: ...th the backup diskette or if you put the wrong diskette into the drive by mistake the computer will respond Compare error on side x track x If the computer shows compare errors start the copying proce...

Страница 84: ...l menu The system prompt will appear Enter the following command This command indicates to MS DOS that you want to copy the contents of a diskette in the A drive to a new diskette located in the B dri...

Страница 85: ...e following message will appear For now type N The system prompt will reappear To compare the backup diskette with the original you will use the DISKCOMP command Enter the command at the system prompt...

Страница 86: ...ter you have confirmed that the backup diskette is a good copy of the master MS DOS diskette you may put your master diskette away in a safe place and put the label on the backup diskette From now on...

Страница 87: ...m files 0 Data files Program files are files that perform a task They manipulate the computer and data files in order to achieve a result MS DOS is a collection of program files as are the control pro...

Страница 88: ...t follow when naming files As you will see these rules leave you a great deal of freedom in your selection of filenames Each filename can be up to eight characters long To this eight character name ca...

Страница 89: ...have been used The following are examples of illegal filenames along with an explanation 3RDQUARTER SALES This is too long MS DOS will accept this filename but it will be shortened to fit the size li...

Страница 90: ...ave them off entirely if you want Using filename extensions with data files allows you to have many different variations for a set of filenames For instance different chapters of a book might be named...

Страница 91: ...such as when the file was created or updated last The DIR Command MS DOS provides a simple command that allows you to look at the directory of any particular disk This is the DIR command Enter the com...

Страница 92: ...rches You can also use the DIR command to search for specific files on a disk To do this enter the DIR command in the following format For instance if you want to find the directory entry for a file n...

Страница 93: ...onto drive A enter the command The computer will display the directory of the diskette inserted in the B drive A similar command will cause the computer to display the directory of your hard disk Not...

Страница 94: ...ctory listing This is through the use of wildcard characters Wildcard characters are used to make a single command cover a number of similarly named files While MS DOS provides several wildcard charac...

Страница 95: ...e with detailed instructions for their set up and use These instructions will often ask you to use the information in this chapter to find specific files in the disk directories or back up the master...

Страница 96: ...n DOS based computer systems is on floppy disks Virtually all commercially available programs are distributed on floppy diskettes Before you buy an application software package for your computer you s...

Страница 97: ...when you want to update the information stored on the diskette The plastic disk is safely protected by a thin jacket The diskette spins inside this jacket allowing the entire surface of the diskette t...

Страница 98: ...rs use MS DOS they can read all disks created by any other PC compatible machine To see what happens when you attempt to use an unformatted disk insert a new blank diskette into the A drive and close...

Страница 99: ...able that allow you to format several different types of diskette The following routines will show you how to use the FORMAT command These procedures assume that you are formatting double sided high d...

Страница 100: ...ete then display Press ENTER if you don t want to have a label of your disk Then the screen will display the following message Don t be concerned if the message displayed is slightly different from th...

Страница 101: ...tion switch The computer will proceed to format the diskette Upon completion you will see this message The following screen will be appeared if you press ENTER If you want to have a volume label type...

Страница 102: ...do this enter the command The computer will proceed to format the diskette Upon completion you will see this message Press ENTER not to have a label of your disk Then the screen will display Enter N...

Страница 103: ...physically stored on the diskette The other area is the system area On your MS DOS main system diskette this area is occupied by the parts of MS DOS that are copied into your computer s memory during...

Страница 104: ...kette To format a new diskette while placing the active MS DOS routines in the system area enter the following command at the system prompt The computer will load the FORMAT command file into system m...

Страница 105: ...The directory listing should appear similar to the following Copying Files If you have a dual drive system it is easy to copy program and data files from one diskette to another This involves the int...

Страница 106: ...ant to copy Once you sure its safe to copy enter the COPY command with the following format For example to copy the file MAYSALES RPT from drive A to drive B enter the command When the copying process...

Страница 107: ...also possible to copy a file between two disks when neither one is the default drive For instance will copy the MAYSALES RPT file from the hard disk onto a diskette in the B drive This time note that...

Страница 108: ...about MAYSALES to the B drive A final example will copy all of the files on a diskette in the A drive to the hard disk drive This command is useful when backing up diskettes containing data files Usin...

Страница 109: ...nient however to store your files on a hard disk drive The main reason for this is the speed of the hard disk drive Files are read off from the hard disk faster than from floppy diskettes Also using a...

Страница 110: ...r computer system a short distance be careful not to drop or bump it For greater protection if you need to transport the computer in a car or ship it by truck or plane pack your system in its original...

Страница 111: ...oaded onto the hard disk If your hard disk has been partitioned and formatted skip this section on preparing your hard disk If the computer responded to the A C command with it means that MS DOS can t...

Страница 112: ...determined that your hard disk is clean that is to say neither partitioned nor formatted you should enter the SETUP program Turn your computer on When you see the following message press DEL key Move...

Страница 113: ...ovided with your hard disk drive Other hard disk drives may require a different disk type number See the instructions provided with your hard disk drive or call your dealer for assistance After verify...

Страница 114: ...the Command Prompt option At this point your are ready to partition your hard disk drive To do this enter the command After loading the FDISK program the computer will display information on the hard...

Страница 115: ...DOS Partition The FDISK menu will disappear and be replaced by To create a single MS DOS partition for your entire hard disk drive select the default option l by pressing ENTER The Create Primary DOS...

Страница 116: ...ompleted these tasks you can restart your system using your MS DOS Install diskette Make sure the MS DOS install diskette is in the A drive then press the ENTER key Your system will now reboot It does...

Страница 117: ...the hard disk that you want to save Press Y to begin formatting The formatting process takes several minutes When it is completed the system will display Here your computer is asking you to name your...

Страница 118: ...st way to check this is to boot the system from the hard disk Make sure that floppy drive A is empty and turn your computer on After going through the start up diagnostic routines the computer will lo...

Страница 119: ...ternal DOS command creates a subdirectory under the directory you are currently in Since your computer boots up in the hard disk root directory the command you just entered created a subdirectory name...

Страница 120: ...the current directory Since you can change the current logged disk drive you would expect to be able to change the current logged directory You can using the CD CHDIR command Enter the command series...

Страница 121: ...u are back in the hard disk root directory Now return to the DOS4 subdirectory by entering the command Another way of moving through the directory tree quickly involves the use of a similar command Th...

Страница 122: ...is complete your computer will display the following message Using the DIR command run a directory to verify that you have copied the MS DOS Install diskette Remove the MS DOS Install diskette from d...

Страница 123: ...r the remaining disks in the MS DOS package Return to the root directory by entering You have now completed organizing your hard disk and installing the MS DOS files into subdirectories As you can see...

Страница 124: ...S Install diskette will help you back up your hard disk The first BACKUP will copy files from the hard disk onto diskettes The other RESTORE allows you to use the diskettes created by the BACKUP progr...

Страница 125: ...the diskettes you will be using The following table shows the approximate number of diskettes needed to backup an entire hard disk HARD DISK NUMBER OF DISKETTES CAPACITY 180K 360K 1 2M 10M byte 63 32...

Страница 126: ...make sure you are in the root directory of the hard disk Enter Now make sure your diskettes are formatted and ready If you are running BACKUP from the MS DOS install diskette enter the command If you...

Страница 127: ...ide The RESTORE Command MS DOS provides the RESTORE command program to allow you to copy files from the archive diskettes created by the BACKUP command back onto the hard disk You should only use the...

Страница 128: ...drive has not yet been partitioned If the computer correctly executed the C command but failed to run a directory it probably means that the hard disk has been partitioned but not yet formatted Once y...

Страница 129: ...drive Enter the following command The RESTORE command file will be read from the MS DOS Install diskette The A C in the command tells MS DOS that you will be restoring files from diskettes in the A d...

Страница 130: ...is impossible for this manual to provide detailed instructions for connecting these devices Please follow the instructions provided with your peripheral if you should have problems with the installat...

Страница 131: ...ed inside your main system unit Since your system CPU must be in constant communication with both the keyboard and the display monitor specific circuits connect them together Since other peripheral de...

Страница 132: ...nals have been agreed upon by the microcomputer industry so that the different manufacturer s machines can communicate with each other You will be prompted to insert the backup archiev diskettes into...

Страница 133: ...try standard Centronics compatible parallel printer port interface Connecting Printers Most but not all printers use the Centronics compatible parallel port To install this type of printer connect an...

Страница 134: ...to the phone system Connecting External Disk Drives At some point you may decide to add an external disk drive This may become necessary if all of the internal drive compartments are in use or if you...

Страница 135: ...ur main system unit you will usually need the following tools a small medium Phillips type screwdriver a small flat blade screwdriver General Precautions In the interests of personal safety and produc...

Страница 136: ...nleve le couvercle Once removed the cover must be replaced and screwed in position before the power supply cord is plugged back in Apres le couvercle a enleve visse le couvercle en place et remettre l...

Страница 137: ...ear panel sockets Set the monitor safely aside Unplug the keyboard and set it aside Unscrew the screws on the rear panel of the unit and set them aside Carefully slide the main system unit s cover tow...

Страница 138: ...cover onto the unit adjust the alignment to permit the cover to slide over the disk drive nosepieces When the cover is properly seated on the main system unit chassis replace and tighten down the scr...

Страница 139: ...ansion The basic computer is shipped from the factory with only the system motherboard installed This system has IDE type HDD controller and the Floppy Disk controller on the system motherboard If you...

Страница 140: ...ew hardware arrangement You will be able to do this without removing the system motherboard from the main system unit chassis although you may need to unplug the disk drive ribbon cable from its conne...

Страница 141: ...ide Making sure the board is correctly aligned carefully insert the board s edge contacts into the slot connector on the main system unit s motherboard A gentle rocking motion is helpful in getting th...

Страница 142: ...arlier Reconnect any internal cables that were disconnected earlier If you have a problem making the cables reach their connectors you may have to move the board you just installed to another slot If...

Страница 143: ...vice Remove the blank front panel from the selected compartment by removing the mounting screws Slide the expansion device into the compartment along the side rails of the drive cage until it is all t...

Страница 144: ...the cover from the main system unit as described previously Attach the hard disk drive next to the Floppy disk drive on the right side of the system Screw the hard disk drive on the system using 4 scr...

Страница 145: ...Figure 7 6 Mounting the Internal Hard Disk Drive 7 16 Expanding Your System...

Страница 146: ...l Storage Humidity 10 to 90 no condensation l Compatibility IBM PC AT l Power Supply 85W 115 Range 100 125VAC 2 2A 50 6OHz 230 Range 200 240VAC l lA 50 60Hz l Keyboard 101 key keyboard System Motherb...

Страница 147: ...t 1ea 25 pin centronics compatible parallel printer port 1ea 5 pin Keyboard port 1ea 6 pin PS 2 compatible mouse port 1ea 15 pin VGA video port l Audio Support 1 mini speaker l Real Time Clock with sy...

Страница 148: ...l Memory Bank Configurations l BIOS ROM 64K byte 150ns 2ea Specifications A 3...

Страница 149: ...1024 768 16 Remarks Standard Max System I O l DMA Channels 8 bit operations 4 channel 16 bit operations 3 channel l Programmable Timers 3 l Vectored Interrupt Levels 15 System Timing l System Clock Sp...

Страница 150: ...LS612 DMA Page Register 0A0 0BF 8259A Interrupt Controller 2 0C0 0DF 8237A 5 DMA Controller 2 0F0 Clear Math Coprocessor Busy 0F1 Reset Math Coprocessor OF OFF Math Coprocessor 378 37F Parallel Printe...

Страница 151: ...pendix if you are not installing expansion products that require changing the motherboard s configuration jumper settings Hardware Settings The system motherboard provides a set of switches to set the...

Страница 152: ...any inconsistencies are found they will be shown on the display monitor before MS DOS is loaded At that time you will be prompted to run the SETUP program to change the options stored in the configura...

Страница 153: ...move the main system unit cover Remove all expansion boards from their slot connectors on the system motherboard noting the location of each board and any internal cable connections for re installatio...

Страница 154: ...hardware The Table B l lists the switch settings SW ON OFF Function SW1 1 Color Mono VGA Monitor type select SW1 2 COM2 Disable SW1 3 COM1 Disable Serial port select SW1 4 English Korean Language Sele...

Страница 155: ...SW2 should be set to whenever the on board adapter is enabled When dual adapters are used the on board video adapter is the primary An add on video board and monitor may be used in conjunction with t...

Страница 156: ...nformation on these connectors see Appendix C Connector Pinouts The connectors provided on the system motherboard are for signal power in facing and the I O ports as follows Table B 2 120 pin Expansio...

Страница 157: ...lots for PC AT boards or 8 bit PC XT boards Keyboard Port J4 The keyboard connector J4 is a 5pin DIN connector for keyboards that are compatible with the IBM AT keyboard Parallel Port J7 Connector J7...

Страница 158: ...o the six expansion slots IDE Interface Connector J8 You use this 40 pin connector with IDE type Hard disk drive VGA Video Connector J11 This system provides the on board VGA connector J11 which requi...

Страница 159: ...in I O Type 1 Input 2 Input 3 output 4 output 5 Ground 6 Input 7 output 8 Input 9 Input Signal Name Carrier Detect CD Receive Data RD Transmit Data TxD Data Terminal Ready DTR Signal Ground GND Data S...

Страница 160: ...output 13 N A 14 Input 15 l O 16 Input 17 Input 18 25 Ground Signal Name strobe Data Bit 0 Data Bit 1 Data Bit 2 Data Bit 3 Data Bit 4 Data Bit 5 Data Bit 6 Data Bit 7 Acknowledge Busy Paper Out sele...

Страница 161: ...ata 3 12 Data 12 13 Data 2 14 Data 13 15 Data 1 16 Data 14 17 Data 0 18 Data 15 19 Ground 20 Key 21 Not Connected 22 Ground 23 10W 24 Ground 25 10R 26 Ground 27 Not Connected 28 ALE 29 Not Connected 3...

Страница 162: ...gnal 2 5 Volts 3 12 Volts 4 12 Volts 5 Ground 6 Ground 7 Ground 8 Ground 9 5 Volts 10 5 Volts 11 5 Volts 12 5 Volts PS 2 Mouse connector J10 6 pin mini DIN PS 2 type connector Pin Signal Name 1 Data 2...

Страница 163: ...Your computer comes with industry standard IBM compatible expansion slots There are five AT style 98 pin expansion slot connectors mounted on your system mother board The charts below show the pin nu...

Страница 164: ...21 A 22 A 23 A 24 A 25 A 26 A 27 A 28 A 29 A 30 A 31 I O Type Input I O I O I O I O I O I O I 0 I O Input Output l O I O I O I O I O I O I O I O I O I O I O I O I O I O I O I 0 I O I O I O I O Signal...

Страница 165: ...I O B 15 output B 16 Input B 17 output B 18 Input B 19 I O B 20 output B 21 Input B 22 Input B 23 Input B 24 Input B 25 Input B 26 output B 27 output B 28 output B 29 Power B 30 output B 31 Ground Si...

Страница 166: ...t D 2 Input D 3 Input D 4 Input D 5 Input D 6 Input D 7 Input D 8 output D 9 Input D 10 output D 11 Input D 12 output D 13 input D 14 output D 15 Input D 16 Power D 17 Input D 18 Ground Signal Name SB...

Отзывы: