- GB -
1 - Composition of the pool....................................................................................7
2 - Tooling and Materials Necessary for Assembly and Installation......................7
3 - Preparation of the ground.................................................................................8
4 - Placing the bottom joint sections and the wall..................................................8
5 - Positioning of the liner and top pieces / Filling .................................................9
6 - Water physical and chemical treatment............................................................9
7 - Safety Recommendations ..............................................................................10
8 - Wintering advice .............................................................................................11
9 - Warranty .........................................................................................................11
1 –
Composition of the pool
■
One sheet metal wall
■
One pack of nuts and bolts (bolts, nuts, washers nut covers)
■
One liner, made of PVC
■
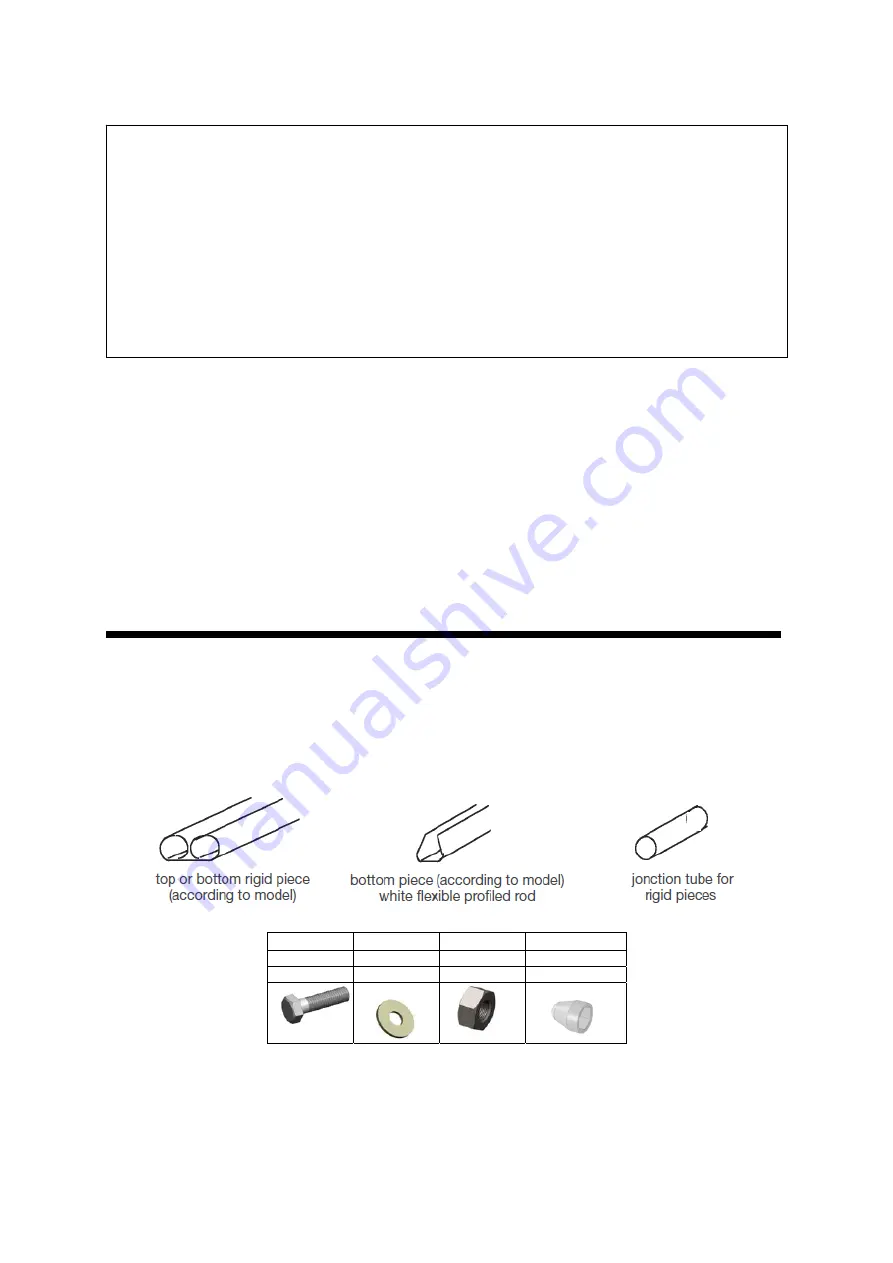
One pack of junction tubes for rigid pieces (depending on model)
■
A bag containing rigid upper profiled rods and lower profiled rods (rigid or flexible, depending on model), plus
one or two white vertical flexible profiled rods (depending on model)
2 –
Tooling and Materials Necessary for Assembly
and Installation
(not supply with the swimming pool)
■
Dia 8 and 10 spanners
■
Adhesive tape
■
Level gauge
■
Shovel, pick and rake
■
Cord
■
Groundsheet
■
Flathead screwdrivers
■
Clothes pegs
■
Clothespins
■
Tape measure
■
2 Stakes
■
Chalk or plaster
■
Hacksaw or Stanley knife
■
Fine sieved sand
A B C D
Ref.121000 Ref.121610 Ref.121510 Ref.122591
bolt washer nut Cover
nut
IMPORTANT
This instruction manual must be read carefully and kept for future reference. The instruction manuals of the
other constituents should also be kept.
Assembly must be carried out by adults (minimum two persons) and the preparation and assembly
instructions must be followed. (Assembly should take about half a day, excluding excavation and initial filling.)
IMPORTANT!
■
Never undertake assembly work in high winds because the sheet metal will be extremely difficult to handle.
■
Securely tighten all screws and bolts. Unsatisfactory tightening may cause the structure to break.
■
Handle the vinyl liner with care during assembly, and avoid having objects with sharp, cutting edges nearby.
Do not use a knife to open the box.
We will not be held liable for failure to follow the assembly instructions.
7 Notice Réf.880195-9


