Instinct
Control Module Replacement
4
and pull the module out.
4. Installation of Control Module
1. Mount the control module into the case by secure-
ing it behind the mounting clips on both sides of
the case.
2. Reconnect the Molex connectors to proper posi-
tion. Each connector is designed to fit only in its re-
spective mating connector. If the plug is equipped
with a locking clip, ensure the clip is engaged.
3. Place the cover in place and lock in the top retain-
ing tab.
4. Remount the front jacket panel to the boiler.
5. Reinstall two "access" screws to tighten the front
panel.
6. Turn power to the unit “ON” and return the boiler
to service.
5. Programming new Control Board
1. Follow the instructions in step 2 to gain access to
the installer menu.
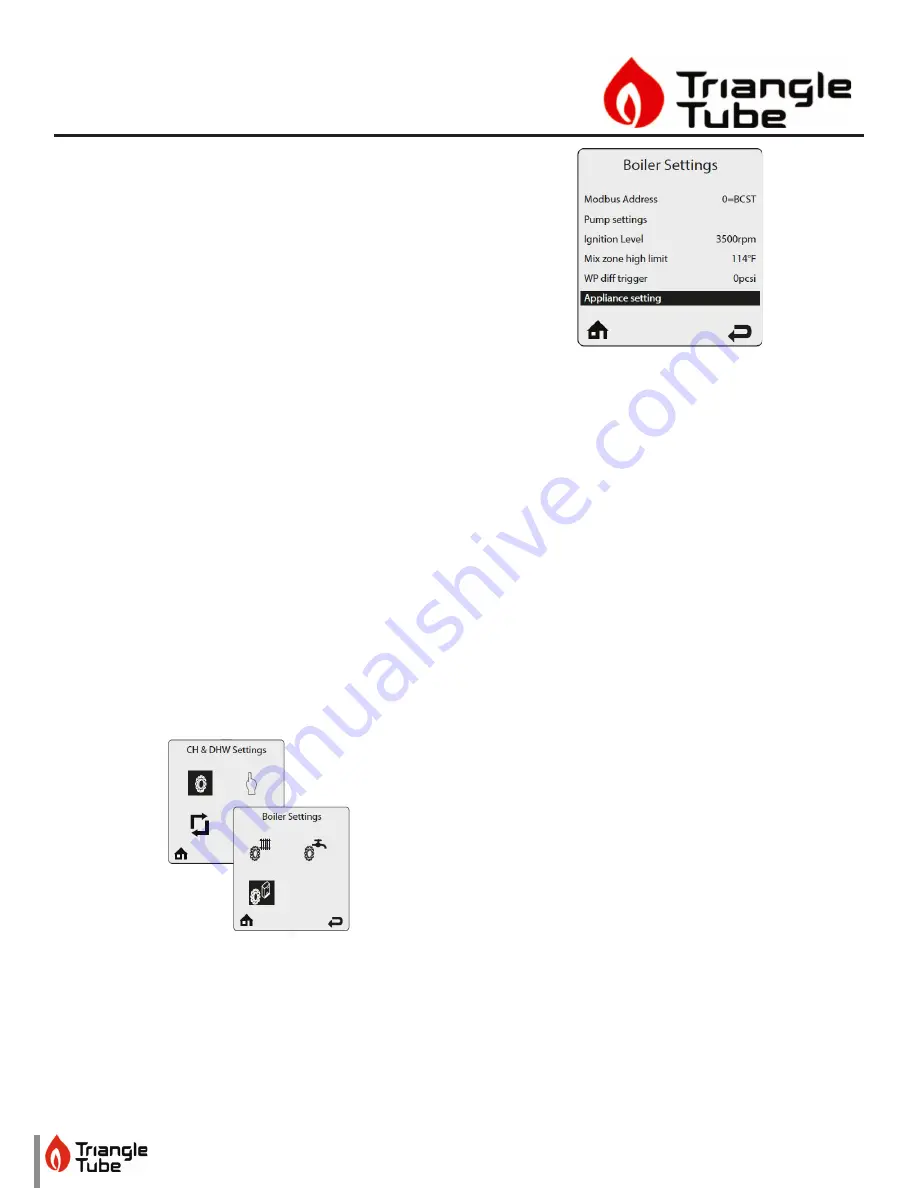
2. Go to boiler settings and click appliance setting, as
seen in Fig. 9 and Fig. 10.
Fig. 9: Installer Menu
Fig. 10: Appliance setting
3. The required code is written on the data plate lo-
cated at the side of the boiler. Use the code for the
gas type, either Natural Gas or Propane.
4. Increase/decrease the value (from 0 to 9, then A to
Z) using the UP or DOWN keys to, then change po-
sition with the LEFT or RIGHT keys.
5. Follow the instructions on the screen to enter the
appliance code for your boiler.
6. The boiler will now be factory set for that particular
model. Return to step 2 and enter settings record-
ed in Table 1 back into the controls to return the
boiler to the customized settings of the old control.
7. Return to step 2 and enter settings recorded in Ta-
ble 1 back into the controls.


