


© Copyright 2017 TRENDnet. All Rights Reserved.
TRENDnet User’s Guide
TEW-WLC100P
11
Change your controller LAN IP address
Management > LAN
This section allows you to change your controller LAN IP address settings. Typically, the
IP address settings should be changed to match your existing network subnet in order to
access the switch management page on your network.
Default Controller IP Address: 192.168.10.200
Default Controller IP Subnet Mask: 255.255.255.0
1. Log into your controller management page (see “
Access you wireless controller
” on page 10).
.
2. Click on Management and click on LAN.
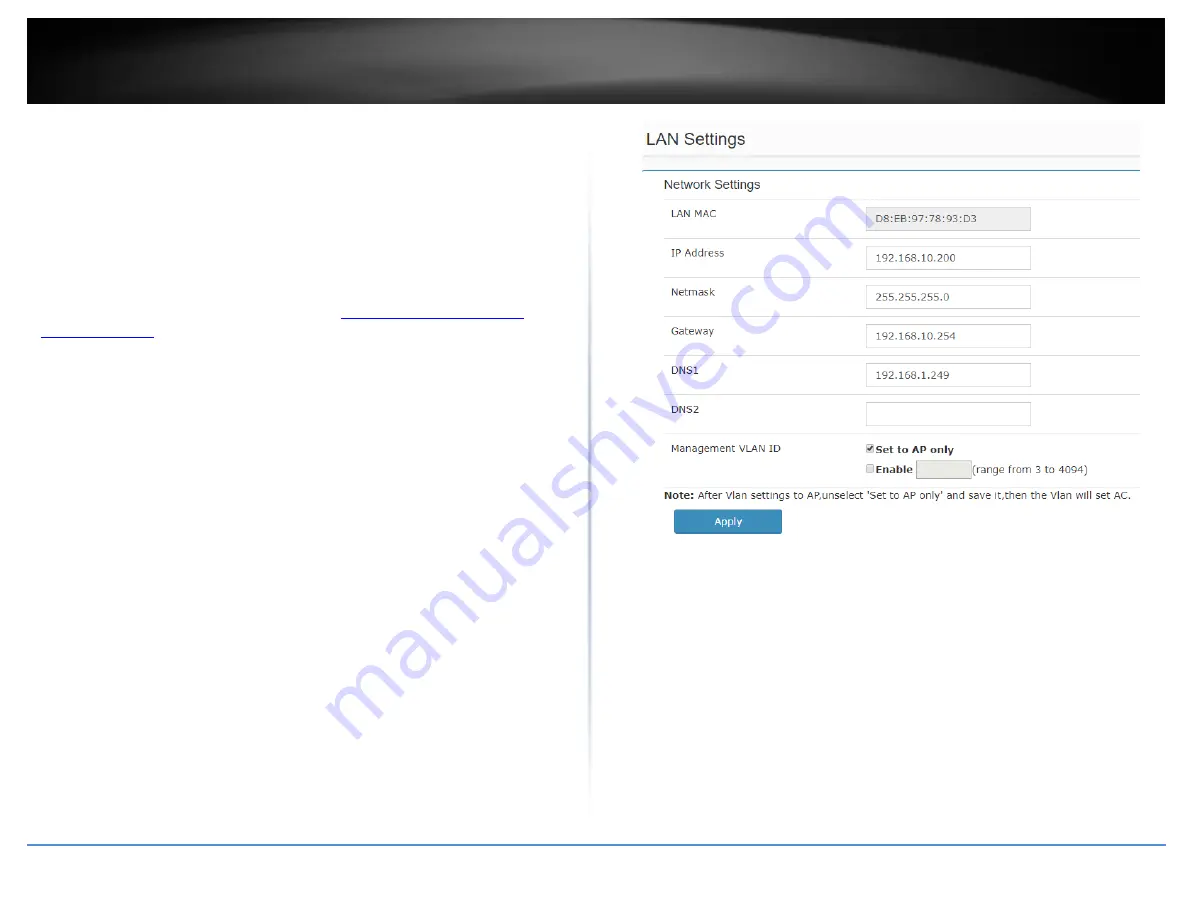
3. Review the settings. When you have completed making changes, click Apply to save
the settings.
LAN MAC: Displays the controller LAN MAC address. (This parameter cannot be
changed).
IP Address: Enter the new controller IP address. (e.g. 192.168.200.200)
Netmask: Enter the new controller subnet mask. (e.g. 255.255.255.0)
Gateway: Enter the default gateway IP address. (e.g. 192.168.200.1 or typically
your router/gateway to the Internet).
DNS1/DNS2: Enter the primary and secondary DNS servers IP address in order to
resolve domain or host names. (e.g. 192.168.200.20)
Management VLAN ID: By default, the management VLAN ID assigned to the
access points and controller is VLAN ID 1. To change the management VLAN ID of
the access points only, leave “Set to AP only” checked and check “Enable”, then
enter the new management VLAN ID to assign. To change both the controller and
access points management VLAN ID, uncheck “Set to AP only” and check
“Enable”, then enter the new management VLAN ID to assign.
Note: The gateway and DNS IP addresses must be assigned to the correct Internet
gateway/router and DNS name resolution server address in order for the controller to
check for available online firmware updates.
Содержание TEW-WLC100P
Страница 1: ...TRENDnet User s Guide Cover Page ...
Страница 57: ......


