background image


User manual 


5.1


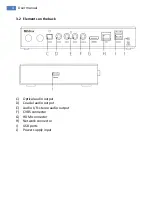
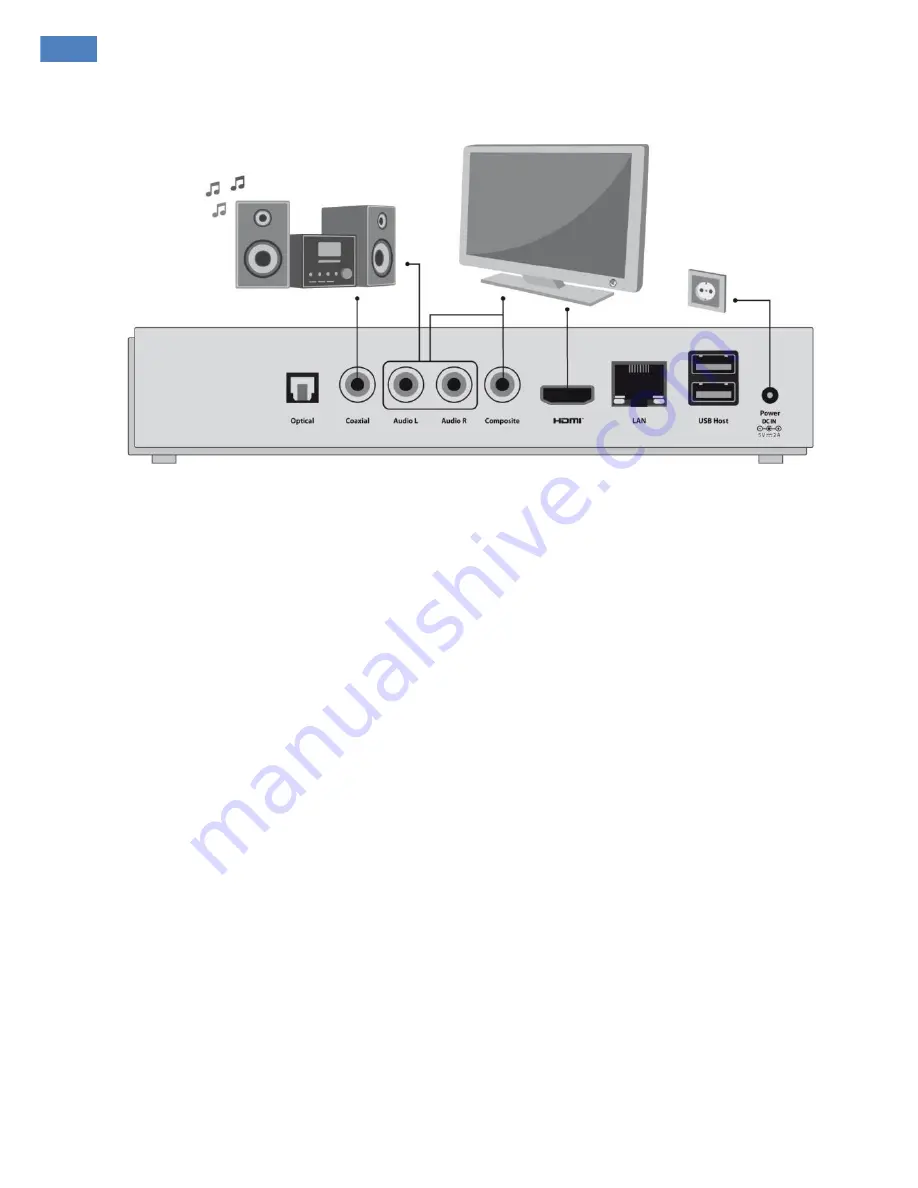
Connecting to a composite input of your TV 

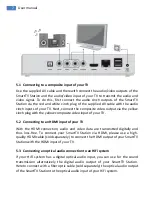
Use the supplied AV cable and therewith connect the audio/video outputs of the 
SmartTV Station and the audio/video input of your TV to transmit the audio and 
video  signal.  To  do  this,  first  connect  the  audio  cinch  outputs  of  the  SmartTV 
Station via the red and white cinch plug of the supplied AV cable with the audio 
cinch inputs of your TV. Next, connect the composite video output via the yellow 
cinch plug with the yellow composite video input of your TV. 
 

5.2


Connecting to an HDMI input of your TV 

With  the  HDMI  connection,  audio  and  video  data  are  transmitted  digitally  and 
thus  loss-free.  To  connect  your  SmartTV  Station  via  HDMI,  please  use  a  high-
quality HDMI cable (sold separately) to connect the HDMI output of your SmartTV 
Station with the HDMI input of your TV. 
 

5.3


Connecting an optical audio connection to an HiFi system 

If  your  HiFi  system  has  a  digital  optical  audio  input,  you  can  use  for  the  sound 
transmission  alternatively  the  digital  audio  output  of  your  SmartTV  Station. 
Hereto connect with a fiber optic cable (sold separately) the optical audio output 
of the SmartTV Station to the optical audio input of your HiFi system. 
 

Содержание SmartTV Station

Страница 1: ......

Страница 2: ...kStor Smart TV Station 2 1 Setting up your Smart TV Station Operate your Smart TV Station only within buildings Put your Smart TV Station onto a flat stable surface It must not stand near a heater or...

Страница 3: ...tor service team We recommend that you use the original packaging for the safe transport of your SmartTV Station 2 4 Prevention of Burn in A long presentation of static images e g a test image can per...

Страница 4: ...User manual 3 2 Elements on the back C Optical audio output D Coaxial audio output E Audio L R stereo audio output F CVBS connector G HDMI connector H Network connector I USB ports J Power supply inpu...

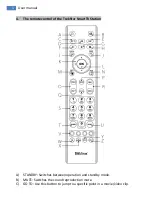
Страница 5: ...remote control of the TrekStor SmartTV Station A STANDBY Switches between operation and standby mode B MUTE Switches the sound reproduction mute C GO TO Use this button to jump to a specific point in...

Страница 6: ...return to the menu view Q OPTION Opens Closes the options menu if available R Switches to the previous next file or page S Numeric field Buttons 0 to 9 for the choice of TV channels and other user in...

Страница 7: ...o input of your TV 5 2 Connecting to an HDMI input of your TV With the HDMI connection audio and video data are transmitted digitally and thus loss free To connect your SmartTV Station via HDMI please...

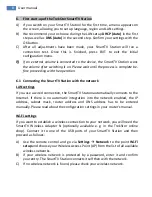
Страница 8: ...LAN settings If you use a wired connection the SmartTV Station automatically connects to the Internet If there is no automatic integration into the network enabled the IP address subnet mask router a...

Страница 9: ...grid Please note that the boot process may take up to 1 minute The duration of the disconnection process may take up to 15 seconds The LED on the opera ting mode display lights red Please note If the...

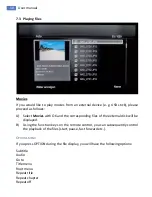
Страница 10: ...e corresponding files of the external disk will be displayed B Using the function keys on the remote control you can subsequently control the playback of the files start pause fast forward etc OPTIONS...

Страница 11: ...t viewed Recently added Music If you would like to play music from an external device e g USB stick please proceed as follows A Select Music with OK and the corresponding files of the external disk wi...

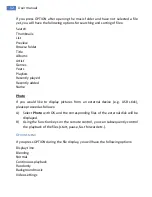
Страница 12: ...you would like to display pictures from an external device e g USB stick please proceed as follows A Select Photo with OK and the corresponding files of the external disk will be displayed B Using the...

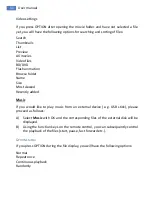
Страница 13: ...photo folder and have not selected a file yet you will have the following options for searching and sorting of files Search Thumbnails List Preview List of images Folder view Date view View images Alb...

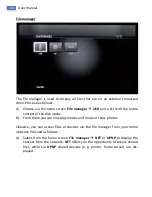
Страница 14: ...ntent of the disk opens B From there you can now play movies and music or show photos Likewise you can access files or devices via the file manager from your home network Proceed as follows A Select f...

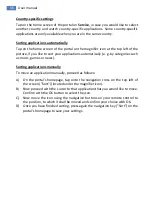
Страница 15: ...tion buttons to navigate between the different appli cations C If you want to start an application please confirm your selection with the OK button To exit an application press PORTAL or the BACK butt...

Страница 16: ...y e g by categories such as music games or news Sorting applications manually To move an application manually proceed as follows A On the portal s homepage tap onto the navigation cross on the top lef...

Страница 17: ...would like to edit LAN SETUP This point is relevant for you if you connect the SmartTV Station via a LAN cable to the Internet The following options are available DHCP IP AUTO Select this option if y...

Страница 18: ...ote control those settings which you would like to edit VERSION INFORMATION Here you can find information about the installed firmware as well as about other components concerning your SmartTV Station...

Страница 19: ...hone application iMediaShare or Smart Remote Control that you can download from the App Store or the Android Market The DLNA DMR feature is divided into the following options DLNA DMR Activate this fu...

Страница 20: ...en switching on the SmartTV Station FACTORY SETTINGS Here you can reset your customized settings back to the factory settings Audio Go to Settings Audio and choose with the help of the navigation cros...

Страница 21: ...sound 5 1 CH Select this option if you have a multi channel sound system 5 main channels 1 separate low frequency effect channel HD AUDIO Select this option if you have a sound system with HD audio f...

Страница 22: ...he picture in 16 10 format This mode is useful when connecting to a 16 10 wide screen TV TV SYSTEM Here you have the option to adjust the video output resolution When connected via HDMI we recommend t...

Страница 23: ...address of the SmartTV Station and confirm with OK or press ENTER on the keyboard Under Windows Vista or Windows 7 you have to enter the IP address into the search field and confirm your input as well...

Страница 24: ...f the HDMI cable is connected properly Unplug the HDMI cable from the SmartTV Station and connect it again 2 Make sure that the HDMI port of the TV is not damaged 3 Connect the SmartTV Station via the...

Страница 25: ...o your SmartTV Station In case of problems with your SmartTV Station please make sure that you have installed the latest firmware version When should I perform a firmware update A firmware update is a...

Страница 26: ...re update by first plugging the USB flash drive that contains the unzipped firmware into the SmartTV Station and then connecting the power cable while holding down the power button of the de vice at t...

Страница 27: ...ort Von Deutschland aus w hlen Sie bitte 01805 TREKSTOR 01805 87357867 Die Nummer der Supporthotline f r andere L nder finden Sie auf unserer Website unter SERVICE 14 Cent Min aus dem deutschen Festne...

Страница 28: ...28 User manual BA STVS EN V1 10 120703...

Отзывы: