


4
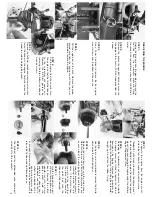
INSTALLING RECEIVER BATTERIES
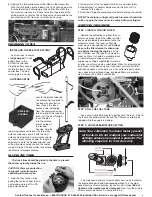
The receiver battery holder is located underneath the battery
cover. Remove the battery cover by removing the two 3x10mm
countersunk self-tapping screws (underneath the chassis). The
on/off switch is mounted in the cover. Install 4 “AA” batteries into
the battery holder. Alkaline batteries should be used. Place the
battery holder into the battery cover with the cushioning foam.
Secure the battery cover to the chassis using the two 3x10mm
countersunk screws.
RADIO SYSTEM OPERATION
Your radio system was pre-adjusted before it left the factory, however,
the adjustment should be checked prior to running the truck.
1) Before you ever turn your radio system on, you must “clear”
your frequency. There are six different channels numbered 1
through 6. Each of the six channels is represented by a color.
Look at the crystal in the back of the transmitter to determine
which of the channels your truck is operating on. Clearing your
frequency means checking to be sure that no one else in the
area is operating on the same channel.
2)
TIP: Always turn the trans-
mitter on first and off last.
This will prevent the model from
receiving stray signals and run-
ning out of control. Slide the
transmitter switch to the “on”
position. A steady red light
should illuminate.
A flashing red light indicates weak batteries.
Weak batteries will limit the range of the radio signal between your
transmitter and receiver. Loss of the radio signal can cause you to
lose control of the truck.
3) Turn the truck on. Tthe switchis located on the battery cover. The
servos should jump and move to their idle (neutral) positions.
4) With the front wheels off the ground, operate the steering control
on the transmitter (channel 1). Check for rapid operation of the
steering servo and that the steering mechanism is not loose or
binding. If the servo operates slowly, check for weak batteries.
Turn the “steering trim” control on the transmitter to adjust the
servo so that the front wheels are pointing straight ahead. Check
to be sure that the wheels do not turn more in one direction than
in the other.
5) Operate the throttle trigger on the transmitter to ensure that
the throttle servo is operating properly. When the servo is in
the neutral position, the carburetor should be in its idle position
(you will adjust the engine idle speed later). When the throttle
trigger is pulled all of the way, the carburetor should be in the
fully open position. When the throttle lever is pushed forward,
the brake should be locked and the throttle should not close
any further than when at idle.
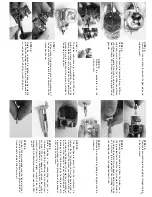
RADIO SYSTEM ADJUSTMENTS
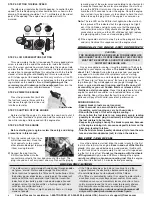
• THROTTLE NEUTRAL ADJUST
The throttle neutral adjustment is located on the transmitter
face and controls the forward and reverse travel of the throttle
trigger. There are two settings, 50/50 which allows equal travel
for both forward and brake, and 70/30 which allows more travel
for throttle and less for brake. Change the adjustment by press-
ing the button and sliding it to the desired position. 50/50 is the
recommended setting while running the T-Maxx.
• SERVO REVERSING SWITCHES
On the front of the transmitter there are three switches. One
for throttle, one for steering, and one for shifting. Moving the
switches reverses the direction of the corresponding servos. For
example, if you turn your steering wheel right and the model
moves left, then switch the steering servo reversing switch to
correct the servo direction. You may need to adjust the corre-
sponding trim control after moving a servo-reversing switch.
BATTERY COVER
ON/OFF SWITCH
TOTAL TRIGGER
MOVEMENT
50%
BRA
KE
50%
FORWARD
NEVER TURN THE TRANSMITTER OR RECEIVER OFF
WHILE THE ENGINE IS RUNNING. THE MODEL COULD
RUN OUT OF CONTROL. (The on/off switch only turns
the receiver on and off. It does not turn off the engine.)
FRONT
0˚ TOE-IN
Wheels pointing straight ahead
Contact Traxxas for assistance: 1-888-TRAXXAS. 972-265-8000 (outside USA). E-mail us at [email protected]
Содержание T-Maxx
Страница 1: ...OPERATING INSTRUCTIONS MODEL 4910...


