background image

4 • SLASH

This model is not intended 
for use by children under 
14 years of age without the 
supervision of a responsible 
and knowledgeable adult.

All instructions and 
precautions outlined in this 
manual should be strictly 
followed to ensure safe 
operation of your model.

No previous experience 
with radio controlled 
models is required.  
Models require a minimum 
of setup, maintenance, or 
support equipment. 

• 

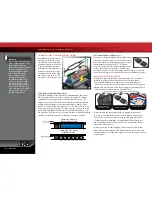
Use Stock Connectors:

 If you decide to change the battery or motor connectors, 

only change one battery or motor connector at a time. This will prevent 
accidentally mis-wiring the speed control. If the XL-5 is not wired exactly as 
shown in the diagram, it can be damaged! Please note that modified speed 
controls can be subject to a rewiring fee when returned for service.

• 

No Reverse Voltage:

 The speed control is not protected against  

reverse polarity voltage. When changing the battery and/or motor, be sure to 
install the same type of connectors to avoid reverse polarity damage to the speed 
control. Removing the battery connectors on the speed control or using the 
same-gender connectors on the speed control will void the product’s warranty.

• 

Motor Capacitors Required: 

Three 0.1µF (50V) ceramic capacitors should be 

properly installed on every motor to prevent radio interference. Capacitors have 
been provided with the XL-5.

• 

No Schottky Diodes:

 External schottky diodes are not compatible with reversing 

speed controls. Using a schottky diode with the XL-5 will damage the ESC and 
void the 30-day warranty.

Batteries and Battery Charging

The XL-5 speed control uses rechargeable batteries that must be handled with care 

for safety and long battery life. Make sure to read and follow all instructions and 
precautions that were provided with your battery packs and your charger. It is your 
responsibility to charge and care for your battery packs properly. In addition to 
your battery and charger instructions, here are some more tips to keep in mind.

• Never leave batteries to charge unattended.
• Remove the batteries from the model while charging.
• Allow the battery packs to cool off between runs (before charging).
• Always unplug the battery from the electronic speed control when the model is 

not in use and when it is being stored or transported.

• Do not use battery packs that have been damaged in any way.
• Do not use battery packs that have damaged wiring, exposed wiring, or a 

damaged connector.

• Children should have responsible adult supervision when charging and handling 

batteries.

• Use the supplied charger to charge the included battery. See “Charging theBattery 

Pack” on page 11.

• Do not charge batteries inside of an automobile. Do not charge batteries while 

driving in an automobile. The charger is equipped with a long cord intended 
to allow the battery to be charged outside of an automobile when using the 
automobile’s auxiliary power socket. If the cord will not reach outside of the 
automobile, find another power source.

• Never charge batteries on wood, cloth, carpet or on any other flammable material.
• Do not operate the charger in a cluttered space, or place objects on top of the 

charger or battery.

• If a battery gets hot to the touch during the charging process (temperature 

greater than 140°F / 60°C), disconnect the battery from the charger and 
discontinue charging immediately.

• Always store battery packs safely out of the reach of children and pets.
• Do not short-circuit the battery pack. This may cause burns and severe damage to 

the battery pack and create the risk of fire.

• Do not burn or puncture the batteries. Toxic materials could be released. If eye or 

skin contact occurs, flush with water.

• Do not expose the charger to water or moisture.
• Do not disassemble the charger.
• Store the battery pack in a dry location, away from heat sources and direct 

sunlight.

• Nickel-Metal Hydride (NiMH) batteries must be recycled or disposed of properly.

Recycling Your Traxxas Power Cell NiMH Battery

Traxxas strongly encourages you to recycle your Power Cell NiMH battery when it 
has reached the end of its useful life. 

Do not throw your battery in the trash.

 All 

Power Cell NiMH battery packs display the RBRC (Rechargeable Battery Recycling 
Corporation) icon, indicating they are recyclable. To find a recycling center near 
you, ask your local hobby dealer or visit www.call2recycle.org.

LiPo Batteries

Lithium Polymer (LiPo) batteries are becoming popular for use in R/C models due 

to their compact size, high energy density, and high-current output; however, 
these types of batteries require special care and handling procedures for long life 
and safe operation. 

WARNING: LiPo batteries are intended only for advanced 

users that are educated on the risks associated with LiPo battery use. Traxxas 
does not recommend that anyone under the age of 14 use or handle LiPo 
battery packs without the supervision of a knowledgeable and responsible 
adult.

The XL-5 speed control is able to use LiPo batteries with nominal voltage not to 

exceed 7.4 volts (2S packs). LiPo batteries have a minimum safe discharge voltage 
threshold that should not be exceeded. The XL-5 is equipped with built-in Low-
Voltage Detection that alerts the driver when LiPo batteries have reached their 
minimum voltage (discharge) threshold. 

It is the driver’s responsibility to stop 

immediately to prevent the battery pack from being discharged below its safe 
minimum threshold.

Low-Voltage Detection on the speed control is just one part of a comprehensive 

plan for safe LiPo battery use. 

It is critical for you, the user, to follow all 

other instructions supplied by the battery manufacturer and the charger 
manufacturer for proper charging, use, and storage of LiPo batteries. Make sure 
you understand how to use your LiPo batteries. 

Be aware that Traxxas shall not 

be liable for any special, indirect, incidental, or consequential damages arising out 
of the installation and/or use of LiPo batteries in Traxxas products.

DO NOT ATTEMPT TO CHARGE LIPO BATTERIES OR ANY OTHER TYPE OF BATTERY 

WITH THE INCLUDED TRAXXAS CHARGER.

If you have questions about LiPo battery usage, please consult with your local 

hobby dealer or contact the battery manufacturer.

SAFETY PRECAUTIONS

Содержание 58044-1 Slash

Страница 1: ...owner s manual MODEL 58034 2 ...

Страница 2: ...not just with your model but also with the company that stands behind it We truly want you to enjoy your new model Thank you again for going with Traxxas Traxxas Support Traxxas support is with you every step of the way Refer to the next page to find out how to contact us and what your support options are Quick Start This manual is designed with a Quick Start path that outlines the necessary proce...

Страница 3: ...ou to safely enjoy your new model Operate your model sensibly and with care and it will be exciting safe and fun for you and those around you Failure to operate your model in a safe and responsible manner may result in property damage and serious injury The precautions outlined in this manual should be strictly followed to help ensure safe operation You alone must see that the instructions are fol...

Страница 4: ...oth carpet or on any other flammable material Do not operate the charger in a cluttered space or place objects on top of the charger or battery If a battery gets hot to the touch during the charging process temperature greater than 140 F 60 C disconnect the battery from the charger and discontinue charging immediately Always store battery packs safely out of the reach of children and pets Do not s...

Страница 5: ...a to include in any R C toolbox Safety glasses Traxxas Ultra Premium Tire Glue Part 6468 CA glue Hobby knife Side cutters and or needle nose pliers Phillips screwdriver Soldering iron Supplied Tools and Equipment U joint wrench Pre load spacers and shock pistons Body clips and body washers 4 way wrench 2 5mm L wrench 2 0mm L wrench 1 5mm L wrench Turnbuckle wrench Foam battery pad Antenna nut wren...

Страница 6: ...tery Hold Down Receiver Box Antenna Mount Front Suspension Arm Front Bumper Steering Servo Shock Toe Link Front Camber Link Rear Camber Link Rear Shock Tower Chassis Front Body Mount Front Shock Tower Half Shaft Rear Suspension Arm Rear Body Mount Transmission Caster Block Steering Block Rear Bumper Audio Connector Sound Control Module ...

Страница 7: ...page 8 The receiver antenna and antenna tube must be properly installed before operating your model Apply other decals if desired 4 Install batteries in the transmitter See page 11 10 Turn on the Sound Control Module See page 18 The transmitter requires 4 AA alkaline or rechargeable batteries sold separately 5 Install battery pack in the model See page 12 11 Drive your model See page 19 Your model...

Страница 8: ...se digital proportional throttle control Electronic speed controls use power more efficiently than mechanical speed controls so that the batteries run longer An electronic speed control also has circuitry that prevents loss of steering and throttle control as the batteries lose their charge Frequency band The radio frequency used by the transmitter to send signals to your model This model operates...

Страница 9: ...e hose voltage corresponds to the pressure that is forcing the water through the hose 550 and 540 These numbers refer to the size of the motor 550 motors have armatures that are 30 longer than 540 motors IMPORTANT RADIO SYSTEM PRECAUTIONS Do not kink the receiver antenna wire Kinks in the antenna wire will reduce range DO NOT CUT any part of the receiver antenna wire Cutting the antenna will reduc...

Страница 10: ...Traxxas TQ 2 4GHz transmitter The transmitter has two channels Channel one operates the steering and channel two operates the throttle The receiver inside the model has three output channels Your model is equipped with one servo and an electronic speed control Transmitter and receiver Steering Trim Park Drive Switch Throttle Trigger Steering Wheel Power Switch Battery Compartment Set Button Red Gr...

Страница 11: ...mitter and check the status LED for a solid green light If the status LED flashes red the transmitter batteries may be weak discharged or possibly installed incorrectly Replace with new or freshly charged batteries The status LED does not indicate the charge level of the battery pack installed in the model Refer to the Troubleshooting section on page 15 for more information on the transmitter stat...

Страница 12: ...ng and easy to grip the Traxxas connector is engineered to extract all the power your battery has to give RADIO SYSTEM RULES Always turn your transmitter on first and off last This procedure will help to prevent your model from receiving stray signals from another transmitter or other source and running out of control Your model has electronic fail safes to prevent this type of malfunction but the...

Страница 13: ...ss and hold the SET button on the transmitter for two seconds The status LED will flash green 2 Turn and hold the steering wheel to the full left or full right position it does not matter which position you choose 3 While holding the steering wheel in position press the SET button to reverse the channel 4 The channel is now reversed Confirm correct servo operation before running your model Throttl...

Страница 14: ...transmitter Range Testing the Radio System Before each running session with your model you should range test your radio system to ensure that it operates properly 1 Turn on the radio system and check its operation as described in the previous section 2 Have a friend hold the model Make sure hands and clothing are clear of the wheels and other moving parts on the model 3 Walk away from the model wi...

Страница 15: ...p nut over the antenna tube and screw it onto the antenna post 4 Use the supplied tool to tighten the crimp nut on the post just until the antenna tube is securely in place Do not overtighten or crush the antenna wire against the chassis Do not bend or kink the antenna wire Do not shorten the antenna tube See the sidebar for more information TRAXXAS TQ 2 4GHz RADIO SYSTEM Antenna Tip Antenna Tube ...

Страница 16: ...tion is now DISABLED XL 5 Setup Programming Calibrating your ESC and transmitter Read through all of the programming steps before you begin If you get lost during programming or receive unexpected results simply unplug the battery wait a few seconds plug the battery pack in and start over 1 Disconnect one of the motor wires between the XL 5 and the motor This is a precaution to prevent runaway whe...

Страница 17: ... or red Low Voltage Detection DISABLED The model is ready to drive Selecting Race Mode Profile 2 100 Forward 100 Brakes No Reverse 1 Connect a fully charged battery pack to the XL 5 and turn on your transmitter 2 With the XL 5 off press and hold the EZ Set button until the LED turns solid green then solid red and then begins blinking red indicating the Profile numbers 3 When the LED blinks RED TWI...

Страница 18: ... setting 5 Reinstall the body Driving Your Model with Sound 1 Start with the red rocker switch in Park 2 Tap the throttle to hear the engine start 3 Pull the throttle to hear the engine rev 4 Move the switch to drive pull the throttle and leave your friends in the dust Note After 10 seconds with no throttle you ll hear the sound of the engine shut down and the sound control module will automatical...

Страница 19: ...f your model so that you can enjoy it for a long time to come When using the supplied optional gearing for top speed running limit your driving to paved surfaces only Running in grass and off road could cause excessive loads on the electrical system in the model The Titan 12T motor will benefit from a short break in period to ensure optimum performance and longer motor life For the first battery p...

Страница 20: ...ped inside the tires if holes are not cut in the tires Cut two small holes 3mm or 1 8 diameter in each tire Each hole should be near the tire centerline 180 degrees apart 3 Confirm that the receiver box O ring and cover are installed correctly and secure Make sure the screws are tight and the blue O ring is not visible protruding from the edge of the cover 4 Confirm that your batteries can be used...

Страница 21: ...ceiver box allows the removal and installation of the receiver without losing the ability to maintain a watertight seal in the box The patent pending wire clamp feature gives you the ability to also install aftermarket radio systems and maintain the watertight features of the receiver box Removing the Receiver 1 To remove the cover remove the two 3x8mm button head cap screws 2 To remove the receiv...

Страница 22: ...d the battery is fully charged and in good condition The model is equipped with a Titan 12T 550 motor The gear combination that comes stock on each model provides good overall acceleration and top speed If you want more top speed and less acceleration install the included high speed gearing more teeth If you want more acceleration and less top speed use a smaller optional not included pinion gear ...

Страница 23: ...nd rough terrain require a softer suspension with the maximum possible suspension travel and ride height Racing on a prepared track or on road use requires a lower ride height and firmer more progressive suspension settings The more progressive suspension settings help reduce body roll increased roll stiffness dive during braking and squat during acceleration The suspension of your model has been ...

Страница 24: ...eering system There are several components that will wear out from use the servo saver Traxxas part 3744 the bellcrank bushings Traxxas part 2545 and the tie rod ends Traxxas part 2742 Replace these components as needed to restore factory tolerances Motor Every 10 15 runs remove clean and lubricate the motor Use a product such as electric motor cleaning spray to flush dirt out of the motor After c...

Страница 25: ...140929 58034 2 OM N EN R00 6200 TRAXXAS WAY McKINNEY TEXAS 75070 1 888 TRAXXAS MODEL 58034 2 owner s manual ...

Отзывы: