background image

16 • E-REVO BRUSHLESS

MXL-6s Specs

Cells:


18 NiCad / NiMH 6s LiPo

Resistance: 

0.0003 Ohms per phase

Brake : 

Proportional with  

adjustable curve

Reversible:


Yes - with lockout

Low Voltage Cutoff:


Programmable

Case Size:

2.2” x 1.9” x 1.4”

Weight with Wires:

121g

Connector Type:

6.5mm bullet

ADJUSTING ELECTRONIC  

THE SPEED CONTROL

The MXL-6s electronic speed control should not need 
reprogramming with normal use

; however, if you install a different 

radio system in your model, or change the transmitter’s throttle-
neutral setting from 50/50 to 70/30, you will need to reprogram the 
speed control. Follow these instructions to reprogram the speed 
control:

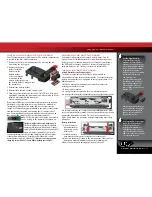
1. Install the batteries of  your choice in the battery compartments 

and plug the batteries into the speed control. 

2. Switch on your transmitter. 
3. Hold full throttle while you switch on the MXL-6s controller. After 

a few seconds, you will hear multiple tones and the RED LED will 
light. 

4. Hold full brake. After a few seconds, you will hear multiple tones  

and the YELLOW LED will light. 

5. Release the trigger to the neutral position. After a few seconds,  

you will hear multiple tones and ALL THE LEDs will light. 

6. Wait a few more seconds for the speed control to ‘arm,’ indicated 

by a double-tone. You are now ready to drive. 

Disconnect Batteries After Use

Always disconnect the batteries from the speed control when  
you are finished using your vehicle. The switch on the speed 
control only shuts off power to the receiver and servos. The speed 
control continues to draw power as long as it is plugged in and 
may over-discharge your batteries if they are left connected to the 
speed control.  

DRIVING YOUR MODEL

Now it’s time to have some fun! This section contains instructions on 
driving and making adjustments to your model. Before you go on, 
here are some important precautions to keep in mind. 

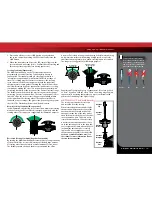
• Make Sure The Axle Nuts Are Tight Before Each Run 

Before operating your E-Revo Brushless 
Edition, take a moment to make sure 
the axle nuts are tight, as they may have 
loosened during shipping. The correct 
size axle-nut wrench is supplied with 
the truck. Check the tightness of the 
axle nuts before each run. The E-Revo’s 
high speed and torque can loosen the 
nuts over time if left unchecked. 

• Allow the model to cool for a few minutes between runs. This is 

particularly important when using high capacity battery packs that 
allow extended periods of running. Monitoring temperatures will 
extend the lives of the batteries and motors.

• Do not continue to operate the model with low batteries or you 

could lose control of it. Indications of low battery power include 
slow operation and sluggish servos (slow to return to center). Stop 
immediately at the first sign of weak batteries. When the batteries 
in the transmitter become weak, the red power light will begin to 
flash. Stop immediately and install new batteries.

• Do not drive the model at night, on public streets, or in large 

crowds of people.

• If the model becomes stuck against an object, do not continue to 

run the motors. Remove the obstruction before continuing. Do not 
push or pull objects with the model.

• Because the model is controlled by radio, it is subject to radio 

interference from many sources beyond your control. Since radio 
interference can cause momentary losses of control, allow a safety 
margin of space in all directions around the model in order to  
prevent collisions.

• Use good, common sense whenever you are driving your model. 

Intentionally driving in an abusive and rough manner will only 
result in poor performance and broken parts. Take care of your 
model so that you can enjoy it for a long time to come.

• High performance vehicles produce small vibrations which may 

loosen hardware over time.  Frequently check wheel nuts and 
other screws on your vehicle to ensure that all hardware remains 
properly tightened.  

9

Содержание 56085

Страница 1: ...MODEL 56085 OWNER S MANUAL ...

Страница 2: ...del Traxxas Support Traxxas support is with you every step of the way Refer to the next page to find out how to contact us and what your support options are Quick Start This manual is designed with a Quick Start path that outlines the necessary procedures to get your model up and running in the shortest time possible If you are an experienced R C enthusiast you will find it helpful and fast Be sur...

Страница 3: ... product support needs We want you to be thoroughly satisfied with your new model SAFETY PRECAUTIONS All of us at Traxxas want you to safely enjoy your new model Operate your model sensibly and with care and it will be exciting safe and fun for you and those around you Failure to operate your model in a safe and responsible manner may result in property damage and serious injury The precautions ou...

Страница 4: ...sible adult Your model is able to use LiPo batteries with nominal voltage not to exceed 7 4 volts 2S packs for each battery 4S total LiPo batteries have a minimum safe discharge voltage threshold that should not be exceeded The electronic speed control is equipped with built in Low Voltage Detection that alerts the driver when LiPo batteries have reached their minimum voltage discharge threshold I...

Страница 5: ...Right Batteries on page 11 A peak detecting charger is recommended for best performance and longest battery life See Traxxas com for more information Battery style is subject to change and may vary from images 4 AA alkaline batteries NiMH battery charger Traxxas EZ Peak Plus part 2933 Two 7 cell NiMH battery packs 17mm wheel wrench Maximum Travel Steering Stop 4 way wrench Shock wrench 5mm turnbuc...

Страница 6: ...mper Rear Body Mount Hex Hub Rear Suspension Arm Axle Carrier Pivot Ball Toe Link Turnbuckle Receiver Box Light Pipe Skid Plate Steering Servo Steering Servo Front Body Mount Battery Compartment Door Battery Compartment Vent Electronic Speed Control Motor Battery Door Release Tab Slipper Clutch Rocker Rocker Push Rod Push Rod Spring Pre load Adjuster Traxxas High Current Connector ...

Страница 7: ...e 26 The transmitter requires 4 AA alkaline or rechargeable batteries Follow these critical steps to maintain the performance of your model and keep it in excellent running condition 4 Install battery packs in the model See pages 11 12 Your model requires two fully charged battery packs included 5 Turn on the radio system See page 13 Make a habit of turning the transmitter on first and off last 6 ...

Страница 8: ...and servos to be powered by the main battery pack in an electric model This eliminates the need to carry a separate pack of 4 AA batteries to power the radio equipment Brushless Motor A D C brushless motor replaces the brushed motor s traditional commutator and brush arrangement with intelligent electronics that energize the electromagnetic windings in sequence to provide rotation Opposite of a br...

Страница 9: ... motor sensors and wiring are not required Servo Small motor unit in your model that operates the steering mechanism Solder Tabs Accessible external contacts on the motor that allows for easy wire replacement Transmitter The hand held radio unit that sends throttle and steering instructions to your model Trim The fine tuning adjustment of the neutral position of the servos made by adjusting the th...

Страница 10: ...on Port Wiring Diagram MXL 6s Electronic Speed Control Specifications Cells 18 NiCad NiMH 6s LiPo Resistance 0 0003 Ohms per phase Brake Proportional with adjustable curve Reversible Yes with lockout Low Voltage Cutoff Programmable Case Size 2 2 x 1 9 x 1 4 Weight with Wires 121g Connector Type 6 5mm bullet Your model is equipped with the TQi 2 4GHz transmitter with Docking Base The transmitter ha...

Страница 11: ...our model Traxxas recommends the EZ Peak Plus charger part 2933 for quick charging of the included batteries See Traxxas com for more information INSTALLING BATTERY PACKS Using Different Battery Configurations The battery compartments in the E Revo are adjustable to accommodate a large variety of battery packs From the factory the battery compartments are configured to accept the included 7 cell N...

Страница 12: ...artment Spring Clip Removal 1 Pull down on the inside of the clip 2 Push the clip in toward the center of the model to release Spring Clip Installation 1 Insert the two tabs on the spring clip into the rectangular tab slots in the chassis 2 Rotate the spring clip upward 3 Snap the tabs into place Many LiPo batteries do not use a hard plastic case If using LiPo batteries that do not have a hard cas...

Страница 13: ... control in its factory location until you become familiar with all the adjustments and capabilities of your model To change the throttle neutral adjust position turn the transmitter off before adjusting the neutral position You will need to reprogram your electronic speed control to recognize the 70 30 setting Turn to page 16 for instructions Steering Trim The electronic steering trim located on ...

Страница 14: ...istance you plan to operate the model 4 Operate the controls on the transmitter once again to be sure that the model responds correctly 5 Do not attempt to operate the model if there is any problem with the radio system or any external interference with your radio signal at your location Higher Speeds Require Greater Distance The faster you drive your model the more quickly it will near the limit ...

Страница 15: ...Sensitivity Negative Exponential By turning the Multi Function knob clockwise the steering sensitivity of the model will be decreased Note that a relatively large amount of steering wheel travel results in a smaller amount of servo travel The farther you turn the knob the more pronounced the effect becomes Decreased steering sensitivity may be helpful when driving on low traction surfaces when dri...

Страница 16: ...autions to keep in mind Make Sure The Axle Nuts Are Tight Before Each Run Before operating your E Revo Brushless Edition take a moment to make sure the axle nuts are tight as they may have loosened during shipping The correct size axle nut wrench is supplied with the truck Check the tightness of the axle nuts before each run The E Revo s high speed and torque can loosen the nuts over time if left ...

Страница 17: ...are available and the methods with which they can be charged it s impossible to give exact run times for the model Another major factor that affects run time is how the model is driven Run times may decrease when the model is driven repetitively from a stop to top speed and with repetitive hard acceleration Tips for Increasing Run Time Use batteries with the highest mAh rating you can purchase Use...

Страница 18: ...ing normal running Water will enter these holes and get trapped inside the tires if holes are not cut in the tires Cut two small holes 3mm or 1 8 diameter in each tire Each hole should be near the tire center line 180 apart 3 Confirm that the receiver box O ring and cover are installed correctly and secure Make sure the screws are tight and the blue O ring is not visibly protruding from the edge o...

Страница 19: ...ring remove the plastic cap with thumb pressure or gently pry the cap off with a flat blade screwdriver To prevent corrosion and ensure maximum bearing life lubricate the bearings with a light oil available at your local hobby store Following these steps will extend motor life and maintain peak performance Be sure to wear eye protection when using spray aerosol cleaners RECEIVER BOX MAINTAINING A ...

Страница 20: ...nd is recommended for advanced users SUSPENSION TUNING Springs The front and rear springs on E Revo have different spring rates The rear springs are about 20 stiffer than the front springs The spring s pre load tension can be adjusted by turning the spring pre load adjuster Adjusting the pre load changes the suspension sag Suspension sag basically defines how much the suspension compresses when th...

Страница 21: ...p Shock Oil The 4 oil filled aluminum shocks dampers effectively control the suspension movement by preventing the wheels and tires from continuing to bounce after rebounding from a bump Changing the oil in the shocks can vary the suspension damping effect Changing the oil to a higher viscosity oil will increase damping Lowering the viscosity of the oil will cause the suspension damping to be redu...

Страница 22: ...e of travel Static camber is the camber angle at the wheel when the vehicle is set at its normal stationary ride height The suspension pivot balls located in the axle carriers adjust the static camber The pivot balls are protected by blue dust plugs To adjust your static camber insert the supplied 2 5 mm hex wrench through the slit in the dust plug and engage the end of the pivot ball compressing ...

Страница 23: ...ded locknut on the slipper shaft Use the supplied universal wrench To tighten or loosen the slipper nut insert the 2 0mm hex wrench into the hole in the end of the slipper shaft This locks the shaft for adjustments Turn the adjustment nut clockwise to tighten less slippage and counter clockwise to loosen more slippage WHEELS AND TIRES Many types of aftermarket tires and wheels can be adapted for u...

Страница 24: ...m wrench to slide the motor mount Slide the motor and pinion gear into the spur gear Retighten the motor mount screw and then remove the strip of paper You should be able to run a fresh strip of paper through the gears without binding them Gearing Compatibility Chart The chart below shows a full range of gear combinations This does NOT imply that these gear combinations should be used Over gearing...

Страница 25: ...de following the same procedure If necessary fine tune the length of the second steering link to eliminate any load on the steering system in the neutral position If you are using aftermarket servos it is important to use servo horns designed for E Revo Optional steering servo horns are sold separately for use with non Traxxas servos Servo Saver Tuning An optional stiffer spring is available for t...

Страница 26: ...amage Motors Every 10 15 runs remove clean and lubricate the motors Use a product such as electric motor cleaning spray to flush dirt out of the motors After cleaning lubricate the bushings at each end of the motors with a drop of light weight electric motor oil Shocks Keep the oil level in the shocks full Use only 100 pure silicone shock oil to prolong the life of the seals If you are experiencin...

Страница 27: ...hicle will tend to add traction to the opposite end For example increasing roll resistance in the rear by installing the upper arms in the lower holes will provide more traction for the front wheels and potentially more steering Installing the upper arms in the lower holes on the front and rear will increase overall roll resistance without changing the handling balance The arms are installed in th...

Страница 28: ...e effect of the various rocker arms on wheel force as the suspension is compressed On the progressive rate wheel force is light at first and increases as the suspension is compressed Bump Steer Elimination Chart The illustrations and the following table detail the position of the outer toe link end for various caster and roll center settings to eliminate bump steer The shims and the hollow balls u...

Страница 29: ...ock oil up to the top of the shock body Slowly move the piston up and down always keeping it submerged in oil to release the air bubbles Let the shock sit for a few minutes to allow any remaining air bubbles to surface 10 Slowly thread the upper cap with the installed shock bladder onto the shock body with the suspension multi tool A The excess oil will bleed out of the small hole in the shock cap...

Страница 30: ...crews 4 Locate push rods Make sure that all four of the suspension push rods are located and secured into the middle position marked LT on the lower suspension arms 5 Reinstall shock absorbers Reinstall all four shock absorbers back into their respective locations MOTOR INSTALLATION To access the motor remove the gear cover by removing the single screw on the top of the gear cover The motor uses a...

Страница 31: ... fun Installing Your Mobile Device The TQi Docking Base has a unique clamping mechanism that allows the Apple iPhone and iPod touch to be easily installed and removed The clamp s self adjusting design allows it to accommodate the wide variety of protective cases available for Apple products Follow these steps to install your mobile device 1 Swing the Docking Base Clamp lever from position A locked...

Страница 32: ...re information on binding Flashing fast green 0 1 sec on 0 15 sec off Throttle Trim Seek Mode Turn the Multi Function knob right or left until the LED stops flashing See sidebar for more information Flashing medium red 0 25 sec on 0 25 sec off Low Battery Alarm Put new batteries in the transmitter See page 11 for more information Flashing fast red 0 125 sec on 0 125 sec off Link Failure Error Tran...

Страница 33: ... throw setting you selected previously Likewise setting the Multi Function knob to disabled will prevent the knob from making further adjustments but the last setting of the Multi Function knob will still apply TRAXXAS LINK MODEL MEMORY Traxxas Link Model Memory is an exclusive patent pending feature of the TQi transmitter Each time the transmitter is bound to a new receiver it saves that receiver...

Страница 34: ...endpoint and press set to save To reset max throw Let go of controls and press SET The menu tree below shows how to navigate through the TQi transmitter s various settings and functions Press and hold MENU to enter the menu tree and use the following commands to navigate through the menu and select options MENU When you enter a menu you always start at the top Press MENU to move down the menu tree...

Страница 35: ... LED blinks Press SET red LED blinks x3 Press MENU twice red LED blinks x3 Turn steering wheel to desired max left and right travel x8 Press SET to save each position Turn steering wheel to test settings IF END POINTS ARE OK Press hold MENU returns to driving mode IF END POINTS NEED TO BE CHANGED Press SET and repeat steps 6 8 To reset the END POINTS of STEERING servo to defaults Press hold MENU g...

Страница 36: ... certified by the developer to meet Apple performance standards Apple is not responsible for the operation of this device or its compliance with safety and regulatory standards Please note that the use of this accessory with iPod and iPhone may affect wireless performance iPhone and iPod touch are trademarks of Apple Inc registered in the U S and other countries Made for iPod touch 4th generation ...

Отзывы: