ProPoint Vista 100W
INSTALLATION GUIDE
V1.0
Cover:
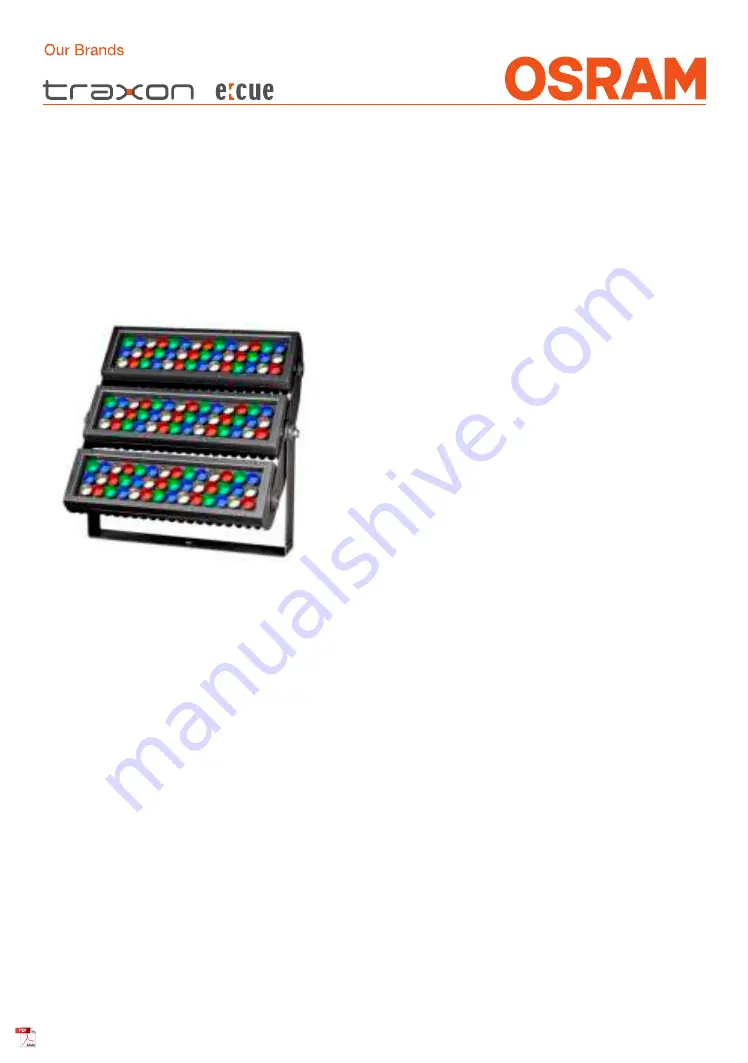
ProPoint Vista 1x100W RGBW
ProPoint Vista 2x100W RGBW
ProPoint Vista 3x100W RGBW
ProPoint Vista 1x100W White
ProPoint Vista 2x100W White
ProPoint Vista 3x100W White
Страница 1: ...nt Vista 100W INSTALLATION GUIDE V1 0 Cover ProPoint Vista 1x100W RGBW ProPoint Vista 2x100W RGBW ProPoint Vista 3x100W RGBW ProPoint Vista 1x100W White ProPoint Vista 2x100W White ProPoint Vista 3x100W White ...
Страница 2: ...RADEMARKS OF TRAXON TECHNOLOGIES U S PATENTS E U PATENTS JAPAN PATENTS OTHER PATENTS PENDING SPECIFICATIONS ARE SUBJECT TO CHANGE WITHOUT NOTICE Installation Guide V1 0 04 21 P 2 of 30 CONTENT 1 INTRODUCTION 4 2 INSTALLATION 12 3 POWER AND DATA WIRING 21 4 CONFIGURATION 26 5 TROUBLESHOOTING 28 6 WARRANTY INFORMATION 28 7 APPENDIX 29 ...
Страница 3: ...ere weather conditions Do not stare directly into the light beam while the unit is illuminated IP66 rated The ProPoint luminaire is not suitable for direct immersion in water Do not operate the ProPoint luminaire without a connection to earth surface without a suitable earth connection refer to local standards The ProPoint luminaire is designed for operation at 120 277V AC ETL 220 240V AC CE Volta...
Страница 4: ...d direct wire nature of the fixture via the two integral cable whips allow for simple installation into existing installations and new structures and is ideal for high rise and tower illumination This manual is intended for use with DMX RDM versions of the ProPoint Vista 100W 1 2 Getting Assistance Additional product information is available on the Traxon web site www traxontechnologies com www os...
Страница 5: ...BJECT TO CHANGE WITHOUT NOTICE Installation Guide V1 0 04 21 P 5 of 30 1 3 Dimensions FIG 1 ProPoint Vista 1x100W 200mm 7 9 261mm 10 3 300mm 11 8 100mm 3 9 4 Ø13mm 4 Ø0 5 Ø 2 7 m m Ø 1 1 636mm 25 0 261mm 10 3 649mm 25 6 286 8mm 11 3 200mm 7 9 636mm 25 0 187mm 7 4 144mm 5 7 ProPoint Vista 100W open wire cable lengths Cable Length open wire Power input cable Data in out cable combined 1830mm 72 1830...
Страница 6: ...nstallation Guide V1 0 04 21 P 6 of 30 FIG 2 ProPoint Vista 2x100W 300mm 11 8 100mm 3 9 4 Ø13mm 4 Ø0 5 Ø27mm Ø1 1 662mm 26 1 674mm 26 5 483mm 18 9 215mm 8 5 430mm 16 9 342mm 13 5 30mm 1 2 686mm 27 662mm 26 1 230mm 9 1 428 6mm 16 9 268mm 10 6 341 6mm 13 4 ProPoint Vista 100Wx2 open wire cable lengths Cable Length open wire Power input cable Data in out cable combined 1830mm 72 1830mm 72 Cable Outer...
Страница 7: ... 649mm 25 6 674mm 26 5 686mm 27 694mm 27 3 710mm 28 144mm 5 7 380mm 15 149mm 5 9 662mm 26 1 ProPoint Vista 100Wx3 open wire cable lengths Cable Length open wire Power input cable Data in out cable combined 1830mm 72 1830mm 72 Cable Outer Diameter 7 8mm 0 31 8 1mm 0 32 30 30 90 30 0 20 20 20 20 30 Additional Accessories Optional accessory for 2x100W and 3x100W units A additional accessories kit may...
Страница 8: ...ER PATENTS PENDING SPECIFICATIONS ARE SUBJECT TO CHANGE WITHOUT NOTICE Installation Guide V1 0 04 21 P 8 of 30 FIG 4 ProPoint Vista 100W Accessories Full Half Glare Shield 191mm 7 52 170mm 6 69 626mm 24 65 5 2mm 0 2 130mm 5 11 148mm 5 83 130mm 5 11 130mm 5 11 130mm 5 11 191mm 7 52 170mm 6 69 626mm 24 65 5 2mm 0 2 130mm 5 11 130mm 5 11 130mm 5 11 130mm 5 11 172mm 6 77 35 Full Glare Shield Half Glar...
Страница 9: ...THER PATENTS PENDING SPECIFICATIONS ARE SUBJECT TO CHANGE WITHOUT NOTICE Installation Guide V1 0 04 21 P 9 of 30 FIG 5 ProPoint Vista 100W Accessories Pole Mounting Supporter Rock Guard 126mm 4 96 13 3mm 0 52 800mm 31 5 4 M8 500mm 19 69 300mm 11 81 25mm 0 98 Ø 3 0 m m 1 1 8 150mm 5 91 Ø116mm 4 57 30mm 1 18 90mm 3 54 158mm 6 22 8mm 0 31 620mm 24 41 179 7mm 7 07 30mm 1 18 Pole Mounting Supporter Roc...
Страница 10: ... 55 C 22 F to 131 F 20 C 4 F 2x100W 28 3 kg 63 lbs 200W 3x100W 44 kg 97 lbs 300W The ProPoint Vista 100W luminaire is available with the following optical engines Model Color Option Lens Options DMX Control Channels Color Temperature 1x100W Color Changing RGBW 3 native 5 8 10 15 20 30 40 55 80 50 x10 50 x5 via accessory Internal Louver Standard 4 RGBW White CCT 4000K standard Other White CCT and R...
Страница 11: ... current 230V Description 1 Fixture 2 Fixtures 3 Fixtures n Fixtures Present time ProPoint Vista 100W 60A 120A 180A n 60A 0 38ms ProPoint Vista 2x100W 200W 120A 240A 360A n 120A 0 38ms ProPoint Vista 3x100W 300W 180A 360A 540A n 180A 0 38ms 1 6 Additional Accessories Termination Kit A ProPoint termination kit part number AM243520054 may be purchased separately This kit contains the following compo...
Страница 12: ...100W luminaire from the packaging and place the unit on a level surface Bracket Preparation and Mounting CAUTION It is the installer s responsibility to ensure that the mounting surface can handle the static weight of the fixture as well as dynamic loading from environmental factors such as wind and snow ice buildup The use of Grade 5 or higher hardware is recommended Make sure that the bolts on t...
Страница 13: ...9 Surface Mounting Step 1 Screws are not included 90mm 3 5 300mm 11 8 662mm 26 1 500mm 19 7 100mm 3 9 4 φ 1 3 m m 0 5 2 7 m m 1 1 Bracket Installation Mark the positions of mounting holes and drill M12 expanding anchors into the holes with the electric drill Fix the M12 50 hex bolt φ12 flat washer φ12 Spring washer as the following picture shows to install the bracket NOTICE It is the responsibili...
Страница 14: ... overall angle of the luminaire and tighten the adjusting bolts Loosen the adjusting bolts with 14mm Hex Key adjust the single head exposure angle and tighten the adjusting bolts CAUTION Do not rotate the luminaire more than 180 degrees Rotating more than 180 degrees may cause the power and or data cables to bind inside the unit resulting in damage FIG 12 Surface Mounting Step 3 11mm hex key can a...
Страница 15: ... Installation Vertical Mounting only Required Tools 2x100W Model 14mm and 17mm Hex Key 3x100W Model 14mm and 17mm Hex Key Pole Mount Installation FIG 13 ProPoint Vista 100W pole Mount Installation Preparation Remove the ProPoint luminaire from the packaging and place the unit on a level surface Pole Mounting Steps Mark the positions of the 4 mounting holes and then drill 4 x M12 holes with an elec...
Страница 16: ...NTS E U PATENTS JAPAN PATENTS OTHER PATENTS PENDING SPECIFICATIONS ARE SUBJECT TO CHANGE WITHOUT NOTICE Installation Guide V1 0 04 21 P 16 of 30 FIG 14 Pole Mounting Step 1 φ102 16 Fix the inner hexagon screw to fasten the pole mounting supporter onto the pole FIG 15 Pole Mounting Step 2 4 mm hex key to fasten screws 4 M8 10 hex socket screw Screws and pole are not included ...
Страница 17: ...nd data cabling through the pole fitting by others Install the luminaire onto the pole fitting and secure mounting screws and lock nuts FIG 16 Pole Mounting Step 3 M12 50 hex bolt φ12 flat washer φ12 Spring washer M12 Nut Put the connected signal cable power cable into the pole Screws and pole are not included Fix the luminaire and use a suitable inner Hex Key to adjust the luminaire to a target a...
Страница 18: ...834 2 3 Power Wiring The ProPoint Vista 100W luminaire is supplied with a 1 8 meter 6 foot long power feed cable This cable may be field cut to the required length by the installer WARNING Risk of electrical shock Make sure that the branch circuit is disconnected prior to installation or inspection CAUTION Make sure that the cable is protected from cuts and abrasions that may result in damage to th...
Страница 19: ...ry Required Tools 2x100W Model 5mm and 3mm Hex Keys 3x100W Model 6mm and 4mm Hex Keys Preparation Remove the ProPoint luminaire from the packaging and place the unit on a level surface FIG 19 Accessories Structure Accessories Installation Fix the screws as the following picture shows to install the additional accessories as your requirements FIG 20 Accessories Mounting Angled Glare Shield Mounting...
Страница 20: ... tasks Install the luminaire onto the mounting bracket and secure the set screws and lock nuts CAUTION Ensure that the power and data cabling is routed so that the luminaire mounting interface does not crush the power and or data cable jacketing Tighten both set screws so that each screw engages securely in the surface mount bracket groove CAUTION Both set screws must engage within the groove Fail...
Страница 21: ...or to performing installation or inspection of data wiring CAUTION Make sure that the cable is protected from cuts and abrasions that may result in damage to the outer jacket CAUTION IP failure induced by stressed damaged cable entry points during or after installation will void the product warranty NOTICE A voltage divider is recommended and may be required by local electrical code when a single ...
Страница 22: ...ation Detail DMX DMX DMX DMX Data pair to luminaire To ProPoint luminaire Data pair from luminaire WAGO 221 412 Lever Nut Typical of 6 120 Ohm Terminator Orange DMX IN Red DMX IN Grey DMX OUT Purple DMX OUT NOTE Maintain data pair wire twist at all connection points To prevent short circuits do not strip more conductor insulation than required for connection The use of wire nuts is not acceptable ...
Страница 23: ... only or other cable type suitable for DMX communication Consult DMX standard for additional guidance signal r Each DMX512 link must be properly terminated to prevent eflections General Notes All data cabling must adhere to ANSI E1 11 2008 R2013 Entertainment Technology USITT DMX512 A Asynchronous Serial Digital Data Transmission Standard for Controlling Lighting Equipment and Accessories Fixture ...
Страница 24: ...e only or other cable type suitable for DMX communication Consult DMX standard for additional guidance signal r Each DMX512 link must be properly terminated to prevent eflections General Notes All data cabling must adhere to ANSI E1 11 2008 R2013 Entertainment Technology USITT DMX512 A Asynchronous Serial Digital Data Transmission Standard for Controlling Lighting Equipment and Accessories Fixture...
Страница 25: ...e only or other cable type suitable for DMX communication Consult DMX standard for additional guidance signal r Each DMX512 link must be properly terminated to prevent eflections General Notes All data cabling must adhere to ANSI E1 11 2008 R2013 Entertainment Technology USITT DMX512 A Asynchronous Serial Digital Data Transmission Standard for Controlling Lighting Equipment and Accessories Fixture...
Страница 26: ...ilable ProPoint luminaires These luminaires can be identified by the prefix 16DC in each unit s UID Using the RDM identify function locate a single unit in the installation The associated luminaire will flash Note the physical location of the flashing unit and then disable the identify function Determine the desired address for the identified luminaire and enter it in the address field of the RDM cont...
Страница 27: ...30 Parameter ID Description Default Value Note 0x00F0 DMX Start Address 1 0x1000 Identify Device 0 Changing value to 1 will cause fixture to flash 0x0081 Manufacturer Label Traxon Technologies Read Only Parameter 0x0082 Device Label ProPoint xx 0x0200 Sensor Definiton N A Read Only Parameter 0x0201 Sensor Value N A Read Only Parameter Supported RDM Sensors Sensor Number Sensor Description Unit of Me...
Страница 28: ... source Flickering Incorrect power input Excess products connected Ensure the input voltage is correct Ensure the power supplies are not overloaded due to an excess of fixtures connected Ensure that only 32 Devices are connected on single daisy chain remove any excess devices and power cycle the fixture feed power Check and see if issue still exists All fixtures respond the same to data input Imprope...
Страница 29: ... 0 04 21 P 29 of 30 7 APPENDIX UID Address Recording Table Luminaire UID DMX Address DMX Universe Fixture Mounting Location Note Unit 1 Unit 2 Unit 3 Unit 4 Unit 5 Unit 6 Unit 7 Unit 8 Unit 9 Unit 10 Unit 11 Unit 12 Unit 13 Unit 14 Unit 15 Unit 16 Unit 17 Unit 18 Unit 19 Unit 20 Unit 21 Unit 22 Unit 23 Unit 24 Unit 25 Unit 26 Unit 27 Unit 28 Unit 29 Unit 30 Unit 31 Unit 32 NOTE Do not exceed 32 lu...
Страница 30: ...check for the latest updates and changes on the Traxon website 2021 TRAXON TECHNOLOGIES ALL RIGHTS RESERVED Information is subject to change without prior notice www traxontechnologies com www osram us traxon ...