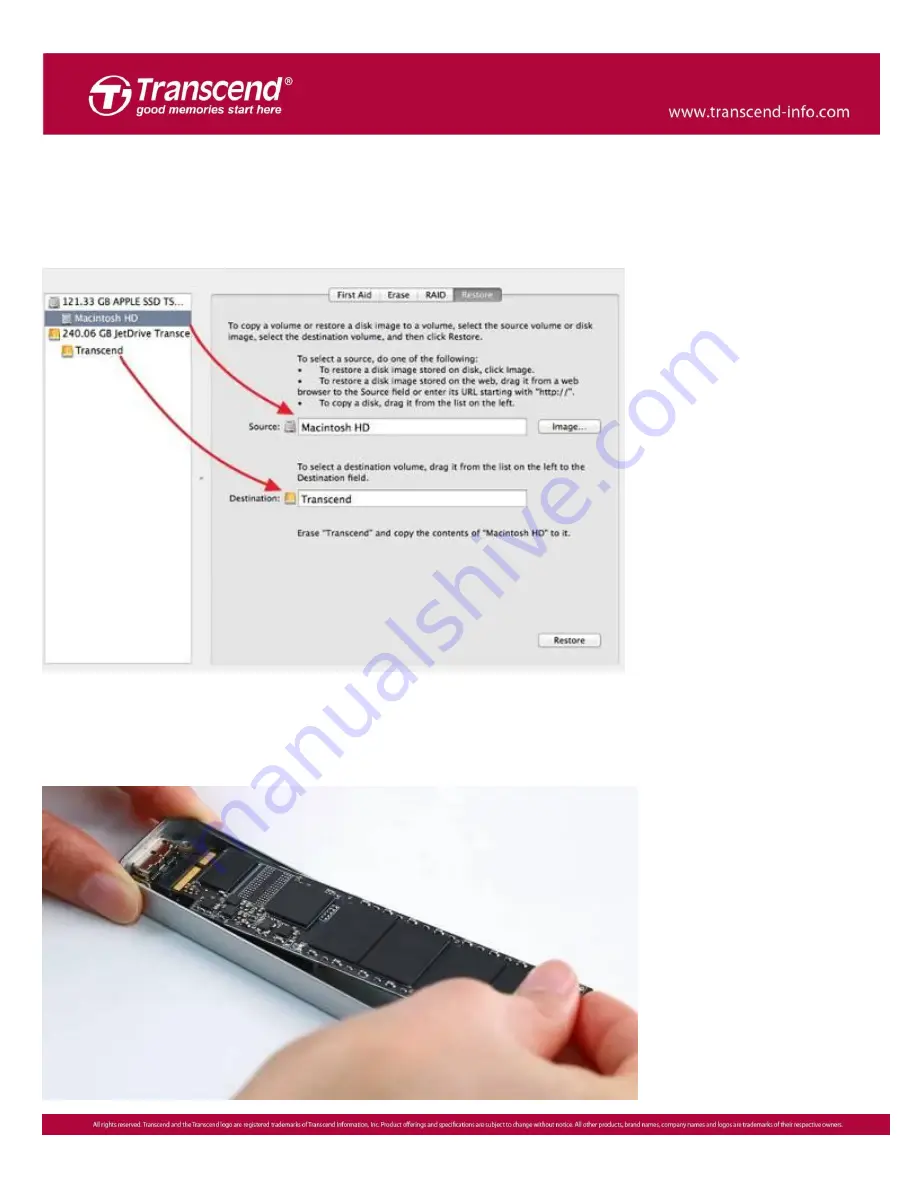
7
Step 7
Click the “Restore” tab, select “Macintosh HD” as the source and drag your JetDrive
partition into the destination field. Click “Restore” to start the cloning process. This
step may take a few minutes.
Step 8
After the cloning process has completed, shut down your Mac and remove your
JetDrive from the enclosure.
Содержание JetDrive SSD Upgrade Kit
Страница 2: ...2 Part 1 How to install the JetDrive SSD Upgrade Kit into your Mac ...
Страница 3: ...3 OS X 10 10 or earlier ...
Страница 9: ...9 OS X 10 11 El Capitan ...
Страница 13: ...13 Step 7 Go to the upper menu bar and click Edit to find the Restore tab ...
Страница 14: ...14 Step 8 Select Macintosh HD as the source Step 9 Click Restore to start the restore process ...
Страница 17: ...17 OS X 10 13 High Sierra ...
Страница 20: ...20 Step 5 Click the View tab Select Show All Devices ...
Страница 22: ...22 Step 8 Select Transcend s SSD in the sidebar Click the Restore tab ...
Страница 23: ...23 Step 9 Select Container disk2 as the source Click Restore to start the restore process ...
Страница 26: ...26 Part 2 How to install the JetDrive SSD into the enclosure ...
Страница 27: ...27 Step 1 Slide off the transparent plastic seal Step 2 Remove the USB to SATA adapter from the enclosure ...
Страница 30: ...30 Step 7 Put the bottom cover back in place and tighten the three screws ...


