background image


NOTE 1: TI-500 RFTM will shut down completely within two hours of a lost connection with the 
indicator. 
NOTE: 2: TI-500 RFTM will only enter sleep mode when the TI-500 RF indicator is OFF. 
 
When shipped from the factory, the TI-500 RF digital indicator is configured to automatically 
switch off after 5 minutes if not in use. 
 
 
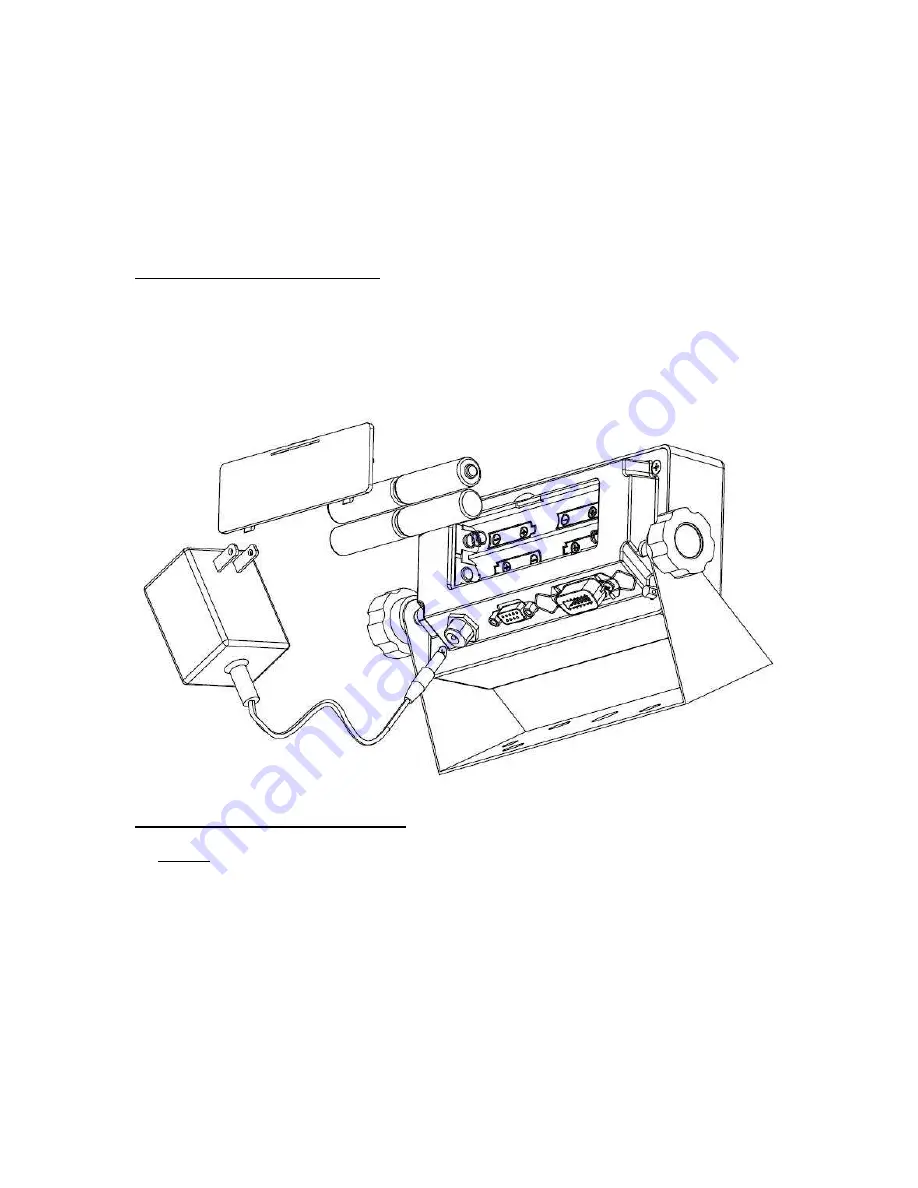
Replacing the batteries – TI-500RF  
 
The TI-500 RF digital indicator can operate either from its AC adaptor or from 4-AA batteries. 
 

1.  Remove the plastic battery cover from the rear panel.  
2.  Remove four AA batteries and discard. 
3.  Observing the proper direction (polarity), install the new batteries.  
4.  Replace the battery cover.  


Replacing the batteries – TI-500 RFTM 
 
An optional cylindrical battery holder is available which requires 4 “C” cell alkaline batteries.  
 

1.  Turn the TI-500 RFTM OFF (Press the RED button) 
2.  Locate the metal battery cylinder 
3.  Unscrew either end cap to reveal batteries 
4.  Exchange the batteries – be careful to note polarity 
5.  Replace the end cap 
6.  Re-install the metal battery cylinder 


Содержание TI-500 RFTM-B1

Страница 1: ...MODEL TI 500 RF Series Digital Weight Indicator with wireless weighing capability User Manual Revision 1 3 July 9 2012...

Страница 2: ...ion TI 500 RFTM 4 Replacing the batteries TI 500 RFTM 5 Rechargeable battery information TI 500 RF SS 6 DISPLAY KEYPAD DETAILS 7 ADVANCED OPERATION 9 Hold operation 9 NET Weighing 9 Piece Counting 10...

Страница 3: ...SER SERVICEABLE COMPONENTS Servicing of the equipment must only be carried out by trained and authorized per sonnel Use only the AC adapter supplied with the scale Other adapters may cause dam age Rou...

Страница 4: ...n sold with an external TI 500 RFTM Radio Frequency Transceiver Module and an op tional wireless radio your TI 500 RF series indicator is transformed from wired to cable free This configuration is dep...

Страница 5: ...of measure press the UNITS key repeatedly until it is indicated e g lb for pounds kg for kilograms etc The indicator features an automatic zero correction meaning that small deviations will be zeroed...

Страница 6: ...om its AC adaptor or from 4 AA batteries 1 Remove the plastic battery cover from the rear panel 2 Remove four AA batteries and discard 3 Observing the proper direction polarity install the new batteri...

Страница 7: ...nnect the charger AC Adapter 12 VDC 800mA to the scale and then plug the charger into an AC outlet Make sure that the AC voltage appearing at the wall outlet matches the input voltage marked on the AC...

Страница 8: ...dicates that the unit of the displayed weight is in pounds kg Indicates that the unit of the displayed weight is in kilograms g Indicates that the unit of the displayed weight is in grams oz Indicates...

Страница 9: ...Gross weight and Net weight but only if a Tare weight has been established first Tare This key is used to establish a Tare weight provided the following conditions are met 1 The indicator is displayin...

Страница 10: ...values only PEAK HOLD A11 3 The display updates as the load increases but not as the load de creases The value shown on the screen is the maximum weight applied to the scale Press the UNITS key to to...

Страница 11: ...ting require a container you must first tare the container off by pressing the TARE key 2 Press the NET GROSS key until Add 5 is indicated on the display The indicator is prompting you to place five i...

Страница 12: ...install er s guide for more information The mode allows you to add weighments together to obtain a total weight When a tare weight is active the net weight is added automatically 1 Load the system wit...

Страница 13: ...isplays A 4 Scroll down using the ZERO OFF down key to reach the parameter level The scale shows A 1 5 Move from A1 to A20 by pressing the TARE left key repeatedly until the screen shows A 20 6 Once y...

Страница 14: ...the ZERO OFF key Pressing the TARE key or the ON PRINT key will change the position of the flashing digit 16 After entering the exact value press the NET GROSS key to save the value and revert back up...

Страница 15: ...is activated and the display returns to the weighing mode Dosing filling with manual start In this application relays 1 and 2 are switched on as soon as the TARE key has been pressed NOTE set point v...

Страница 16: ...turn off and relay 2 will be opened 5 The display shows done for a few seconds and returns in the normal weighing mode 6 The net weight is displayed A printout may be made at this point Cancel the fi...

Страница 17: ...r stp1 will turn off and relay 1 will be opened 3 As soon as set point 2 is reached pointer stp2 will turn off and relay 2 will be opened 4 The display shows done for a few seconds and then returns to...

Страница 18: ...dicator WIRELESS SYSTEMS ONLY TI 500 RFTM 1 batteries have been depleted and need to be replaced WIRELESS SYSTEMS ONLY TI 500 RFTM 2 batteries have been depleted and need to be replaced WIRELESS SYSTE...

Страница 19: ...fications TI 500 RF SS Stainless steel enclosure 0 8 6 digit LCD w LED backlight Operating temperature 14 F to 104 F 10 C to 40 C Internal connection port for optional printer Tilt adjustable bracket...

Страница 20: ...cell damaged on platform Internal fault with indicator call Transcell Tech Support Scale turns off on its own The indicator has a power conservation feature set to automatically power off the scale af...

Отзывы: