background image

CHAPTER 6: CALIBRATION  


6.1 CALIBRATION 

OVERVIEW 

 
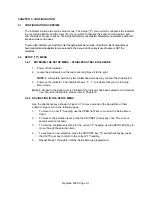
The indicator is calibrated by following the procedures embedded in F16 (Zero) and F17 (Span) of 
the Setup Menu. Each procedure enters a value into the indicator's non-volatile memory - F16 the 
zero value (deadweight) and F17 the span value (test weight). The minimum test weight that can be 
used is 1% of full-scale capacity. After the two calibration procedures are executed successfully, 
you should record both calibration values in Table 6-1 using the F18 View procedure. 
 
In the unlikely event that either value is lost while in the field, the setup menu makes provisions for 
re-entering these values via F19 and F20, thus eliminating the need for re-calibration with test 
weights. 
 

NOTE:

 This chapter assumes that the indicator is in Setup (“F”) Menu mode. If the indicator is not 

in Setup Menu mode, refer to Chapter 3 for instructions. 
 

6.2 

ZERO CALIBRATION (F16) 


1.  While in the Setup mode, scroll to "

F 16

", then scroll down once using the UNIT/SET key to 

enter zero calibration menu. The display will momentarily show "

C 0

" followed by a value. This 

value is the internal A/D count and can prove useful when trying to troubleshoot setup 
problems. 

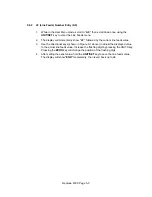
2.  After making sure that there are no test weights on the platform, press the ZERO key again to 

zero out the displayed value. 

3.  Press the UNIT/SET key to save the zero point value. The display will show "

EndC0

momentarily, then revert back up to F16. At this time, proceed to the F17 span calibration to 
complete indicator calibration. 


6.3 

SPAN CALIBRATION (F17) 


1.  While in the Setup mode, scroll to "

F 17

", then scroll down once using the UNIT/SET key to 

enter span calibration menu. 

2.  The display will momentarily show "

C 1

" for the span calibration, followed by a value with one 

flashing digit. This value will be zero with the Decimal Point parameter selected in F10. Place 
the test weight on the weighing mechanism. 

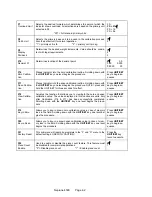
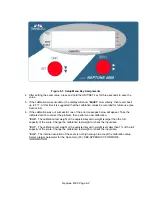
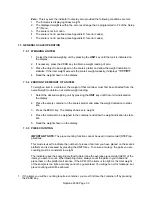
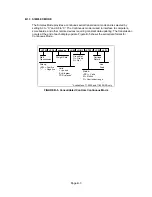
3.  Use the directional keys (shown in Figure 6-1 below) to adjust the displayed value to the actual 

test weight value. Change the flashing digit by pressing the UNIT/SET key. Pressing the ZERO 
key will change the position of the flashing digit. 


Neptune 4500  Page 6-1 


Содержание NEPTUNE 4500

Страница 1: ...vision 0 3 February 6 2003 2003 Transcell Technology Inc Contents subject to change without notice Transcell Technology Inc 975 Deerfield Parkway Buffalo Grove IL 60089 Tel 847 419 9180 Fax 847 419 15...

Страница 2: ...he equipment is operated in a commercial environment This equipment generates uses and can radiate radio frequency energy and if not installed and used in accordance with the instructions manual may c...

Страница 3: ...he Setup Menu Stainless Steel Enclosure 3 1 3 2 2 Navigating in the Setup Menu 3 2 3 2 3 Notes on the Setup Menu 3 3 3 2 4 Exiting the Setup Menu Stainless Steel Enclosure 3 3 3 3 User A Menu 3 3 3 3...

Страница 4: ...tion 7 3 7 3 1 Weighing an item 7 3 7 3 2 Zeroing an item 7 3 7 3 3 Piece Counting 7 3 Chapter 8 Legal for Trade Sealing 8 1 8 2 Stainless Steel Enclosure 8 1 Appendix A Specifications A 1 Appendix B...

Страница 5: ...nments 5 3 6 1 Setup Menu Key Assignments 6 2 7 1 Neptune 4500 Series LED Display Detail 7 1 7 2 Function Keys Layout 7 2 B 1 Cable Diagram for Indicator to IBM PC B 1 B 2 Consolidated Controls Demand...

Страница 6: ...f you are an installer the indicator s installation and wiring instructions are found in Chapter 2 The indicator contains two main setup menus The Setup F menu which configures the indicator to your w...

Страница 7: ...and set aside T NOTE On earlier units the rear cover must remain off to access the Setup Menu and calibration procedures J8 S SH E S E CPU EPROM J3 TXD RXD GND J1 P P JP2 J4 J6 5 Figure 2 1 Neptune 4...

Страница 8: ...the 5V terminal not shown 1 Connect your serial printer remote display or computer communication cable not included to the appropriate terminal on the main board Figure 2 3 Connection assignments for...

Страница 9: ...o drilled head screws may conceal the slide switch 3 Power on the indicator The indicator shows F 1 to indicate that you are in Setup Menu mode Note 1 Access to the back cover is inhibited if the indi...

Страница 10: ...Figure 3 1 Setup Menu Key Assignments Neptune 4500 Page 3 2...

Страница 11: ...eys will now return to their normal mode of operation 3 3 USER A MENU 3 3 1 ENTERING THE USER MENU 1 Enter the Setup F menu by following the directions in Section 3 2 1 or 3 2 2 2 Use the ZERO directi...

Страница 12: ...models in the series Likewise additional selections may be available on other models in the series See Chapter 5 for more information 3 3 4 EXITING THE USER MENU 1 Exit the User A menu by sliding the...

Страница 13: ...ated whenever this pa rameter is altered See Appendix C for more information 25 50 75 100 150 200 F3 Zero Track Band Selects the range within which the scale will automatically zero Note that the scal...

Страница 14: ...seconds for effect Press UNIT SET key to begin se quence F18 View Calibra tion Actuates the function that allows you to view both the zero and span calibration value The values displayed in this funct...

Страница 15: ...ONS F1 Graduations 6 000 8 000 10 000 12 000 20 000 30 000 40 000 50 000 F3 Zero Tracking Band SAZSM 0d 5d F5 Motion Band 3d 5d 10d 15 d 20d 30d 40d 50d F6 Digital Filter 1 2 4 Table 4 1 Invalid Setup...

Страница 16: ...function that illuminates all digit segments decimal points and LCD annunciators in a test sequence Pressing the UNIT SET key to scroll down one level begins the test sequence Press UNIT SET key to b...

Страница 17: ...y a value with one flashing digit This value will be the current ID number value 3 Use the directional keys to adjust the displayed value to the actual ID Number value Increase the flashing digit by p...

Страница 18: ...wed by the current line feeds value 3 Use the directional keys shown in Figure 5 1 above to adjust the displayed value to the actual line feeds value Increase the flashing digit by pressing the UNITS...

Страница 19: ...IT SET key to enter zero calibration menu The display will momentarily show C 0 followed by a value This value is the internal A D count and can prove useful when trying to troubleshoot setup problems...

Страница 20: ...Take the indicated action to correct the problem then perform a new calibration Err0 The calibration test weight or the adjusted keyed in weight is larger than the full capacity of the scale Change t...

Страница 21: ...etup mode scroll to F 19 then scroll down once using the UNIT SET key 2 The display will momentarily show CAL 0 followed by a flashing zero Use the directional keys shown in Figure 6 1 to adjust the d...

Страница 22: ...tting Diode display Typically LCD s are used for outdoor applications while LED s are used indoors where brightness is needed Table 7 1 summarizes both types of dis play annunciators 7 1 1 LIGHT EMITT...

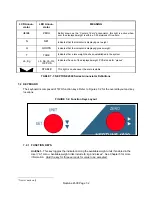
Страница 23: ...e unit of the displayed weight PCS stands for pieces STABLE This light is on whenever the scale is stable TABLE 7 1 NEPTUNE 4500 Series Annunciator Definitions 7 2 KEYBOARD The keyboard is composed of...

Страница 24: ...g unit by pressing the UNIT key until that unit is indicated on the display 2 Place the empty container on the scale s platter and allow the weight indication to stabi lize 3 Press the ZERO key The di...

Страница 25: ...2 3 Place the sample items on the platform all at once and allow the weight indication to stabilize Once this is done press and hold the UNIT SET for three seconds If the sample size is large enough t...

Страница 26: ...cial Legal for Trade pplications as follows a 1 Power off the indicator 2 On the rear cover of the indicator locate the calibration switch cover 3 Thread a wire security seal through both drilled head...

Страница 27: ...age Neptune 4500 10 VDC 4 x 350 load cells SERIAL COMMUNICATIONS Serial Port Full Duplex 1200 2400 4800 9600 Baud 8 data bits no parity 1 stop bit 7 data bits odd parity 1 stop bit 7 data bits even pa...

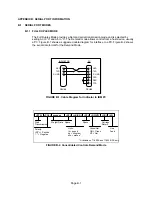
Страница 28: ...C Figure B 2 shows the serial data format for the Demand Mode INDICATOR PC 2 RXD RXD 2 TXD 3 S GND 5 3 TXD 5 S GND 6 DSR 4 DTR 8 CTS DSUB9 DSUB9 FIGURE B 1 Cable Diagram for Indicator to IBM PC STX PO...

Страница 29: ...t The indicator will not respond if the scale is in motion positive overload or negative overload The indicator will also not respond if it is not in gross mode or a tare has yet to be established C T...

Страница 30: ...nsmission occurs at the end of each display update Figure B 5 shows the serial data format for Continuous Mode STX POL xxxxx xx L K G N STAT CR LF Polarity SP Positive Negative Weight Data Units L pou...

Страница 31: ...sest to your full scale input range in millivolts 2 Enter the Setup Menu and save this number for the Span Gain parameter in F2 3 Perform a system calibration If the calibration proves unsuccessful or...

Страница 32: ...3 000 150 75 50 50 50 25 25 25 25 25 25 25 25 25 25 4 000 200 100 75 50 50 50 50 25 25 25 25 25 25 25 25 5 000 150 100 75 50 50 50 50 50 25 25 25 25 25 25 6 000 150 100 75 75 50 50 50 50 50 25 25 25 2...

Страница 33: ...check keyed in value Err 2 Span Calibration Mode F17 There is not enough load cell signal to produce the internal counts necessary to properly calibrate the scale First check all load connections Use...

Страница 34: ...d to repair replacement or credit of equipment of parts The warranty does not extend coverage to labor material freight or service charges involved in removal shipping or reinstallation of equipment o...

Отзывы: