background image

17

EN

Green twig funnel

To shred green twigs of up to Ø 1”, use the twig funnel, [Fig. 19, page 09].

Green feed chute

Use the feed chute to shred all other materials mentioned in this manual, [Fig. 20, page 10].

MAINTENANCE

To carry out any maintenance or adjustment work, turn off the engine and unplug appliance 
from the power outlet.

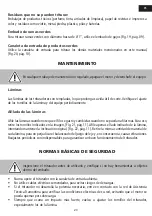
Blades

The shredder has tempered blades, which extends their cutting life. Do periodic checks to verify that the 
screws on the blades and other parts of the appliance are securely tightened.

Sharpening the blades

Sharpen the blades when you notice that they have gone blunt, and replace them when they 
can’t  be  sharpened  anymore.  In  order  to  do  that,  remove  the  screws  as  indicated  in  the  image,                                       
[Fig. 21, page 11]. Sharpen only the indicated side of the blade, trying to stick to the original inclination, 
[Fig. 22, page 11]. Remove the material from each blade evenly to prevent damage to the balance 
of the axis package, which will result in vibrations. Periodical re-tightening the screws is essential to 
ensure the shredder’s good performance.

BASIC SAFETY GUIDELINES

Inspect the shredder before using it and check if there aren’t any tools or objects inside the 
chute or funnel.

•  Never operate the shredder when the feed chute is open.
•  Do not use a power cable with seams, as there is a risk of electric shocks.
•  If the shredder does not operate to full power, contact Tramontina’s Technical Support to verify the 

conditions of your power network, thus preventing the engine from burning out.

•  Always re-tighten the screws of the shredder, mainly the ones of the blades, after a harder impact.
•  Keep children and animals away from the appliance when it is operational.
•  Do not allow inexperienced people to operate the shredder without reading the instructions 

manual first.

•  Do not use the shredder during periods when power cuts are likely to happen.
•  Do not use the shredder for any other purposes not specified in this manual.
•  It is recommended that spare parts be always of the same model and branded Tramontina.

Содержание TRO25

Страница 1: ...ICO EL CTRICO MANUAL DE USO E MANUTEN O USER AND MAINTENANCE MANUAL MANUAL DE USO Y MANTENIMIENTO CONSULTE A REDE DE ASSIST NCIA T CNICA CONSULT THE TECHNICAL ASSISTANCE NETWORK CONSULTE LA RED DE ASI...

Страница 2: ...da 02 Funil de galhos 03 Corpo 04 Sa da inferior 05 Suporte tubular 06 Motor 07 Interruptor 08 Rodas 09 Grade de prote o 10 Chave seletora de tens o 11 Disco do volante 12 L mina central 13 L minas la...

Страница 3: ...abo el trico deste manual Antes de introduzir qualquer material no funil acione o motor e espere at ele atingir a rota o adequada Aten o antes de utillizar o equipamento leia o manual de instru es Agu...

Страница 4: ...4 PT VISTA EXPLODIDA Detailed drawing Dibujo desgloce...

Страница 5: ...o conjunto da roda no suporte das rodas 5 Fig 03 Alinhe os furos dos mancais 4 com os furos dos suportes das rodas 5 introduza os parafusos 2 as arruelas 3 e aperte os com as porcas 1 Fig 04 Veja o de...

Страница 6: ...izar a montagem da calha Fig 09 Localize na parte traseira da carca a do triturador o eixo 3 da calha de entrada Remova um dos pinos 4 e o eixo 3 da carca a Fig 10 Apoie a calha de entrada 5 em cima d...

Страница 7: ...a A chave seletora de tens o 127 V 220 V encontra se acoplada ao motor na parte traseira do triturador Fig 14 Para ligar o equipamento conecte o cabo el trico no interruptor e pressione o bot o preto...

Страница 8: ...a calha de entrada nem pela sa da inferior O TRO25 equipado com uma grade de seguran a que impossibilita o acesso das m os do operador as l minas de corte A grade de seguran a n o deve ser removida Fi...

Страница 9: ...er triturados Frutas legumes verduras aparas de grama e cerca viva folhas flores secas palhas papel sem impress o filtro e borra de caf restos de alimentos e pequenos galhos verdes com at 1 para este...

Страница 10: ...is mencionados nesse manual Fig 20 MANUTEN O Em qualquer manuten o e regulagem desligue o motor e desconecte a tomada do equipamento L minas As l minas do triturador s o temperadas o que prolonga sua...

Страница 11: ...ia T cnica Tramontina para verificar as condi es el tricas de sua rede evitando assim a queima do motor por sobrecarga Sempre ap s um impacto mais forte reaperte os parafusos do triturador principalme...

Страница 12: ...ten es e limpezas peri dicas necess rias ao equipamento bem como pela observa o a todos os cuidados dispostos no manual de uso S o situa es n o cobertas pela garantia Pe as danificadas pelo desgaste n...

Страница 13: ...n parts 01 Feed chute 02 Twig funnel 03 Body 04 Lower outlet 05 Tubular support 06 Motor 07 Switch 08 Wheels 09 Safety grill 10 Tension selector key 11 Blade plate 12 Center blade 13 Side blades 14 Sa...

Страница 14: ...table in this manual Before inserting any type of materials switch the motor on and wait until it reaches the proper rotation Read the instruction manual before using your equipment Wait until all of...

Страница 15: ...d lower outlet 3 Fig 08 page 06 Step 4 On the upper part of the shredder shell you will find the screws 1 and the washers 2 to attach the feed chute Remove these to assemble the chute Fig 09 page 06 L...

Страница 16: ...activated when the feed chute is accidentally open Fig 17 page 08 Use the wheels to move the appliance around Never move the shredder when it is operational Fig 18 page 09 The Tramontina organic waste...

Страница 17: ...nce of the axis package which will result in vibrations Periodical re tightening the screws is essential to ensure the shredder s good performance BASIC SAFETY GUIDELINES Inspect the shredder before u...

Страница 18: ...packaging and shipping the product to the nearest Authorized Tramontina Service Center The Buyer is responsible for servicing maintaining and periodically cleaning the machine as required as well as f...

Страница 19: ...gajos 03 Cuerpo 04 Salida inferior 05 Soporte tubular 06 Motor 07 Llave 08 Llantas 09 Rejilla de seguridad 10 Manija para transporte 11 Llave selectora de tensi n 12 Disco del volante 13 L mina centr...

Страница 20: ...de introducir cualquier tipo de material accione el motor y espere hasta que alcance la rotaci n adecuada Conexi n a tierra No poner la mano Apague y saque el enchufe del tomacorriente antes de ajust...

Страница 21: ...07 p g 06 Vea el detalle de la salida inferior 3 montada Fig 08 p g 06 Paso 4 En la parte superior de la caja del triturador se encuentran fijados los tornillos 1 y las arandelas 2 de fijaci n de la c...

Страница 22: ...as de corte La rejilla de seguridad no se debe retirar Fig 16 p g 08 La traba de seguridad evita el accionamiento del triturador con la canaleta de entrada superior abierta en el caso que el operador...

Страница 23: ...se puedan afilar m s Para eso retire los tornillos indicados en la imagen Fig 21 p g 11 Afile apenas el lado indicado de la l mina intentando mantener la inclinaci n original Fig 22 p g 11 Retire la...

Страница 24: ...e la boleta de compra Dentro del plazo total TRAMONTINA MULTI S A se compromete a reparar o cambiar gratuitamente las piezas que en condiciones normales de uso y manutenci n y seg n evaluaci n t cnica...

Страница 25: ...lida somente com a apresenta o deste certificado preenchido por completo Guarantee is valid only presenting this certificate completely filled in La garant a solamente ser validada con la presentaci...

Страница 26: ......

Страница 27: ...WWW TRAMONTINA COM TO SEE OUR FULL RANGE OF GARDENING EQUIPMENTS VISIT OUR WEBSITE WWW TRAMONTINA COM EQUIPAMENTOS PARA JARDINAGEM EQUIPOS DE JARDINER A GARDENING EQUIPMENTS Aparador de grama el tric...

Страница 28: ...8 ES TRAMONTINA MULTI S A Rod BR 470 RS km 230 95185 000 Carlos Barbosa RS Tel 55 54 3461 8250 CNPJ 88 037 668 0001 54 Ind stria brasileira Made in Brazil Hecho en Brasil www tramontina com 213610 072...

Отзывы: