background image


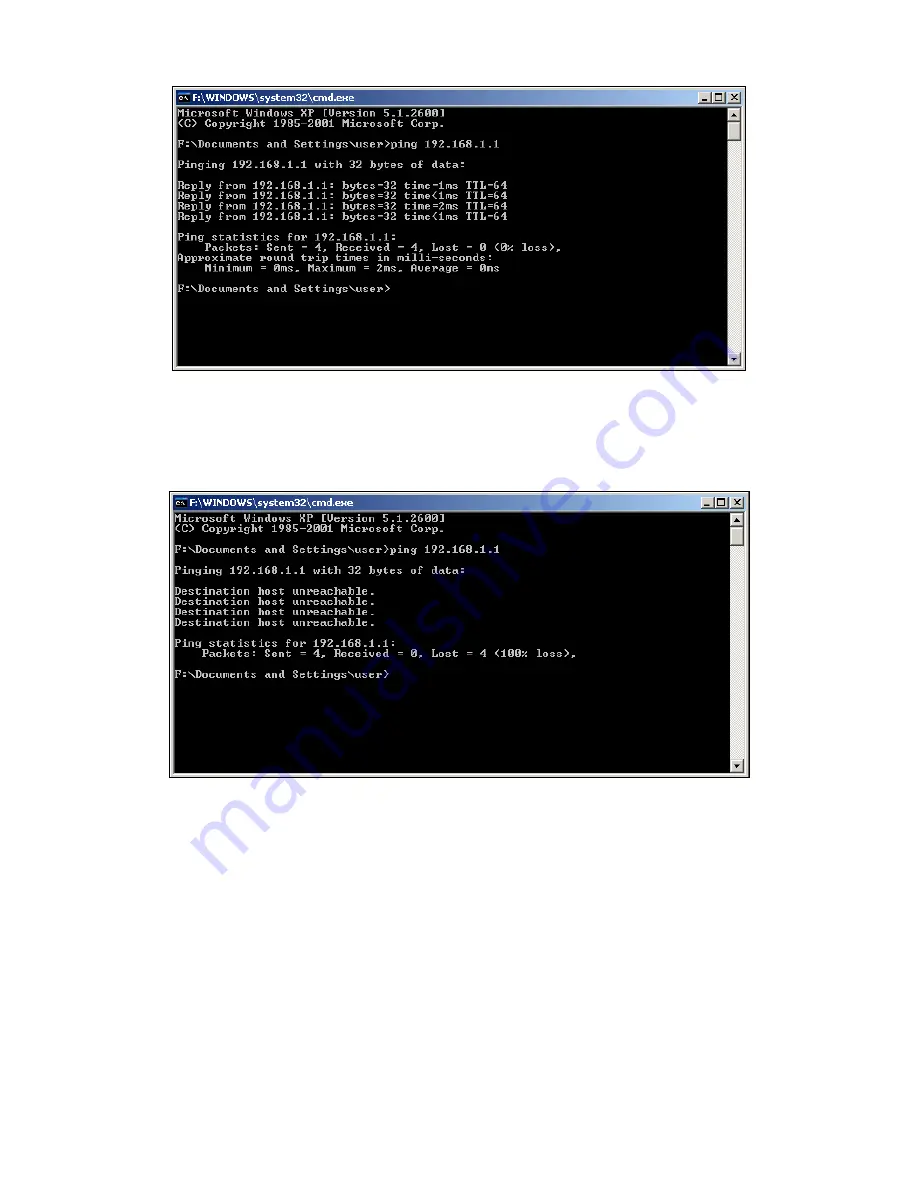
Figure 3-1    Success result of Ping command 

If the result displayed is similar to that shown in Figure 3-2, it means that your PC has not 

connected to the router.   


Figure 3-2    Failure result of Ping command 

Please check the connection following these steps: 

1.  Is the connection between your PC and the router correct? 

)


Note: 

The 1/2/3/4 LEDs of LAN port which you link to on the router and LEDs on your PC's adapter 

should be lit. 

2. Is 

the 

TCP/IP 

configuration for your PC correct? 


Содержание TL-WR541G - Wireless Router

Страница 1: ...TL WR541G 54M Wireless Router Rev 1 1 0 1910010139 ...

Страница 2: ... off and on the user is encouraged to try to correct the interference by one or more of the following measures Reorient or relocate the receiving antenna Increase the separation between the equipment and receiver Connect the equipment into an outlet on a circuit different from that to which the receiver is connected Consult the dealer or an experienced radio TV technician for help This device comp...

Страница 3: ...thin the band 2454 2483 5 MHz Military Radiolocation use Refarming of the 2 4 GHz band has been ongoing in recent years to allow current relaxed regulation Full implementation planned 2012 Italy If used outside of own premises general authorization is required Luxembourg None General authorization required for network and service supply not for spectrum Norway Implemented This subsection does not ...

Страница 4: ...roduct is in conformity with the following standards or other normative documents ETSI EN 300 328 V1 7 1 2006 ETSI EN 301 489 1 V1 8 1 2008 ETSI EN 301 489 17 V1 3 2 2008 EN 61000 3 2 2006 EN 61000 3 3 1995 A1 2001 EN60950 1 2006 EN50371 2002 Directives 2004 108 EC The above product is in conformity with the following standards or other normative documents EN 55022 2006 EN 55024 1998 A1 2001 A2 20...

Страница 5: ...rements 6 2 2 Installation Environment Requirements 6 2 3 Connecting the Router 6 Chapter 3 Quick Installation Guide 7 3 1 TCP IP configuration 7 3 2 Quick Installation Guide 10 Chapter 4 Configuring the Router 13 4 1 Login 14 4 2 Status 14 4 3 Quick Setup 15 4 4 Network 16 4 4 1 LAN 16 4 4 2 WAN 17 4 4 3 MAC Clone 27 4 5 Wireless 28 4 5 1 Wireless Settings 28 4 5 2 MAC Filtering 33 4 5 3 Wireless...

Страница 6: ... Firewall 46 4 8 2 IP Address Filtering 47 4 8 3 Domain Filtering 50 4 8 4 MAC Address Filtering 51 4 8 5 Advanced Security 53 4 9 Static Routing 55 4 10 IP QoS 57 4 11 IP MAC Binding Setting 58 4 11 1 Binding Setting 59 4 11 2 ARP List 60 4 12 DDNS 61 4 12 1 Dyndns org DDNS 62 4 12 2 Oray net DDNS 62 4 12 3 Comexe cn DDNS 63 4 13 System Tools 64 4 13 1 Time 65 4 13 2 Firmware 66 4 13 3 Factory De...

Страница 7: ...4 13 4 Backup Restore 67 4 13 5 Reboot 68 4 13 6 Password 68 4 13 7 Syslog 69 4 13 8 Remote Management 70 4 13 9 Statistics 70 Appendix A FAQ 73 Appendix C Specifications 82 Appendix D Glossary 83 ...

Страница 8: ...ation Guide One Resource CD for TL WR541G 54Mbps Wireless Router including This Guide Other Helpful Information Note Make sure that the package contains the above items If any of the listed items are damaged or missing please contact with your distributor Conventions The router or TL WR541G mentioned in this guide stands for TL WR541G 54Mbps Wireless Router without any explanation ...

Страница 9: ...Xtended Range WLAN transmission technology so that transmission distance is 2 3 times of traditional IEEE 802 11g and IEEE 802 11b solutions up to a distance of 855 36m tested in China Transmission range is extended to 4 9 times It is compatible with all IEEE 802 11g and IEEE 802 11b products The TL WR541G 54Mbps Wireless Router provides flexible access control so that parents or network administr...

Страница 10: ...atic IP address distributing Built in firewall supporting IP address filtering Domain Name filtering and MAC address filtering Supports connecting disconnecting from the Internet on a specified time of day Supports access control parents and network administrators can establish restricted access policies based on time of day for children or staff Provides 64 128 152 bit WEP encryption security and...

Страница 11: ...ction is disabled WLAN Flashing The Wireless function is enabled Off There is no device linked to the corresponding port On There are devices linked to the corresponding ports but no data transmitted or received WAN 1 4 LAN Flashing Sending or receiving data over corresponding port Table1 1 The LEDs description 1 3 2 The Rear Panel The following parts are located on the rear panel View from left t...

Страница 12: ...There are two ways to reset the router s factory defaults 1 Use the Factory Defaults function on System Tools Factory Defaults page in the router s Web based Utility 2 Use the Factory Default Reset button With the router powered on use a pin to press and hold the Reset button about 5 seconds until the SYS LED becomes quick flash from slow flash And then release the button and wait the router to re...

Страница 13: ...perating temperature 0 40 32 104 Operating Humidity 10 90 RH Non condensing 2 3Connecting the Router Before you install the router you should connect your PC to the Internet through your broadband service successfully If there is any problem please contact your ISP After that please install the router according to the following steps Don t forget to pull out the power plug and keep your hands dry ...

Страница 14: ... Installation of the TL WR541G 54Mbps Wireless Router Chapter 3 Quick Installation Guide After connecting the TL WR541G Router into your network you should configure it This chapter describes how to configure the basic functions of your TL WR541G Wireless Router These procedures only take you a few minutes You can access the Internet via the router immediately after successfully configuring 3 1TCP...

Страница 15: ...he router s default IP address Obtain an IP address automatically 1 Set up the TCP IP Protocol in Obtain an IP address automatically mode on your PC If you need instructions as to how to do this please refer to Appendix B Configuring the PC 2 Power off the router and PC Then turn on the router and restart the PC The built in DHCP server will assign IP address for the PC Note For Windows 98 OS or e...

Страница 16: ...t connected to the router Figure 3 2 Failure result of Ping command Please check the connection following these steps 1 Is the connection between your PC and the router correct Note The 1 2 3 4 LEDs of LAN port which you link to on the router and LEDs on your PC s adapter should be lit 2 Is the TCP IP configuration for your PC correct ...

Страница 17: ...ping http 192 168 1 1 in the address field of Web browser Figure 3 3 Login the router After a moment a login window will appear similar to that shown in Figure 3 4 Enter admin for the User Name and Password both in lower case letters Then click the OK button or press the Enter key Figure 3 4 Login Windows Note If the above screen does not pop up it means that your Web browser has been set to a pro...

Страница 18: ...ys to connect to Internet Please select one compatible with your ISP Click Next to enter the necessary network parameters If you choose PPPoE you will see this page shown in Figure 3 7 Figure 3 7 Quick Setup PPPoE Account Name and Password Enter the Account Name and Password provided by your ISP These fields are case sensitive If you have difficulty with this process please contact your ISP If you...

Страница 19: ... including your ISP Enter the IP address into the field Subnet Mask The Subnet Mask is used for the WAN IP address it is usually 255 255 255 0 Default Gateway Enter the gateway IP address into the box if required Primary DNS Enter the DNS Server IP address into the boxes if required Secondary DNS If your ISP provides another DNS server enter it into this field After you complete the above click Ne...

Страница 20: ...reless function of the router can be used It may be illegal to use the wireless function of the router in a region other than one of those specified in this field Channel The current channel in use This field determines which operating frequency will be used Mode Indicates the current mode 54Mbps 802 11g 11Mbps 802 11b If you select 54Mbps 802 11g it is compatible with 11Mbps 802 11b These setting...

Страница 21: ...figuration All information is read only 1 LAN This field displays the current settings or information for the LAN including the MAC address IP address and Subnet Mask 2 Wireless This field displays basic information or status for wireless function including Wireless Radio SSID Channel Mode Wireless MAC address and IP address 3 WAN These parameters apply to the WAN port of the router including MAC ...

Страница 22: ...15 Figure 4 1 Router Status 4 3Quick Setup Please refer to Section 3 2 Quick Installation Guide ...

Страница 23: ...The value can t be changed IP Address Enter the IP address of your router in dotted decimal notation factory default 192 168 1 1 Subnet Mask An address code that determines the size of the network Normally use 255 255 255 0 as the subnet mask Note a If you change the IP Address of LAN you must use the new IP Address to login the router b If the new LAN IP Address you set is not in the same subnet ...

Страница 24: ...connection type you use currently please contact your ISP to obtain the correct information 1 If you choose Dynamic IP the router will automatically get IP parameters from your ISP You can see the page as follows Figure 4 4 Figure 4 4 WAN Dynamic IP This page displays the WAN IP parameters assigned dynamically by your ISP including IP address Subnet Mask Default Gateway etc Click the Renew button ...

Страница 25: ...ed 2 If you choose Static IP you should have fixed IP Parameters specified by your ISP The Static IP settings page will appear shown in Figure 4 5 Figure 4 5 WAN Static IP You should type the following parameters into the spaces provided IP Address Enter the IP address in dotted decimal notation provided by your ISP Subnet Mask Enter the subnet Mask in dotted decimal notation provided by your ISP ...

Страница 26: ...er to automatically re establish your connection as soon as you attempt to access the Internet again If you wish to activate Connect on Demand click the radio button If you want your Internet connection to remain active at all times enter 0 in the Max Idle Time field Otherwise enter the number of minutes you want to have elapsed before your Internet connection terminates Caution Sometimes the conn...

Страница 27: ...to remain active at all times enter 0 in the Max Idle Time field Otherwise enter the number time in minutes that you wish to have the Internet connecting last unless a new link is requested Caution Sometimes the connection cannot be disconnected although you specify a time to Max Idle Time since some applications are visiting the Internet continually in the background Click the Connect button to c...

Страница 28: ...lt value is 0 you can input the value between 0 and 120 The router will detect Access Concentrator online at every interval between seconds If the value is 0 it means do not detect DNS IP address If you know that your ISP does not automatically transmit DNS addresses to the router during login click Use the following DNS servers checkbox and enter the IP address in dotted decimal notation of your ...

Страница 29: ... Static IP Settings User Name Enter the user name for 802 1X authentication provided by your ISP Password Enter the password for 802 1X authentication provided by your ISP Click Login to start 802 1X authentication Click Logout to end 802 1X authentication IP Address Enter the IP address in dotted decimal notation provided by your ISP Subnet Mask Enter the subnet Mask in dotted decimal notation pr...

Страница 30: ...ttempt to access the Internet again If you wish to activate Connect on Demand click the radio button If you want your Internet connection to remain active at all times enter 0 in the Max Idle Time field Otherwise enter the number of minutes you want to have elapsed before your Internet connection terminates Caution Sometimes the connection cannot be disconnected although you specify a time to Max ...

Страница 31: ... the connection cannot be disconnected although you specify a time to Max Idle Time since some applications are visiting the Internet continually in the background Click the Connect button to connect immediately Click the Disconnect button to disconnect immediately 7 If you choose L2TP you should enter the following parameters Figure 4 11 Figure 4 11 L2TP Settings User Name Password Enter the User...

Страница 32: ...some applications is visiting the Internet continually in the background Connect Automatically Connect automatically after the router is disconnected To use this option click the radio button Connect Manually You can configure the router to make it connect or disconnect manually After a specified period of inactivity Max Idle Time the router will disconnect from your Internet connection and you wi...

Страница 33: ...d click the Save button Click the Connect button to connect immediately Click the Disconnect button to disconnect immediately Connect on Demand You can configure the router to disconnect from your Internet connection after a specified period of inactivity Max Idle Time If your Internet connection has been terminated due to inactivity Connect on Demand enables the router to automatically re establi...

Страница 34: ... Max Idle Time field Otherwise enter the number in minutes that you wish to have the Internet connecting last unless a new link is requested Caution Sometimes the connection cannot be disconnected although you specify a time to Max Idle Time since some applications are visiting the Internet continually in the background 4 4 3 MAC Clone You can configure the MAC address of the WAN port on this page...

Страница 35: ...the router will prompt you to reboot 4 5Wireless Figure 4 14 Wireless menu There are three submenus under the Wireless menu shown in Figure 4 14 Wireless Settings MAC Filtering and Wireless Statistics Click any of them and you will be able to configure the corresponding function The detailed explanations for each submenu are provided below 4 5 1 Wireless Settings The basic settings for the wireles...

Страница 36: ...y that you change your networks name SSID to a different value This value is case sensitive For example TP LINK is NOT the same as tp link Region Select your region from the pull down list This field specifies the region where the wireless function of the router can be used It may be illegal to use the wireless function of the router in a region other than one of those specified in this field If y...

Страница 37: ...11b wireless stations to connect to the router Enable Wireless Router Radio The wireless radio of this Router can be enabled or disabled to allow wireless stations access If enabled wireless stations will be able to access the router Otherwise wireless stations will not be able to access Enable SSID Broadcast If you select the Enable SSID Broadcast checkbox the Wireless Router SSID will broadcast ...

Страница 38: ...cation type based on 802 11 authentications WPA PSK WPA2 PSK Select WPA WPA2 authentication type based on pre shared pass phrase WPA WPA2 Select WPA WPA2 authentication type based on Radius Server Authentication Options You can select one of the following authentication options When you select WEP for authentication type you can select the following authentication options Automatic Select Shared K...

Страница 39: ...enter 10 hexadecimal digits any combination of 0 9 a f A F zero key is not permitted or 5 ASCII characters For 128 bit encryption You can enter 26 hexadecimal digits any combination of 0 9 a f A F zero key is not permitted or 13 ASCII characters For 152 bit encryption You can enter 32 hexadecimal digits any combination of 0 9 a f A F zero key is not permitted or 16 ASCII characters Encryption When...

Страница 40: ...he router will reboot automatically after you click Save 4 5 2 MAC Filtering The Wireless MAC Filtering for wireless networks is set on this page Figure 4 18 Figure 4 18 Wireless MAC address Filtering The Wireless MAC Address Filtering feature allows you to control wireless stations accessing the router which depend on the station s MAC addresses MAC Address The wireless station s MAC address that...

Страница 41: ...entry click the Add New button The Add or Modify Wireless MAC Address Filtering entry page will appear shown in Figure 4 19 Figure 4 19 Add or Modify Wireless MAC Address Filtering entry To add or modify a MAC Address Filtering entry follow these instructions 1 Enter the appropriate MAC Address into the MAC Address field The format of the MAC Address is XX XX XX XX XX XX X is any hexadecimal digit...

Страница 42: ...76586A while all other wireless stations cannot access the router you should configure the Wireless MAC Address Filtering list by following these steps 1 Click the Enable button to enable this function 2 Select the radio button Deny the stations not specified by any enabled entries in the list to access for Filtering Rules 3 Delete all or disable all entries if there are any entries already 4 Clic...

Страница 43: ...s not specified by any enabled entries in the list to access for Filtering Rules and there are not any enable entries in the list thus no wireless stations can access the router 4 5 3 Wireless Statistics This page shows MAC Address Current Status Received Packets and Sent Packets for each connected wireless station Figure 4 20 The router attached wireless stations MAC Address The connected wireles...

Страница 44: ... corresponding function The detailed explanations for each submenu are provided below 4 6 1 DHCP Settings The router is set up by default as a DHCP Dynamic Host Configuration Protocol server which provides the TCP IP configuration for all the PC s that are connected to the router on the LAN The DHCP Server can be configured on the page shown in Figure 4 22 Figure 4 22 DHCP Settings DHCP Server Ena...

Страница 45: ...ary DNS Optional Input the DNS IP address provided by your ISP Or consult your ISP Secondary DNS Optional Input the IP address of another DNS server if your ISP provides two DNS servers Note To use the DHCP server function of the router you must configure all computers on the LAN as Obtain an IP Address automatically mode This function will take effect until the router reboots 4 6 2 DHCP Clients L...

Страница 46: ...igure 4 24 Address Reservation MAC Address The MAC address of the PC of which you want to reserve IP address Assigned IP Address The IP address of the router reserved Status The status of this entry either Enabled or Disabled To Reserve IP addresses 1 Click the Add New button Pop up Figure 4 25 2 Enter the MAC address The format for the MAC Address is XX XX XX XX XX XX and IP address in dotted dec...

Страница 47: ... Figure 4 26 Virtual Servers Port Triggering DMZ and UPnP Click any of them and you will be able to configure the corresponding function The detailed explanations for each submenu are provided below 4 7 1 Virtual Servers Virtual servers can be used for setting up public services on your LAN such as DNS Email and FTP A virtual server is defined as a service port and all requests from the Internet t...

Страница 48: ...her Enabled or Disabled To setup a virtual server entry 1 Click the Add New button pop up Figure 4 28 2 Select the service you want to use from the Common Service Port list If the Common Service Port list does not have the service that you want to use type the number of the service port or service port range in the Service Port box 3 Type the IP Address of the computer in the Server IP Address box...

Страница 49: ...nd Click the Previous button to return the previous page Note If you set the virtual server of service port as 80 you must set the Web management port on Security Remote Management page to be any value except 80 such as 8080 Or else there will be a conflict to disable the virtual server 4 7 2 Port Triggering Some applications require multiple connections like Internet games video conferencing Inte...

Страница 50: ...triggered this rule You can input at most 5 groups of ports or port section Every group of ports must be set apart with For example 2000 2038 2050 2051 2085 3010 3030 Incoming Protocol The protocol used for Incoming Ports Range either TCP or UDP or ALL all protocols supported by the router Status The status of this entry either Enabled or Disabled To add a new rule enter the following data on the ...

Страница 51: ...led Click the Delete All button to delete all entries Note 1 When the trigger connection is released the according opening ports will be closed 2 Each rule allowed to be used only by one host on LAN synchronously The trigger connection of other hosts on LAN will be refused 3 Incoming Port Range cannot overlap each other 4 7 3 DMZ The DMZ host feature allows one local host to be exposed to the Inte...

Страница 52: ...discovered by the UPnP service application on the LAN You can configure UPnP on this page that shown in Figure 4 32 Figure 4 32 UPnP Setting Current UPnP Status UPnP can be enabled or disabled by clicking the Enable or Disable button As allowing this may present a risk to security this feature is disabled by default Current UPnP Settings List This table displays the current UPnP information App De...

Страница 53: ...re 4 33 Firewall IP Address Filtering Domain Filtering MAC Address Filtering and Advanced Security Click any of them and you will be able to configure the corresponding function The detailed explanations for each submenu are provided below 4 8 1 Firewall Using the Firewall page shown in Figure 4 34 you can turn the general firewall switch on or off The default setting for the switch is off If the ...

Страница 54: ...e router Enable Domain Filtering set Domain Filtering is enabled or disabled Enable MAC Filtering set MAC Address Filtering is enabled or disabled You can select the default filtering rules of MAC Address Filtering either Allow or Deny accessing the router 4 8 2 IP Address Filtering The IP address Filtering feature allows you to control Internet Access by specific users on your LAN based on their ...

Страница 55: ...Entry To create or modify an IP Address Filtering entry please follow these instructions 1 Effective Time Enter a range of time in HHMM format which point to the range time for the entry to take effect For example 0803 1705 the entry will take effect from 08 03 to 17 05 2 LAN IP Address Enter a LAN IP Address or a range of LAN IP addresses in the field in dotted decimal notation format For example...

Страница 56: ...n existing entry 1 Click the Modify in the entry you want to modify If you want to delete the entry click the Delete 2 Modify the information 3 Click the Save button Click the Enable All button to make all entries enabled Click the Disabled All button to make all entries disabled Click the Delete All button to delete all entries You can change the entry s order as desired Fore entries are before h...

Страница 57: ...ain Filtering have been selected on the Firewall page To Add a Domain filtering entry click the Add New button The page Add or Modify a Domain Filtering entry will appear shown in Figure 4 38 Figure 4 38 Add or Modify a Domain Filtering entry To add or modify a Domain Filtering entry follow these instructions 1 Effective Time Enter a range of time in HHMM format specifying the time for the entry t...

Страница 58: ...ton to make all entries enabled Click the Disabled All button to make all entries disabled Click the Delete All button to delete all entries Click the Next button to go to the next page and the Previous button to return to the previous page For example if you want to block the PC s on your LAN to access websites www xxyy com cn www aabbcc com and websites with net in the end on the Internet while ...

Страница 59: ...g entry To add or modify a MAC Address Filtering entry follow these instructions 1 Enter the appropriate MAC Address into the MAC Address field The format of the MAC Address is XX XX XX XX XX XX X is any hexadecimal digit For example 00 0E AE B0 00 0B 2 Type the description of the PC in the Description field Fox example John s PC 3 Status Select Enabled or Disabled for this entry on the Status pul...

Страница 60: ...Previous button to return to the previous page Fox example If you want to block the PC with MAC addresses 00 0A EB 00 07 BE and 00 0A EB 00 07 5F to access the Internet first enable the Firewall and MAC Address Filtering on the Firewall page then you should specify the Default MAC Address Filtering Rule Deny these PC s with effective rules to access the Internet on the Firewall page and the follow...

Страница 61: ...packets When the current ICMP FLOOD Packets numbers is beyond the set value the router will start up the blocking function immediately Enable UDP FLOOD Filtering Enable or Disable the UDP FLOOD Filtering UDP FLOOD Packets threshold 5 3600 The default value is 50 Enter a value between 5 3600 packets When the current UPD FLOOD Packets numbers is beyond the set value the router will start up the bloc...

Страница 62: ...This page shows Host IP Address and Host MAC Address for each host blocked by the router Host IP Address The IP address that blocked by DoS are displayed here Host MAC Address The MAC address that blocked by DoS are displayed here To update this page and to show the current blocked host click on the Refresh button Click the Clear All button to clear all displayed entries After the table is empty t...

Страница 63: ...dress is the network portion and which portion is the host portion Gateway This is the IP Address of the gateway device that allows for contact between the router and the network or host 3 Select Enabled or Disabled for this entry on the Status pull down list 4 Click the Save button to save it Figure 4 44 Add or Modify a Static Route Entry To modify or delete an existing entry 1 Click the Modify i...

Страница 64: ...ull use of the supplied bandwidth You can configure the IP QoS on this page shown as in Figure 4 45 Figure 4 45 Enable IP QoS Enable or disable IP QoS function You can enable this function for better performance and experience with online games and other interactive applications such as VoIP The following IP Range QoS configuration won t be effective unless it is enabled Choose Bandwidth Type Spec...

Страница 65: ...he Save button to save all configuration For example we assume that PC A B C are sharing the Internet with 2Mbps bandwidth through one router PC A is often for VoIP or online games to guarantee its better performance without interference from PC B and C you can specify the minimum bandwidth for PC A such as 100Kbps Note 1 The conversion relation of bandwidth 1 Mbps 1000Kbps 2 Please choose the Net...

Страница 66: ...ire shown in Figure 4 47 Figure 4 47 IP MAC Binding Setting MAC Address The MAC address of the controlled computer in the LAN IP Address The assigned IP address of the controlled computer in the LAN Bind Whether or not enable the arp binding Modify Edit or delete item When you want to add or modify an IP MAC Binding entry you can click the Add New button or Modify button and then you will go to th...

Страница 67: ...e MAC Address or IP Address 3 Enter the Find button in the next page shown in Figure 4 49 Figure 4 49 Find IP MAC Binding Entry Click the Enable All button to make all entries enabled Click the Delete All button to delete all entries 4 11 2 ARP List To manage the computer you could observe the computers in the LAN by checking the relationship of MAC address and IP address on the ARP list and you c...

Страница 68: ...s Note An item could not be loaded to the IP MAC Binding list if the IP address of the item has been loaded before Error warning will prompt as well Likewise Load All only loads the items without interference to the IP MAC Binding list 4 12 DDNS The router offers a Dynamic Domain Name System DDNS feature DDNS lets you assign a fixed host and domain name to a dynamic Internet IP Address It is usefu...

Страница 69: ...n names your dynamic DNS service provider gave 2 Type the User Name for your DDNS account 3 Type the Password for your DDNS account 4 Click the Login button to login to the DDNS service Connection Status The status of the DDNS service connection is displayed here Click Logout to logout of the DDNS service 4 12 2 Oray net DDNS If your selected dynamic DNS Service Provider is www oray net the page w...

Страница 70: ...DNS account 3 Click the Login button to login the DDNS service Connection Status The status of the DDNS service connection is displayed here Domain Name The domain names are displayed here Click Logout to logout the DDNS service 4 12 3 Comexe cn DDNS If your selected dynamic DNS Service Provider is www comexe cn the page will appear as shown in Figure 4 53 ...

Страница 71: ...vice provider gave 2 Type the User Name for your DDNS account 3 Type the Password for your DDNS account 4 Click the Login button to login to the DDNS service Connection Status The status of the DDNS service connection is displayed here Click Logout to logout of the DDNS service 4 13 System Tools Figure 4 54The System Tools menu ...

Страница 72: ... Figure 4 55 Figure 4 55Time Settings Time Zone Select your local time zone from this pull down list Date Enter your local date in MM DD YY into the right blanks Time Enter your local time in HH MM SS into the right blanks Time setting follows these steps below 1 Select your local time zone 2 Enter date and time in the right blanks 3 Click Save Click the Get GMT button to get GMT time from Interne...

Страница 73: ...nd can be downloaded for free If the router is not experiencing difficulties there is no need to upgrade firmware unless the new firmware supports a new feature you need Note When you upgrade the router s firmware you will lose current configuration settings so make sure you backup the router s settings before you upgrade its firmware To upgrade the router s firmware follow these instructions 1 Do...

Страница 74: ...nfiguration settings to their default values The default User Name admin The default Password admin The default IP Address 192 168 1 1 The default Subnet Mask 255 255 255 0 Note Any settings you have saved will be lost when the default settings are restored 4 13 4 Backup Restore This page shown in Figure 4 58 allows you to save current configuration of router as backup or restore the configuration...

Страница 75: ...9 allows you to reboot the router Figure 4 59Reboot the router Click the Reboot button to reboot the router Some settings of the router will take effect only after rebooting which include Change LAN IP Address System will reboot automatically MAC Clone system will reboot automatically DHCP service function Static address assignment of DHCP server Web Service Port of the router Upgrade the firmware...

Страница 76: ... user name and password must not exceed 14 characters in length and must not include any spaces Enter the new Password twice to confirm it Click the Save button when finished Click the Clear All button to clear all 4 13 7 Syslog This page shown in Figure 4 61 allows you to query the logs of the router Figure 4 61System Log The router can keep logs of all traffic You can query the logs to find what...

Страница 77: ...use when accessing your router from the Internet The default IP Address is 0 0 0 0 It means this function is disabled To enable this function change the default IP Address to another IP Address as desired To access the router you will type your router s WAN IP Address into your browser s Address in IE or Location in Navigator box followed by a colon and the custom port number For example if your R...

Страница 78: ...Statistics Table IP Address The IP Address displayed with statistics Packets The total amount of packets received and transmitted by the router Total Bytes The total amount of bytes received and transmitted by the router Packets The total amount of packets received and transmitted in the last Packets Statistic interval seconds Bytes The total amount of bytes received and transmitted in the last Pa...

Страница 79: ... packets transmitted to WAN in the last Packets Statistic interval seconds Click the Save button to save the Packets Statistic interval value Click the Auto refresh checkbox to refresh automatically Click the Refresh button to refresh immediately ...

Страница 80: ...Connection Type Type user name in the User Name field and password in the Password field finish by clicking Connect Figure A 1 PPPoE Connection Type 4 If your ADSL lease is in pay according time mode select Connect on Demand or Connect Manually for Internet connection mode Type an appropriate number for Max Idle Time to avoid wasting paid time Otherwise you can select Auto connecting for Internet ...

Страница 81: ...ress button and your PC s MAC address will fill in the WAN MAC Address field Or else type the MAC Address into the WAN MAC Address field The format for the MAC Address is XX XX XX XX XX XX Then click the Save button It will take effect after rebooting Figure A 3 MAC Clone 3 I want to use Netmeeting what do I need to do 1 If you start a Netmeeting as a host no configuration is needed but entering t...

Страница 82: ... left of your browser and click DMZ submenu On the DMZ page click Enable radio and type your IP address into the DMZ Host IP Address field using 192 168 1 169 as an example remember to click the Save button Figure A 6 DMZ 4 I want to build a WEB Server on the LAN what should I do 1 Because the WEB Server port 80 will interfere with the WEB management port 80 on the router you must change the WEB m...

Страница 83: ...ation takes effect to configure to the router by typing http 192 168 1 1 88 the router s LAN IP address Web Management Port in the address field of the Web browser 3 Login to the router click the Forwarding menu on the left of your browser and click the Virtual Servers submenu On the Virtual Server page click Add New then on the Add or Modify a Virtual Server page enter 80 into the blank behind th...

Страница 84: ...he Wireless Router Radio is enabled 2 Make sure that the wireless stations SSID accord with the router s SSID 3 Make sure the wireless stations have right KEY for encryption when the router is encrypted 4 If the wireless connection is ready but you can t access the router check the IP Address of your wireless stations ...

Страница 85: ...if necessary 1 Configure TCP IP component 1 On the Windows taskbar click the Start button and then click Control Panel 2 Click the Network and Internet Connections icon and then click on the Network Connections tab in the appearing window 3 Right click the icon that showed below select Properties on the prompt page Figure 0 1 4 In the prompt page that showed below double click on the Internet Prot...

Страница 86: ...play and the IP Address tab is open on this window by default Now you have two ways to configure the TCP IP protocol below Setting IP address automatically Select Obtain an IP address automatically Choose Obtain DNS server automatically as shown in the Figure below ...

Страница 87: ...f the router s LAN IP address is 192 168 1 1 specify the IP address as 192 168 1 x x is from 2 to 254 and the Subnet mask as 255 255 255 0 3 Type the router s LAN IP address the default IP is 192 168 1 1 into the Default gateway field 4 Select Use the following DNS server addresses In the Preferred DNS Server field you can enter the same value as the Default gateway or type the local DNS server IP...

Страница 88: ...81 Now Click OK to keep your settings ...

Страница 89: ...Cabling Type 10BASE T UTP category 3 4 5 cable maximum 100m EIA TIA 568 100Ω STP maximum 100m 100BASE TX UTP category 5 5e cable maximum 100m EIA TIA 568 100Ω STP maximum 100m Radio Data Rate 54 48 36 24 18 12 9 6Mbps or 11 5 5 3 2 1Mbps LEDs Power SYS WLAN WAN 1 4 Safety Emissions FCC CE Environmental and Physical Operating Temp 0 40 32 104 Operating Humidity 10 90 RH Non condensing Dimensions W ...

Страница 90: ...4 Mbps using direct sequence spread spectrum DSSS technology using OFDM modulation and operating in the unlicensed radio spectrum at 2 4GHz and backward compatibility with IEEE 802 11b devices and WEP encryption for security DDNS Dynamic Domain Name System The capability of assigning a fixed host and domain name to a dynamic Internet IP Address DHCP Dynamic Host Configuration Protocol A protocol t...

Страница 91: ...d with the same SSID This is typically the configuration parameter for a wireless PC card It corresponds to the ESSID in the wireless Access Point and to the wireless network name WEP Wired Equivalent Privacy A data privacy mechanism based on a 64 bit or 128 bit or 152 bit shared key algorithm as described in the IEEE 802 11 standard Wi Fi A trade name for the 802 11b wireless networking standard ...

Отзывы: