5
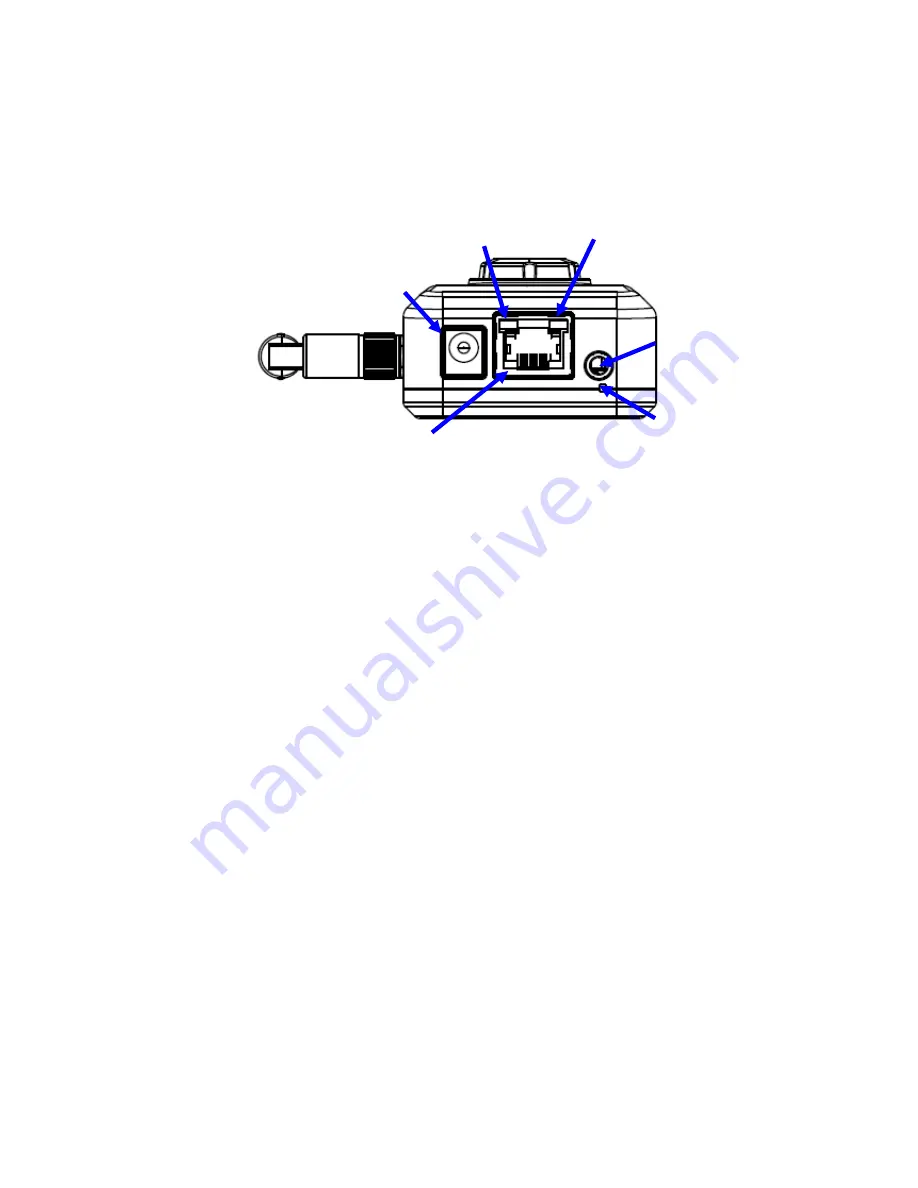
2.2 Bottom View
Audio Output Jack:
Audio-out Jack allows this camera to output audio or alerting sound.
DC Power Jack:
The input power is 12VDC. Supply the power to the camera with the power
adapter included in package. Otherwise, the improper power adapter may damage the unit and
result in danger.
Factory Default Reset:
This button is hidden in the pinhole. This button is used to restore the all
factory default settings. Sometimes restarting the camera will make the system back to a normal
state. If the system still got problems after restart, the user can restore the factory default settings
and install it again. To restore the camera, please follow the steps below:
1. Make sure the camera is ready first. Insert the paper clip or other tool and press and hold the
button down continuously.
2. Hold it for at least 5 seconds and release the tool while the camera is operating. Then the
camera has been restored to default settings and reboot again.
)
Note:
Restoring the factory default setting will lose all previous settings included IP address forever.
The user needs to run the IP Search program to search the camera and configure it to let the
camera work properly again.
LAN Port:
The LAN port is a RJ45 connector for connections to 10Base-T Ethernet or
100Base-TX Fast Ethernet cabling. This Ethernet port built N-Way protocol can detect or
negotiate the transmission speed of the network automatically. Please use Category 5 cable to
connect the camera to a 100Mbps Fast Ethernet network switch or hub.
LAN LED (green color):
This LED will be flashing while network accessing via Ethernet.
Power / Wireless LED (orange color):
This LED is used to indicate whether the camera is ready
or not. In addition, this LED will be flashing when the camera is connected to a wireless network
(WLAN model only).
LAN Port
DC Power
Jack
Factory
Default Reset
Audio
Output Jack
Power/Wireless
LED
LAN LED
Содержание TL-SC3230N
Страница 1: ...TL SC3230N Wireless N Megapixel Surveillance Camera REV 1 0 0 1910010754...
Страница 29: ...21 5 10About Click the icon to show this ActiveX information...
Страница 68: ...60 6 13 2 Record The user can choose the type of record file for event or schedule application...
Страница 86: ...78 top right of the login page 8 Click the Services 9 Click the Dynamic DNS 10 Click the Get Started...
Страница 93: ...85 Select Universal Plug and Play Click OK Click Next...
Страница 94: ...86 Please wait while Setting up configures the components Click Finish...


