background image

310

2004 L/C100 from Aug ’03 Prod. (OM60A04U)

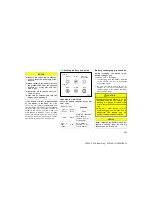
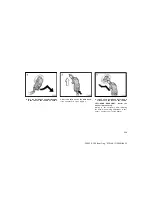
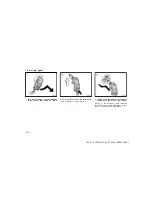
—Front fog lights

1. Turn the bulb base counterclockwise

to the front of the vehicle as shown.

2. Pull the bulb out of the bulb base.

If the connector is tight, wiggle it.

3. Install a new bulb base by turning it

clockwise to the front of the vehicle.

Aiming is not necessary after replacing
the bulb. When aiming adjustment  is nec-
essary, contact your Toyota dealer.

Содержание 2004 LAND CRUISER 100

Страница 1: ... from Aug 03 Prod OM60A04U OPERATION OF INSTRUMENTS AND CONTROLS Overview of instruments and controls Instrument panel overview 2 Instrument cluster overview 5 Indicator symbols on the instrument panel 6 SECTION 1 1 ...

Страница 2: ...lock switches 8 Power window switches 9 Automatic transmission selector lever 10 Seat heater switches 11 Rear seat audio system 12 Cup holder 13 Parking brake lever 14 Second start mode selector button and driving pattern selector button 15 Four wheel drive control lever 16 Lower vent 17 Hood lock release lever 18 Fuel filler door opener 19 Window lock switch Instrument panel overview View A ...

Страница 3: ...lt reminder light 9 Air conditioning controls 10 Outside rear view mirror heater switch 11 Rear air conditioning switch 12 Rear window defogger switch 13 Center differential lock switch 14 Power antenna switch 15 Power tilt and telescopic steering switch 16 Instrument panel light control dial 17 Power rear view mirror control switches 18 Power quarter window switch left hand side 19 Power quarter ...

Страница 4: ...4 2004 L C100 from Aug 03 Prod OM60A04U 1 Ashtray 2 Cigarette lighter 3 Power outlet Lower part of center cluster panel ...

Страница 5: ...trument cluster overview 1 Voltmeter 2 Speedometer 3 Service reminder indicators and indicator lights 4 Tachometer 5 Engine oil pressure gauge 6 Engine coolant temperature gauge 7 Odometer and two trip meters 8 Trip meter reset knob 9 Fuel gauge ...

Страница 6: ...ystem warning light 1 Open door warning light 1 SRS warning light 1 Low fuel level warning light 1 Automatic transmission fluid temperature warning light 1 Unengaged Park warning light 1 Discharge warning light 1 Engine oil replacement reminder light Center differential lock indicator light Driving pattern POWER mode indicator light Automatic transmission second start indicator light Cruise contro...

Страница 7: ...l on page 142 3 For details see Roll sensing of curtain shield airbags off switch on page 66 vehicle stability control system off indicator light 1 vehicle stability control system and active traction control system warning light 1 Active traction control system indicator light Slip indicator light Roll sensing of curtain shield airbags off indicator light 3 ...

Страница 8: ...8 2004 L C100 from Aug 03 Prod OM60A04U ...

Страница 9: ...PERATION OF INSTRUMENTS AND CONTROLS Keys and Doors Keys 10 Engine immobilizer system 12 Side doors 13 Power windows 21 Power quarter windows 23 Back door 24 Hood 26 Theft deterrent system 27 Fuel tank cap 29 Electric moon roof 30 SECTION 1 2 ...

Страница 10: ... duplicate key you will not be able to cancel the system or start the engine To protect items locked in the glove box when using valet parking leave the sub key with the attendant Since the side doors can be locked with out a key you should always carry a spare master key in case you accidentally lock your keys inside the vehicle For information on use of the wireless remote control key see Wirele...

Страница 11: ...r keys includ ing keys of other vehicles from the ring or while gripping or covering them with your hand to start the engine Do not bend the key grip Do not cover the key grip with any material that cuts off electromagnet ic waves Do not knock the key hard against other objects Do not leave the key exposed to high temperatures for a long period such as on the dashboard and hood under the direct su...

Страница 12: ... the transponder chip in the key s head transmits an electronic code to the ve hicle The engine will start only when the electronic code in the chip corre sponds to the registered ID code for the vehicle The system is automatically set when the key is removed from the ignition switch The indicator light will start flashing to show the system is set If either of the following indicator condi tions ...

Страница 13: ...ce may not cause harmful interference and 2 this device must accept any interfer ence received including interference that may cause undesired operation CAUTION Changes or modifications not ex pressly approved by the party respon sible for compliance could void the user s authority to operate the equip ment Side doors LOCKING AND UNLOCKING WITH KEY Insert the key into the keyhole and turn it To lo...

Страница 14: ...hicle Front side doors cannot be locked when either front side door is open and the key is in the ignition l12093a Driver s side l12046a Passenger s side LOCKING AND UNLOCKING WITH POWER DOOR LOCK SWITCH Push the switch To lock Push the switch down on the front side To unlock Push the switch down on the rear side All the side doors and back door lock or unlock simultaneously When the front doors a...

Страница 15: ...ocking functions The initial mode is mode 1 Mode 1 Automatic locking operation linked to shift lever position All doors are automatically locked when the shift lever is moved out of P position after the ignition switch is turned to the ON position and all the doors are closed Mode 2 Automatic locking operation linked to vehicle speed All doors are automatically locked when the vehicle speed goes a...

Страница 16: ...and unlocked to indicate that the function is set To cancel the function do the above op eration again To set the mode 3 the automatic un locking operation linked to the ignition switch 1 Set the parking brake close all doors and turn the ignition switch to the ON position 2 Shift the selector lever into the P into the N position 3 Press the driver s side power door lock switch on the rear side fo...

Страница 17: ... in the ignition switch locking cannot be per formed by the LOCK switch To unlock Push the UNLOCK switch once to unlock the driver s door alone Pushing the switch twice within 3 seconds unlocks all the side doors and back door simultaneously At this time turn signal lights flash twice NOTE The 2 step unlocking function can be changed The turn signal lights can be set not to flash Ask your Toyota d...

Страница 18: ... not disassemble it Avoid knocking it hard against other objects or dropping it Avoid putting it in water You can use up to 4 wireless remote con trol keys for the same vehicle Contact your Toyota dealer for detailed information If the wireless remote control key does not actuate the doors or operate from a normal distance or the indicator light on the key is dimmed or does not come on Check for c...

Страница 19: ...the receiving an tenna Increase the separation between the equipment and receiver Connect the equipment into an outlet on a circuit different from that to which the receiver is connected Consult the dealer or an experienced radio TV technician for help FCC WARNING Changes or modifications not ex pressly approved by the party respon sible for compliance could void the user s authority to operate th...

Страница 20: ...Remove the screw and then the cover 2 Remove the module from the key frame 3 Remove the 2 screws to take out the lid of the module Take out the dis charged battery and put a new battery with the positive side up NOTICE Do not bend the terminals ...

Страница 21: ... The power windows work when the ignition switch is in the ON position Key off operation If both front doors are closed they work for 45 seconds even after the ignition switch is turned off They stop working when either front door is opened OPERATING THE DRIVER S WINDOW Use the switch on the driver s door Normal operation The window moves as long as you hold the switch To open Lightly push down th...

Страница 22: ...windows cannot be operated The indicator lights on the switch tell you which of the switches can be operated 12C007b Automatic operation Push the switch completely down or pull it completely up and then release it The window will fully open or close To stop the window part way lightly move the switch in the oppo site direction and then release it Jam protection function If something gets caught be...

Страница 23: ...e to remove the ignition key when you leave your vehicle Never leave anyone particularly a small child alone in your vehicle especially with the ignition key still inserted Otherwise he or she could use the power window switches and get trapped in a win dow Unattended person particular ly a small child can be involved in a serious accident Never try jamming any part of your body in a window to act...

Страница 24: ...our vehicle especially with the ignition key still inserted Otherwise he or she could use the power quarter win dow switches and get trapped in a window Unattended person particu larly a small child can be involved in a serious accident Back door LOCKING AND UNLOCKING WITH KEY Insert the key into the key hole and turn it To lock Turn the key clockwise To unlock Turn the key counterclockwise All th...

Страница 25: ...oor When closing the back door make sure it is fully closed See Cargo and luggage on page 224 for precautions when loading luggage CAUTION Keep the back door closed while driving This not only keeps the luggage from being thrown out but also prevents exhaust gases from entering the vehicle If the open back door hides the stop and tail lights rear turn signal lights or rear retro reflectors while y...

Страница 26: ...ack door is closed and locked especially when small children are in the ve hicle Along with the proper use of seat belts locking the doors helps prevent the driver and passengers from being thrown out from the ve hicle during an accident It also helps prevent the doors from being opened unintentionally Hood To open the hood 1 Pull the hood lock release lever The hood will spring up slightly CAUTIO...

Страница 27: ...od is forcibly unlocked or opened or the bat tery terminal is disconnected and then reconnected when the vehicle is locked The alarm blows the horn intermittently and flashes the headlights tail lights and other exterior lights SETTING THE SYSTEM 1 Turn the ignition key to the LOCK position and remove it The indicator light will start flashing when the key is removed from the ignition switch See E...

Страница 28: ...the alarm will automati cally stop and the indicator light will starts flashing again Reactivating the alarm Once set the system automatically resets the alarm after the alarm stops The alarm will activate again under the same circumstances described in Activating the system Stopping the alarm The alarm will be stopped by the following two ways Turn the ignition key from the LOCK to ON position Un...

Страница 29: ...move the cap quickly In hot weath er fuel under pressure could cause injury by spraying out of the filler neck if the cap is suddenly re moved 12C006b 2 To remove the fuel tank cap turn the cap slowly counterclockwise then pause slightly before removing it After removing the cap hang it on the cap hanger It is not unusual to hear a slight swoosh when the cap is opened When installing turn the cap ...

Страница 30: ...ter the ignition switch is turned off It stops working when either of the front doors is opened Sun shade operation The sun shade can be opened or closed by hand Sliding operation To open Push the switch on the rear side The roof will open and stop partway 30 mm 1 2 in from the fully opened posi tion When you push the switch again the moon roof will open fully To stop the roof partway push the sam...

Страница 31: ...ttery with the moon roof slide opened or tilted up In any of these cases you should return the moon roof to normal To normalize the moon roof push and hold the switch until the moon roof is closed or tilted down completely Make sure the moon roof opens and closes automatically If the moon roof can not be operated properly have it checked by your Toyota dealer CAUTION To avoid serious personal inju...

Страница 32: ...n roof switches and get trapped in the roof open ing Unattended person particularly a small child can be involved in a serious accident Never sit on top of the vehicle around the roof opening Never try jamming any part of your body to activate the jam protection function intentionally The jam protection function may not work when something gets caught just before the moon roof is fully closed ...

Страница 33: ...S Occupant restraint systems Seats 34 Front seats 34 Armrest 37 Rear seats 37 Head restraints 46 Seat heaters 47 Seat belts 48 SRS driver airbag and front passenger airbag 58 SRS side airbags and curtain shield airbags with roll sensing function 65 Child restraint 76 SECTION 1 3 ...

Страница 34: ...risk zone for driver airbag is the first 50 75 mm 2 3 in of inflation placing yourself 250 mm 10 in from your driver airbag provides you with a clear margin of safety This distance is measured from the center of the steering wheel to your breastbone If you sit less than 250 mm 10 in away now you can change your driving position in sever al ways Move your seat to the rear as far as you can while st...

Страница 35: ...or serious injury Do not modify or replace the seats or upholstery of the seats equipped with side airbags Such change may prevent the side airbag system from activating correctly disable the sys tem or cause the side airbags to inflate accidentally resulting in death or serious injury CAUTION Do not adjust the seat while the vehicle is moving as the seat may unexpectedly move and cause the driver...

Страница 36: ...duce the risk of sliding under the lap belt during a collision avoid reclining the seatback any more than needed The seat belts provide maxi mum protection in a frontal or rear collision when the driver and the front passenger are sitting up straight and well back in the seats If you are reclined the lap belt may slide past your hips and apply restraint forces directly to the abdomen In the event ...

Страница 37: ... their origi nal position observe the following in order to prevent personal injury in a collision or sudden stop Make sure the seat is securely locked by pushing forward and rear ward on the top of the seatback and by trying to pull up the edge of the bottom cushion Failure to do so will prevent seat belt from operating properly Make sure the seat belts are not twisted or caught under the seat an...

Страница 38: ...d the lap belt may slide past your hips and apply restraint forces directly to the abdomen Therefore in the event of a frontal collision the more the seat is reclined the greater the risk of personal injury Do not adjust the seat while the vehicle is moving After adjusting the seatback push your body back against the seat to make sure the seat is locked in position For easy access to the third sea...

Страница 39: ...ING SECOND SEAT 1 Stow the second seat belt buckles as shown in the illustration This prevents the seat belt buckles from falling out when you tumble the second seat NOTICE The seat belt buckles must be stowed before you tumble the second seat I13340a 2 Make sure the shoulder belt passes through the hanger when folding the second seat This prevents the shoulder belt from being damaged CAUTION The ...

Страница 40: ...estraint Unlock the seat back and fold it down Tumbling the rear seats will enlarge the luggage compartment See Cargo and luggage on page 224 for precautions when loading luggage 2 Unlock the seat cushion Swing the whole seat up and forward 3 Hook the strap When returning the second seat to its original position put the holding strap into the hole ...

Страница 41: ...try it hard Release the lock of the seat belt in the following way Push in the lower front edge of the seatback cush ion to slacken the seat belt 1 and let the seat belt retract a little 2 CAUTION When returning seats to their original position observe the following pre cautions in order to prevent personal injury in a collision or sudden stop Make sure the seat is securely locked by pushing forwa...

Страница 42: ...f you are reclined the lap belt may slide past your hips and apply re straint forces directly to the abdo men Therefore in the event of a frontal collision the more the seat is reclined the greater the risk of personal injury Do not adjust the seat while the vehicle is moving After adjusting the seatback push your body back against the seat to make sure the seat is locked in position Tumbling thir...

Страница 43: ... must be removed from the hanger when the seat belt is in use TUMBLING THIRD SEAT 1 Lower the head restraint to the low est position Unlock the seatback and fold it down Tumbling the third seats will enlarge the luggage compartment See Cargo and luggage on page 224 for precautions when loading luggage 2 Unlock the seat cushion and slide the whole seat to the rear most position while pulling up the...

Страница 44: ...strap into the hole 13c559 5 Remove the seat hook covers from the back of the seat cushion and install them over the seat hooks CAUTION Be sure to apply the covers on the seat hooks or you may get burned when they become hot When returning the third seat to its origi nal position remove the seat hook covers from the floor and install them in the back of the seat cushion ...

Страница 45: ... caught under the seat and are arranged in their proper position and are ready to use Removing third seats After tumbling the third seat open the cover hold the whole seat and pull it up while pulling the handle toward you Removing the third seat will enlarge the luggage compartment See Cargo and luggage on page 224 for precautions when loading luggage Remove the seat hook covers from the back of ...

Страница 46: ... To prevent personal injury in a colli sion or sudden stop Do not sit on or place anything on the folded seatback while driving Do not leave the removed seat loose in the vehicle Do not try to sit on or place any thing on the removed seat When reinstalling the seat be care ful not to hit the seat against you or inside of the vehicle Install each seat in the same posi tion from which it was removed...

Страница 47: ...usting the head restraint make sure it is locked in position Do not drive with the head re straints removed Seat heaters Left side front seat Right side front seat To turn on the seat heater push the switch to HI high heating tempera ture or LO low heating temperature To turn off the seat heater push the switch lightly on the opposite side The key must be in the ON position CAUTION Occupants must ...

Страница 48: ... is too large for a child restraint system the child should sit in the rear seat and must be restrained using the vehicle s seat belt According to accident statistics the child is safer when properly restrained in the rear seat than in the front seat If a child must sit in the front seat the seat belts should be worn properly If an accident occurs and the seat belts are not worn properly the force...

Страница 49: ...ardware Take care that they do not get caught or pinched in the seat or doors Inspect the belt system periodically Check for cuts fraying and loose parts Damaged parts should be re placed Do not disassemble or modify the system Keep the belts clean and dry If they need cleaning use a mild soap solution or lukewarm water Never use bleach dye or abrasive clean ers or allow them to come into contact ...

Страница 50: ... twisted Do not insert coins clips etc in the buckle as this may prevent you from properly latching the tab and buckle If the seat belt does not function normally immediately contact your Toyota dealer Do not use the seat until the seat belt is fixed because it cannot protect an adult occupant or your child from injury Take up slack Keep as low on hips as possible Too high Adjust the position of t...

Страница 51: ...on CAUTION Always make sure the shoulder belt is positioned across the center of your shoulder The belt should be kept away from your neck but not falling off your shoulder Failure to do so could reduce the amount of protection in an accident and cause serious injuries in a collision To release the belt press the buckle release button and allow the belt to retract If the belt does not retract smoo...

Страница 52: ... properly latching the tab and buckle If the seat belt does not function normally immediately contact your Toyota dealer Do not use the seat until the seat belt is fixed because it cannot protect an adult occupant or your child from injury Too high Adjust to a snug fit Keep as low on hips as possible Remove excess length of the belt and adjust the belt position To shorten the belt pull the free en...

Страница 53: ...g precautions Failure to follow these instructions could reduce the effectiveness of the seat belt restraint system in case of an accident increasing the chance of personal injury Remember that the extender pro vided for you may not be safe when used on a different vehicle for another person or at a different seating position than the one origi nally intended If the seat belt extender has been con...

Страница 54: ...uttons of the ex tender and the seat belt are both facing outward as shown You will hear a click when the tab locks into the buckle When releasing the seat belt press on the buckle release button on the extender not on the seat belt This helps prevent damage to the vehicle interior and extend er itself When not in use remove the extender and store in the vehicle for future use CAUTION After insert...

Страница 55: ...eld airbags off indicator light The seat belt pretensioners will not oper ate in a vehicle rollover if the roll sensing of curtain shield airbags off indicator light is on For details see Roll sensing of curtain shield airbags off switch on page 66 CAUTION Make sure the roll sensing of cur tain shield airbags off indicator light is not on When the roll sensing of curtain shield airbags off switch ...

Страница 56: ...nding area or wiring Doing any of these may prevent the seat belt pretensioners from activating cor rectly cause sudden operation of the system or disable the system resulting in death or serious injury Do not use tires or wheels other than the manufacturer s recom mended size Such a use may cause the curtain shield airbags and seat belt pretensioners to inflate acci dentally resulting in death or...

Страница 57: ...ting properly This warning light system monitors the airbag sensor assembly front airbag sen sors side and curtain shield airbag sen sors curtain shield airbag sensors driv er s seat position sensor driver s seat belt buckle switch seat belt pretensioner as semblies inflators warning light roll sens ing of curtain shield airbags off indicator light interconnecting wiring and power sources For deta...

Страница 58: ...passenger in addition to the primary safety protection provided by the seat belts In response to a severe frontal impact the SRS front airbags work together with the seat belts to help reduce injury by inflating The SRS front airbags help re duce injuries mainly to the driver s or front passenger s head or chest caused by hit ting the vehicle interior The front passenger airbag is activated even w...

Страница 59: ...estraint system Toyota strongly recommends that all in fants and children be placed in the rear seat of the vehicle and proper ly restrained The rear seat is the safest for infants and children For instructions concerning the installa tion of a child restraint system see Child restraint on page 76 The SRS front airbags are designed to deploy in severe usually frontal colli sions where the magnitud...

Страница 60: ... or vehicle falling The SRS front airbags may also deploy if a severe impact occurs to the under side of your vehicle Some examples are shown in the illustration The SRS front airbag system consists mainly of the following components and their locations are shown in the illustra tion 1 Front airbag sensors 2 SRS warning light 3 Airbag module for front passenger airbag and inflator 4 Airbag sensor ...

Страница 61: ...arily to the head and chest it may also cause other less severe injuries to the face chest arms and hands These are usually in the nature of minor burns or abrasions and swelling but the force of a deploying airbag can cause more seri ous injuries especially if an occupant s hands arms chest or head is in close proximity to the airbag module at the time of deployment This is why it is important fo...

Страница 62: ...ition see Front seat precautions on page 34 Do not sit on the edge of the seat or lean against the dashboard when the vehicle is in use since the front passenger airbag could inflate with considerable speed and force Anyone who is up against or very close to an airbag when it inflates can be killed or seriously injured Sit up straight and well back in the seat and always use your seat belt properl...

Страница 63: ...by the force of deploying airbags Like wise the driver and front passenger should not hold objects in their arms or on their knees Do not modify or remove any wir ing Do not modify remove strike or open any components such as the steering wheel pad steering wheel column cover dashboard near the front passenger airbag front passenger airbag or airbag sensor assembly Doing so may pre vent the front ...

Страница 64: ...e igni tion key is turned to the ON position It goes off after about 6 seconds This means the SRS front airbags are oper ating properly This warning light system monitors the airbag sensor assembly front airbag sen sors side and curtain shield airbag sen sors curtain shield airbag sensors driv er s seat position sensor driver s seat belt buckle switch seat belt pretensioner as semblies inflators w...

Страница 65: ...in shield air bags on impacted side work with the seat belts to help reduce injury by inflating The SRS side airbags help reduce injuries mainly to the driver s or front passenger s chest and the SRS curtain shield airbags help reduce injuries mainly to the driver s front passenger s or second seat passen ger s head and can help the driver front passenger and second seat passengers to retain insid...

Страница 66: ... is a child seated in the child restraint system It is dangerous if the SRS side air bag and curtain shield airbag in flate and the impact of the deploy ing airbag could cause death or se rious injury to the occupant Improperly seated and or restrained infants and children can be killed or seriously injured by the deploy ing airbags An infant or child who is too small to use a seat belt should be ...

Страница 67: ...CAUTION Make sure the roll sensing of cur tain shield airbags off indicator light is not on When the roll sensing of curtain shield airbags off switch is turned on and the roll sensing of curtain shield airbags off indicator light is on the curtain shield airbags will not inflate in a vehicle rollover and turning off the curtain shield air bags can reduce the occupant protection which your vehicle...

Страница 68: ...from the side at certain angles or a collision to the side of the vehicle body other than the passenger compartment as shown in the illustra tion The curtain shield airbags are designed to inflate when the passenger compartment area suffers a severe impact from the side or vehicle rollover Always wear your seat belts properly The angle of vehicle tip up is marginal Skidding vehicle hitting a curb ...

Страница 69: ...ng over a deep hole Landing hard or vehicle falling The SRS side airbags and curtain shield airbags may deploy if a severe impact occurs to the underside of your vehicle Some examples are shown in the il lustration 13c538a The SRS side airbag and curtain shield airbag system consists mainly of the fol lowing components and their locations are shown in the illustration 1 SRS warning light 2 Curtain...

Страница 70: ...smoke may remain inside the vehicle for some time and may cause some minor irritation to the eyes skin or breathing Be sure to wash off any residue as soon as possible to prevent any potential skin irritation with soap and water If you can safely exit from the vehicle you should do so immediately Deployment of the airbags happens in a fraction of a second so the airbags must inflate with considera...

Страница 71: ... a small child in the ve hicle Sit up straight and well back in the seat distributing your weight evenly in the seat Do not apply excessive weight to the outer side of the seats with side airbags and to the front and rear pillar front center and rear garnish and roof interior with the curtain shield airbags Make sure the roll sensing of cur tain shield airbags off indicator is not on The curtain s...

Страница 72: ...yone to kneel on the passenger seat facing the pas senger s side door since the side airbags and curtain shield airbags could inflate with considerable speed and force Otherwise he she may be killed or seriously injured Special care should be taken espe cially when you have a small child in the vehicle Do not allow anyone to get his her head or hands out of windows since the curtain shield airbags...

Страница 73: ...ice or object will be thrown away with great force or the curtain shield airbags may not activate correctly resulting in death or serious injury Do not hook a hanger heavy or sharp pointed objects on the coat hook If the curtain shield airbags inflate those items will be thrown away with great force or the curtain shield airbags may not activate cor rectly resulting in death or serious injury When...

Страница 74: ...e Checking and replacing tires on page 296 Do not place luggage heavier than specified on the roof luggage carri er Such luggage may cause the curtain shield airbags to inflate ac cidentally resulting in death or seri ous injury For details see Roof luggage carrier on page 196 Failure to follow these instructions can result in death or serious injury Consult your Toyota dealer about any repair and...

Страница 75: ...t position sensor driver s seat belt buckle switch seat belt pretensioner as semblies inflators warning light roll sens ing of curtain shield airbags off indicator light interconnecting wiring and power sources For details see Service remind er indicators and warning buzzers on page 122 If either of the following conditions occurs this indicates a malfunction of the airbags or seat belt pretension...

Страница 76: ...on page 48 for details CAUTION For effective protection in automo bile accidents and sudden stops a child must be properly restrained using a seat belt or child restraint system depending on the age and size of the child Holding a child in your arms is not a substitute for a child restraint system In an acci dent the child can be crushed against the windshield or between you and the vehicle s inte...

Страница 77: ...and that the system is properly se cured It is not secured properly it may cause death or serious injury to the child in the event of a sud den stop or accident Child restraint system A child restraint system for a small child or baby must itself be properly restrained on the seat with either the lap belt or the lap portion of the lap shoulder belt You must carefully con sult the manufacturer s in...

Страница 78: ...e instructions provided by its manufac turer Your vehicle has anchor brackets for se curing the top strap of a child restraint system For instructions about how to use the anchor bracket see Using a top strap on page 92 Child restraint lower anchorages approved for your vehicle may also be used See Installation with child restraint lower an chorages on page 94 A Infant seat B Convertible seat C Bo...

Страница 79: ...feres with the lock mechanism of the second seats Otherwise the child or second seat occupant s may be killed or se riously injured in case of sudden braking or a collision 1 Run the center lap belt through or around the infant seat following the instructions provided by its manufactur er and insert the tab into the buckle taking care not to twist the lap belt Installation with 2 point type seat b...

Страница 80: ...ion normally it cannot protect your child from death or serious injury Contact your Toyota dealer immediately Do not install the child restraint seat on the seat until the seat belt is fixed 2 While pressing the infant seat firmly against the seat cushion and seatback tighten the lap belt by pulling its free end to hold the infant seat securely CAUTION Push and pull the child restraint sys tem in ...

Страница 81: ... size of the child When installing follow the manufacturer s instruction about the ap plicable age and size of the child as well as directions for installing the child restraint system CAUTION Do not install a child restraint system on the third seat if it interferes with the lock mechanism of the second seats Otherwise the child or second seat occupant s may be killed or se riously injured in cas...

Страница 82: ... of the belt is not twisted Do not insert coins clips etc in the buckle as this may prevent your child from properly latching the tab and buckle If the seat belt does not function normally it cannot protect your child from death or serious injury Contact your Toyota dealer immediately Do not install the child restraint seat on the seat until the seat belt is fixed 2 While pressing the convertible ...

Страница 83: ...t directions to be sure it is secure Follow all the installation instructions provided by its manufac turer 3 To remove the convertible seat press the buckle release button 13c564 A INFANT SEAT INSTALLATION An infant seat must be used in rear facing position only Installation with 3 point type seat belt ...

Страница 84: ...aint sys tem on the third seat if it interferes with the lock mechanism of the sec ond seats Otherwise the child or second seat occupant s may be killed or seriously injured in case of sudden braking or a collision If the driver s seat position does not allow sufficient space for safe installation install the child re straint system on the second right seat 1 Run the lap and shoulder belt through ...

Страница 85: ...ct your child from death or serious injury Contact your Toyota dealer immediately Do not install the child restraint seat on the seat until the seat belt is fixed 2 Fully extend the shoulder belt to put it in the lock mode When the belt is then retracted even slightly it cannot be extended To hold the infant seat securely make sure the belt is in the lock mode before letting the belt retract 3 Whi...

Страница 86: ... button and allow the belt to retract completely The belt will move freely again and be ready to work for an adult or older child passen ger 13c566 B CONVERTIBLE SEAT INSTALLATION A convertible seat must be used in for ward facing or rear facing position de pending on the age and size of the child When installing follow the manufacturer s instructions about the applicable age and size of the child...

Страница 87: ...y when it is unavoidable Always move the seat as far back as possible because the front pas senger airbag could inflate with considerable speed and force Otherwise the child may be killed or seriously injured On vehicle with side airbags and curtain shield airbags do not allow the child to lean his her head or any part of his her body against the door or the area of the seat front or rear pillar f...

Страница 88: ...h or around the convertible seat following the instructions provided by its manufacturer and insert the tab into the buckle taking care not to twist the belt Keep the lap portion of the belt tight CAUTION After inserting the tab make sure the tab and buckle are locked and that the lap and shoulder portions of the belt are not twisted Do not insert coins clips etc in the buckle as this may prevent ...

Страница 89: ...ke sure the belt is in the lock mode before letting the belt retract 3 While pressing the convertible seat firmly against the seat cushion and seatback let the shoulder belt retract as far as it will go to hold the convert ible seat securely CAUTION Push and pull the child restraint sys tem in different directions to be sure it is secure Follow all the installation instructions provided by its man...

Страница 90: ...569 C BOOSTER SEAT INSTALLATION A booster seat must be used in for ward facing position only 13c570 Move seat fully back CAUTION A forward facing child restraint sys tem should be allowed to be installed on the front passenger seat only when it is unavoidable Always move the seat as far back as possible because the front pas senger airbag could inflate with considerable speed and force Otherwise t...

Страница 91: ...houlder belt is correctly across the child s shoulder and that the lap belt is positioned as low as possible on child s hips See Seat belts on page 48 for details CAUTION Always make sure the shoulder belt is positioned across the center of child s shoulder The belt should be kept away from child s neck but not falling off child s shoulder Otherwise the child may be killed or seriously injured in ...

Страница 92: ...ry Contact your Toyota dealer immediately Do not install the child restraint seat on the seat until the seat belt is fixed 2 To remove the child restraint system press the buckle release button and allow the belt to retract Using a top strap 13C001 Follow the procedure below for a child restraint system that requires the use of a top strap ...

Страница 93: ...THE ANCHOR BRACKET 1 Remove the head restraint 13C004 2 Fix the child restraint system with the seat belt 3 Take off the cover latch the hook onto the anchor bracket and tighten the top strap For instructions to install the child re straint system see Child restraint on page 76 CAUTION Make sure the top strap is securely latched and check that the child re straint system is secure by pushing and p...

Страница 94: ... seat back of left and center second seats Child restraint system interfaced with the FMVSS225 specification can be fixed with these anchorages In this case it is not necessary to fix the child restraint system with a seat belt on the vehicle 13C532d CHILD RESTRAINT SYSTEM INSTALLA TION 1 Take off the cover between the seat cushion and seatback a little and confirm the position of the lower an cho...

Страница 95: ...nual equipped with each product CAUTION When using the lower anchorages for the child restraint system be sure that there are no irregular ob jects around the anchorages or that the seat belt is not caught Push and pull the child restraint system in different directions to be sure it is secure Follow all the installation instructions provided by its manufacturer Do not install a child restraint sy...

Страница 96: ...96 2004 L C100 from Aug 03 Prod OM60A04U ...

Страница 97: ...ug 03 Prod OM60A04U OPERATION OF INSTRUMENTS AND CONTROLS Steering wheel and Mirrors Power tilt and telescopic steering wheel 98 Outside rear view mirrors 99 Anti glare inside rear view mirror 100 Sun visors 105 SECTION 1 4 ...

Страница 98: ...ering column length push the control switch forward or backward to set the steering wheel to the desired position When the ignition key is removed the steering column moves forward away from the driver and also tilts up for easy exit and entry When the key is inserted into the ignition switch the steering column returns to the previously set position This feature can be set inoperative Ask your To...

Страница 99: ...outside rear view mirrors will quickly clear the mirror surface See Outside rear view mirror heaters on page 116 CAUTION Do not adjust the mirror while the vehicle is moving Doing so may cause the driver to mishandle the vehicle and an accident may occur resulting in death or serious inju ries Since the mirror surfaces can get hot do not touch them when the mirror heater switch is on To adjust a m...

Страница 100: ...rs folded backward Both the driver and pas senger side rear view mirrors must be extended and properly adjusted before driving 13C010 Adjust the mirror so that you can just see the rear of your vehicle in the mir ror Pushing the switch changes the mode between AUTO and DAY The indicator comes on when the AUTO mode is selected DAY mode The mirror surface is nor mal AUTO mode If the mirror detects l...

Страница 101: ...hing the AUTO button for longer 3 seconds turns on or off the compass display The compass may not show the correct direction in the following conditions The vehicle is stopped immediately af ter turning The compass does not ad just while the vehicle is stopped The ignition switch is turned off imme diately after turning The vehicle is on an inclined surface The vehicle is in a place where the eart...

Страница 102: ...display on the compass deviates from the true direction deter mined by the earth s magnetic field The amount of deviation varies according to the geographic position of the vehicle To adjust for this deviation stop the ve hicle and push the button for longer than about 6 seconds until the number 1 15 appears on the display Then push the button again referring to the following map to select the num...

Страница 103: ...ction is displayed several sec onds after adjustment the calibration is finished CAUTION Do not adjust the display while the vehicle is moving Be sure to adjust the display only when the vehicle is stopped 13C015a Zone number Hawaii is included in zone 6 ...

Страница 104: ...nnot be performed because of the magnetized vehicle etc take your vehicle to Toyota dealer Do not perform circling calibration of the compass in a place where the earth s magnetic field is subject to in terference by artificial magnetic fields underground parking under a steel tower between buildings roof parking near a crossing near a large vehicle etc During calibration do not operate elec tric ...

Страница 105: ...to the lateral side You can adjust its position as shown To block the glare from the front when the main sun visor is swung down swing down the second sun visor CAUTION Slide the main sun visor only when it is swung down to the lateral side It can cover the anti glare inside rear view mirror and obstruct the rear view Vanity mirror To use the vanity mirror swing down the main sun visor and open th...

Страница 106: ...106 2004 L C100 from Aug 03 Prod OM60A04U ...

Страница 107: ...dlight and turn signals 108 Emergency flashers 110 Instrument panel light control 111 Front fog lights 111 Interior lights 112 Personal lights 113 Ignition switch light 114 Windshield wipers and washer 114 Rear window wiper and washer 115 Rear window defogger 115 Outside rear view mirror heaters 116 SECTION 1 5 ...

Страница 108: ...all of the above Position 3 AUTO Headlights and or all of the lights in position 1 They automatically turn on or off depend ing on the darkness of the surroundings Manually twist the knob to the position 2 to turn on the headlights if they are need ed immediately when entering a dark tun nel parking structure etc NOTE The operating condition or sensi tivity can be changed Ask your Toyota dealer fo...

Страница 109: ... LOCK but ton on the wireless remote control key turns off the headlights NOTE The time before turning off the lights can be changed Ask your Toyota dealer for details NOTICE To prevent the battery from being dis charged do not leave the lights on for a long period when the engine is not running Daytime running light system The headlights turn on at reduced intensi ty when the parking brake is rel...

Страница 110: ... the ON position The lever automatically returns after you make a turn but you may have to return it by hand after you change lanes To signal a lane change move the lever up or down to the pressure point position 2 and hold it If the turn signal indicator lights green lights on the instrument panel flash faster than normal a front or rear turn signal bulb is burned out See Replacing light bulbs on...

Страница 111: ...h on longer than necessary when the en gine is not running Instrument panel light control To adjust the brightness of the instru ment panel lights turn the dial Front fog lights To turn on the front fog lights twist the band of the headlight turn signal lever They will come on only when the headlights are on low beam ...

Страница 112: ...OOR position the light comes on when either side or back door is opened After all the doors are closed the light remains on for a certain time and then goes out However in the following cases the light goes out immediately All the doors are closed when the igni tion key is in ACC or ON position The ignition key is turned to ACC ON or START when the light is still on All the doors are locked when t...

Страница 113: ...cked or unlocked by key or wireless remote control key Personal lights Front Center To turn on the personal light push the switch on 1 side To turn the lights off push the switch on 2 side PERSONAL LIGHTS CUT OFF OPERA TION When the ignition switch is OFF and any personal lights in the vehicle stay lighting on the lights will cut off automatically after 30 minutes You can cancel the cut off operat...

Страница 114: ...to in crease the wiping time interval between sweeps and downward to decrease it To squirt washer fluid pull the lever toward you If the windshield wipers are off they will operate a couple of times after the washer squirts For instructions on adding washer fluid see Adding washer fluid on page 307 In freezing weather warm the windshield with the defroster before using the washer This will help pr...

Страница 115: ... these positions after you release it For instructions on adding washer fluid see Adding washer fluid on page 307 NOTICE Do not operate the rear wiper if the rear window is dry It may scratch the glass Rear window defogger To defog or defrost the rear window push the switch The key must be in the ON position The thin heater wires on the inside of the rear window will quickly clear the surface An i...

Страница 116: ...outside rear view mirrors will quickly clear the surfaces An indicator light will illuminate to indicate the mirror heaters are operating Push the switch once again to turn the defoggers off The system will automatically shut off af ter the mirror heaters have operated about 15 minutes CAUTION Since the mirror surfaces can get hot do not touch them when the mirror heater switch is on Make sure you...

Страница 117: ...Gauges Meters and Service reminder indicators Fuel gauge 118 Engine coolant temperature gauge 118 Engine oil pressure gauge 119 Voltmeter 120 Tachometer 120 Odometer and two trip meters 121 Service reminder indicators and warning buzzers 122 Trip information display 129 SECTION 1 6 ...

Страница 118: ...el tank immediately The indicator lamp goes off after driving several times If the indicator lamp does not go off contact your Toyota dealer as soon as possible It is not a malfunction even if the needle of the fuel gauge returns to E when the ignition switch is turned to the START position The gauge indicates the engine coolant temperature when the ignition switch is on The engine operating tempe...

Страница 119: ...indicates engine oil pressure when the ignition switch is on Check it while driving to make sure the needle is in the proper range If the engine oil pressure should stay be low the normal range pull off the road to a safe place and stop the engine immedi ately Call a Toyota dealer or qualified repair shop for assistance Engine oil pressure may not build up when the engine oil level is too low The ...

Страница 120: ...ion even if the needle of the voltmeter returns to 9 when the ignition switch is turned to the START position Tachometer The tachometer indicates engine speed in thousands of rpm revolutions per minute Use it while driving to prevent engine over revving Driving with the engine running too fast causes excessive engine wear and poor fuel economy Remember in most cases the slower the engine speed the...

Страница 121: ...asure the distance on each trip All trip meter data is cancelled if the elec trical power source is disconnected 3 Trip meter reset knob Resets the two trip meters to zero and also change the meter display To change the meter display quickly push and release the knob The meter display changes in the order from the odometer to trip meter A to trip meter B then back to the odometer each time you pus...

Страница 122: ...omes on Do this a b c d e f g h Indicator and buzzer Indicator and buzzer If parking brake is off stop immediately and contact Toyota dealer Fasten driver s seat belt Fasten front passenger s seat belt Stop and check Replace engine oil Take vehicle to Toyota dealer Fill up tank Take vehicle to Toyota dealer immediately ...

Страница 123: ... this i j k l m n Key reminder buzzer Take vehicle to Toyota dealer If brake system warning light is also on stop immediately and contact Toyota dealer Close all side doors and back door Shift four wheel drive control out of N Stop and check Take vehicle to Toyota dealer Remove key ...

Страница 124: ...itions oc cur immediately stop your vehicle at a safe place and contact your Toyota dealer The light does not turn off even after the parking brake is released while the engine is running The warning buzzer comes on to gether with the warning light In either case this can indicate that the brakes may not work properly and your stopping distance will become longer Depress the brake pedal firmly and...

Страница 125: ...ning blower radio etc and drive directly to the nearest Toyota dealer or repair shop NOTICE Do not continue driving if the engine drive belt is broken or loose e Engine Oil Replacement Reminder Light This light reminds you when to replace the engine oil This light will come on when the ignition switch is turned to ON and will go off after about a few seconds When you drive for about 7200 km 4500 m...

Страница 126: ...act your Toyota dealer as soon as possible to service the vehicle If the engine speed does not increase with the accelerator pedal depressed there may be a problem somewhere in your electronic throttle control system At this time vibration may occur Howev er if you depress the accelerator pedal more firmly and slowly you can drive your vehicle at low speeds Have your vehicle checked by your Toyota...

Страница 127: ...hen the ignition key is turned to the ON position If the anti lock brake system and the brake assist system work properly the light turns off after a few seconds Thereafter if either of the systems mal functions the light comes on again When the ABS warning light is on and the brake system warning light is off the anti lock brake system the brake assist system the vehicle stability control sys tem...

Страница 128: ...w down and pull off the road Stop the vehicle at a safe place and put the selector lever in P and leave the engine idling until the light goes off If the light goes off you can start the vehicle again If the light does not go off call a Toyota dealer or qualified repair shop for assis tance NOTICE Continued driving with the warning light on may damage the automatic transmission m Vehicle Stability...

Страница 129: ...ne All the service reminder indicators ex cept the open door warning light should come on The ABS VSC TRAC VSC OFF TRAC and slip indicator light go off after a few seconds The SRS warning light goes off after about 6 seconds There may be the case that the ABS VSC TRAC and VSC OFF stay on for about 60 seconds after the ignition key is turned to ON position It is normal if they go out after a while ...

Страница 130: ...unning The displayed value is updated every 10 seconds To begin recalculating push the RESET button for about 1 second Driving distance after engine starting The driving distance after engine start ing is displayed To begin recalculating push the RESET button for about 1 second Available driving range The available driving range is calcu lated and displayed depending on the amount of remaining fue...

Страница 131: ...fuel ing The value is updated every 10 seconds When refueling be sure to stop your ve hicle and turn the ignition key off Current fuel consumption The current fuel consumption is calcu lated and displayed based on the driv ing distance and the fuel consumption per 2 second interval with the engine running The value is updated every 2 seconds If you are driving at low speeds just be fore stopping t...

Страница 132: ...132 2004 L C100 from Aug 03 Prod OM60A04U ...

Страница 133: ... CONTROLS Ignition switch Transmission and Parking brake Ignition switch with steering lock 134 Automatic transmission 135 Four wheel drive system 139 Parking brake 142 Cruise control 142 Active traction control system 145 Vehicle stability control system 147 SECTION 1 7 ...

Страница 134: ...d open the driver s door a buzzer will remind you to remove the key LOCK Engine is off and the steering wheel is locked The key can be re moved only at this position To turn the key from ACC to the LOCK position you must put the selector lever in the P position Once you remove the key the engine im mobilizer system is automatically set See Engine immobilizer system on page 12 When starting the eng...

Страница 135: ...ions Normal mode for general driving condition PWR power mode for powerful acceleration This indicator lights on the instrument panel Second start mode selector button for selecting either second start mode or normal driving mode Second start mode This indicator lights on the instrument panel in the second start mode L Position for maximum engine braking Shift while pressing the brake pedal Igniti...

Страница 136: ...e trans mission will downshift to fourth gear and engine braking will be enabled Shift into the 3 position The trans mission will downshift to third gear when the vehicle speed drops down to or lower than following speed for third gear and more powerful engine braking will be enabled Four wheel drive control lever in H 124 km h 77 mph Four wheel drive control lever in L 49 km h 31 mph Shift into t...

Страница 137: ...ch the tachometer to keep engine rpm from going into the red zone The approximate maximum al lowable speed for each position is given below for your reference km h mph Transmission Transfer L H 4 67 42 165 102 3 48 30 118 73 2 33 20 81 50 L 19 12 47 29 Do not continue hill climbing or hard towing for a long time in the 3 2 or L position This may cause severe automatic transmis sion damage from ove...

Страница 138: ...ing a trailer in order to main tain engine braking efficiency do not use overdrive CAUTION Always keep your foot on the brake pedal while stopped with the engine running This prevents the vehicle from creeping NOTICE Always use the brake pedal or the parking brake to hold the vehicle on an upgrade Do not attempt to hold the vehicle using the accelerator ped al as this can cause the transmission to...

Страница 139: ...pending on the center differential lock but ton position Use the center differential lock system if your wheels get stuck in a ditch or when you are driving on a slippery or bumpy surface When the center differential is locked the vehicle stability control system is automatically turned off and the center differential lock and VSC OFF indicator lights come on because the function that controls eng...

Страница 140: ...even in the L low speed position center differential un locked mode Also using this mode when driving down steep off road inclines will help contribute to increased vehicle stabil ity The indicator light tells when the differen tial lock is engaged Note that the differ ential is not still locked as long as the indicator light remains off If the indicator light does not go off when you push out the...

Страница 141: ... button SHIFTING BETWEEN H AND L Stop the vehicle put the transmission into N and move the four wheel drive control lever CAUTION Never move the four wheel drive con trol lever if wheels are slipping Wait until the wheels have stopped slip ping or spinning before shifting NOTICE For normal driving on dry and hard surface roads unlock the center dif ferential To prevent damage to the center differe...

Страница 142: ... Before driving be sure the parking brake is fully released and the park ing brake reminder light is off Cruise control The cruise control allows you to cruise the vehicle at a desired speed over about 40 km h 25 mph even with your foot off the accelerator pedal Your cruising speed can be maintained within the limits of engine performance although a slight speed change may occur when driving up or...

Страница 143: ...system on The indicator light in the instrument panel shows that you can now set the vehicle at a desired cruising speed Anoth er push on the switch will turn the system completely off CAUTION To avoid accidental cruise control en gagement keep the ON OFF button off when not using the cruise control SETTING AT A DESIRED SPEED The transmission must be in D or 4 before you set the cruise control spe...

Страница 144: ...and hold it Release the lever when the desired speed is attained While the lever is held down the vehicle speed will gradually decrease However a faster way to reset is to de press the brake pedal and then push the control lever down in the SET direc tion Even if you downshift the transmission from the D position to 4 with the cruise control on engine braking will not be ap plied because the cruis...

Страница 145: ...light blinks You may hear a sound in the engine compartment for a few seconds when the engine is started or just after the vehicle begins to move This means that the ac tive traction control system is in the self check mode and does not indicate mal function When the active traction control system is operating you may feel vibra tion or hear noise of your vehicle caused by operation of the brakes ...

Страница 146: ...tive traction control system is not operating The VSC TRAC warning light will come on when the ignition key is turned ON and will go off after a few seconds The VSC TRAC warning light may stay on for 60 seconds after the ignition key is turned to ON position It is normal if it goes off after a few seconds Depressing the brake pedal repeatedly may turn on the VSC TRAC warning light It is normal if ...

Страница 147: ... and anti lock brake system are electron ic systems designed to help the driver maintain control under ad verse conditions They are not a substitute for safe driving practices Factors including speed road con ditions and driver steering input can all affect whether active trac tion control system vehicle stability control system and anti lock brake system will be effective in prevent ing a loss of...

Страница 148: ...ator comes on with the center differential lock indicator light For details see Four wheel drive system a Four wheel drive control on page 139 Vehicle stability control system failure warning These lights warn when there is a prob lem somewhere in the vehicle stability control system or active traction control system If the VSC TRAC warning light and VSC OFF indicator light come on have your vehic...

Страница 149: ...sing the brake pedal repeatedly may turn on the lights It is normal if they go off after a few seconds When the VSC TRAC warning light and VSC OFF indicator light come on the vehicle stability control system is not op erating but there is no problem if you continue to drive In the following cases contact your Toyota dealer The VSC TRAC warning light VSC OFF indicator light and slip indicator light...

Страница 150: ...150 2004 L C100 from Aug 03 Prod OM60A04U ...

Страница 151: ...ar audio system Reference 152 Using your audio system 152 Car audio system operating hints 162 Rear seat audio system 166 Audio remote controls steering switches 167 For vehicle equipped with Navigation system please refer to the separate Navigation System Owner s Manual SECTION 1 8 ...

Страница 152: ...ect the cassette tape or com pact disc If the another function was pre viously playing it will come on again SWITCHING BETWEEN FUNCTIONS Push AM FM TAPE or DISC if the system is already on but you want to switch from one function to another TONE AND BALANCE For details about your system s tone and balance controls see the description of your own system Tone How good an audio program sounds to you ...

Страница 153: ...lso have an antenna printed on the inside of the right side quarter window NOTICE To prevent damage to the antenna make sure it is retracted before driving your Toyota through an au tomatic car wash The antenna mast has to be ex tended higher than 100 mm 3 94 in length when the audio is on Extend the antenna mast when the radio signal is weak Putting a window tint especially conductive or metallic...

Страница 154: ...tarting with disc number 1 The disc number of the disc currently be ing played the track number and the time from the beginning of the program appear on the display When play of one disc ends the first track of the following disc starts When play of the final disc ends play of the first disc starts again The player will skip any empty disc num ber NOTICE Do not stack up two discs for in sertion or...

Страница 155: ...155 2004 L C100 from Aug 03 Prod OM60A04U Controls and features Details of specific buttons controls and features are described in the alphabetical list that follows 17c517c ...

Страница 156: ...oaded in the player as follows 1 Push either side of the DISC button until the number of the disc you want to eject is displayed 2 Push and release the compact disc eject button To eject all the discs loaded in the player Push and hold the compact disc eject but ton until you hear a beep when the audio system is on The last compact disc played before pushing the button will be ejected first If a d...

Страница 157: ...hed tones MID Adjusts mid pitched tones TRE Adjusts high pitched tones BAL Adjusts the sound balance between the right and left speakers FAD Adjusts the sound balance between the front and rear speakers Manual tuning function Turn the knob The radio will step up or down to another frequency DISC Compact Disc button Push DISC to switch from radio or cas sette operation to compact disc operation If ...

Страница 158: ...D button This button is used to load the compact discs in the compact disc auto changer which is integrated with the radio and cas sette player This compact disc auto changer can store up to 6 discs The key must be in the ACC or ON position Loading one compact disc only To load one compact disc only quickly push and release the button If you hold the button too long if the audio system is on at th...

Страница 159: ...ceive an RDS station while turned to FM broadcasts RDS will appear on the display RPT Repeat Cassette Player Push while the track is playing will appear on the display When the track ends it will automatically be rewound and replayed This process will be continued until you push the button again to turn off the repeat feature There must be at least 3 seconds of blank space between tracks in order ...

Страница 160: ...e discs in the player Push SCAN until you hear a beep SCAN will appear on the display and the player will perform the first track of the next disc To select a disc push the SCAN again If the player has scanned all the discs it will stop scan ning SEEK TRACK button Radio In the seek mode the radio finds and plays the next station up or down the station band To seek a station quickly push and re lea...

Страница 161: ... player by pushing TAPE In both cases a cassette must already be loaded in the player TEXT button Radio This button is operational only in RDS mode To display the station name and text mes sage push this button while RDS ap pears on the display Each time you push the button indication on the display will change from the band to the station name to radio text in this order After 6 seconds passes in...

Страница 162: ...ergency message With the program type displayed push the SEEK TRACK or SCAN button You can seek or scan for the station broad casting the same type of program NOTICE To ensure correct audio system op erations Be careful not to spill beverages over the audio system Do not put anything other than a cassette tape or Compact Disc into the slot The use of a cellular phone inside or near the vehicle may...

Страница 163: ... radio station to sound alternately strong and weak Station interference When a reflected sig nal and a signal received directly from a radio station are very nearly the same frequency they can interfere with each other making it difficult to hear the broad cast Static AM is easily affected by external sources of electrical noise such as high tension power lines lightening or electri cal motors Th...

Страница 164: ...ip If moisture gets into your compact disc player you may not hear any sound even though your compact disc player appears to be working Remove the disc from the player and wait until it dries CAUTION Compact disc players use an invisible laser beam which could cause hazard ous radiation exposure if directed outside the unit Be sure to operate the player correctly Use only compact discs marked as s...

Страница 165: ...Dirt scrapes warping pin holes or other disc damage could cause the player to skip or to repeat a section of a track To see a pin hole hold the disc up to the light Remove discs from the compact disc player when you are not listening to them Store them in their plastic cases away from moisture heat and direct sunlight To clean a compact disc Wipe it with a soft lint free cloth that has been damp e...

Страница 166: ...and hold it until you hear a beep The radio will begin seek ing up or down for a station and will stop on reception Each time you push the button the stations will be searched automatically one after anoth er c When the TAPE mode is selected PROG button Push this button to select the other side of a cassette tape TRACK button Push the left or right side to skip forward or backward to locate the so...

Страница 167: ...e canceled To step up or down the frequency push and hold the switch even after you hear a beep When you release from the switch the radio will begin seeking up or down for a station Do this again to find the next station b When the TAPE mode is selected or switch Push this switch to fast forward or rewind the tape or for automatic program selection Push this switch until you hear a beep to fast f...

Страница 168: ...168 2004 L C100 from Aug 03 Prod OM60A04U ...

Страница 169: ...ont air conditioning system Controls 170 Air flow selector settings 174 Operating tips 175 Instrument panel vents 177 Rear air conditioning system Controls 178 Air flow selector settings 180 For vehicle equipped with Navigation system please refer to the separate Navigation System Owner s Manual SECTION 1 9 ...

Страница 170: ...ure selector knob 2 AUTO button 3 Temperature display 4 Fan speed display 5 Air flow display 6 MODE button 7 A C button 8 Front windshield button 9 Fan speed control button 10 Air intake control button 11 OFF button Front air conditioning system Controls ...

Страница 171: ...o adjust the fan speed unless you desire another fan speed mode Temperature selector knob To increase the temperature turn the knob to right side to decrease it turn the knob to left side MAX COLD appears when you adjust to maximum cooling and MAX HOT ap pears when you adjust to maximum warm ing OFF button Push the button to turn off the air condi tioning system MODE button Push the button to sele...

Страница 172: ...ts Pressing the button once again returns the air flow mode to the last one used Pressing the front windshield button turns on the defroster linked air conditioning At this time the A C button indicator comes on when the air intake control is in recir culate mode regardless of whether or not the A C button is pressed in This is to clean up the front view more quickly To turn off the air conditioni...

Страница 173: ... air inside the vehicle 2 Fresh Draws outside air into the sys tem A C button To turn on the air conditioning press the A C button The A C button indicator will come on To turn the air conditioning off press the button again If the A C button indicator flashes there is a problem in the air conditioning system and the air conditioning automatically shuts off If this happens take your ve hicle to a ...

Страница 174: ...174 2004 L C100 from Aug 03 Prod OM60A04U Air flow selector settings See Instrument panel vents described below 17C001a ...

Страница 175: ...s close all windows If dust thrown up by the ve hicle is still drawn into the vehicle after closing the windows it is recommended that the air intake control button be set to FRESH and the fan speed control button to any setting except OFF If following another vehicle on a dusty road or driving in windy and dusty conditions it is recommended that the air intake control button be temporarily set to...

Страница 176: ...utton the air intake selects Fresh automatical ly This is to clean up the front view more quickly Press the A C button for dehumidified heating or cooling This setting clears the front view more quickly On humid days do not blow cold air on the windshield the difference be tween the outside and inside tempera tures could make the fogging worse Defrosting The outside of the windshield For best resu...

Страница 177: ...s Lower vent If air flow control is not satisfactory check the instrument panel vents The instrument panel vents may be opened or closed as shown For removing frost or fog it is recom mended that you close the lower vent when you use the Floor the Floor Wind shield or the Windshield mode ...

Страница 178: ...4 L C100 from Aug 03 Prod OM60A04U 1 Rear air conditioning on off switch 2 AUTO button 3 Air flow selector 4 Fan speed selector 5 Temperature selector 6 OFF button Rear air conditioning system Controls 18c507 ...

Страница 179: ...s the buttons to adjust the fan speed In automatic operation you do not have to adjust the fan speed unless you desire another fan speed mode Temperature selector Move the lever to adjust the tempera ture to the right to warm to the left to cool OFF button Push the button to turn off the rear air conditioning system Air flow selector Press one of the buttons to select the vents used for air flow A...

Страница 180: ...180 2004 L C100 from Aug 03 Prod OM60A04U Air at lower than room temperature does not flow from the floor vents Air flow selector settings 18c508 Warm air Cool air ...

Страница 181: ...view monitor system 183 Cigarette lighter and ashtray 186 Power outlets 186 Roll sensing of curtain shield airbags off switch 187 Rear console box 188 Glove box 189 Garage door opener 189 Auxiliary boxes 192 Cup holders 193 Card holder 195 Tie down hooks 195 Cargo net hooks 196 Roof luggage carrier 196 Floor mat 198 Coat hooks 199 SECTION 1 10 ...

Страница 182: ...tween 1 01 1 29 the time will change to 1 00 If the time is between 1 30 1 59 the time will change to 2 00 If the electrical power source has been disconnected from the clock the time dis play will automatically be set to 1 00 one o clock When the instrument panel lights are turned on the brightness of the time in dication will be reduced Outside temperature display The outside temperature display...

Страница 183: ...n objects and flat surfaces will differ from actual distances If you back up while looking only at the screen you may hit a vehicle a person or an object When backing up be sure to check behind and all around the vehicle visually and with mir rors before proceeding Do not use the system when the back door is not completely closed If the back of the vehicle is hit the position and mounting angle of...

Страница 184: ...creen 19C508 On screen Corners of bumper Check surroundings for safety The area detected by the camera is limited Objects which are close to either corner of the bumper or under the bumper cannot be seen on the screen The area displayed on the screen may vary according to vehicle orien tation or road conditions ...

Страница 185: ...remely high or low When water droplets are adhering to the camera or when humidity is high for example when it rains When foreign matter for example snow or mud adheres to the camera lens When the sun or the beam of head lights is shining directly into the cam era lens Check surroundings for safety If a bright light for example sunlight re flected off the vehicle body is picked up by the camera th...

Страница 186: ...he lock spring plate and pull out CAUTION To reduce the chance of injury in case of an accident or sudden stop while driving always close the ash tray completely after use Power outlets The power outlets are designed for power supply for car accessories To use them open the lids as shown in the following illustrations The key must be in the ACC or ON position to be used NOTICE To prevent the fuse ...

Страница 187: ...vehicle rollover This switch should only be used in a situa tion where the inflation is not desired such as extreme off road driving When you push the roll sensing of curtain shield airbags off switch for a few seconds with the ignition switch on the roll sens ing of curtain shield airbags off indicator light comes on and the roll sensing func tion is turned off When you push the switch again the ...

Страница 188: ...function on page 65 CAUTION Make sure the roll sensing of cur tain shield airbags off indicator light is not on When the roll sensing of curtain shield airbags off switch is turned on and the roll sensing of curtain shield airbags off indicator light is on the curtain shield airbags and front seat belt pretensioners will not inflate in a vehicle rollover and turning off the curtain shield air bags...

Страница 189: ...r each button To ensure correct programming into the HomeLink install a new battery in the hand held transmitter prior to program ming The battery side of the hand held trans mitter must be pointed away from the HomeLink during the programming pro cess For Canadian users follow the procedure in Programming an entrance gate Pro gramming all devices in the Canadian market 1 Decide which of 3 HomeLin...

Страница 190: ...Following this step you have 30 sec onds in which to initiate step 3 below 3 Press and release the vehicle s pro grammed HomeLink button twice The garage door may open If the door does open the programming process is complete If the door does not open press and release the button a third time This third press and release will complete the programming process by opening the garage door The ceiling ...

Страница 191: ... Transceiver you may be operating a garage door or other de vice Make sure people and objects are out of the way of the garage door or other device to prevent po tential harm or damage Do not use this HomeLink Universal Transceiver with any garage door opener that lacks the safety stop and reverse feature as required by federal safety standards This includes any garage door opener model manufac tu...

Страница 192: ...nce of injury in case of an accident or a sudden stop always keep the auxiliary box closed while driving NOTICE Auxiliary boxes on the ceiling In hot weather inside of the vehicle ceiling becomes very hot Do not leave any thing flammable or deformable such as a lighter the glasses etc inside Type A luggage compartment Type B luggage compartment Type C rear console ...

Страница 193: ...lf is not included as an original equipment this auxiliary box can be used to store the warning reflector Hold the warning reflector kit with a band Make sure the warning reflector is secure ly held Cup holders The cup holder is designed for holding cups or drink cans securely To use them observe the following illustra tions CAUTION Do not place anything else other than cups or drink cans in the c...

Страница 194: ...8 For front seat To use a cup holder in the console box 1 Open the console box lid Pull down the knob so that the cup holder swings down 2 While holding the console box lid with your hand push down the cup holder to be secured NOTICE When you use the cup holder in the console box make sure it is se curely locked Do not rest your arm on the cup holder in the console box Wipe up spilt drink at once ...

Страница 195: ...holder You can store a card in the slot as shown in the illustration Tie down hooks To secure your luggage use the tie down hooks as shown above See Cargo and luggage on page 224 for precautions when loading luggage NOTICE Do not use the seat anchors instead of the tie down hooks ...

Страница 196: ...luded as an original equipment these hooks can be used to hang the cargo net NOTICE To prevent damage to the hook avoid hanging things other than a cargo net on it Roof luggage carrier Roof rails Cross rails The roof luggage carrier consists of roof rails and sliding cross rails Side knobs Upper knob ADJUSTING THE POSITION OF CROSS RAILS 1 Turn the upper and side knobs coun terclockwise to loosen ...

Страница 197: ... or se vere injury in the event of emergency braking or a collision Follow the manufacture s instructions and precautions when installing the attach ments or their equivalent CAUTION When you load cargo on the roof lug gage carrier observe the following Place the cargo so that its weight is distributed evenly between the front and rear axles If loading long or wide cargo never exceed the vehicle o...

Страница 198: ... When loading the luggages be careful not to scratch the surface of the moon roof Floor mat Use a floor mat of the correct size If the floor carpet and floor mat have a hole then it is designed for use with a locking clip Fix the floor mat with locking clip into the hole in the floor carpet CAUTION Make sure the floor mat is properly placed on the floor carpet If the floor mat slips and interferes...

Страница 199: ...e hook CAUTION Do not hook a hanger heavy or sharp pointed object on the coat hook If the curtain shield airbags inflate those items will be hurled away with great force or the curtain shield air bags may not active correctly When you hang clothes hang them on the coat hook directly ...

Страница 200: ...200 2004 L C100 from Aug 03 Prod OM60A04U ...

Страница 201: ... countries 205 Three way catalytic converter 206 Engine exhaust cautions 207 Facts about engine oil consumption 208 Iridium tipped spark plugs 209 Brake system 209 Brake pad wear limit indicators 213 Rear step bumper 213 Limited slip differential 214 Your Toyota s identification 214 Theft prevention labels 215 Suspension and chassis 215 Tire information 216 Vehicle load limits 224 Cargo and luggag...

Страница 202: ...rs any more than low slung sports cars designed to perform satisfactorily under off road conditions Therefore sharp turns at excessive speeds may cause rollover CAUTION Always observe the following precau tions to minimize the risk of serious personal injury or damage to your ve hicle In a rollover crash an unbelted per son is significantly more likely to die than a person wearing a seat belt Ther...

Страница 203: ... break in But following a few simple tips for the first 1600 km 1000 miles can add to the future economy and long life of your vehicle Avoid full throttle acceleration when starting and driving Avoid racing the engine Try to avoid hard stops during the first 300 km 200 miles Do not drive for a long time at any single speed either fast or slow Do not tow a trailer during the first 800 km 500 miles ...

Страница 204: ... Charter WWFC that is expected to be applied world wide The WWFC consists of four categories that depend on required emission lev els In the U S category 3 has been adopted The WWFC improves air quali ty by providing for better emissions in vehicle fleets and customer satisfaction through better vehicle performance CLEANER BURNING GASOLINE Cleaner burning gasoline including re formulated gasoline ...

Страница 205: ...l may cause paint damage FUEL TANK CAPACITY 96 L 25 4 gal 21 1 Imp gal Fuel pump shut off system The fuel pump shut off system stops sup plying fuel to the engine when the engine stalls or an airbag inflates upon collision To restart the engine after the fuel pump shut off system activates turn the ignition switch to ACC or LOCK once and start it CAUTION Inspect the ground under the vehicle before...

Страница 206: ...bserve the following precautions Use only unleaded gasoline Do not drive with an extremely low fuel level running out of fuel could cause the engine to misfire creat ing an excessive load on the three way catalytic converter Do not allow the engine to run at idle speed for more than 20 min utes Avoid racing the engine Do not push start or pull start your vehicle Do not turn off the ignition while ...

Страница 207: ...t have the system checked immediately Do not run the engine in a garage or enclosed area except for the time needed to drive the vehicle in or out The exhaust gases cannot escape making this a particularly dangerous situation Do not remain for a long time in a parked vehicle with the engine run ning If it is unavoidable however do so only in an unconfined area and adjust the heating or cooling sys...

Страница 208: ...ehicle is driven under More oil is consumed by high speed driv ing and frequent acceleration and decel eration A new engine consumes more oil since its pistons piston rings and cylinder walls have not become conditioned Oil consumption Max 1 0 L per 1000 km 1 1 qt 600 miles 0 9 Imp qt 600 miles When judging the amount of oil con sumption note that the oil may become diluted and make it difficult t...

Страница 209: ...l will be harder to press and your stopping distance will increase Also the brake system warning light may come on CAUTION Do not drive your vehicle with only a single brake system Have your brakes fixed immediately BRAKE BOOSTER The brake booster uses brake fluid pres surized by the pump to power assist the brakes If the brake booster fails during driving the brake system warning light comes on a...

Страница 210: ... the anti lock brake system function is in action you may feel the brake pedal pulsating and hear a noise In this situation to let the anti lock brake system work for you just hold the brake pedal down more firmly Do not pump the brake in a panic stop This will result in reduced braking perfor mance The anti lock brake system becomes op erative after the vehicle has accelerated to a speed in exces...

Страница 211: ...e vehicle in front of you Compared with vehicles without an anti lock brake system your vehicle may require a longer stopping dis tance in the following cases Driving on rough gravel or snow covered roads Driving with tire chains installed Driving over the steps such as the joints on the road Driving on roads where the road surface is pitted or has other differ ences in surface height Install all ...

Страница 212: ... only the anti lock brake system will fail but also the vehicle will become extremely unsta ble during braking Either of the following conditions may occur but do not indicate a malfunc tion The light may stay on for about 60 seconds after the ignition key is turned to ON position It is normal if it turns off after a while Depressing the brake pedal repeatedly may turn on the light It is normal if...

Страница 213: ...cement is required If you hear a squealing or scraping noise while driving have the brake pads checked and replaced by your Toyota dealer as soon as possible Expensive ro tor damage can result if the pads are not replaced when necessary Rear step bumper The rear step bumper is for rear end protection and easier step up loading To get on the rear step bumper use the shaded area between the arrows i...

Страница 214: ...he jack and could pose a danger or re sult in serious injury NOTICE Use only a spare tire of the same size construction and load capacity as the original tires on your Toyota because damage to the limited slip differential could possibly occur with another tire type The vehicle identification number VIN is the legal identifier for your vehicle This number is on the left top of the instrument panel...

Страница 215: ...covery of parts from stolen vehicles The label is designed so that once it is applied to a surface any attempt to remove it will result in destroy ing the integrity of the label Transferring these labels intact from one part to anoth er will be impossible NOTICE You should not attempt to remove the theft prevention labels as it may vio late certain state or federal laws Suspension and chassis CAUT...

Страница 216: ...r of rubber coated parallel cords Cords mean the strands forming the plies in the tire 4 Location of tread wear indica tors For details see Checking and replacing tires on page 296 5 Summer tire or all season tire An all season tire has M S on the sidewall The tire not marked with M S is a summer tire For details see Types of tires on page 227 6 Radial tires or bias ply tires A radial tire has RAD...

Страница 217: ...ng and replacing tires on page 296 10 Maximum cold tire inflation pressure This means the pres sure to which a tire may be in flated For recommended cold tire inflation pressure see Tires on page 320 21A009 This illustration indicates typical DOT and Tire Identification Number TIN 1 DOT symbol 2 Tire Identification Number TIN 3 Tire manufacturer s identification mark 4 Tire size code 5 Manufacture...

Страница 218: ...e height to section width 4 Tire construction code R Radial D Diagonal 5 Wheel diameter in inch 6 Load index 2 digits or 3 digits 7 Speed symbol alphabet with one letter 21A007a 1 Section width 2 Tire height 3 Wheel diameter 1 Bead 2 Sidewall 3 Shoulder 4 Tread 5 Belt 6 Inner liner 7 Reinforcing rubber 8 Carcass 9 Rim lines 10 Bead wires 11 Chafer Tire size Name of each section of tire ...

Страница 219: ...he tread wear grade is a comparative rating based on the wear rate of the tire when tested un der controlled conditions on a speci fied government test course For ex ample a tire graded 150 would wear one and a half 1 1 2 times as well on the government course as a tire graded 100 The relative performance of tires depends upon the actual conditions of their use however and may depart significantly...

Страница 220: ... life and excessive temperature can lead to sudden tire failure The grade C cor responds to a level of performance which all passenger car tires must meet under the Federal Motor Vehicle Safety Standard No 109 Grades B and A represent higher levels of per formance on the laboratory test wheel than the minimum required by law Warning The temperature grades for this tire are established for a tire t...

Страница 221: ...ipment whether installed or not Curb weight The weight of a motor vehicle with standard equipment including the maximum capacity of fuel oil and coolant and if so equipped air conditioning and addi tional weight optional engine The sum of The sum of a Curb weight Maximum loaded vehicle weight a Curb weight b Accessory weight Maximum loaded vehicle weight b Accessory weight c Vehicle capacity weigh...

Страница 222: ...specified in the third column of Table 1 that follows Rim A metal support for a tire or a tire and tube assembly upon which the tire beads are seated Rim diameter Wheel diameter Nominal diameter of the bead seat Rim size designation Rim diameter and width Rim type designation The industry of manufacturer s designation for a rim by style or code Rim width Nominal distance between rim flanges Vehicl...

Страница 223: ...ution for vehicle normal load for various designated seating capacities Designated seating capacity number of occupants Vehicle normal load number of occu pants Occupant distribution in a normally loaded vehicle 2 through 4 2 2 in front 5 through 10 3 2 in front 1 in second seat ...

Страница 224: ...icle is able to tow Cargo capacity Cargo capacity may increase or de crease depending on the size weight and the number of occupants For de tails see Capacity and distribution that follows CAUTION Do not apply the load more than each load limit That may cause not only damage to the tires but also deterioration to the steering ability and braking ability which may cause an accident When stowing car...

Страница 225: ...with the driver s field of view Or they may move during sharp vehicle acceleration or turning and im pair the driver s control of the vehicle In an accident they may injure the vehicle occu pants NOTICE Do not load the vehicle beyond the vehicle capacity weight giv en in Section 8 Cargo capacity depends on the to tal weight of the occupants Cargo capacity Total load capac ity Total weight of occup...

Страница 226: ...tal load capacity Cargo capacity EXAMPLE ON YOUR VEHICLE In case that 2 people with the com bined weight of 166 kg 366 lb are riding in your vehicle with the total load capacity of 545 kg 1200 lb the available amount of cargo and lug gage load capacity will be as follows 545 kg 166 kg 379kg 1200 lb 366 lb 834 lb From this condition if 3 more passen gers with the combined weight of 176 kg 388 lb ge...

Страница 227: ...tal weight of occupants weight of the removed third seat Third seat weight kg lb Right 20 44 Left 20 44 Types of tires Determine what kind of tires your vehicle is originally equipped with 1 Summer tires Summer tires are high speed capabil ity tires best suited to highway driving under dry conditions Since summer tires do not have the same traction performance as snow tires summer tires are inadeq...

Страница 228: ...etails about how to distinguish summer tires from all season tires are described on page 216 CAUTION Do not mix summer and all sea son tires on your vehicle as this can cause dangerous han dling characteristics resulting in loss of control Do not use tires other than the manufacturer s designated tires and do not mix tires or wheels of the sizes different from the originally equipped tires and whe...

Страница 229: ...d driving Before starting the enginee 230 How to start the engine 230 Tips for driving in various conditions 231 Off road driving precautions 232 Winter driving tips 234 Dinghy towing 235 Trailer towing 235 How to save fuel and make your vehicle last longer too 243 SECTION 3 ...

Страница 230: ...tart the engine while the vehicle is moving put the selector le ver in N A starter safety device will prevent the starter from operating if the selector lever is in any drive position 4 Depress the brake pedal and hold it to the floor until driving off c Starting the engine Before starting the engine be sure to fol low the instructions in b Before crank ing Normal starting procedure The multiport ...

Страница 231: ...To see whether they are wet check that there is no traffic near you and then press the pedal lightly If you do not feel a normal braking force the brakes are probably wet To dry them drive the vehicle cautiously while lightly pressing the brake pedal with the park ing brake applied If they still do not work safely pull to the side of the road and call a Toyota dealer for assistance CAUTION Before ...

Страница 232: ...les are permitted to trav el b Respect private property Get owner s permission before entering private prop erty c Do not enter areas that are closed Honor gates barriers and signs that re strict travel d Stay on established roads When conditions are wet driving techniques should be changed or travel delayed to prevent damage to roads For owners in U S mainland Hawaii and Puerto Rico To obtain add...

Страница 233: ... dam age to your vehicle s suspension and chassis NOTICE If driving through water such as when crossing shallow streams first check the depth of the water and the bottom of the river bed for firmness Drive slowly and avoid deep water Take all necessary safety measures to ensure that water damage to the engine or other components does not occur Water entering the engine air intake will cause severe...

Страница 234: ...ing winter months may cause harder starting If you are not sure about which oil to use call your Toyota dealer he will be pleased to help Keep the door locks from freezing Squirt lock de icer or glycerine into the locks to keep them from freezing Use a washer fluid containing an anti freeze solution This product is available at your Toyota dealer and most auto parts stores Follow the manufacturer ...

Страница 235: ... details be fore towing WEIGHT LIMITS Before towing make sure the total trail er weight gross combination weight gross vehicle weight gross axle weight and trailer tongue load are all within the limits The total trailer weight and tongue load can be measured with platform scales found at a highway weighing station build ing supply company trucking company junk yard etc CAUTION The maximum gross tr...

Страница 236: ...by the trailer hitch manufacturer can cause an accident resulting in seri ous personal injuries 20c508 The gross vehicle weight must not exceed the Gross Vehicle Weight Rating GVWR indicated on the Certification Label The gross ve hicle weight is the sum of weights of the unloaded vehicle driver pas sengers luggage hitch and trailer tongue load It also includes the weight of any special equipment ...

Страница 237: ...trailer and the remaining 40 in the rear HITCHES If you wish to install a trailer hitch you should consult with your Toyota dealer Use only a hitch recommended by the hitch manufacturer and the one which conforms to the total trailer weight requirement The hitch must be bolted securely to the vehicle frame and installed accord ing to the hitch manufacturer s instruc tions The hitch ball and king p...

Страница 238: ...cation 1 Determine the correct trailer ball size for the trailer coupler Most couplers are stamped with the required trailer ball size The sizes you will most likely find stamped on the coupler are Trailer Class Typical Trailer Ball Size III 2 in II 2 in I 1 7 8 in 2 Select the appropriate trailer ball to match or exceed the gross trailer weight rating of the trailer The trailer ball load rating s...

Страница 239: ...railer Leave sufficient slack in the chain for turns The chain should cross under the trailer tongue to prevent the tongue from dropping to the ground in case it becomes dam aged or separated For correct safety chain procedures follow the hitch or trailer manufacturer s recommenda tions CAUTION If the total trailer weight exceeds 453 kg 1000 lb trailer brakes are required Never tap into your vehic...

Страница 240: ...n signals and stop lights each time you hitch up Direct splicing may damage your vehicle s electrical system and cause a malfunction of your lights BREAK IN SCHEDULE Toyota recommends that you do not tow a trailer with a new vehicle or a vehicle with any new power train com ponent engine transmission differen tial wheel bearing etc for the first 800 km 500 miles of driving MAINTENANCE If you tow a...

Страница 241: ...dden braking Remember that when making a turn the trailer wheels will be closer than the vehicle wheels to the inside of the turn Therefore compensate for this by making a larger than normal turning radius with your vehicle Backing with a trailer is difficult and requires practice Grip the bottom of the steering wheel and move your hand to the left to move the trailer to the left Move your hand to...

Страница 242: ...wheel blocks are in place release your brakes slowly until the blocks absorb the load 4 Apply the parking brake firmly 5 Shift into P and turn off the en gine When restarting out after parking on a slope 1 With the transmission in P posi tion start the engine Be sure to keep the brake pedal depressed 2 Shift into the 3 2 L or R position 3 Release the parking brake and brake pedal and slowly pull o...

Страница 243: ...s to avoid traffic lights Keep a proper dis tance from other vehicles to avoid sud den braking This will also reduce wear on your brakes Avoid heavy traffic or traffic jams whenever possible Do not rest your foot on the brake pedal This causes premature wear overheating and poor fuel economy Maintain a moderate speed on high ways The faster you drive the greater the fuel consumption By reducing yo...

Страница 244: ...d OM60A04U CAUTION Never turn off the engine to coast down hills Your power steering and brake booster will not function with out the engine running Also the emission control system operates properly only when the engine is run ning ...

Страница 245: ...rtt 246 If your engine stalls while driving 249 If you cannot increase the engine speed 250 If your vehicle overheats 250 If you have a flat tire 251 If your vehicle becomes stuck 262 If your vehicle needs to be towed 262 If you cannot shift automatic transmission selector lever 266 If you lose your keys 266 SECTION 4 ...

Страница 246: ...erior light 3 If the light is out dim or goes out when the starter is cranked the battery is discharged You may try jump start ing See c Jump starting for further instructions If the light is O K but the engine still will not start it needs adjustment or repair Call a Toyota dealer or qualified repair shop NOTICE Do not pull or push start the ve hicle It may damage the vehicle or cause a collision...

Страница 247: ...amaged electronic components these instructions must be followed precisely If you are unsure about how to follow this procedure we strongly recommend that you seek the help of a competent me chanic or towing service CAUTION Batteries contain sulfuric acid which is poisonous and corrosive Wear protective safety glasses when jump starting and avoid spilling acid on your skin clothing or ve hicle If ...

Страница 248: ... pedal lightly depressed Discharged battery Positive terminal mark Jumper cable Booster battery Positive terminal mark 4 Make the cable connections in the or der a b c d a Connect the clamp of the positive red jumper cable to the positive terminal on the discharged battery b Connect the clamp at the other end of the positive red jumper cable to the positive terminal on the booster battery Discharg...

Страница 249: ...e cable and then the positive cable 7 Carefully dispose of the battery cover cloths they may now contain sulfuric acid 8 If removed replace all the battery vent plugs If the cause of your battery discharging is not apparent for example lights left on you should have it checked at your Toyota dealer If your engine stalls while driving 1 Reduce your speed gradually keeping a straight line Move cauti...

Страница 250: ...Turn off the air conditioning if it is being used 2 If coolant or steam is boiling out of the radiator or reservoir stop the engine Wait until the steam subsides before opening the hood If there is no coolant boiling over or steam leave the engine running CAUTION To help avoid personal injury keep the hood closed until there is no steam Escaping steam or coolant is a sign of very high pressure 3 V...

Страница 251: ...rom the traffic Avoid stopping on the center divider of a highway Park on a level spot with firm ground 2 Stop the engine and turn on your emergency flashers 3 Firmly set the parking brake and put the transmission in P 4 Have everyone get out of the ve hicle on the side away from traffic 5 Read the following instructions thoroughly CAUTION When jacking be sure to observe the following to reduce th...

Страница 252: ...icle When raising the vehicle do not place any objects on top of or underneath the jack Raise the vehicle only high enough to remove and change the tire NOTICE Do not continue driving with a deflated tire Driving even a short distance can damage a tire and wheel beyond repair 1 Get the required tools and spare tire 1 Tool bag 2 Jack 3 Spare tire To prepare yourself for an emergency you should fami...

Страница 253: ...d to gether as shown in the illustration 1 Jack handle end 2 Jack handle extension 3 Jack handle CAUTION Make sure they are each securely fixed with screws When connecting a jack handle exten sion with a jack handle end use a jack handle to tighten the bolts on the joints as shown in the illustration When connecting the jack handle with extension tighten the wing bolt on the joint securely Make su...

Страница 254: ...r To protect the paint place several sheets of paper over the paintwork 3 Insert the jack handle end into the lowering screw through the access hole and turn it counterclockwise with pushing it to the front lightly 4 After the tire is lowered completely to the ground remove the holding bracket as shown in the illustration ...

Страница 255: ... from the side to see that the tire is stored horizontally Blocking the wheel 2 Block the wheel diagonally op posite the flat tire to keep the vehicle from rolling when it is jacked up When blocking the wheel place a wheel block in front of one of the front wheels or behind one of the rear wheels Removing wheel ornament 3 Remove the wheel ornament Pry off the wheel ornament using the beveled end o...

Страница 256: ... the handle is on the right side as shown above Grab the wrench near the end of the handle and pull up on the han dle Be careful that the wrench does not slip off the nut Do not remove the nuts yet just un screw them about one half turn CAUTION Never use oil or grease on the bolts or nuts The nuts may loos en and the wheels may fall off which could cause a serious ac cident Positioning the jack 5 ...

Страница 257: ...nd together as shown in the illustration 1 Jack handle end 2 Jack handle extensions 3 Jack handle CAUTION Make sure they are each securely fixed with screws When connecting a jack handle exten sion with another extension and a jack handle end use a jack handle to tight en the bolts on the joints as shown in the illustration When connecting the jack handle with extension tight en the wing bolt on t...

Страница 258: ... Remember you will need more ground clearance when putting on the spare tire than when removing the flat tire To raise the vehicle insert the jack handle end into the joint of the jack it is a loose fit and turn it clockwise with the handle making sure the han dle remains firmly fitted onto the jack handle end As the jack touches the vehicle and begins to lift double check that it is properly posi...

Страница 259: ...e and press it back over the other bolts Before putting on wheels remove any corrosion on the mounting surfaces with a wire brush or such Installation of wheels without good metal to met al contact at the mounting surface can cause wheel nuts to loosen and eventually cause a wheel to come off while driving Reinstalling wheel nuts 8 Reinstall all the wheel nuts fin ger tight Reinstall the wheel nut...

Страница 260: ...e extension Use only the wheel nut wrench and turn it clockwise to tighten the nuts Do not use other tools or any addition al leverage other than your hands such as a hammer pipe or your foot Make sure the wrench is securely en gaged over the nut Tighten each nut a little at a time in the order shown Repeat the process until all the nuts are tight CAUTION When lowering the vehicle make sure all po...

Страница 261: ... drive slowly to the nearest service station and fill to the correct pressure Do not forget to reinstall the tire infla tion valve cap as dirt and moisture could get into the valve core and possibly cause air leakage If the cap is missing have a new one put on as soon as possible 12 Restow all the tools jack and flat tire securely As soon after changing wheels as possible tighten the wheel nuts to...

Страница 262: ...he vehicle During the rocking operation the vehicle may suddenly move forward or backward as it becomes unstuck causing injury or damage to nearby people or ob jects NOTICE If you rock your vehicle observe the following precautions to prevent dam age to the transmission and other parts Do not depress the accelerator ped al while shifting the selector lever or before the transmission is com pletely...

Страница 263: ...al laws pertaining to towing Your vehicle can be damaged if it is towed incorrectly Although most operators know the correct procedure it is possible to make a mistake To avoid damage to your vehicle make sure the following pre cautions are observed If necessary show this page to the tow truck driver TOWING PRECAUTIONS Use a safety chain system for all towing and abide by the state provincial and ...

Страница 264: ...e hicle Avoid sudden starts or erratic driving maneuvers which would place excessive stress on the emergency towing hook and towing cable or chain The hook and towing cable or chain may break and cause serious injury or damage NOTICE Do not use front and rear eyelets It is not designed for towing Use only a cable or chain specifi cally intended for use in towing ve hicles Securely fasten the cable...

Страница 265: ...se excessive stress will be put on the hook and the towing cable or chain may break causing serious injury or damage If the towing vehicle can hardly move do not forcibly continue the towing Contact your Toyota dealer or a commercial tow truck service for assistance Tow the vehicle as straight ahead as possible Keep away from the vehicle during towing Tips for towing a stuck vehicle The following ...

Страница 266: ...on as possible If you lose your keys You can purchase a new key at your Toyota dealer if you can give them the key number and master key Even if you lose only one key contact your Toyota dealer to make a new key If you lose all your master keys you cannot make new keys the whole engine immobi lizer system must be replaced See the suggestion given in Keys on page 10 You can use the wireless remote ...

Страница 267: ...om Aug 03 Prod OM60A04U CORROSION PREVENTION AND APPEARANCE CARE Corrosion prevention and appearance care Protecting your Toyota from corrosionn 268 Washing and waxing your Toyota 269 Cleaning the interior 271 SECTION 5 ...

Страница 268: ... above signifies the necessity to keep your vehicle particularly the underside as clean as possible and to repair any dam age to paint or protective coatings as soon as possible To help prevent corrosion on your Toyota follow these guidelines Wash your vehicle frequently It is of course necessary to keep your vehicle clean by regular washing but to prevent corrosion the following points should be ...

Страница 269: ... cause weakness to the paint or corrosion to the body and parts Wash your vehicle as soon as pos sible When driving in a coastal area When driving on a road sprinkled with antifreeze When having coal tar tree sap bird droppings and carcass of an insect When driving in the areas where there is a lot of smoke soot dust iron dust and chemical substances When the vehicle becomes remarkably dirty with ...

Страница 270: ... wheth er the process is safe for the paint on your vehicle NOTICE To prevent damage to the antenna make sure it is retracted before driv ing your Toyota through an automatic car wash Waxing your Toyota Polishing and waxing is recommended to maintain the original beauty of your Toyota s finish Apply wax once a month or if the vehicle surface does not repel water well 1 Always wash and dry the vehi...

Страница 271: ... the floor when cleaning the vehicle interior or exterior Water may get into audio components or other electrical components above or un der the floor carpet or mat and cause a malfunction and it may cause body corrosion Vinyl interior The vinyl upholstery may be easily cleaned with a mild soap or detergent and water First vacuum over the upholstery to re move loose dirt Then using a sponge or sof...

Страница 272: ...n the belts it may weaken them Do not use the belts until they be come dry Windows The windows may be cleaned with any household window cleaner NOTICE When cleaning the inside of the rear window be careful not to scratch or damage the heater wires or connec tors Air conditioning control panel car au dio instrument panel console panel and switches Use a soft damp cloth for cleaning Soak a clean sof...

Страница 273: ...lutions for clean ing the leather as these could cause discoloring Use of a nylon brush or synthetic fiber cloth etc may scratch the fine grained surface of the leather Mildew may develop on soiled leath er upholstery Be especially careful to avoid oil spots Try to keep your upholstery always clean Long exposure to direct sunlight may cause the leather surface to harden and shrink Keep your ve hic...

Страница 274: ...274 2004 L C100 from Aug 03 Prod OM60A04U ...

Страница 275: ...enance and care Maintenance requirementss 276 General maintenance 277 Does your vehicle need repairing 279 Emissions inspection and maintenance I M programs 280 For scheduled maintenance information please refer to the Scheduled Maintenance Guide or Owner s Manual Supplement SECTION 6 ...

Страница 276: ...enance or for the repair of the emission con trol system The owner may elect to use non Toyota supplied parts for replacement pur poses without invalidating the emission control system warranty However use of replacement parts which are not of equivalent quality may impair the effec tiveness of the emission control sys tems You may also elect to have mainte nance replacement or repair of the emiss...

Страница 277: ...ach time when refueling Washer fluid Make sure there is sufficient fluid in the tank See page 307 for additional informa tion Engine coolant level Make sure the coolant level is between the FULL and LOW lines on the see through reservoir when the engine is cold See page 290 for additional information Radiator condenser and hoses Check that the front of the radiator and condenser are clean and not ...

Страница 278: ...h as buckles retractors and anchors operate properly and smoothly Make sure the belt webbing is not cut frayed worn or dam aged Accelerator pedal Check the pedal for smooth operation and uneven pedal effort or catching Brake pedal Check the pedal for smooth operation and that the pedal has the proper clearance Check the brake booster function Brakes At a safe place check that the brakes do not pul...

Страница 279: ...ging Appreciable loss of power Strange engine noises A fluid leak under the vehicle however water dripping from the air conditioning after use is normal Change in exhaust sound This may indicate a dangerous carbon monoxide leak Drive with the windows open and have the exhaust system checked im mediately Flat looking tire excessive tire squeal when cornering uneven tire wear Vehicle pulls to one si...

Страница 280: ...ave not been set in the OBD system Readiness codes are automatically set during ordinary driving However when the battery is disconnected or run down the codes are erased Also depending on your driving habits the codes may not be completely set Also if the malfunction indicator lamp had come on recently due to temporary mal function such as a loose fuel tank cap your vehicle may not pass the I M t...

Страница 281: ...81 2004 L C100 from Aug 03 Prod OM60A04U DO IT YOURSELF MAINTENANCE Introduction Engine compartment overview 282 Fuse locations 283 Do it yourself service precautions 284 Parts and tools 285 SECTION 7 1 ...

Страница 282: ...compartment overview 1 Engine oil filler cap 2 Brake fluid reservoir 3 Fuse block 4 Battery 5 Windshield and rear window washer fluid tank 6 Engine oil level dipstick 7 Condenser 8 Radiator 9 Engine coolant reservoir 10 Power steering fluid reservoir ...

Страница 283: ...283 2004 L C100 from Aug 03 Prod OM60A04U Fuse locations Spare fuses 1 Spare fuses ...

Страница 284: ... them Oil fluids and spark plugs may also be hot If the engine is hot do not remove the radiator cap or loosen the drain plugs to prevent burning yourself Do not smoke cause sparks or al low open flames around fuel or the battery Their fumes are flammable Be extremely cautious when work ing on the battery It contains poi sonous and corrosive sulfuric acid Do not get under your vehicle with just th...

Страница 285: ...wer steering fluid or the transmission transfer and power steering could be damaged Do not drive with the air cleaner filter removed or excessive engine wear could result Also backfiring could cause a fire in the engine compartment Be careful not to scratch the glass surface with the wiper frame When closing the engine hood check to see that you have not for gotten any tools rags etc Parts and too...

Страница 286: ... III Tools Rag or paper towel Funnel only for adding fluid CHECKING BATTERY CONDITION Tools Warm water Baking soda Grease Conventional wrench for terminal clamp bolts CHECKING AND REPLACING FUSES Parts if replacement is necessary Fuse with same amperage rating as original ADDING WASHER FLUID Parts Water Washer fluid containing antifreeze for winter use Tools Funnel REPLACING LIGHT BULBS Parts Bulb...

Страница 287: ...hecking the engine coolant level 290 Checking the radiator and condenser 291 Checking brake fluid 292 Checking power steering fluid 293 Checking tire inflation pressure 293 Checking and replacing tires 296 Rotating tires 298 Installing snow tires and chains 298 Replacing wheels 300 Aluminum wheel precautions 301 SECTION 7 2 ...

Страница 288: ...n as far as it will go or the reading will not be correct 4 Pull the dipstick out and look at the oil level while holding a rag under the end CAUTION Be careful not to touch the hot ex haust manifold NOTICE Be careful not to drop the engine oil on the vehicle components If the oil level is below or only slightly above the low level add engine oil of the same type as already in the engine Remove th...

Страница 289: ...Toyota approved Toyota Genuine Motor Oil or equivalent to satisfy the following grade and viscos ity Oil grade API grade SL Energy Conserving or ILSAC multigrade engine oil Recommended viscosity Temperaturerange anticipated before next oil change SAE 5W 30 SAE 5W 30 is the best choice for good fuel economy and good starting in cold weather If SAE 5W 30 oil is not available SAE 10W 30 oil may be us...

Страница 290: ...as been specifically tested and approved for all Toyota engines Please contact your Toyota dealer for fur ther details about Toyota Genuine Motor Oil Look at the see through coolant reser voir when the engine is cold The cool ant level is satisfactory if it is between the FULL and LOW lines on the reservoir If the level is low add the coolant For the coolant type see Coolant type selection describ...

Страница 291: ...ater alone Toyota recommends Toyota Super Long Life Coolant which has been tested to ensure that it will not cause corrosion nor result in malfunction of your engine cool ant system with proper usage Toyota Su per Long Life Coolant is formulated with long life hybrid organic acid technology and has been specifically designed to avoid engine cooling system malfunction on Toyota vehicles Please cont...

Страница 292: ...rake fluid 1 Turn the ignition switch off 2 Depress the brake pedal more than 40 times 3 Remove the reservoir cap by hand Add brake fluid up to the MAX line If you do not follow the procedure above the reservoir may overflow Use only newly opened brake fluid Once opened brake fluid absorbs moisture from the air and excess moisture can cause a dangerous loss of braking CAUTION Take care when fillin...

Страница 293: ...an all dirt from outside of the reservoir tank and look at the fluid level If the fluid is cold the level should be in the COLD range Similarly if it is hot the fluid level should be in the HOT range If the level is at the low side of either range add automatic transmission fluid DEXRON II or III to bring the level within the range To remove the reservoir cap turn it coun terclockwise and lift up ...

Страница 294: ... accurate cold tire inflation pres sure reading Always use a tire inflation pres sure gauge The appearance of a tire can be misleading Besides tire inflation pressures that are even just a few pounds off can de grade ride and handling Do not bleed or reduce tire inflation pressure after driving It is normal for the tire inflation pressure to be higher after driving Never exceed the vehicle capac i...

Страница 295: ...lation pressure may waste fuel reduce the comfort of driv ing reduce tire life and make your ve hicle less safe to drive If a tire frequently needs refilling have it checked by your Toyota deal er CAUTION Keep your tires properly inflated Otherwise the following condi tions may occur and cause an ac cident resulting in death or seri ous injuries Low tire pressure underinfla tion Excessive wear Une...

Страница 296: ...ire damage such as cuts splits cracks deep enough to expose the fabric or bulges indi cating internal damage the tire should be replaced If a tire often goes flat or cannot be properly repaired due to the size or location of a cut or other damage it should be replaced If you are not sure consult with your Toyota dealer If an air loss occurs while driving do not continue driving with a deflated tir...

Страница 297: ...may occur resulting in death or serious injuries Do not mix radial bias belted or bias ply tires on your ve hicle as this may cause dan gerous handling characteris tics resulting in loss of control Do not use tires other than the manufacturer s recommended size as this may cause danger ous handling characteristics resulting in loss of control Do not use tires of different brands sizes construction...

Страница 298: ... uneven wear and damage Abnormal wear is usually caused by incorrect tire infla tion pressure improper wheel align ment out of balance wheels or se vere braking WHEN TO USE SNOW TIRES OR CHAINS Snow tires or chains are recommended when driving on snow or ice On wet or dry roads conventional tires provide better traction than snow tires SNOW TIRE SELECTION If you need snow tires select tires of the...

Страница 299: ...talled on all wheels Installing snow tires on the rear wheels only can lead to an excessive difference in road grip capability between the front and rear tires which could cause loss of vehicle control When storing removed tires you should store them in a cool dry space Mark the direction of rotation and be sure to install them in the same direction when replacing CAUTION Do not drive with the sno...

Страница 300: ...s which may cause the vehicle to bounce Avoid sharp turns or locked wheel braking as use of chains may ad versely affect vehicle handling When driving with chains installed be sure to drive carefully Slow down before entering curves to avoid losing control of the vehicle Otherwise an accident may occur Replacing wheels WHEN TO REPLACE YOUR WHEELS If you have wheel damage such as bending cracks or ...

Страница 301: ...acteristics resulting in loss of control Do not use wheels of different brands sizes and types as this may cause dangerous handling characteristics resulting in loss of control Aluminum wheel precautions When installing aluminum wheels check that the wheel nuts are tight after driving your vehicle the first 1600 km 1000 miles If you have rotated repaired or changed your tires check that the wheel ...

Страница 302: ...302 2004 L C100 from Aug 03 Prod OM60A04U ...

Страница 303: ...03 Prod OM60A04U DO IT YOURSELF MAINTENANCE Electrical components Checking battery condition 304 Battery recharging precautions 305 Checking and replacing fuses 306 Adding washer fluid 307 Replacing light bulbs 307 SECTION 7 3 ...

Страница 304: ...g get medi cal attention immediately If electrolyte gets on your clothes there is a possibility of its soaking through to your skin so immediate ly take off the exposed clothing and follow the procedure above if nec essary If you accidentally swallow electro lyte drink a large quantity of water or milk Follow with milk of magne sia beaten raw egg or vegetable oil Then go immediately for emer gency...

Страница 305: ... Blue White Red CHECKING BY INDICATOR Check the battery condition by the indi cator color Indicator color Condition Type A Type B Condition Green Blue Good Dark White Charging necessary Have battery checked by your Toyota dealer Clear or light yellow Red Have battery checked by your Toyota dealer Battery recharging precautions During recharging the battery is pro ducing hydrogen gas Therefore befo...

Страница 306: ... If you are not sure whether the fuse has blown try replacing the suspected fuse with one that you know is good If the fuse has blown push a new fuse into the clip Only install a fuse with the amperage rat ing designated on the fuse box lid If you do not have a spare fuse in an emergency you can pull out the RADIO DOME or RR A C fuse which may be dispensable for normal driving and use it if its am...

Страница 307: ...ealer and most auto parts stores Follow the manufacturer s directions for how much to mix with water NOTICE Do not use engine antifreeze or any other substitute because it may damage your vehicle s paint Do not fill washer fluid over the NORMAL level Replacing light bulbs The following illustrations show how to gain access to the bulbs When replacing a bulb make sure the ignition switch and light ...

Страница 308: ...05 60 A Headlights low 9006 51 B Front turn signal and front side marker lights 1157NA 27 8 C Front fog lights 9006 51 B Parking lights 5 D Light bulbs Bulb No W Type Rear turn signal lights 7440 21 G Stop tail lights 7443 21 5 D Back up lights 7440 21 D License plate lights 5 D Interior lights 8 E Personal lights Type A Type B 5 8 F E Glove box light 1 4 D Door courtesy lights 3 D Vanity lights 1...

Страница 309: ... 3 Pull the bulb out of the bulb base If the connector is tight wiggle it 4 Install a new bulb base by turning it clockwise to the front of the vehicle LEFT HAND HEADLIGHT Install the washer inlet securely Aiming is not necessary after replacing the bulb When aiming adjustment is nec essary contact your Toyota dealer ...

Страница 310: ...o the front of the vehicle as shown 2 Pull the bulb out of the bulb base If the connector is tight wiggle it 3 Install a new bulb base by turning it clockwise to the front of the vehicle Aiming is not necessary after replacing the bulb When aiming adjustment is nec essary contact your Toyota dealer ...

Страница 311: ...311 2004 L C100 from Aug 03 Prod OM60A04U Use a Phillips head screwdriver Parking lights Use a Phillips head screwdriver Front turn signal and front side marker lights ...

Страница 312: ...312 2004 L C100 from Aug 03 Prod OM60A04U Use a Phillips head screwdriver Stop and tail lights ...

Страница 313: ...313 2004 L C100 from Aug 03 Prod OM60A04U Use a flat bladed screwdriver a Back up light b Rear turn signal light c Stop tail light License plate lights Rear turn signal stop tail and back up lights ...

Страница 314: ...314 2004 L C100 from Aug 03 Prod OM60A04U ...

Страница 315: ...315 2004 L C100 from Aug 03 Prod OM60A04U SPECIFICATIONS Specifications Dimensions and weightss 316 Engine 316 Fuel 316 Service specifications 317 Tires 320 Fuses 321 SECTION 8 ...

Страница 316: ...0 Towing capacity trailer weight cargo weight kg lb 2948 6500 1 Unladen vehicle Engine Model 2UZ FE Type 8 cylinder V type 4 cycle gasoline Bore and stroke mm in 94 0 84 0 3 70 3 30 Displacement cm3 cu in 4664 284 6 Fuel Fuel type Unleaded gasoline Octane Rating 87 Research Octane Number 91 or higher For improved vehicle performance the use of premium unleaded gasoline with an Octane Rating of 91 ...

Страница 317: ...aturerange anticipated before next oil change Please contact your Toyota dealer for fur ther details COOLING SYSTEM Total capacity L qt Imp qt Without rear heater 14 7 15 5 12 9 With rear heater 15 4 16 3 13 6 Coolant type Toyota Super Long Life Coolant is filled in your Toyota vehicle at factory fill In order to avoid technical problems only use Toyota Super Long Life Coolant or similar high qual...

Страница 318: ...Toyota Genuine ATF WS may cause deterioration in shift quality locking up of your transmission accompanied by vibration and ultimate ly damage the automatic transmission of your vehicle TRANSFER Oil capacity L qt Imp qt 1 3 1 4 1 1 Oil type Gear oil API GL 4 or GL 5 Recommended oil viscosity SAE 75W 90 DIFFERENTIAL Oil capacity L qt Imp qt Front 1 6 1 7 1 4 Rear 3 3 3 5 2 9 Oil type Hypoid gear oi...

Страница 319: ...n 116 4 6 Pedal free play mm in 1 6 0 04 0 24 Pad wear limit mm in 1 0 0 04 Lining wear limit mm in 1 0 0 04 Parking brake adjustment when pulled with the force of 196 N 20 kgf 44 lbf 4 6 clicks Fluid type SAE J1703 or FMVSS No 116 DOT 3 STEERING Wheel free play Less than 40 mm 1 6 in Power steering fluid type Automatic transmission fluid DEXRON II or III ...

Страница 320: ...rmal driving Trailer towing Wheel size P275 65R17 113S 200 29 220 32 220 32 240 35 17 8JJ P275 60R18 111H 200 29 220 32 220 32 240 35 18 8JJ Wheel nut torque N m kgf m ft lbf 131 13 4 96 6 NOTE For a complete information on tires e g replacing tires or replacing wheels see Checking tire inflation pressure on page 293 through Aluminum wheel precautions on page 301 ...

Страница 321: ... system 10 NV IR 20 A No circuit 11 FR FOG 15 A Fog lights 12 TOWING BRK 30 A Trailer lights 13 HEAD CLNER 20 A Headlight cleaner 14 FR IG 10 A Charging system 15 PANEL 7 5 A Instrument panel light 16 TOWING TAIL 30 A Trailer lights 17 TAIL 15 A Parking lights Tail lights Right side kick panel 18 BAT 30 A All components in ECU B2 19 TEL 7 5 A No circuit 20 AMP 30 A Audio system 21 EFI or ECD No 1 ...

Страница 322: ...4 A C 15 A Air conditioning system 45 STOP 15 A Stop lights 46 OBD 2 7 5 A On board diagnosis system 47 IDEL UP 7 5 A Idle up system 48 LH SEAT 30 A Power seat system 49 DOOR 25 A Power door lock system Power windows 50 SUN ROOF 25 A Electronic moon roof 51 RR WIPER 15 A Rear wiper system 52 ECU B2 10 A Power door lock system Power window 53 DIFF 20 A Four wheel drive system 54 WASHER 15 A Windshi...

Страница 323: ... Aug 03 Prod OM60A04U REPORTING SAFETY DEFECTS FOR U S OWNERS AND UNIFORM TIRE QUALITY GRADING Reporting safety defects for U S owners and uniform tire quality grading Reporting safety defects for U S ownerss 324 SECTION 9 ...

Страница 324: ... an investiga tion and if it finds that a safety de fect exists in a group of vehicles it may order a recall and remedy campaign However NHTSA cannot become involved in individual prob lems between you your dealer or Toyota Motor Sales U S A Inc To contact NHTSA you may either call the Auto Safety Hotline toll free at 1 800 424 9393 or 366 0123 in Washington D C area or write to NHTSA U S Departme...

Страница 325: ...r assistance you may require If there is not a Toyota dealer near you or you need emergency assistance for any reason please call the following number U S OWNERS Toyota Customer Assistance Center Toll free 1 800 331 4331 Please leave this Owner s Manual in this vehicle at the time of resale The next owner will need this information also All information and specifications in this manual are current...

Страница 326: ...maintenance 277 Complete index NO TAG Gas station information Fuel type UNLEADED gasoline Octane Rating 87 Research Octane Number 91 or higher For improved vehicle performance the use of premium unleaded gasoline with an Octane Rating of 91 Research Octane Number 96 or higher is recommended See page 203 for detailed information Fuel tank capacity 96 L 25 4 gal 21 1 lmp gal Engine oil API grade SL ...

Страница 327: ...This is a warning against anything which may cause injury to people if the warning is ignored You are informed about what you must or must not do in order to reduce the risk of injury to yourself and others NOTICE This is a warning against anything which may cause damage to the vehicle or its equipment if the warning is ignored You are informed about what you must or must not do in order to avoid ...

Страница 328: ...these systems can provide when used together That is why it is important for you and your family to understand the purpose and proper use of each of these systems and how they relate to each other The purpose of all occupant restraint systems is to help reduce the possibility of death or serious injury in the event of a collision None of these systems either indi vidually or together can ensure th...

Страница 329: ...and your family in the event of an accident Toyota recommends you to read the provisions in Sec tion 1 3 carefully and refer to them as needed during your time of ownership of this vehicle New vehicle warranty Your new vehicle is covered by the following Toyota limited warranties New vehicle warranty Emission control systems warranty Others For further information please refer to the Owner s Warra...

Страница 330: ...ed engine oil contains chemicals that have caused cancer in laboratory animals Always protect your skin by washing thoroughly with soap and water Accessories spare parts and modification of your Toyota A wide variety of non genuine spare parts and accesso ries for Toyota vehicles are currently available in the market You should know that Toyota does not warrant these products and is not responsibl...

Страница 331: ...g on your Toyota Underinflated or overinflated tire inflation pressure and the excess load may result in the deterioration of steering ability and braking ability leading to an accident Check the tire inflation pressure peri odically and be sure to keep the load limits given in this Owner s Manual For details about tire infla tion pressure and load limits see pages 293 and 224 Scrapping of your To...

Страница 332: ...nger car because it is designed for off road use also In addition this vehicle has a higher ground clearance and center of gravity than that of an ordinary passenger car This vehicle design feature causes this type of vehicle to be more likely to rollover Failure to operate this vehicle correctly may result in loss of control accidents or vehicle rollover causing death or serious injury Be sure to...

Страница 333: ...viii 2004 L C100 from July 03 Prod OM60A04U ...

Страница 334: ...l tells you how to maintain your vehicle and enables you to correctly perform your own maintenance The best way to keep your new vehicle in top running order is to maintain it properly from the moment you drive it off the showroom floor The Toyota authorized Repair Manual is packed with literally everything you need to know to perform your own maintenance in virtually every area of your new vehicl...

Страница 335: ... for the engine chassis body electrical system and more are clearly explained and illustrated Periodic maintenance and tune up Periodic maintenance and tune up helps to pre vent smallproblems fromgrowing intolarger oneslat er on The repair manual outlines exactly what main tenance is required and clearly explains how to do the work yourself step by step Areas covered include such things as spark p...

Страница 336: ...rod OM60A04U WE REALLY CARE ABOUT YOU PLEASE BUCKLE UP Toyota has made a special effort to encourage use of seat belts Toyota belts are Comfortable Easy to use Convenient We encourage you to use your belts every time you drive U ...

Страница 337: ...AIR CONDITIONING 131 AIR CONDITIONING Automatic air conditioning controlss 132 SECTION V ...

Страница 338: ...ntrol button 135 2 Automatic control button 134 3 OFF button 134 4 Front windshield button 137 5 Air conditioning operation screen display button 134 6 Air intake control button 136 7 Air conditioning on off switch 137 8 Air flow control switch 135 9 Fan speed control switch 136 ...

Страница 339: ...AIR CONDITIONING 133 UNX501 Air flow selection See Lower vent on page 139 V ...

Страница 340: ...ch above you can op erate the speech command system For the operation of the speech command system and the command see page 126 and 127 a Climate control SETTING OPERATION automatic control 1 Push the AUTO button Air flow quantity switching of the diffusers on of f of the air conditioning and switching of the air intake between RECIRCULATED AIR and OUTSIDE AIR are automatically ad justed The opera...

Страница 341: ...ed The outlets from which air is delivered can be selected manually by touching the switch The function of each mode is as follows 1 Panel Air flows mainly from the instru ment panel vents 2 Bi level Air flows from both the floor vents and the instrument panel vents 3 Floor Air flows mainly from the floor vents It is recommended that you close the lower vent For details about this see page 139 4 F...

Страница 342: ...system will take fresh out side air into the vehicle If quick circulation of cooled air is desired push the air intake control button for RECIR CULATED AIR The RECIRCULATED AIR mode indicator light will come on For normal use it is best to keep the air intake control button set to OUTSIDE AIR mode If recirculated air is used during heating the windows will fog up more easily If the engine coolant ...

Страница 343: ...g operation b Windshield defogging and de frosting To remove interior fog on the windshield Push the FRONT WINDSHIELD button To remove frost or exterior fog on the windshield 1 Push the upper side of the temperature control button until maximum figure appears on the temperature display 2 Push the FRONT WINDSHIELD but ton 3 Push the HI of the air flow control switch to obtain a maximum air flow 4 L...

Страница 344: ... switch The rear air conditioning operates in the automatic mode To adjust the air flow and setting temperature follow the steps in ac cordance with Rear air conditioning con trols in the Lexus Owner s Manual Center vents The center vents may be opened or closed as shown Side vents The side vents may be opened or closed as shown ...

Страница 345: ...ONING 139 Lower vent The lower vent may be opened or closed as shown For removing frost or fog it is recommended that you close the lower vent when you use the Floor the Floor Windshield or the Wind shield mode V ...

Страница 346: ...AIR CONDITIONING 140 ...

Страница 347: ...7 Distance unit 79 Estimated travel time 79 Auto reroute 81 Adjusting time zone 81 Auto voice guidance 82 Voice guidance in all modes 83 Notifying traffic restriction 84 Intersection guidance 85 Guidance screen on freeway 86 Street name on scroll map 87 Display of building shape 88 Screen layout function Function 89 POI category change Show POI Icons 90 Delete previous point 91 Map color 92 Screen...

Страница 348: ...tch INFORMATION When you do not have route guidance the Suspend Guidance switch cannot be used The screen will return to the current posi tion map without route guidance To resume guidance You can resume the suspended route guidance Push the MENU button to display the Menu screen and touch the Resume Guidance switch The screen will change to the current posi tion map with route guidance ...

Страница 349: ... green INFORMATION During route guidance the voice guid ance continues even if the navigation screen is changed to other screens Adaptive Volume Control If you turn the Adaptive Volume Control on the volume is turned up automatically when the vehicle speed exceeds 50 mph 80 km h To turn the Adaptive Volume Control system on touch the switch The indicator will be highlighted User selection The syst...

Страница 350: ...er The confirmation screen will appear To register touch the Yes switch To re turn to the previous screen touch the No or Back switch When you touch the switch already regis tered this screen appears To replace touch the Yes switch To cancel the re placement touch the No or Back switch ...

Страница 351: ...button to display the Menu screen Then touch the Select User switch Touch the User number switch you wish to change The above message appears then the map screen will be displayed To delete user Touch the Delete switch of User num ber you wish to delete ...

Страница 352: ...e previous screen touch the No or Back switch My places You can register and keep your own memory points like restaurants sports fa cilities etc and use the memory points to input a destination a Registering memory points 1 Push the MENU button to display the Menu screen and touch the My Places switch ...

Страница 353: ...ed point in the same way as inputting a destination See page 20 When you finish memory point registration the memory point data screen will appear You can set the icon attribute name location and phone number Touch your desired switch you want to set For details see b Editing memory points INFORMATION Up to 106 memory points can be regis tered ...

Страница 354: ...screen lists the memory points Date Touch this switch to list the memory points in order of the registered date Icon Touch this switch to list the memory points in order of the icon type Name Touch this switch to list the memory points in alphabetical order Attribute Touch this switch to list the memory points in order of the home and quick access number Touch the desired memory point switch to di...

Страница 355: ... icons When your vehicle approaches the memory point the sound which you chose will sound Touch the desired sound icon The next screen appears when you touch the Bell with direction switch Touch the direction switches and adjust the direction Touch the Enter switch The bell sounds only when your vehicle ap proaches this point in the direction that you set ...

Страница 356: ... ute of the memory points as Home or Quick access 1 to 5 Touch the desired attribute It is possible to replace a registered attribute To replace the attribute touch the Yes switch To return to the previous screen touch the No or Back switch To delete the attribute touch the Del switch ...

Страница 357: ... completed touch the OK switch on the screen The previous screen will be displayed Show Name You can set the name of a memory point to be displayed or not on the map To show the name touch the On switch Not to show it touch the Off switch To change Location Touch the eight direction switch to move the cursor to the desired point on the map Touch the Enter switch and the previous screen will be dis...

Страница 358: ...oints 1 Push the MENU button to display the Menu screen and touch the My Places switch 2 Touch the Delete switch of the Memory Points 3 Touch the corresponding switch To delete all memory points touch the De lete All switch For efficient memory point search memory points can be sorted by the Date Icon Name or Attribute switch To delete touch the Yes switch To cancel the deletion touch the No switc...

Страница 359: ...he area to avoid a route passing through the area to avoid may be shown a Registering area to avoid 1 Touch the Register switch of the Areas to avoid 2 Enter the location in the same way as inputting a destination or display the map of the area you wish to avoid See page 20 INFORMATION Up to 10 locations can be registered as point area to avoid If there are 10 loca tions already registered the mes...

Страница 360: ...he size of the area to avoid b Editing area to avoid 1 Touch the Edit switch of the Areas to Avoid to display the Edit Area to Avoid screen 2 To edit an area to avoid touch the cor responding switch 3 Touch the Name Location or Area Size switch on this screen ...

Страница 361: ...a name can be set to be dis played or not on the map To show the name touch the On switch Not to show it touch the Off switch To change Location Set the cursor to the desired location then touch the Enter switch The previous screen will be displayed To change Area size Touch either or switch to change the size of area you want to avoid and touch the OK switch The previous screen will be displayed ...

Страница 362: ...h the Setup switch Touch the items you wish to set 3 Touch the OK switch on the screen and then the previous screen will be dis played Default This switch initializes all of the set tings Calibration You can adjust the current ve hicle position mark manually Distance You can select km or miles as the distance unit Estimated Travel Time You can set the system to display the travel time to the des t...

Страница 363: ... the map screen Show POI Icons You can choose 6 icons displayed on Show POI Icons top screen Previous Point You can delete the pre vious destination Map Color Day You can select the de sired map color Map Color Night You can select the de sired map color Screen Animation You can set some screen displays to be animated Current position calibration When driving the current vehicle position mark will...

Страница 364: ...ge calibration function will be used when replacing the tires This func tion will adjust the mis calculation caused by the circumference difference between the old tires and new ones If this proce dure is not performed when tires are re placed the current vehicle position mark may be incorrectly displayed To perform a distance calibration procedure touch the Tire Change switch on the Calibration s...

Страница 365: ...up switch 3 Touch the km or miles switch of Distance to choose the distance unit The selected switch is highlighted in green 4 Touch the OK switch Estimated travel time You can set the speed that is used for the calculation of the estimated travel time 1 Push the MENU button ...

Страница 366: ...you finish setting the desired speeds touch the OK switch INFORMATION The displayed time to the destination is the approximate driving time that is calculated based on the speeds you selected and your actual position along the guidance route The time shown on the screen may vary greatly depending on your prog ress along the route which may be af fected by road conditions such as traffic jams const...

Страница 367: ...lable To turn the Auto Reroute mode on 1 Push the MENU button 2 Touch the Setup switch 3 Touch the On switch of Auto Reroute The selected switch is highlighted in green INFORMATION If your vehicle strays from the guidance route the system searches for a new route to the destination The new route may or may not take you back to the pre vious route depending on how far you are off the original guida...

Страница 368: ...the Setup screen will be displayed Auto voice guidance When the Auto Voice Guidance feature is turned on the voice guidance can be heard automatically When the Auto Voice Guidance feature is turned off the voice guidance can be heard only if you push the MAP VOICE button To turn the Auto Voice Guidance mode on 1 Push the MENU button 2 Touch the Setup switch Then touch switch to display page 2 of t...

Страница 369: ...uidance in All Modes feature is turned on you can hear the voice guidance in all modes When the Voice Guidance in All Modes feature is turned off voice guidance can not be heard when you using the audio system To turn the Voice Guidance in All Modes on 1 Push the MENU button 2 Touch the Setup switch Then touch switch to display page 2 of the Setup screen ...

Страница 370: ...h Notifying traffic restriction When the Notify Traffic Restriction fea ture is turned on the system notifies you of traffic or seasonal restriction To turn the Notify Traffic Restriction mode on 1 Push the MENU button 2 Touch the Setup switch Then touch switch to display page 2 of the Setup screen ...

Страница 371: ...section guidance When the Intersection Guidance feature is turned on the system will display the in tersection guidance screen if you drive with route guidance To turn the Intersection Guidance mode on 1 Push the MENU button 2 Touch the Setup switch Then touch switch to display page 2 of the Setup screen ...

Страница 372: ... freeway When the Guidance Screen on Freeway feature is turned on the system will dis play the lane guidance screen if you drive on a freeway with route guidance To turn the Guidance Screen on Free way mode on 1 Push the MENU button 2 Touch the Setup switch Then touch switch to display page 2 of the Setup screen ...

Страница 373: ...croll map When the Street Name on Scroll Map feature is turned on the system will dis play the name of a street where the cursor is positioned on the scroll map To turn the Street Name on Scroll Map mode on 1 Push the MENU button 2 Touch the Setup switch Then touch switch twice to display page 3 of the Setup screen ...

Страница 374: ...ape When the Display Building Shape fea ture is turned on the system will display the building shape on the map screen us ing a scale of 150 feet 50 m to 300 feet 100 m To turn the Display Building Shape mode on 1 Push the MENU button 2 Touch the Setup switch Then touch switch twice to display page 3 of the Setup screen ...

Страница 375: ...nction You can set display or hide each switch and current street name on the map screen 1 Push the MENU button 2 Touch the Setup switch Then touch switch twice to display page 3 of the Setup screen 3 Touch the Change switch of the Function 4 Touch the switch corresponding to the desired setting Then touch the OK switch ...

Страница 376: ...e Show POI Icons top screen so that you can easily set which icons to display on the map screen 1 Push the MENU button 2 Touch the Setup switch Then touch switch twice to display page 3 of the Setup screen 3 Touch the Change switch of Show POI Icons 4 Touch the category switch you wish to change ...

Страница 377: ...e desired category Then touch the OK switch Delete previous point You can delete your previous destination 1 Push the MENU button 2 Touch the Setup switch Then touch switch twice to display page 3 of the Setup screen 3 Touch the Delete switch of Pre vious Point ...

Страница 378: ... point search pre vious points can be sorted by the Date or Name switch 5 To delete the point touch the Yes switch To cancel the deletion touch the No switch Map color 1 Push the MENU button 2 Touch the Setup switch Then touch switch three times to display page 4 of the Setup screen ...

Страница 379: ...lt map color Screen animation When the Screen Animation feature is turned on some switches and screens be come animated e g change map guid ance on the map screen To turn the Screen Animation mode on 1 Push the MENU button 2 Touch the Setup switch Then touch switch three times to display page 4 of the Setup screen 3 Touch the On switch of Screen Animation and touch the OK switch ...

Страница 380: ...ADVANCED FUNCTIONS 94 ...

Страница 381: ...AUDIO SYSTEM 141 AUDIO SYSTEM Audio system 142 SECTION VI ...

Страница 382: ...tion switch display screen 144 3 Cassette tape slot 151 4 Frequency turning knob 148 5 Radio mode Preset tuning 148 Tape mode Side change of cassette tape 151 DISC mode Disc selection 155 6 SCAN button 149 156 7 Mode selectors 144 8 Stopping and ejecting a cassette tape 151 9 Radio mode Seek tuning 148 Tape DISC mode Direct access to a desired program 152 156 10 Turning the system on and adjusting...

Страница 383: ...discharged do not leave the car audio on longer than necessary when the engine is not running oxu002 By pushing the switch above you can op erate the speech command system For the operation of the speech command system and the command see page 126 and 127 a Turning the system on and off UNX602 POWER VOL Push this knob to turn the au dio system on and off Turn this knob to adjust the volume The sys...

Страница 384: ... turn on You can turn off the cassette player by eject ing the cassette tape If the audio system was previously off then the entire audio system will be turned off when you eject the cassette tape If another function was previously play ing it will come on again The switches for radio cassette tape and disc player operation are displayed on the liquid crystal display Touch them lightly and directl...

Страница 385: ...of the treble mid range and bass levels In fact different kinds of music and vocal programs usually sound better with different mixes of treble mid range and bass A good balance of the left and right stereo channels and of the front and rear sound lev els is also important Keep in mind that if you are listening to a ste reo recording or broadcast changing the right left balance will increase the v...

Страница 386: ...o is on or the radio system is on and re tracts when the radio mode is off UNX602 To adjust the height of the antenna manu ally push the switch Clean the antenna mast periodically with a clean dry cloth CAUTION Before extending the antenna confirm that no one is close enough to get injured NOTICE To prevent damage to the antenna make sure it is retracted before driving your vehicle through an auto...

Страница 387: ...usly play all the discs set in the magazine When you set discs into the magazine make sure they face the correct way If not the play er will display DISC CHECK and the disc number NOTICE Never try to disassemble or oil any part of the automatic changer Do not insert anything except a compact disc or DVD video disc into the magazine The player is intended for use with 12 cm 4 7 in discs only Radio ...

Страница 388: ...AM To change the preset station to a different one follow the same procedure The preset station memory is cancelled when the power source is interrupted by battery dis connection or a blown fuse c Selecting a station Your Lexus has an electronic tuning radio ETR Tune in the desired station using one of the following methods Preset tuning Touch the switch 1 6 or push the or button of the CH button ...

Страница 389: ...r down the band stay there for a few seconds and then move to the next preset station To select a station touch the SCAN switch a second time d RDS Radio Data System Program type When you touch the TYPE or TYPE switch on the screen the current program type receiving from RDS station appears on the display If the system receives no RDS stations NO PTY appears on the display Each time you touch the ...

Страница 390: ...c program station is found the name for traffic program station is displayed and TRAF is lit for a while until traffic announce ment is received Radio text If the system receives a radio text from RDS station MSG appears on the display Touch the MSG switch and a text message is dis played on the screen In case a text message is not accepted in a screen you can touch the MSG switch and hold it to d...

Страница 391: ...For best sound reproduction play your tapes with this switch on or off ac cording to the mode used for recording the tape Dolby noise reduction manufactured under license from Dolby Laboratories Licensing Corporation DOLBY and the double D symbol are trademarks of Dolby Labora tories Licensing Corporation b Manual program selection Reverse switch You can reverse the tape by touching the switch or ...

Страница 392: ...s is especially useful at the end of cassettes Touch the SKIP switch The player will au tomatically skip any blank portions of 15 se conds or more and play the next program To cancel it touch the switch once again UNX623 Automatic program selection button The automatic program selection feature al lows you to program your cassette player to skip forward or backward to locate the song you want to h...

Страница 393: ...tic program selection features These features may not work well with some spoken word live or classical recordings DVD player operation The DVD player can play audio CDs DVD video discs and video CDs For appropriate discs for this paper see Car audio video system operating hints on page 169 For safety reasons you can enjoy DVD video discs and video CDs only when the vehicle is completely stopped w...

Страница 394: ... page 169 unx608a 5 Insert the magazine into the player as indicated by the arrow ahead on the maga zine close the door and console box When the magazine is set completely the system will be in a Load cycle for approxi mately 30 seconds while the system searches for discs in the magazine Upon completion of this cycle the DVD player unit will be ready to play If the DISC button is pushed during the...

Страница 395: ...isplay c Selecting a desired disc On the screen Touch the desired disc number The selected disc number is highlighted in green The player will start playing the selected disc from the first track On the audio panel Push the or side of the DISC button When you release the button the player will start playing the selected disc from the first track d Operating an audio CD i Playing an audio CD Push t...

Страница 396: ...of the disc it will continue scanning at track 1 After all the tracks are scanned in one pass normal play resumes Touch the DISK SCAN switch DISC SCAN will be highlighted in green The program at the beginning of each disc will be played for 10 seconds To continue listen ing to the program of your choice touch the DISC SCAN switch a second time After all the audio disc are scanned in one pass norma...

Страница 397: ... DVD video discs may be determined by a DVD video software producer This DVD player plays a disc as the software produc er intended So some functions may not work properly Be sure to read the instruc tion manual for the DVD video disc sepa rately provided For the detailed informa tion about DVD video discs see h DVD player and DVD video disc information Precautions on DVD video disc When recording...

Страница 398: ...r sounds may have a significant impact on the human body or pose a driving hazard Keep this in mind when you adjust the volume The DVD Hint screen appears when the video screen is first displayed after you turn the ignition key to ACC or ON Touch the OK switch when you read the message i Playing a DVD video disc unx614 Push the AUDIO button to display this screen You can operate the switches and c...

Страница 399: ...nt to the switch is not permitted iii Description of each switch Switches on top page Menu and Top Menu switches If you touch any of the above switches the menu screen for DVD video appears For the op eration see the manual that come with the DVD video disc provided separately switch The menu control key ap pears on the screen See page 160 switch Use this switch to pause the video screen When you ...

Страница 400: ...nu item Enter the menu item using or switches and touch Enter The player starts playing video for that menu item For details see the manual that comes with the DVD video disc provided separately Each you push Move Buttons switch the switches on the screen move upward and downward When you push OFF switch the displayed switches do not display To display them again push ON switch Touch Back the prev...

Страница 401: ...s screen re turns vii Changing the audio language Each time you touch Audio the lan guage is selected from the ones stored in the discs and changed Touch Back and the previous screen re turns viii Changing the angle The angle can be selected for discs that are multi angle compatible when the angle mark appears on the display Each time you touch Angle the angle changes Touch Back and the previous s...

Страница 402: ... the DVD video menu 1 Touch DVD Language 2 Touch the language you want to read on the Select DVD Language screen and Enter If you cannot find the language you want to read on this screen touch Others and enter a language code For the entry of language code see the following x Entry of language code Angle mark The multi angle mark can be turned on or off on the screen while the disc which is multi ...

Страница 403: ...r Code Language 1001 Japanese 0514 English 0618 French 0405 German 0920 Italian 0519 Spanish 2608 Chinese 1412 Dutch 1620 Portuguese 1922 Swedish 1821 Russian 1115 Korean 0512 Greek 0101 Afar 0102 Abkhazian 0106 Afrikaans 0113 Amharic 0118 Arabic 0119 Assamese 0125 Aymara 0126 Azerbaijani 0201 Bashkir 0205 Byelorussian 0207 Bulgarian 0208 Bihari 0209 Bislama 0214 Bengali 0215 Tibetan 0218 Breton 0...

Страница 404: ...mbodian 1114 Kannada 1119 Kashmiri 1121 Kurdish 1125 Kirghiz 1201 Latin 1214 Lingala 1215 Laothian 1220 Lithuanian 1222 Latvian 1307 Malagasy 1309 Maori 1311 Macedonian 1312 Malayalam 1314 Mongolian 1315 Moldavian 1318 Marathi 1319 Malay 1320 Maltese 1325 Burmese 1401 Nauru 1405 Nepali 1415 Norwegian 1503 Occitan 1513 Afan Oromo 1518 Oriya 1601 Panjabi 1612 Polish 1619 Pashto Pushto 1721 Quechua 1...

Страница 405: ... Tagalog 2014 Setswana 2015 Tonga 2018 Turkish 2019 Tsonga 2020 Tatar 2023 Twi 2111 Ukrainian 2118 Urdu 2126 Uzbek 2209 Vietnamese 2215 Volapük 2315 Wolof 2408 Xhosa 2515 Yoruba 2621 Zulu f Operating a video CD i Playing a video CD unx623 Push the AUDIO button to display this screen You can operate the switches and choose the number of the disc you want to play When you touch the PICTURE switch th...

Страница 406: ...i Description of each switch Switches on top page Select Number switch The track or num ber search screen appears See Searching by track on this page Prev Menu switch When you touch this switch while the disc menu is displayed the previous page appears on the screen If you touch this switch while the player is playing video the previous track is searched and played Next Menu switch When you touch ...

Страница 407: ... malfunction your audio system will dis play one of the six following messages If DISC CHECK appears on the display It indicates that the disc dirty damaged or it was inserted upside down Clean the disc or insert it correctly If NO DISC appears on the display It indi cates that there is no disc in the DVD player If REGION CODE ERROR appears on the display It indicates that the DVD region code is n...

Страница 408: ...isc can be played ALL in all countries Number region code ii DVD video disc glossary DVD video discs Digital versatile Disc that holds video DVD video discs have adopted MPEG2 one of the world standards of digi tal compression technologies The picture data is compressed by 1 40 on average and stored Variable rate encoded technology in which the volume of data assigned to the pic ture is changed de...

Страница 409: ...Pro Logic and the double D symbol are trademarks of Dolby Laboratories Confidential unpub lished works 1992 1997 Dolby Laboratories All rights reserved This product incorporates copyright protection technology that is protected by method claims of certain U S patents and other intellectual property rights owned by Macrovision Corporation and other rights owners Use of this copyright protection tec...

Страница 410: ...on until the original signal can be picked up again AM Fading AM broadcasts are reflected by the upper atmosphere especially at night These reflected signals can interfere with those received directly from the radio station causing the radio station to sound alternately strong and weak Station interference When a reflected sig nal and a signal received directly from a radio station are very nearly...

Страница 411: ...und even though your multi disc player appears to be work ing Remove the magazine from the play er and wait until it dries CAUTION Multi disc players use an invisible laser beam which could cause hazardous radiation exposure if directed outside the unit Be sure to operate the player correctly Audio CDs DVD video discs Video CDs DVD player Use only compact discs marked as shown above The following ...

Страница 412: ...edge and do not bend them Avoid getting fingerprints on them particu larly on the shiny side Dirt scrapes warping pin holes or other disc damage could cause the player to skip or to repeat a section of a track To see a pin hole hold the disc up to the light EMV8033U To clean a disc Wipe it with a soft lint free cloth that has been dampened with water Wipe in a straight line from the center to the ...

Страница 413: ...peration Touch switch operation 2 Inputting letters and numbers 2 Current position display 4 Screen scroll operation one touch scroll 5 Map scale 8 Orientation of the map 9 Limitations of the navigation system 9 Map database information and updates 12 SECTION I ...

Страница 414: ...may become darker and moving images may be slightly distorted when the display is cold Inputting letters and numbers When searching for an address or a name or entering a memo you can input letters and numbers via the touch screen To input letters To display the alphabet keys touch the A Z switch or the À Ý switch Enter letters by touching the alphabet keys di rectly Touching this switch erases on...

Страница 415: ...splayed without touching the List switch INFORMATION The number of matching items is shown to the right side of the screen If the number of matching items is more than 9 999 the system displays on the screen List screen operation When a list is displayed you can scroll or page through the list by using the appropriate switch To shift to the next or previous page To scroll up or down one item at a ...

Страница 416: ...n to this map screen showing your current position at any time from any screen by touching the MAP VOICE button During driving the current vehicle position mark is fixed in the screen and the map moves The current position is automatically set as your vehicle receives signals from the GPS Global Positioning System If your current position is not correct it is automatically cor rected after your ve...

Страница 417: ...button the current vehicle position mark returns to the center of the screen and the map moves as you proceed along the designated route INFORMATION When you use the one touch scroll fea ture the current vehicle position mark may disappear from the screen Move the map with a one touch scroll again or push the MAP VOICE button to re turn to the current vehicle position map location display To set t...

Страница 418: ... screen returns The registered point is shown by on the map To change the icon or name etc see page 68 You can register up to 106 memory points If you attempt to register more than 106 a mes sage appears for confirmation To see information about the icon where the cursor is set To display information about an icon set the cursor on it POI INFORMATION When the cursor is set on a POI icon the name a...

Страница 419: ...ddi tional destination will set the new one as the first point of arrival To register this POI as a memory point touch the Mark switch For details see page 66 INFORMATION The desired Point of Interest can be dis played on the map screen For details see page 49 MEMORY POINT INFORMATION When the cursor is set on a memory point icon the name and Info switch are dis played on the top of screen Touch t...

Страница 420: ... scale ranges 150 feet 50 m to 250 miles 400 km Touch the or switch until the scale bar changes normally If you continue to touch on the switch the scale bar changes smoothly You can change the scale of the map display by touching the scale bar directly It is not available during driving The map scale is displayed under the north up symbol or heading up symbol at the top left of the screen INFORMA...

Страница 421: ...e cur rent vehicle position using satellite sig nals various vehicle signals map data etc However the accurate position may not be shown depending on the satellite condition road configuration vehicle condition or other circumstances The Global Positioning System GPS devel oped and operated by the U S Department of Defense provides an accurate current vehicle position using 3 to 4 satellites The G...

Страница 422: ...S signals the vehicle position may not be shown accurately or inappropriate route guidance may occur in some cases a Accurate current vehicle posi tion may not be shown in the fol lowing cases When driving on a small angled Y shaped road When driving on a winding road When driving on a slippery road such as in sand gravel snow etc When driving on a long straight road When freeway and surface stree...

Страница 423: ... route may not be changed An unnecessary U turn may be shown or announced A location may have multiple names and the system will announce one or more Some routes may not be searched If the route to your destination includes gravel unpaved roads or alleys the route guidance may not be shown Your destination point might be shown on the opposite side of the street When a portion of the route has regu...

Страница 424: ...USE The DATABASE is restricted for use in the specific system for which it was created Except to the extent explicitly permitted by mandatory laws you may not extract or re utilize any portion of the contents of the DATABASE nor reproduce copy modify adapt translate disassemble decompile or reverse engineer any portion of the DATABASE TRANSFER You may not transfer the DATABASE to third parties exc...

Страница 425: ...NGS The DATABASE reflects reality as existing before you received the DATABASE and it comprises data and information from government and other sources which may contain errors and omissions Accordingly the DATABASE may contain inaccurate or incomplete information due to the passage of time changing circumstances and due to the nature of the sources used The DATABASE does not include or reflect inf...

Страница 426: ... NO EXPRESS OR IMPLIED WARRANTIES INCLUDING WITHOUT LIMITATION ANY EXPRESS OR IMPLIED WARRANTY OF FITNESS FOR A PARTICULAR PURPOSE OR WARRANTY OF MERCHANTABILITY 5 Limitation of Liability EITHER INFOUSA OR SUPPLIER OF POI DATA SHALL NOT BE LIABLE FOR ANY INDIRECT CONSEQUENTIAL OR INCIDENTAL DAMAGES MADE OR ALLEGED IN CONNECTION WITH YOUR USE OF THE POI DATA END USER LICENSE AGREEMENT Personal Use ...

Страница 427: ...OUR POSSESSION USE OF OR INABILITY TO USE THIS INFORMATION ANY DEFECT IN THE INFORMATION OR THE BREACH OF THESE TERMS OR CONDITIONS WHETHER IN AN ACTION IN CONTRACT OR TORT OR BASED ON A WARRANTY EVEN IF DENSO OR ITS LICENSORS HAVE BEEN ADVISED OF THE POSSIBILITY OF SUCH DAMAGES Some states territories and countries do not allow certain liability exclusions or damages limitations so to that extent...

Страница 428: ... in a straight line from the current vehicle position to the destination area In order to provide you with as accurate map information as possible we are always gath ering information such as road repairs and doing site investigation However the names of roads streets facilities and their locations are often changed In some places construc tion on roads may be in progress For that reason informati...

Страница 429: ...BASIC FUNCTIONS 17 To display the disc coverage area touch the Covered Area switch Confirm the covered area on the screen Contact your dealer to find out if there is a more recent update released ...

Страница 430: ...BASIC FUNCTIONS 18 ...

Страница 431: ...y 32 Destination input by Memory 33 Destination input by Previous 34 Destination input by Map 34 Destination input by Intersection 35 Destination input by Freeway Ent Exit 36 Destination input by Coordinates 37 Destination input by Phone 37 Starting route guidance 38 Entering destination 38 Route guidance screen 40 Typical voice guidance prompts 40 Setting and deleting destination 42 Setting and d...

Страница 432: ...matically Set the destination again To select an Address POI Name Freeway Ent Exit Intersection or Phone in a different area it is necessary to change the search area If you enter a destination the road nearest to the point you selected is set as the destination CAUTION While you are driving be sure to obey traffic regulations and keep the road conditions in mind If a traffic sign on the road has ...

Страница 433: ...homa Texas US6 Illinois Indiana Kentucky Michigan Ohio Wisconsin US7 Arkansas Alabama Louisiana Mississippi Tennessee US8 Connecticut Massachusetts Maine New Hampshire New Jersey New York Rhode Island Vermont US9 Washington D C Delaware Maryland New Jersey Pennsylvania Virginia West Virginia US10 Florida Georgia North Carolina South Carolina Canada Switch Provinces and regions included in the sear...

Страница 434: ...switch even while driving Destination input by Quick access Touch any of the quick access switches on the Destination screen The screen changes and displays the map location of the quick access point and the route preference See Entering des tination on page 38 To use this function it is necessary to set the Attribute for each memory point To regis ter the Quick Access see page 70 INFORMATION Guid...

Страница 435: ...e It is possible to input a street name first Touch the Street switch to display the screen for inputting a street name Input the street name When you find your desired street name touch the corresponding switch The screen changes and displays the map location of the selected destination and the route preference See Entering destination on page 38 If the same address exists in more than one city t...

Страница 436: ...hanges You can then input the house num ber If the above screen appears you can select an address range on the screen b Selecting a city to search Touch the City switch To search by city the following three methods are possible 1 Selecting from the last 5 cities 2 Selecting from the nearest 5 cities 3 Inputting the city name INFORMATION To cancel the city setting touch the Any City switch ...

Страница 437: ...current screen changes to the screen for inputting a house number or a street name See page 23 SELECTING FROM THE NEAREST 5 CITIES Touch the Nearest 5 Cities switch Touch the switch of the desired city name from the displayed list The current screen changes to the screen for inputting a house number or a street name See page 23 INPUTTING THE CITY NAME Touch the Input City Name switch Input a city ...

Страница 438: ... number or a street name See page 23 Destination input by POI Name Touch the POI Name switch on the Destination screen Input the name of Point of Interest Touch the switch of the desired destina tion The screen changes and displays the map location of the selected destination and the route preference See Enter ing destination on page 38 If you input the name of a specific Point of In terest and th...

Страница 439: ... See a Selecting a city to search and b Select ing from the categories INFORMATION The desired Point of Interest can be dis played on the map screen For details see page 49 a Selecting a city to search Touch the City switch To search by city the following three methods are possible 1 Selecting from the last 5 cities 2 Selecting from the nearest 5 cities 3 Inputting the city name INFORMATION To can...

Страница 440: ...ING FROM THE NEAREST 5 CITIES Touch the Nearest 5 Cities switch Touch the switch of the desired city name INPUTTING THE CITY NAME Touch the Input City Name switch Input the city name Touch the switch of the desired city name from the displayed list ...

Страница 441: ...led list of the POI category If the desired POI category is not on the screen touch the List All Catego ries switch to list all POI categories When you touch the desired category the POI name list screen appears Destination input by POI Category The destination can be set by selecting the POI category and the search point Touch the POI Category switch on the Destination screen ...

Страница 442: ...r category touch the OK switch to return the previous screen If you wish to select a destination from the category displayed by the icon touch the List switch b Setting a search point It is possible to display the names of POIs lo cated within approximately 20 miles 30 km from the selected search point Touch the Search Point switch To set search points the following four meth ods are possible 1 In...

Страница 443: ...INT Touch the Current Position switch When you touch an arrow facing the desired point the map scrolls in that direction When you release your finger scrolling stops To set the position of the cursor touch the Enter switch SETTING THE SEARCH POINT VIA THE MAP SCREEN Touch the Map switch When you touch an arrow facing the desired point the map scrolls in that direction When you release your finger ...

Страница 444: ...rence See Enter ing destination on page 38 Dist To sort in the order of distance from your current location Icon To sort in the order of the POI icons Name To sort in alphabetical order by name On Route When the indicator is illumi nated by touching this switch the list of the items searched along the route is displayed Destination input by Emergency By touching the Emergency switch on the Destina...

Страница 445: ...unavail able See page 11 Destination input by Memory Touching the Memory switch on the Destination screen displays your list of registered memory points See page 66 for registering and editing memory points When you touch the switch of your de sired memory point the screen changes and displays the map location of the se lected destination and the route prefer ence See Entering destination on page ...

Страница 446: ...the previous destinations in or der of registered date Name To list the previous destinations in alphabetical order INFORMATION You can delete the list of previous des tinations while your vehicle is stopped if you no longer need them See page 91 Destination input by Map Touch the Map switch on the Destina tion screen The screen changes and displays the map location that was previously displayed j...

Страница 447: ... After inputting the two intersecting streets the screen changes and displays the map location of the selected destination and the route preference See Entering destination on page 38 If the same two streets cross at more than one intersection the screen changes and dis plays the menu to select the city name where the streets intersect Select the city and the map location of the selected destinati...

Страница 448: ...8 Select the desired freeway by touching the switch You can then select either a freeway En trance or Exit Touch the switch of the desired entrance or exit name The screen changes and dis plays the map location of the selected des tination and the route preference See Entering destination on page 38 Dist Sort In the order of distance from your current position The distance from your current positi...

Страница 449: ...Phone Touch the Phone switch on the Destination screen Input a telephone number After inputting a telephone number touch the OK switch and the screen changes and displays the map location of the se lected destination and the road prefer ence See Entering destination on page 38 If there is more than one site having the same number the following screen appears INFORMATION If there is no match for th...

Страница 450: ...ion is already set the Add to switch and the Replace switch are displayed Add to To add a destination Replace To delete the existing destina tions and set a new one Change To change the route preference See page 39 Info If this switch is displayed on the top of the screen touch the switch to see name address and phone number etc SCREEN B 3 To start guidance touch the Guide switch 3 Routes To selec...

Страница 451: ...including a freeway in some cases If the calculated route includes a trip by ferry the route guidance shows a sea route After you travel by ferry the current vehicle position may be incorrect Upon reception of GPS sig nals it is automatically corrected 3 ROUTES SELECTION To select the desired route from three routes touch the 3 Routes switch on SCREEN B Touch the Quick1 Quick2 or Short switch to s...

Страница 452: ...he vehicle approaches a guidance point such as an intersection or a freeway the screen automatically divides in two to display the guidance screen For details see page 53 The current street name will be displayed at the bottom of the screen In some areas the roads have not been com pletely digitized in our database yet For this reason the route guidance may guide the road that is not allowed to pa...

Страница 453: ...bout 4 miles to the traf fic circle 2 In a quarter of a mile traffic circle ahead and then 3rd exit ahead 3 The 3rd exit ahead 4 The exit ahead 5 Beep sound only One way road One way road The system indicates a U turn if the dis tance between two one way roads of oppo site directions is less than 50 feet 15 m in residential areas or 164 feet 50 m in non residential areas 1 In half of a mile make a...

Страница 454: ...ine the current vehicle position correctly in cases of poor GPS signal reception the voice guidance may be made ear ly or delayed If you did not hear the voice guidance command touch the MAP VOICE button to hear it again To adjust the voice guidance volume see page 63 Setting and deleting destination a Adding destinations You can add destinations and search again for the routes 1 Touch the Route s...

Страница 455: ...r of the destinations 1 Touch the Route switch 2 Touch the Reorder switch of Des tination 3 Select the destination in the order of arrival by touching the switch of destina tions Reordered number of arrival is displayed on the right side of the screen When you finish selecting the destinations touch the OK switch The system searches for the guidance route again and displays the entire route Even i...

Страница 456: ...message appears to confirm your re quest to delete To delete the destina tion s touch the Yes switch If you touch the Yes switch the data can not be recovered If you touch the No switch the previous screen will return 5 If more than one destination is set touch the OK switch after deleting the destinations The system searches for the guidance route again and displays the en tire route Setting and ...

Страница 457: ...t switch to use another road 5 If more than one destination is set the Add Preferred Road screen appears Touch the Add switch where you wish to add a preferred road b Deleting preferred road You can delete a set preferred road 1 Touch the Route switch 2 Touch the Delete switch of Pre ferred road 3 When more than one preferred road is set a list will appear on the screen Touch the switch of the pre...

Страница 458: ...preferred road is set touch the OK switch after deleting the preferred road The system searches for the guidance route again and displays en tire route c Search condition You can designate the route conditions of the route to the destination 1 Touch the Route switch 2 Touch the Search Condition switch The Search Condition screen appears 3 Touch the Quick Quick1 Quick2 or Short switch and touch the...

Страница 459: ...ng the sys tem returns to the original guidance route Whole Route If you touch this switch the system will calculate an entire new route to the destination This picture shows an example of how the system would guide you around a delay caused by a traffic jam 1 This position indicates the location of a traffic jam caused by road repairs or an accident 2 This route indicates the detour sug gested by...

Страница 460: ...n the indicator on or off by touching the switch When searching for a route the system avoids routes where the indicator is dimmed as much as possible After choosing the conditions touch the OK switch f Starting route from adjacent road You can start the route guidance from the adjacent road ex When the route guidance guides the route on the freeway but you drive on the par allel way along a freew...

Страница 461: ...reen with a limited choice of Points of In terest will be displayed To change the dis played POI see page 90 When you touch the desired Point of Interest category sym bols will appear on the map screen indicating where the POI addresses are located To turn off the symbols of the Points of In terest on the map screen touch the POI Off switch More If you cannot find your desired Point of Interest on...

Страница 462: ... in alphabetical order by name On Route When the indicator is illumi nated by touching this switch the list of the items searched along the route is displayed To set a POI as a destination You can select one of the Points of Interest icons on the map screen as a destination and use it as route guidance Directly touch the Point of Interest icon that you wish to set as a destination The map will shi...

Страница 463: ...n displays the list of the roads up to your destination You can scroll through the list of roads by touching or However not all road names in the route may appear on the list If a road changes its name without requiring a turn such as on a street that runs through two or more cities the name change will not ap pear on the list The street name closest to the starting point will be displayed with a ...

Страница 464: ...e Route Preview switch To indicate the next destination To preview the route to the next des tination To preview the route to the next des tination in fast forward mode To stop the preview To review the route to the previous destination or starting point To review the route to the previous destination or starting point in fast forward mode To indicate the previous destination or starting point ...

Страница 465: ...the conditions it may not be possible to select certain screen configura tion switches To display single map screen See page 53 To display dual map screen See page 54 To display compass mode screen See page 54 To display turn list screen See page 55 To display arrow screen See page 55 To display freeway information screen See page 55 To display intersection guidance screen or guidance screen on fr...

Страница 466: ...p Touch the OK switch when you complete editing The screen returns to the dual map screen c Compass mode Information about the destination and current position as well as a compass is displayed on the screen The destination mark is displayed in the direc tion of the destination When driving refer to the longitude and latitude coordinates and the compass to make sure that your vehicle is headed in ...

Страница 467: ...corner f Freeway information screen This screen displays the distance to the next junction and exit or POIs in the vicinity of the freeway exit Map To display the selected map of the exit vicinity On the left side of the Map switch up to five POIs around the selected exit are dis played To scroll for farther junctions or exits To scroll for closer junctions or exits To scroll for the closest three...

Страница 468: ...e screen disappears and the map screen appears When touching the switch or pushing the MAP VOICE button the intersec tion guidance screen reappears INFORMATION Intersection guidance can be turned on or off See page 85 Guidance screen on freeway This screen automatically appears when the vehicle approaches a junction or exit on a freeway The distance to the junction or exit is shown at the bottom o...

Страница 469: ... to display the follow ing screen 2 Touch the number switch of the des tination you wish to display The distance and the estimated travel time from the current position to the selected des tination are displayed Displayed while driving along the guidance route Displayed while driving off the guidance route The destination direction is indicated by an arrow INFORMATION When the vehicle is on the gu...

Страница 470: ...int map display Touch the switch INFORMATION If the map or the current position is moved to the area which is not cov ered by the foot print map the screen scale automatically changes to 150 feet 50 m On the foot print map a one way street is displayed by It is not possible to perform scrolling on the foot print map one touch scroll while driving To display building information Information is avai...

Страница 471: ...ove the cursor to the position of the building you wish to display information 3 Touch the Building Info switch 4 Details of POIs in some buildings may be displayed If you wish to see detailed POI information touch the building name You can see the detail of the selected POIs ...

Страница 472: ...DESTINATION INPUT AND ROUTE GUIDANCE 60 ...

Страница 473: ...ning against anything which may cause damage to the ve hicle or its equipment if the warning is ignored You are informed about what you must or must not do in order to avoid or reduce the risk of damage to your vehicle and its equipment INFORMATION This provides additional information Initial screen When you start the engine or turn the ignition switch to the ACC position the initial screen appear...

Страница 474: ...select a language Read and follow the instructions When you touch the I Agree switch on the screen the map screen appears You can access this screen when you push the INFO button and touch the Lan guage switch Then you can select a lan guage ...

Страница 475: ...d become thoroughly familiar with it Read the entire Navigation System Owner s Manual to make sure you under stand the system Do not allow others to use this system until they have read and under stood the instructions in this manual For your safety some functions may become inoperable when you start driving Unavail able switches are dimmed You can input your destination and select your route only...

Страница 476: ...estrictions no left turns street closures etc frequently change Therefore before you follow any instruction from the system look to see whether you can comply with the instruction safely and legally This system cannot warn you about such things as the safety of an area condition of streets and availability of emergency servi ces If you are unsure about the safety of an area do not drive into it Un...

Страница 477: ...vigation system s database includes about 75 Point of Interest categories to allow you to easily select destinations such as restaurants and banks If a destination is not in the database you can enter the street address or a major intersection close to it and the system will guide you there The system will provide both a visual map and audio instructions The audio instructions will announce the di...

Страница 478: ... FUNCTIONS 95 OTHER FUNCTIONS Maintenance informationn 96 Calendar with memo 101 Trip information 108 Hands free system 109 Speech command system 126 Help screen 127 Setting screen 128 Screen adjustment 129 ...

Страница 479: ... displayed again touch the Do not dis play this message again switch 1 Push the INFO button to display the Information Menu screen and touch the Maintenance switch 5u004 2 Touch the desired icon and input the conditions Notice of Date You can input the next maintenance date Notice of Distance You can input the driv ing distance until the next maintenance check When you touch the switch on the Main...

Страница 480: ...ntenance informa tion please refer to the Scheduled Maintenance Guide or Owner s Manual Supplement Depending on the driving or the road conditions the actual date and dis tance may differ from the stored date and distance in the system Information items Oil change Replace oil filter Rotate tires Replace tires Replace battery Replace brake linings Replace wiper blades Replace engine coolant Replace...

Страница 481: ...Set Dealer switch on the Maintenance screen 2 Enter the location of the dealer in the same way as for destination input See page 20 After you input the dealer the screen changes and displays the map location of the dealer If it is OK touch the Enter switch The screen changes to Edit Dealer screen See b Edit dealer ...

Страница 482: ...on the Maintenance screen The Edit Dealer screen appears 2 To edit touch the corresponding switch To edit Dealer or Contact To input the name touch the alphabet nu meral and or umlaut keys You can input up to 24 letters After inputting touch the OK switch at the bottom right of the screen The previous screen will be displayed ...

Страница 483: ...reen To edit Phone telephone number Touch numeral keys After inputting touch the OK switch The previous screen will be displayed c Delete dealer 1 Touch the Delete Dealer switch on the screen 2 A message will appear on the screen To delete touch the Yes switch To cancel the deletion touch the No or Back switch ...

Страница 484: ...th memo This system informs you of the memo entry At the specified date the memo in formation will be displayed when the navi gation system is in operation The memo information screen will appear every time the system is turned on To disable this screen touch the Do not display this message again switch 1 Push the INFO button to display the Information Menu screen 5u004 2 Touch the Calendar switch...

Страница 485: ...the cur rent date is not displayed on the screen touch the Today switch to display the current month calendar a Inputting a memo 1 Touch the day you want to add a memo 2 To display the Memo screen touch the Add Memo switch Memo Touch the Memo switch to enter text ...

Страница 486: ...om right of the screen Location Touch the Location switch to set loca tion A screen similar to the destination input screen appears Input the same way as in putting a destination See page 20 You can add the memos up to 100 until De cember 31 2022 The date inputted is marked as shown above You can choose the desired mark and or date color ...

Страница 487: ...h the Date switch Touch your desired color for the date You can set a color of the mark and or date for the date you added the memo and or location To default the date color touch the De lete switch on the screen After you choose the date and or mark color touch the OK switch to display the previous screen ...

Страница 488: ...emo You can add the memo up to 100 c Deleting a memo Touch the corresponding date Touch the corresponding memo switch and then touch the Delete switch on the screen A message appears on the display To de lete touch the Yes switch To cancel the deletion touch the No switch d Editing a memo To edit the memo touch the correspond ing date and then touch the memo you wish to edit ...

Страница 489: ...FUNCTIONS 106 Touch the Memo or Location switch e Memo list 1 To list the memos you added touch the List switch 2 Touch the desired search condition to list the memos The Memo list is dis played on the screen ...

Страница 490: ...iod from January 1 2003 through December 31 2022 for searching To delete and or edit the memo touch the desired memo switch To delete all memos touch the Delete All switch A message appears on the display To delete touch the Yes switch To cancel the deletion touch the No switch To edit Touch the corresponding Memo or Location switch See page 105 for details To delete Touch the Delete switch See pa...

Страница 491: ... displayed based on the total driving distance and the total fuel con sumption after refueling The value is updated every 10 seconds When refueling be sure to stop your vehicle and turn the ignition switch off Cruising Range How far you can drive with the remaining fuel is displayed Even though the display indicates sufficient miles to run if the fuel level on the fuel gauge approaches E or the lo...

Страница 492: ...one does not support the Bluetooth this system can not be functioned CAUTION While you are driving do not use a cellu lar phone or connect the Bluetooth phone NOTICE Do not leave your cellular phone in the car The temperature indoor may be high and damage the phone INFORMATION In the following conditions the system may not be functioned The cellular phone is turned OFF The current position is outs...

Страница 493: ...olume of receiving voice down Otherwise echo is coming up When you talk on the phone speak clearly towards the microphone In the following situation your voice may not reach the remote party Driving on unpaved road Making a traffic noise Driving at the high speed The window is open Turning the air conditioning vents towards the microphone The sound of the air conditioning fan is loud 1 Indicates a...

Страница 494: ...f the Bluetooth connection may turn yellow and the system may not be functioned when you use the Bluetooth phone in the follow ing condition and place Your cellular phone is hiding behind the display behind the seat or in the glove box and console box Your cellular phone touches or covered with metal materials Leave the Bluetooth phone on the place where Blue indication is displayed BLUETOOTH is a...

Страница 495: ...e operation of the phone see the manu al that comes with your cellular phone pro vided separately 5 When the connection is completed de vice name and Bluetooth Device Address is displayed You do not need to enter it in case of using the same phone b Select the Bluetooth phone In case of registering a number of Blue tooth phones you need to select the usual phone 1 Touch the Settings switch to dis ...

Страница 496: ...nected and the con nection result is displayed Leave the Bluetooth phone enable to con nect This screen appears when the Bluetooth phone is first connected after you turn the igni tion key to ACC or ON Reconnect the Bluetooth phone If the Bluetooth phone is disconnected with the radio condition of Bluetooth net work and the like when the ignition key is turned to ACC or ON the system auto maticall...

Страница 497: ...nd PASS KEY BD_ADDR is Bluetooth device address Do not change the Device Name to the same name as the one of the other Bluetooth phones They cannot be identified BD_ADDR is different by the system You can confirm the address when it cannot be identified i Change the Device Name You can change the Device Name to the desired one from the name already regis tered in the system Touch the Change of Dev...

Страница 498: ...nge the PASS KEY within 4 8 figures Touch the Change of PASS KEY to display Enter PASS KEY screen Touch the desired key to input the PASS KEY Each time you touch an inputted num ber is deleted Touch Enter c Delete the Bluetooth phone 1 Touch the Settings switch to dis play Settings screen and scroll with ...

Страница 499: ...can call by inputting the telephone number You can not operate it while driv ing Touch the desired key to input the tele phone number Each time you touch an inputted num ber is deleted Touch or push of the telephone but ton ii By phonebook You can call by phonebook data which has been transferred from your cellular phone The system has two phonebooks You can register up to 500 numbers in phonebook...

Страница 500: ...aled numbers If it is over than 5 the oldest number is de leted This cannot be operated while you are driv ing 1 Touch the Log switch to display Dialed no screen When you call by phonebook the name if registered is displayed When you call the same number continu ously the newest number is only regis tered 2 Select the desired number from the list Touch or push of the telephone button ...

Страница 501: ...isplay Rec Calls screen When a telephone number registered in phonebook is received the name and the number is displayed Received calls which you did not answer are also memorized in the system and Abs is displayed on the left side of the number Un notified telephone number such as a public telephone is not memorized in the system 3 Select the desired number from the list Touch or push of the tele...

Страница 502: ...ng the screen above appears Touch the desired name to call The tele phone number is not displayed vi By POI call You can call by operating a switch when Call displayed on the screen from Navi gation system See page 38 for details e Receive the Bluetooth phone When a call is received this screen is dis played with a sound Touch or push of the telephone button to talk on the phone To hang up the pho...

Страница 503: ...er to input the key To hang up the phone Touch or push of the telephone button This cannot be operated while you are driv ing If the continuous tone signal is registered in a phonebook this screen appears If not registered Send and Exit is not displayed Confirm the number displayed on the screen and touch Send The number to marked sign will be sent When you touch Exit this function will be finishe...

Страница 504: ...a telephone service in bank you can do this op eration g Change the settings of the Bluetooth phone Touch the Settings switch to display Settings screen and scroll with You can change the settings of the phone i Change the phonebook The system has two phonebooks You can select either of a phonebook Touch the Phone Book 1 or Phone Book 2 switch ...

Страница 505: ...is not empty 3 Transfer the phonebook data to the system with operating the Bluetooth phone This screen appears while transferring To cancel it touch the Cancel switch If the transferring is interrupted on the way the phonebook data transferred by then can be memorized in the system iii Register the one touch dial You can register the desired telephone number from phonebooks dialed num bers and re...

Страница 506: ...eceived number is registered in the 6th item iv Delete the memory Delete the telephone number in the phonebook Touch the Delete switch of Phone Book Select the desired number from the list If you want to delete all the phone numbers in phonebook touch the Delete All switch Touch YES switch Touch NO switch and the previous screen appears ...

Страница 507: ...the list If you want to delete all dialed numbers touch the Delete All switch Touch YES switch Touch NO switch and the previous screen appears Delete the received calls Touch the Delete switch of Received Calls Select the desired number from the list If you want to delete all received calls touch the Delete All switch ...

Страница 508: ...vious screen appears Delete the one touch dial Touch the Delete switch of One Touch Dial Select the desired number from the list If you want to delete all the one touch dial touch the Delete All switch Touch YES switch Touch NO switch and the previous screen appears ...

Страница 509: ...he Help screen See Help screen on page 127 When you touch the Cancel the previous screen returns If the navigation system does not respond or the confirmation screen does not disappear please push the speech command switch and try again If no command is given a beep sounds and the indicator disappears 6 seconds later If the system does not recognize your speech the system will respond with this me...

Страница 510: ...searching for a route to your home If the destination is already registered Add or Replace is displayed on the screen Touch or say Cancel and the search will be canceled INFORMATION In the following conditions the system may not recognize the command proper ly The command is not correct or clear There are some noises such as wind noise etc Help screen This system has a function which displays the ...

Страница 511: ...y the Information Menu screen 2 Touch the Screen Setting switch a Automatic transition You can select a function that enables au tomatic return to the navigation screen from the audio screen 5u008 Select the ON or OFF and then touch the OK ON The navigation screen automatically re turns from the audio or air conditioner screen 20 seconds after the end of audio or air condi tioner screen operation ...

Страница 512: ...Weakens the contrast of the screen BRIGHTNESS Brightens the screen BRIGHTNESS Darkens the screen The screen turns off when you push the SCREEN OFF To turn the display screen back on push any bezel switch such as OP TION etc The selected screen appears Color and tone adjustment You can adjust the color and the tone while the DVD video and Video CD are being played COLOR RED Strengthens the red colo...

Страница 513: ...DAY MODE on the adjustment screen for bright ness and contrast control However if the instrument panel light control switch is turned fully to the right mode switch ing cannot be done It remains in the day mode In this case DAY MODE is not shown on the screen If the screen is set in the day mode with the headlight switch turned to on this condition is memorized in the system even with the en gine ...

Страница 514: ...s tem Whenever your vehicle is receiving signals from the GPS this mark is displayed 9 4 Distance and time to destination Displays the distance and the estimated travel time to the destination 57 5 Zoom out switch Touch this switch to reduce the map scale 8 6 Mark switch Touch this switch to register the cursor posi tion as a memory point 6 7 Route switch Touch this switch to change the route 42 4...

Страница 515: ...ap switch Touch this switch to display the foot print map and the building information 58 12 Screen configuration switch Touch this switch to change the screen mode 53 13 INFO button Push this button to display the Information Menu screen iii 96 101 109 14 DISPLAY button Push this button to display the Display screen 129 15 MENU button Push this button to display the Menu screen xii 16 61 16 DEST ...

Страница 516: ... 3 POI Category switch You can select a destination from the POI category 29 4 Previous switch You can select a destination from any of the last 99 previously set destinations and from the previous starting point 34 5 Memory switch You can select the location from those regis tered as the Memory points To register memory points see page 66 33 6 Emergency switch You can select one of the three cate...

Страница 517: ... can enter a destination by the telephone number 37 11 Coordinates switch You can set a destination using latitude and longitude coordinates 37 12 Quick access switch You can select one of 5 preset destinations directly To use this function it is necessary to set the Attribute for each memory point To register the Quick Access see page 70 22 13 Home switch You can select your own home without en t...

Страница 518: ...ch Enables recall of up to three memorized user setting patterns 63 3 Setup switch Enables various settings for the navigation system 76 4 My Places switch Enables changes to Memory points and Areas to avoid 66 5 Suspend Guidance and Resume Guidance switch Suspends or resumes the guidance 62 6 Volume switch Sets the volume of the voice guidance 63 Menu screen ...

Страница 519: ...PASSPORT t o p e r f o r m a n c e 2004 Scheduled Maintenance Guide ...

Страница 520: ...ty and peace of mind from your Toyota for many years to come Documenting Your Investment To help you verify that you ve invested in proper maintenance each mainte nance log in this booklet includes space for your Toyota dealership to certify that you obtained Genuine Toyota Service for your vehicle The dealership will mark the dealer service verification area with the following stamp which may be ...

Страница 521: ...aintenance Providers Maintenance and repair services may be performed by you or by any automotive service provider you choose Toyota will not deny a warranty claim solely because you used a service provider other than a Toyota dealership for maintenance and repairs However damage or failures caused by improper maintenance or repairs are not covered under warranty Dealer Recommended Maintenance You...

Страница 522: ... Maintenance and Repair Support Toyota Dealership Service Toyota Express Lube Genuine Toyota Parts and Accessories Lifetime Guarantee Replacement Parts TrueStart Batteries Collision Repair Parts Do It Yourself Products Toyota Parts Centers Toyota Service Manuals Service Agreements and Pre Paid Maintenance Table of Contents 40 41 42 44 45 46 48 50 51 52 2 3 4 20 36 ...

Страница 523: ...Scheduled Maintenance Logs 2 Vehicle Identification Model In service date Selling dealership Key number Body style Mileage at delivery Selling dealership phone number Vehicle Identification Number ...

Страница 524: ... approxi mately 833 miles per month If you drive more than 833 miles per month you should obtain maintenance at the indicated mileage interval rather than the indicated time interval The maintenance log charts are colored differently for cars and SUVs trucks Charts for cars have dark blue bars and charts for SUVs trucks have gold bars Be sure to follow the appropriate charts for your vehicle ...

Страница 525: ...en nuts and bolts on chassis Driving while towing Tighten nuts and bolts on chassis 10 000 Miles or 12 Months Replace engine oil and oil filter1 Rotate tires except MR2 Spyder Visually inspect brake linings drums and brake pads discs Additional Maintenance Items for Special Operating Conditions Driving in desert or on dirt roads Inspect ball joints and dust covers Inspect drive shaft boots Inspect...

Страница 526: ... urban dusty or desert areas may shorten the life of the cabin air filter Replacement may be needed if you notice reduced air flow from the air conditioner and heater or if the windows fog easily when you use the Fresh mode Consult your dealer if any of these conditions occur Additional Maintenance Items for Special Operating Conditions Driving in desert or on dirt roads Inspect engine air filter ...

Страница 527: ...ten nuts and bolts on chassis Driving while towing Tighten nuts and bolts on chassis 25 000 Miles or 30 Months Replace engine oil and oil filter1 Rotate tires except MR2 Spyder Visually inspect brake linings drums and brake pads discs Additional Maintenance Items for Special Operating Conditions Driving in desert or on dirt roads Inspect ball joints and dust covers Inspect drive shaft boots Inspec...

Страница 528: ...es __ Brake linings drums and brake pads discs3 __ Differential oil __ Drive shaft boots __ Engine coolant __ Exhaust pipes and mountings Additional Maintenance Items for Special Operating Conditions Driving in desert or on dirt roads Tighten nuts and bolts on chassis Driving while towing Replace automatic transmission fluid Avalon Replace differential oil Avalon and models with integrated manual ...

Страница 529: ...ten nuts and bolts on chassis Driving while towing Tighten nuts and bolts on chassis 40 000 Miles or 48 Months Replace engine oil and oil filter1 Rotate tires except MR2 Spyder Visually inspect brake linings drums and brake pads discs Additional Maintenance Items for Special Operating Conditions Driving in desert or on dirt roads Inspect ball joints and dust covers Inspect drive shaft boots Inspec...

Страница 530: ... urban dusty or desert areas may shorten the life of the cabin air filter Replacement may be needed if you notice reduced air flow from the air conditioner and heater or if the windows fog easily when you use the Fresh mode Consult your dealer if any of these conditions occur Additional Maintenance Items for Special Operating Conditions Driving in desert or on dirt roads Inspect engine air filter ...

Страница 531: ...hten nuts and bolts on chassis Driving while towing Tighten nuts and bolts on chassis 55 000 Miles or 66 Months Replace engine oil and oil filter1 Rotate tires except MR2 Spyder Visually inspect brake linings drums and brake pads discs Additional Maintenance Items for Special Operating Conditions Driving in desert or on dirt roads Inspect ball joints and dust covers Inspect drive shaft boots Inspe...

Страница 532: ...ll joints and dust covers __ Brake lines and hoses __ Brake linings drums and brake pads discs3 __ Differential oil __ Drive belts4 __ Drive shaft boots __ Engine coolant __ Engine valve clearance Additional Maintenance Items for Special Operating Conditions Driving in desert or on dirt roads Tighten nuts and bolts on chassis Driving while towing Replace differential oil Avalon and models with int...

Страница 533: ...hten nuts and bolts on chassis Driving while towing Tighten nuts and bolts on chassis 70 000 Miles or 84 Months Replace engine oil and oil filter1 Rotate tires except MR2 Spyder Visually inspect brake linings drums and brake pads discs Additional Maintenance Items for Special Operating Conditions Driving in desert or on dirt roads Inspect ball joints and dust covers Inspect drive shaft boots Inspe...

Страница 534: ...ty or desert areas may shorten the life of the cabin air filter Replacement may be needed if you notice reduced air flow from the air conditioner and heater or if the windows fog easily when you use the Fresh mode Consult your dealer if any of these conditions occur Additional Maintenance Items for Special Operating Conditions Driving in desert or on dirt roads Inspect engine air filter Tighten nu...

Страница 535: ...s Inspect ball joints and dust covers Inspect drive shaft boots Inspect engine air filter Inspect steering linkage and boots Tighten nuts and bolts on chassis Driving while towing Tighten nuts and bolts on chassis 85 000 Miles or 102 Months Replace engine oil and oil filter1 Rotate tires except MR2 Spyder Visually inspect brake linings drums and brake pads discs Additional Maintenance Items for Sp...

Страница 536: ...plugs ECHO 2 Replace timing belt Avalon Camry with 1MZ FE or 3MZ FE Camry Solara with 3MZ FE Inspect the following __ Ball joints and dust covers __ Brake lines and hoses __ Brake linings drums and brake pads discs3 __ Differential oil __ Drive belts __ Drive shaft boots __ Engine coolant __ Exhaust pipes and mountings Additional Maintenance Items for Special Operating Conditions Driving in desert...

Страница 537: ... bolts on chassis Driving while towing Tighten nuts and bolts on chassis 100 000 Miles or 120 Months Replace engine oil and oil filter1 Rotate tires except MR2 Spyder Replace engine coolant2 Visually inspect brake linings drums and brake pads discs Additional Maintenance Items for Special Operating Conditions Driving in desert or on dirt roads Inspect ball joints and dust covers Inspect drive shaf...

Страница 538: ...haft boots Note Driving in heavy traffic on dirt roads or in urban dusty or desert areas may shorten the life of the cabin air filter Replacement may be needed if you notice reduced air flow from the air conditioner and heater or if the windows fog easily when you use the Fresh mode Consult your dealer if any of these conditions occur Additional Maintenance Items for Special Operating Conditions D...

Страница 539: ...hten nuts and bolts on chassis Driving while towing Tighten nuts and bolts on chassis Dealer Service Verification Date Mileage 115 000 Miles or 138 Months Replace engine oil and oil filter1 Rotate tires except MR2 Spyder Visually inspect brake linings drums and brake pads discs Additional Maintenance Items for Special Operating Conditions Driving in desert or on dirt roads Inspect ball joints and ...

Страница 540: ...plugs2 Inspect the following __ Ball joints and dust covers __ Brake lines and hoses __ Brake linings drums and brake pads discs3 __ Differential oil __ Drive belts __ Drive shaft boots __ Engine coolant __ Engine valve clearance Additional Maintenance Items for Special Operating Conditions Driving in desert or on dirt roads Tighten nuts and bolts on chassis Driving while towing Replace differenti...

Страница 541: ...peller shaft bolt all models except Highlander and RAV4 Tighten nuts and bolts on chassis 10 000 Miles or 12 Months Replace engine oil and oil filter1 Rotate tires Visually inspect brake linings drums and brake pads discs Additional Maintenance Items for Special Operating Conditions Driving in desert or on dirt roads Inspect ball joints and dust covers Inspect drive shaft boots Highlander Land Cru...

Страница 542: ...acoma 4WD Tundra 4WD 4Runner __ Engine coolant __ Exhaust pipes and mountings __ Front differential oil all 4WD except Highlander and RAV4 Note Driving in heavy traffic on dirt roads or in urban dusty or desert areas may shorten the life of the cabin air filter Replacement may be needed if you notice reduced air flow from the air conditioner and heater or if the windows fog easily when you use the...

Страница 543: ...opeller shaft bolt all models except Highlander and RAV4 Tighten nuts and bolts on chassis 25 000 Miles or 30 Months Replace engine oil and oil filter1 Rotate tires Visually inspect brake linings drums and brake pads discs Additional Maintenance Items for Special Operating Conditions Driving in desert or on dirt roads Inspect ball joints and dust covers Inspect drive shaft boots Highlander Land Cr...

Страница 544: ...ped Land Cruiser 4WD Tacoma 2WD Tundra Replace spark plugs 4Runner w 1GR FE Sequoia Tacoma Tundra 2 Re torque drive shaft bolt 4WD Highlander 4WD RAV4 Re torque propeller shaft bolt all models except Highlander and RAV4 Inspect the following __ Automatic transmission fluid __ Ball joints and dust covers __ Brake lines and hoses __ Brake linings drums and brake pads discs3 __ Drive shaft boots High...

Страница 545: ...opeller shaft bolt all models except Highlander and RAV4 Tighten nuts and bolts on chassis 40 000 Miles or 48 Months Replace engine oil and oil filter1 Rotate tires Visually inspect brake linings drums and brake pads discs Additional Maintenance Items for Special Operating Conditions Driving in desert or on dirt roads Inspect ball joints and dust covers Inspect drive shaft boots Highlander Land Cr...

Страница 546: ...acoma 4WD Tundra 4WD 4Runner __ Engine coolant __ Exhaust pipes and mountings __ Front differential oil all 4WD except Highlander and RAV4 Note Driving in heavy traffic on dirt roads or in urban dusty or desert areas may shorten the life of the cabin air filter Replacement may be needed if you notice reduced air flow from the air conditioner and heater or if the windows fog easily when you use the...

Страница 547: ...opeller shaft bolt all models except Highlander and RAV4 Tighten nuts and bolts on chassis 55 000 Miles or 66 Months Replace engine oil and oil filter1 Rotate tires Visually inspect brake linings drums and brake pads discs Additional Maintenance Items for Special Operating Conditions Driving in desert or on dirt roads Inspect ball joints and dust covers Inspect drive shaft boots Highlander Land Cr...

Страница 548: ...r if equipped Lubricate drive shaft bushing Land Cruiser Lubricate propeller shaft PreRunner and all 4WD except Highlander and RAV4 Lubricate wheel bearings Land Cruiser 2WD Tacoma Replace limited slip differential oil if equipped 4WD Highlander Land Cruiser 4WD RAV4 4WD Tacoma 2WD Tundra Replace spark plugs all models except Highlander and Land Cruiser 2 Re torque drive shaft bolt Highlander 4WD ...

Страница 549: ...opeller shaft bolt all models except Highlander and RAV4 Tighten nuts and bolts on chassis 70 000 Miles or 84 Months Replace engine oil and oil filter1 Rotate tires Visually inspect brake linings drums and brake pads discs Additional Maintenance Items for Special Operating Conditions Driving in desert or on dirt roads Inspect ball joints and dust covers Inspect drive shaft boots Highlander Land Cr...

Страница 550: ...s __ Drive shaft boots Highlander Land Cruiser RAV4 4WD Sequoia 4WD Tacoma 4WD Tundra 4WD 4Runner __ Engine coolant __ Exhaust pipes and mountings Note Driving in heavy traffic on dirt roads or in urban dusty or desert areas may shorten the life of the cabin air filter Replacement may be needed if you notice reduced air flow from the air conditioner and heater or if the windows fog easily when you...

Страница 551: ...nder and RAV4 Driving while towing Lubricate propeller shaft PreRunner and all 4WD except Highlander and RAV4 Re torque propeller shaft bolt all models except Highlander and RAV4 Tighten nuts and bolts on chassis 85 000 Miles or 102 Months Replace engine oil and oil filter1 Rotate tires Visually inspect brake linings drums and brake pads discs Additional Maintenance Items for Special Operating Con...

Страница 552: ...reRunner and all 4WD except Highlander and RAV4 Lubricate wheel bearings Land Cruiser 2WD Tacoma Replace limited slip differential oil if equipped Land Cruiser 4WD Tacoma 2WD Tundra Replace spark plugs 4Runner w 1GR FE Sequoia Tacoma Tundra 2 Replace timing belt3 Re torque drive shaft bolt 4WD Highlander 4WD RAV4 Re torque propeller shaft bolt all models except Highlander and RAV4 Inspect the foll...

Страница 553: ...t bolt all models except Highlander and RAV4 Tighten nuts and bolts on chassis 100 000 Miles or 120 Months Replace engine oil and oil filter1 Rotate tires Replace engine coolant2 Visually inspect brake linings drums and brake pads discs Additional Maintenance Items for Special Operating Conditions Driving in desert or on dirt roads Inspect ball joints and dust covers Inspect drive shaft boots High...

Страница 554: ... in heavy traffic on dirt roads or in urban dusty or desert areas may shorten the life of the cabin air filter Replacement may be needed if you notice reduced air flow from the air conditioner and heater or if the windows fog easily when you use the Fresh mode Consult your dealer if any of these conditions occur Additional Maintenance Items for Special Operating Conditions Driving in desert or on ...

Страница 555: ...opeller shaft bolt all models except Highlander and RAV4 Tighten nuts and bolts on chassis 115 000 Miles or 138 Months Replace engine oil and oil filter1 Rotate tires Visually inspect brake linings drums and brake pads discs Additional Maintenance Items for Special Operating Conditions Driving in desert or on dirt roads Inspect ball joints and dust covers Inspect drive shaft boots Highlander Land ...

Страница 556: ...e shaft bushing Land Cruiser Lubricate propeller shaft PreRunner and all 4WD except Highlander and RAV4 Lubricate wheel bearings Land Cruiser 2WD Tacoma Replace limited slip differential oil if equipped 4WD Highlander Land Cruiser 4WD RAV4 4WD Tacoma 2WD Tundra Replace spark plugs all models 2 Re torque drive shaft bolt Highlander 4WD RAV4 Re torque propeller shaft bolt all models except Highlande...

Страница 557: ...for looseness and damage Check all dust covers for deterioration and damage Replace any deteriorated or damaged parts A qualified technician should perform these operations Brake Lines and Hoses Visually inspect for proper installation Check for chafing cracks deterioration and signs of leakage Replace any deteriorated or damaged parts A qualified technician should perform these operations Brake L...

Страница 558: ...and replace if necessary Engine Coolant Drain and flush the cooling system and refill with an ethylene glycol type coolant Inspect the radiator condenser and or intercooler for leaves dirt and insects and clean if necessary Inspect hoses and connections for corrosion and leaks Tighten connections and replace parts as necessary A qualified technician should perform these operations Note Your Toyota...

Страница 559: ...lly inspect for cracks deterioration and damage and replace if necessary Nuts and Bolts on Chassis and Body Re tighten the seat mounting bolts and front rear suspension member retaining bolts to specified torque Propeller Shaft Lubricate the propeller shaft spiders and slide yokes with lithium base chassis grease and the double cardan joint with molybdenum disulfide lithium base chassis grease and...

Страница 560: ...operation Tire Rotation Tires should be rotated at specified intervals according to the instructions in the Owner s Manual When rotating tires check for damage and uneven wear Replace if necessary Transfer Case Oil Inspect or replace at specified intervals When performing inspections check for signs of leakage If you discover any leakage have it repaired by a qualified tech nician immediately Whee...

Страница 561: ...ech nical bulletins service publications and training courses Many are also certified through the Toyota Certification Program which requires completion of Toyota s specialized state of the art training as well as rigorous exams through both Toyota and the National Institute for Automotive Service Excellence ASE Feel free to ask any Toyota dealership to show you its technicians credentials You can...

Страница 562: ...nd filter change using Genuine Toyota Parts along with a multi point inspection or the next one is free You never need an appointment to use Express Lube at a Toyota dealership You ll be waited on promptly and your oil and filter change will be done while you wait Express Lube also delivers outstanding value since the service is priced very competitively with franchised quick lube centers More tha...

Страница 563: ...n of batteries are warranted for 12 months from date of installation regardless of mileage or the remainder of any applicable New Vehicle Limited Warranty whichever provides greater coverage Selected Toyota replacement parts are covered by a lifetime warranty see page 44 Non Genuine Toyota Parts and any damage or failures resulting from their use are not covered by any Toyota warranty Genuine Toyo...

Страница 564: ...te quality precise fit and long term durability Aftermarket accessories don t always meet these same high standards The quality of Genuine Toyota Accessories is also backed by the integrity of a Toyota warranty Coverage is for 12 months from date of purchase regardless of mileage If an accessory is installed during the New Vehicle Limited Warranty period 36 months 36 000 miles coverage is for the ...

Страница 565: ...s are guaranteed to the original purchaser for the life of the vehicle This includes coverage for parts and labor Compare the guarantees offered on these parts by aftermarket repair shops many don t offer the extensive coverage Toyota does And remember that only Genuine Toyota Parts are manufactured to your vehicle s exact specifications So don t compromise When replacement time comes count on you...

Страница 566: ...cification often not met by aftermarket brands supplies the power you need during high demand conditions such as driving in heavy traffic RC is also what gives you the power to operate electronic accessories with the engine off By choosing a TrueStart you can be confident your battery will meet your needs every day Warranty coverage is another important consideration when selecting a battery TrueS...

Страница 567: ...ne Toyota quality Toyota warranty coverage remains intact when vehicle repairs are completed with Genuine Toyota Parts Toyota warranties do not cover imitation or used salvage parts or any damage or failures caused by the use of such parts In Case of Accident Be an Informed Owner Toyota believes customers have the right to choose the types of parts used in the repair of their vehicles That s why T...

Страница 568: ... its normal channels These parts maintain the manufacturer s vehicle warranty Aftermarket or imitation Parts that are made by companies other than the vehicle manufacturer or its licensees Recycled or used salvage Used parts and assemblies that have been removed from another vehicle There are no systems in place to regulate the quality or safety of these parts Remanufactured Parts that have been r...

Страница 569: ...0 000 miles Provide the maximum spark required by Toyota s high compression engines Resist fouling and misfires for more efficient conbustion and better fuel economy Genuine Toyota Brake Pads Friction materials selected for optimum performance when matched with Toyota brake drums or rotors Precision machined backing plates allow pads to move freely within the calipers for smooth efficient braking ...

Страница 570: ... Life Antifreeze Coolant Genuine Toyota Super Long Life Antifreeze Coolant is the same high quality factory fill product found in new Toyotas You ll know it by its distinctive pink color It provides maximum protection and durability without the use of harmful silicates And because it s compatible with non metallic materials it helps extend the life of water pump seals Don t trust your engine to an...

Страница 571: ... Genuine Toyota maintenance parts and car care products for do it yourselfers In addition to Toyota maintenance and repair products TPCs offer free technical advice to Toyota owners who want to service their own vehicles You ll also find how to brochures covering most common maintenance jobs These are provided to customers free of charge Toyota Parts Centers are open during regular dealership hour...

Страница 572: ...ps throughout the United States It is fully illustrated and includes maintenance and repair procedures for all vehicle mechanical systems It also includes instructions for vehicle tune ups Electrical Systems Manual This manual provides detailed wiring diagrams for each electrical system in your vehicle along with troubleshooting tips and repair procedures Automatic Transmission Transaxle Repair Ma...

Страница 573: ...your needs Toyota Auto Care Prepaid Maintenance Program The Toyota Auto Care Prepaid Maintenance Program provides a convenient way to prepay for your vehicle s regularly scheduled maintenance and protects you from the rising cost of service Toyota Auto Care Classic Prepaid Maintenance Plans are available for both new and used vehicles Benefits include oil and filter changes lubrication of key chas...

Страница 574: ...Toyota Maintenance and Repair Support 53 Notes ...

Страница 575: ...Toyota Maintenance and Repair Support 54 Notes ...

Страница 576: ...Printed in U S A 7 03 00505 T2004 SMG1 ...

Отзывы: