background image

4

MAIN ASSEMBLY ––––––––––––––––––––––

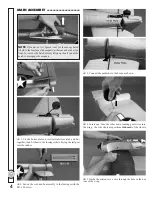
NOTE: 

If you haven’t yet 

fi

 gured it out yet, the canopy hatch 

is held to the fuselage with magnets at the rear and a tab at the 
front. To remove the hatch, simply lift up on the aft end of the 
hatch to disengage the magnets.

  1. Fit the horizontal and vertical stabilizer (stab and 

fi

 n) 

together, then 

fi

 t them to the fuselage while keying the tail gear 

into the rudder.

  2. Fasten the stab and 

fi

 n assembly to the fuselage with the 

M3 x 40 screw.

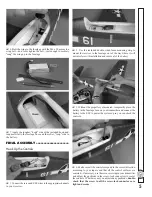
  3. Connect the pushrods to the horns as shown.

  4. Insert one, then the other main landing gear wires into 

the wing – the wire struts are positioned 

inboard

 of the wheels.

  5. Guide the aileron servo wire through the hole in the bot-

tom of the wing.

Содержание F6F Hellcat

Страница 1: ...esulting from the use by the user of the final user assembled product By the act of using the user assembled product the user accepts all resulting liability If the buyer is not prepared to accept the liability associated with the use of this product the buyer is advised to return this kit immediately in new and unused condition to the place of purchase To make a warranty claim send the defective ...

Страница 2: ...o the instructions Do not alter or modify the model as doing so may result in an unsafe or unflyable model In a few cases the instructions may differ slightly from the photos In those instances the written instructions should be considered as correct 3 You must use an R C radio system that is in good condition All components must be correctly installed so that the model operates correctly on the g...

Страница 3: ...hampaign IL 61822 E mail airsupport hobbico com ORDERING REPLACEMENT PARTS Replacement parts for the Tower Hobbies EPHellcat are available using the order numbers in the Replacement Parts List that follows The fastest most economical service can be provided by your hobby dealer or mail order company To locate a hobby dealer visit the Hobbico web site at www hobbico com Choose Where to Buy at the b...

Страница 4: ...he horizontal and vertical stabilizer stab and fin together then fit them to the fuselage while keying the tail gear into the rudder 2 Fasten the stab and fin assembly to the fuselage with the M3 x 40 screw 3 Connect the pushrods to the horns as shown 4 Insert one then the other main landing gear wires into the wing the wire struts are positioned inboard of the wheels 5 Guide the aileron servo wir...

Страница 5: ... fuselage out of the way where it will not interfere with installation and removal of the battery 3 Without the propeller yet mounted temporarily place the battery in the fuselage turn on your transmitter and connect the battery to the ESC to power the system up so you can check the controls 4 Make sure all the controls respond in the correct direction according to your inputs and that all the con...

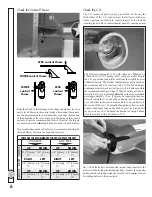
Страница 6: ...le reacting too slowly to control inputs or too instable reacting too quickly to control inputs possibly causing a crash The Hellcat is designed to fly with either an 1800mAh or 2100mAh 3S 11 7V battery but it could use a little help in the C G department and will benefit from the slightly heavier 2100mAh battery The Hellcat should balance pretty much on the recommended C G location with a 3S 2100...

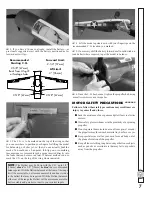
Страница 7: ...r due to the ballast that may be required With the Hellcat balanced at the rear of the range the Hellcat will be more maneuverable but less stable and quicker to react to your control inputs 4 Lift the model upside down with your fingertips on the recommended C G location you marked 5 If necessary shift the battery forward or aft or add stick on lead ballast where required to get the model to bala...

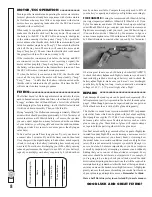
Страница 8: ...y your battery s capacity by 8 to find out how much you have available Compare the capacity used to 80 of your battery s capacity and adjust your flight time accordingly FOR EXAMPLE If using the recommended 2100mAh battery your target capacity available is 1680mAh 2100mAh x 8 If you fly for five minutes and it takes 1200mAh to recharge your battery you still had 480mAh to go so adjust your timer t...

Отзывы: