174
10°
G1/2
(Unit : mm)
TBP02001*
50 or more
67
Fixing
screws
Fixed
connector
Anti-dropping
Screws
O-ring
O-ring
Install the product according to this Installation Manual so that the product fulfills its function. When the installation is over, fully explain how to use the single handle faucet to the customer.
TBP02001*
03N321E
2017.8
Installation Manual
Bath Spout
Installation completion figure
Faucets installation
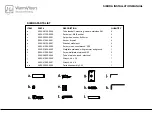
Identification of Parts
Identify the following parts.
Main body of
water outlet
Fixed connector
Others
Use condition and attentions in construction
Use condition
1. Cold water supply*hot water supply pressure
Minimum pressure……………0.05MPa (flow pressure)
Maximum pressure……………1.0MPa (static pressure)
Recommended Operating pressure…………0.1~0.5MPa (flow pressure)
Test pressure……………………0.4MPa (static pressure)
2. The Temperature for water supply is 4-90°C. Recommended hot water temperature 60°C,
Do not use steam to supply hot water.
3. The ambient temperature for use is above 0°C. If the ambient temperature is lower
than 0°C, the faucets will deform and crack from freezing.
4. Being out of use for a long time may result in internal and external rust to the faucets and
being unable to be used.
5. If you want to scrap this product, do not treat it as you do for general household garbage.
Please follow relevant statutes to have it treated, recovered and collected appropriately
by an independent recovery system.
6. The product in these instructions has a cleaning function.
Safety Precautions
Please read these Safety Precautions before installation work in order to install the product properly.
CAUTION
●This manual employs various indications in order to install
the product properly and to prevent harm to the customer
and other people, as well as damage to their properties.
The indications and meanings are as follows:
This indication means that
if the content in the
column of this indication is
ignored or handled
wrongly, injury or property
damage may occur.
Prohibited
The bath spout body may be damaged or the setscrew may be loosened.
Do not connect the piping joint after combining the bath
spout body and the joint.
Water may leak.
Do not damage the O-ring.
Trouble may be caused.
Do not disassemble or remodel the product with other items
than what are described in this manual.
If the bath spout is loose, it may detach or the wall may break whereby
causing injury.
When completely mounted, check the bath spout for any looseness.
The threads may cut your hands.
Pay attention to the threaded part.
Water may leak.
Use the sealing materials for piping on the connecting part.
CAUTION
●The contents you must observe are
classified into the following symbols;
their meanings are explained.
Indicates things that you must
not do as “Prohibited”.
The left figure indicates that
“Disassembly is Prohibited”.
Indicates things that you must
do without fail as “Mandatory”.
The left figure indicates to
“Execute it without fail”.
The construction space 60 or more
bath tub bottom face
upper edge face on
the bath tub
1. Cleaning in water supply pipe
Before installing the faucets, it is imperative to wash and flush out the dust, sand,
etc.in the water supply pipe.
2. Installation of main body of faucets
(1) Wind an appropriate amount of teflon tape on the thread of fixed connector and screw
in the water supply pipe. Be sure to tight sufficiently.
(2) Remove the fixing screws and anti-dropping screws and then install the main body
of the water outlet onto the fixed connector. Firstly, tighten sufficiently with the fixing
screws and then just lock tight the anti-dropping screws. (After applying some soap
water, etc. on the O-ring of the fixed connector, it will be easier to assemble)
Note :
ʒ
Adjust the water outlet to the optimum position.
ʓ
To ensure that the body can fully cover the installation hole after installation,
the OD of the wall opening shall not be greater than 47. Please grasp
properly the installation hole dimension. Otherwise, the components buried
in wall may not be covered after installation.
ʔ
Please make sure that lock fixing screws and anti-dropping screws,
otherwise likely spit water body in danger of falling.
Wall
Elbow
Main body of
water outlet
Gasket
O-ring
Fixed connector
Fixed connector
Hex wrench metric
2mm (not supplied)
Fixing
screws
Water outlet
Open spanner,
metric 18mm
(not supplied)
Note :
For the installation dimension of
the fixed connector, refer to the
main points for installation
for the fixed connector.
< The main points for installation
for the fixed connector.>
0~10mm
Anti-dropping
screws
Be sure to follow all
precautions for safety sake.
Mandatory
Disassembly
Prohibited
Hand it over to the
customer without fail.
Installation
Manual
Operation
Manual


