3
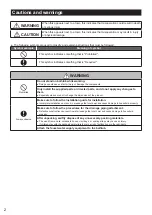
WARNING
Always observe
Make sure to install the bathtub according to the installation guide and in a stable
location.
●
.
Ensure that you have an ergonomic working position during transport and assembly.
●
Take care at every stage that your move is safe. Ensure that you have assistance to avoid risk of accident
or injury.
Observe the current local prevention of accidents and building regulations as well as
sanitary and environmental protection rules during installation.
CAUTION
Prohibited
Do not place a stepladder inside the bathtub or place heavy objects on the edge the
bathtub.
●
This may cause damage.
Do not drop or bump anything hard or heavy onto the bathtub.
●
This may cause the bathtub to crack and result in an injury, or leakage that could wet and cause damage
to household property.
Keep sources of heat at a distance. Do not smoke.
●
Doing so could cause damage.
Do not install the bathtub outdoors or in a location that is regularly exposed to
sunlight (such as a sun room).
●
This may cause the bathtub to freeze and cause damage or discoloration.
When delivering the bathtub, do not hold the hose or piping or bump anything hard
against it.
Always observe
When opening the packaging, make sure that all of the supplied parts and the
bathtub itself are not damaged. If they are, do not use the damaged parts.
●
Replace any damaged parts.
When installing the bathtub in a location that could result in damage due to water
●
.
Remove the bathtub's protective sheet after the construction is completed.
Secure an area that enables proper space for the usage and maintenance of the bathtub.
●
If water leakage is detected, remove the cause of the leakage.
SAVE THESE INSTRUCTIONS
Содержание PJY1724PW
Страница 7: ...7 Dimension drawings PJY1724PW PPY1780PT ...
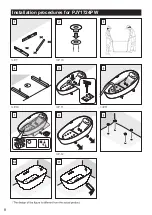
Страница 8: ...Installation procedures for PJY1724PW 8 P 7 P 10 P 10 P 11 P 12 P 11 ...
Страница 9: ...Installation procedures for PPY1780PT 9 P 18 P 18 3 16 5mm 13 16 20mm P 7 P 16 P 19 ...
Страница 10: ...Installing the bathtub for PJY1724PW 2 1 B 20 B 10 2 3 4 10 ...
Страница 11: ...5 1 2 A 5 B 10 B 6 6 11 ...
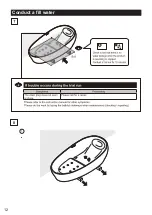
Страница 12: ...Conduct a fill water 8 1 12 ...
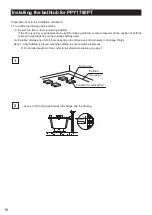
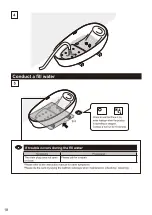
Страница 13: ...9 8 Fix the bathtub A 6 B 4 B 2 M12 A 2 3 2 2 1 13 3 16 5 mm 3 16 5 mm ...
Страница 14: ...CAUTION Required Fix the bathtub in place with mortar using the provided sleeves A 6 9 10 3 14 ...
Страница 15: ...B 5 11 WARNING that does not contain alcohol Finishing 15 ...
Страница 18: ...18 ...
Страница 21: ...MEMO ...
Страница 22: ...MEMO ...
Страница 23: ...MEMO ...
Страница 24: ... TOTO Ltd All rights reserved 2018 12 Printed in China NTE225 ...


