3
ENGLISH
1. Connect the water supply to the faucet according to the faucet instructions.
2. Connect and tighten the p-trap to the drain.
3. Turn on the water supplies to the faucet.
4. Purge air from the hot and cold water by running the water for a few seconds.
5. Fill the lavatory with water.
6. Check for any leaks at the water supply and drain connections.
1. Install the faucets and drain (not supplied) per the manufacturer’s instructions.
2. Slide lavatory over carrier arms.
3. Use the screws on the underside front and back holes to level the lavatory.
4. Use the underside center holes to lock the lavatory in place.
INSTALLATION PROCEDURE
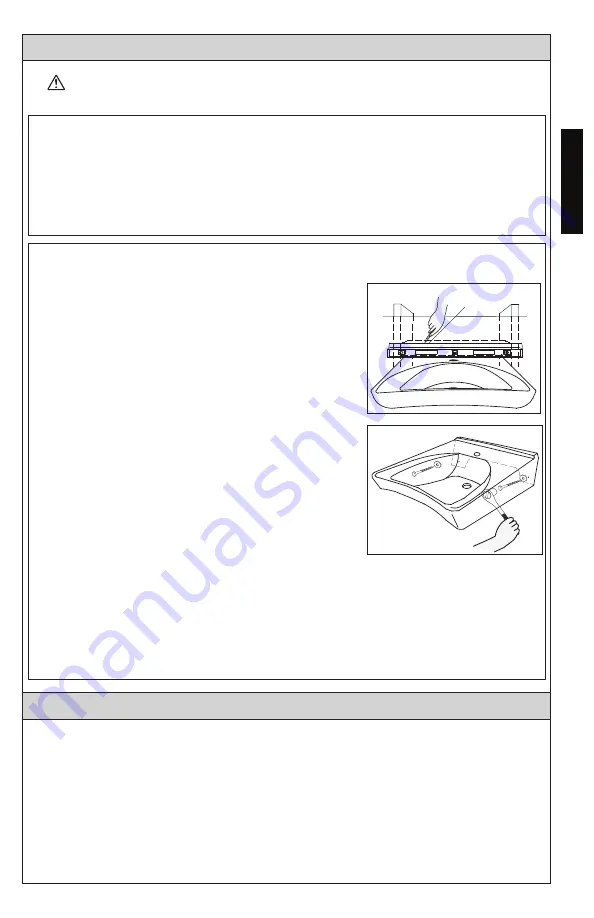
1. Place the lavatory on the bracket. Brace it
adequately so that the lavatory cannot tip over.
2. Verify that the lavatory is level and at the
correct height (see Ill. 3). Mark the location of
the mounting holes.
N OTE:
To help recall the lavatory position,
trace a line along the sides and top edge of
the lavatory with a pencil.
3. Remove the lavatory from the bracket.
4. Drill the remaining holes for the mounting
bracket and install the four remaining screws.
5. Install the faucets and drain (not supplied) per
the manufacturer’s instructions.
6. Return the lavatory into position.
7. Install the lavatory mounting hardware (see Ill. 4).
A. Place a metal washer onto the screw. Do not secure the screw at this time.
B. Place the remaining metal washer onto the screw and insert the screw
through a mounting hole in the lavatory.
C. Verify the lavatory is level with the mark along the top and sides of the
lavatory and secure the lavatory to the wall by tightening screws.
Ill. 3
WARNING
Ill. 4
Installation using bracket (LT307 only)
Installation using carrier
DO NOT OVERTIGHTEN HARDWARE.
Overtightening hardware may
damage the products and cause personal injury and/or property damage.
AFTER INSTALLATION


