background image

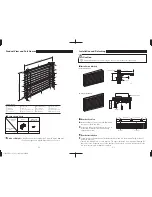
Bottom Rail

P. 6

P. 7

Installing the main unit

With the screen in the stacked position, latch 

the temporary stopper hook onto the front 

groove of the Head Rail.

Push the Head Rail in until it clicks into place.

Attaching surface

Latch onto the 

temporary 

stopper hook

Push in and up

Head Rail

Bracket

After installing the main unit, make sure the main unit is secured to the brackets.

Caution

Attaching surface

Hold in the 

release button

Pull forward

Head Rail

Bracket

Uninstalling the main unit

With the screen in the stacked position, grasp 

the main unit and hold the Bracket release 

button while pulling forward.

Remove the main unit from the temporary 

stopper hook.

Operation Methods

Caution

When removing the product from the brackets, be sure to support it with your hand.

Raising and lowering the entire screen (moving the Bottom Rail)

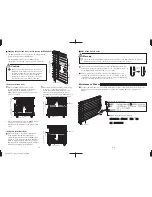
<Pull up the screen (Bottom Rail)>

Pull the Cord Joint or the Upper Operation 

Cord downwards until the Upper Screen 

(Middle Rail) is stacked all the way to the top.

Please do not raise the lower screen 
when the upper screen is in a fully 
stacked position. Otherwise, the Lift 
Cord may come off and damage may 
occur. If the Lift Cord comes off the 
upper screen during an operation 
error, pull the inner Operation Cord 
downward to lower the Bottom Rail 
and then pull the Upper Operation 
Cord down a bit to lower the Middle 
Rail and it will be released.

Caution

Bottom Rail

Upper Scr

een

Lower Scr

een

Before releasing your hand from the 

Upper Operation Cord, make sure that 

the screen is securely stopped (be 

sure that the changing movement is 

set to stop). If the changing movement 

is not set to stop, the screen may 

forcefully fall and cause injury or 

damage.

Caution

Pull the Lower Operation Cord downwards 

until the screen (Bottom Rail) is in the 

position you want and release your hand.

<Pull down the screen (Bottom Rail)>

 When raising and lowering the 

Bottom Rail, do not pull on the rear 

portion of Operation Cord. Damage 

to the product will occur.

Pull the Lower Operation Cord downwards 

until the lower screen (Bottom Rail) is in the 

position you want and release your hand.

Cor
d Joint 

(Upper Operation Cor

d)

Middle Rail

Lower Operation Cor

d

Lower Operation Cor

d

Lower Operation Cor

d

(rear portion)

Bottom Rail

Содержание Shiori 25 Cord Twin

Страница 1: ...operate this product Please provide this manual to a customer Instruction Manual Thank you for purchasing TOSO products To ensure safe use of this product please read the following thoroughly and keep this manual stored INDEX Caution 2 Product View and Part Names 4 Installation and Detaching 5 Operation Methods 7 Maintenance Sticker 9 Troubleshooting 10 Cleaning 11 ...

Страница 2: ...is product is intended for indoor use Please do not use it for outdoor purposes Locations subject to high temperatures and high humidity or areas where water may leak should be avoided Make sure to install this product horizontally Precautions upon installing the product Please read before installation Warning Caution Safety During Use Please read thoroughly Warning Please keep the cord or the cha...

Страница 3: ...r xylem only Do not use on materials other than xylem Installation and Detaching Caution Installation Method Front Attachment Ceiling Attachment Attaching surface 25 10 m m 44 44 22 m m Bracket Attaching surface 25 Bracket Indoor side Window side Bracket Position Install the Bracket in a position 40 70mm from the edges of the Head Rail If there are three or more brackets be sure to install them at...

Страница 4: ...e the lower screen when the upper screen is in a fully stacked position Otherwise the Lift Cord may come off and damage may occur If the Lift Cord comes off the upper screen during an operation error pull the inner Operation Cord downward to lower the Bottom Rail and then pull the Upper Operation Cord down a bit to lower the Middle Rail and it will be released Caution Bottom Rail Upper Screen Lowe...

Страница 5: ...d Cord Joint Upper Operation Cord When raising and lowering the Middle Rail do not pull on the rear portion of Upper Operation Cord Damage to the product will occur Pull down the Middle Rail When the Cord Joint or Upper Operation Cord is pulled downwards slightly the stopper will be released and the Middle Rail will lower If you want to stop the Middle Rail partway again pull the Cord Joint or Upp...

Страница 6: ...rate again once the pleat folds are corrected The length of time required for correction varies depending on the screen type and condition If the screen disorganization is not corrected on the first attempt leave the screen in the stacked position described in 2 above for as long as possible If the screen is disorganized adjust the pleats and raise into the stacked position Fixing screen folds tha...

Отзывы: