background image

P. 4

P. 5

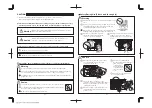
Product View and Part Names

<Cord Type>

<Drum Type>

Product width (W)

Product width (W)

Head Rail Cap
Bracket
Head Rail
Cord Outlet

Cord Joint
Lift Cord
Operation Cord
Bottom Rail Cap

Bottom Rail
Screen
Pitch Keeper Cord
Operation Pulley

Drum Operation Cord
Safety Joint
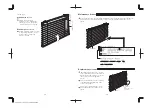
Maintenance 

Sticker

Product Weight


(Product Width 2,000 mm x Product Height 2,000 mm)

Components Parts

−1200

1210−2000
2010−        

Components

Name

Bracket

(Cord Type)

2
3
4

2
3
4

Bracket

(Drum Type)

Fixing Screw

(round head Ø3.5 x 20)

2
3
4

Product Width

(mm)

Safety Tassel

* Drum Type only

1

Cord Type

2.5 kg

Drum Type

3.2 kg

∗ 

Product weight varies slightly 
depending on the screen.

Screws provided are for xylem only. Do not use on materials other than xylem.

Installation and Detaching

Caution

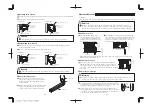
<Front Attachment>

<Ceiling Attachment>

25

(45)

10

(19)

(m/m)

44 (55)

44 (55)

22 (30)

(m/m)

Attaching surface

Attaching surface

25

(45)

∗ 

For Drum Type

4−7 cm

4−7 cm

Even interval

Even interval

Bracket

Head Rail

Bracket Position

Install the Bracket in a position 40-70mm from 

the edges of the Head Rail.
If there are three or more brackets, be sure to 

install them at intervals that are as equally 

spaced as possible.

Bracket installation

Follow the above illustrations for "Installation Method" and use the included Fixing Screws to 

install the brackets.


There is one Fixing Screw for each bracket. The above illustration is a dimensional drawing for 

the center of the elongated holes on the brackets. The brackets also have round holes, please 

use them according to installation conditions.

Pr

oduct height (H)

Pr

oduct height (H)

Product Name

Installation Method

Bracket

Bracket

Indoor side

W

indow side

Содержание Shiori 25 Cord Single

Страница 1: ...Shiori 25 Cord Single Drum Single Pleated Blind INDEX Caution 2 Product View and Part Names 4 Installation and Detaching 5 Operation Methods 7 Maintenance Sticker 9 Replacement screens 9 Troubleshooting 10 Cleaning 11 Guide for Distributors and Installation Contractors This manual contains information for a user to safely operate this product Please provide this manual to a customer ...

Страница 2: ... it for outdoor purposes Locations subject to high temperatures and high humidity or areas where water may leak should be avoided Make sure to install this product horizontally Precautions upon installing the product Please read before installation Warning Caution Safety During Use Please read thoroughly Warning Please keep the cord or the chain where children cannot reach Please avoid actions whi...

Страница 3: ...lem Installation and Detaching Caution Front Attachment Ceiling Attachment 25 45 10 19 m m 44 55 44 55 22 30 m m Attaching surface Attaching surface 25 45 For Drum Type 4 7 cm 4 7 cm Even interval Even interval Bracket Head Rail Bracket Position Install the Bracket in a position 40 70mm from the edges of the Head Rail If there are three or more brackets be sure to install them at intervals that ar...

Страница 4: ...t or the Operation Cord downwards until the screen is in the position you want and release your hand When the Bottom Rail is partially raised pull the Cord Joint or Operation Cord downwards slightly temporarily release your hand and then again pull the Cord Joint or Operation Cord until the screen is in the position you want and release your hand Pull down the Screen When the Cord Joint or Operati...

Страница 5: ...ll the front of the Drum Operation Cord 1 downwards until the screen is in the position you want and release your hand Pull down the screen Pull the rear Drum Operation Cord 2 downwards until the screen is in the position you want and release your hand SHIORI Replacement Screens are also sold so that the material can be replaced with the mechanisms left as is Perfect for redecorating or for replac...

Страница 6: ...zed adjust the pleats and raise into the stacked position Leave the screen in the stacked position for a while and operate again once the pleat folds are corrected The length of time required for correction varies depending on the screen type and condition If the screen disorganization is not corrected on the first attempt leave the screen in the stacked position described in 2 above for as long a...

Отзывы: