28
DIGITAL VIDEO RECORDER
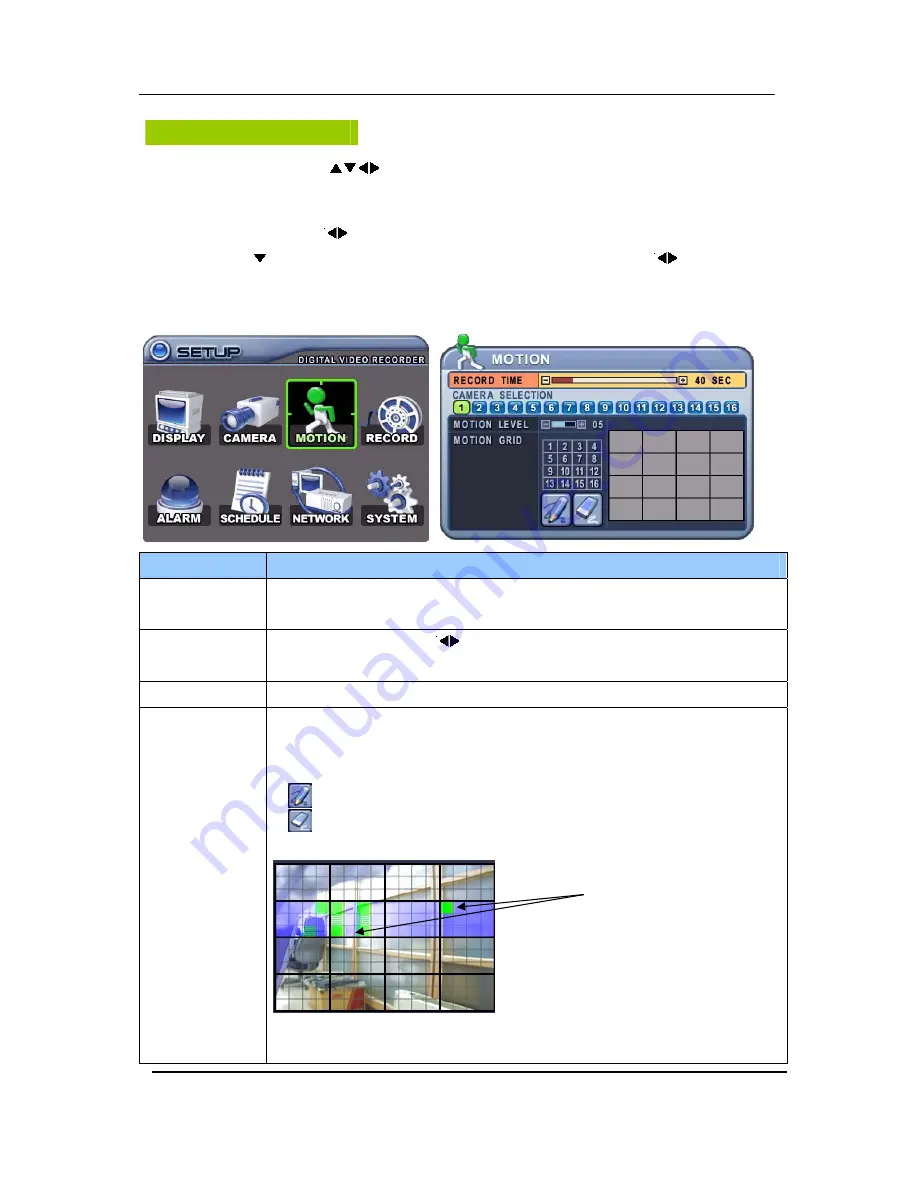
Motion Recording
1. Use Direction buttons [
] to select “MOTION” menu. Then, press [ENTER] button to
display “MOTION”.
2. Use Left/Right buttons [
] or Number button to select the Camera you wish to configure.
3. Use Down [ ] button to move specified menu and use Left/Right buttons [
] to select other
item.
4. Use [-, +] button to change the value.
ITEM
ADJUSTMENT
RECORD TIME
y
Determines the duration of recording when motion is detected.
[20SEC ~ 240SEC]
CAMERA
SECTION
y
Use Left/Right buttons [
] or Number button to select the Camera you wish
to configure.
MOTION LEVEL
y
Level 1: Low sensitivity~ Level 20: High sensitivity.
MOTION GRID
y
Use this menu to setup Zones for the motion detection The screen shown
below will overlay the current video image.
y
It is divided into 16 Grid and selected by Number button.
y
: Select All.
y
: : Clear All.
y
Motion detected zones will be changed to GREEN Color.
y
It is also possible to select smaller motion grids for more precise motion
detection by using CMS.
Motion Detected zones
Содержание M5000
Страница 62: ...61 DIGITAL VIDEO RECORDER CLIENT PROGRAM Central Management Software ...
Страница 100: ...99 DIGITAL VIDEO RECORDER 5 FTP Server Set up Set up the FTP Server for Auto Back up Refer to FTP Back up ...
Страница 106: ...105 DIGITAL VIDEO RECORDER 3 Double click Make New Connection 4 Click Next at the window of network connection wizard ...


