background image

23

Operations

22

1

Turn on the power.

Turn on the power by following the instructions in “Turning the power on” 

p.21

.

2

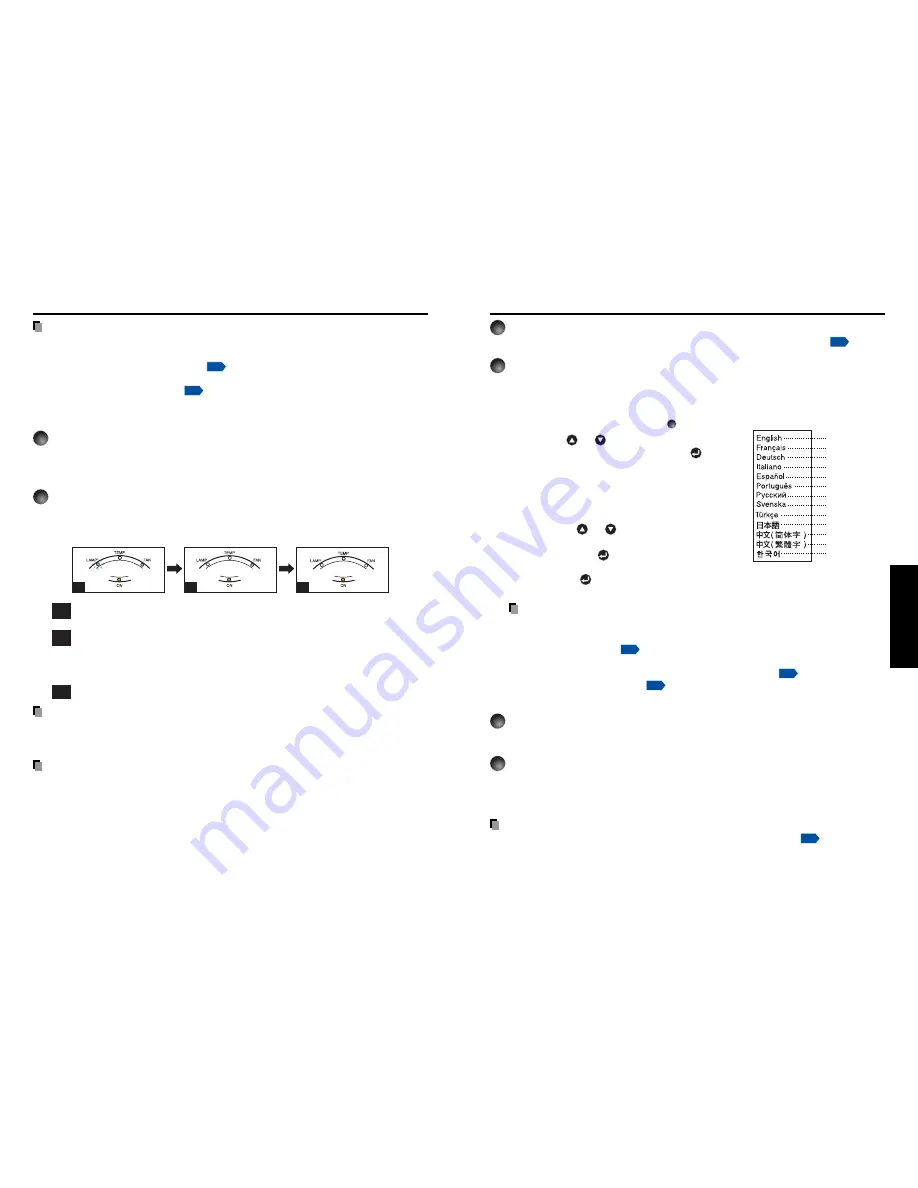
 Select the language and the lamp power (When using the

first time).

When the projector is used for the first time after purchase, menu for language and
lamp power selection and configuration is displayed in English. (If the screen is out of
focus, adjust it according to the step 

6

.)

q

Use the 

 or 

 button to select the

desired language and press the 

 button.

Message for setup confirmation is displayed in a
selected language.
Then, the menu for lamp power selection and
configuration is displayed. It is automatically set as
Standard. To change the setting, follow the step 

w

.

w

Using the 

 or 

 button, select Low or

Standard for the lamp power (menu item)
and press the 

 button.

The lamp power, if selected, will be toggled without
pressing the 

 button. The display automatically

disappears in a few seconds.

Notes

• When the projector is turned on the next time, the Language and Lamp power

menus do not appear upon startup. However, if “Reset all” is executed from the
Default setting menu 

p.31

, the Language and Lamp power menus will be

displayed the next time when the power is turned on.

• The language can also be set via the Display setting menu 

p.30

 and Lamp power

via the Default setting menu 

p.31

.

• This owner’s manual assumes that English has been selected.

3

Activate the connected device.

Turn on and start the connected device such as a computer.

4

Press the INPUT button.

An image of the connected equipment is projected.
Each time you press the INPUT button, it switches to the input of the connected
equipment.

Basic operations

Notes

• When [Auto input search] is set to [On] in the default setting menu 

p.31

, the image of

the equipment which is connected and turned on is projected.

• Moving pictures generated with the DVD software for computers may appear unnatural if

it is projected with this projector, but it is not a malfunction.

English
French
German
Italian
Spanish
Portuguese
Russian
Swedish
Turkish
Japanese
Chinese (simplified)
Chinese (traditional)
Korean

Notes

• The start-up screen will disappear after a moment. You can dismiss the start-up screen

before this by performing any operation. You can also configure the start-up screen not to
appear via the Display setting menu 

p.30

.

• The first time you use the projector after purchase, after the start-up screen disappears,

the Language menu is displayed 

p.23

.

 Turning the power off

1

Press the ON/STANDBY button.

A message appears on the screen, confirming that you wish to shut off the power. This
message will disappear after a moment. (This operation is no longer valid after the
message disappears.)

2

Press the ON/STANDBY button again.

The screen turns off, but the internal cooling fan continues to operate for a short while.
Then, the projector goes into standby mode.
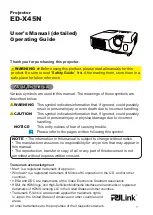
When cooling lamp

During internal cooling

After cooling complete

A

B

C

(Orange)

(Orange)

(Green)

(Green)

(Off)

(Orange)

Flashing

(Green)

(Off)

(Off)

A

During cooling, the LAMP indicator flashes. In this state, the power cannot be
turned back on.

B

After the LAMP indicator goes off, the cooling fan continues to operate for a
short while, in order to expel excess internal heat. If you are in a hurry, there is
no problem with unplugging the power cord or turning off the main power switch
in this state.

C

In standby mode

Note

• The projector consumes about 12W of power in standby. We recommend that you unplug

the power cord or turn off the main power switch if you will not be using the projector for
an extended period.

PRECAUTION

• If the power cord is unplugged before cooling is complete, give the lamp time (about 5

minutes) to cool before plugging it back in. If the lamp overheats, it may fail to light, and
its lifetime will be shortened.

Turning the power on and off (Continued)

Содержание TDP-T98

Страница 1: ...Others Maintenance Operations Preparations Before Using OWNER S MANUAL DATA PROJECTOR TDP T98 XGA ...

Страница 2: ...ause undesired operation This equipment has been tested and found to comply with the limits for a Class B digital device pursuant to part 15 of the FCC Rules These limits are designed to provide reasonable protection against harmful interference in a residential installation This equipment generates uses and can radiate radio frequency energy and if not installed and used in accordance with the in...

Страница 3: ...afeguards incorporated in this unit will protect you if you observe the following procedures for installation use and servicing This unit is fully transistorized and does not contain any parts that can be repaired by the user DO NOT REMOVE THE CABINET COVER OR YOU MAY BE EXPOSED TO DANGEROUS VOLTAGE REFER SERVICING TO QUALIFIED SERVICE PERSONNEL ONLY 1 Read Owner s Manual After unpacking this prod...

Страница 4: ...to avoid injury and contact your dealer for repair service The broken pieces of glass may cause to injury In the unlikely event of the lamp rupturing thoroughly clean the area around the projector and discard any edible items placed in that area 18 Servicing Do not attempt to service this product yourself as opening or removing covers may expose you to dangerous voltage or other hazards Refer all ...

Страница 5: ... of 20 degrees or more Using this instrument near a TV or radio may cause interference to the images or audio sound If this happens move it away from the TV or radio Moving the projector from a low temperature room to a high temperature room may cause condensation on the lens or internal parts in the instrument If you continue to use it in that situation the malfunction may result Ensure to wait u...

Страница 6: ...XGA are trademarks or registered trademarks of International Business Machines Corporation Digital Light Processing Digital Micromirror Device and DMD are trademakes of Texas Instruments Macintosh is a registered trademark of Apple Computer Inc Windows is a registered trademark of Microsoft Corporation in the U S and other countries Adobe is a registered trademark and Acrobat Reader is a trademark...

Страница 7: ...erations 23 Using handy features 25 Using auto setting 25 Cutting off the picture and sound temporarily Mute 27 Freezing the image Freeze 27 Using the menus 28 How to use the menus 28 The image adjustment menu 29 The display setting menu 30 The default setting menu 31 Displaying Information Status display 32 Maintenance About lamp 33 Lamp replacement 33 Lens and main unit cleaning 35 Others Troubl...

Страница 8: ...e on screen instructions Macintosh Run the CD ROM select the Reader English folder and run Reader Installer Follow the on screen instructions to install the software Viewing the manual Run the CD ROM and double click on Start pdf Acrobat Reader launches and the menu screen of the Owner s manual appears Click on your language The Owner s Manual cover and list of bookmarks appear Click on a bookmark...

Страница 9: ...tch AC power line ON standby OFF 13 AC IN socket Connect the supplied power cord here 14 AUDIO IN terminal Input audio signals from a computer or video equipment with a component video signal output terminal 15 Antitheft lock hole Attach a safety cable or any other antitheft device Parts on the rear panel Names of each part on the control panel and remote control Control panel Remote Control 2 3 4...

Страница 10: ...range of 1 20 m to 10 00 m H is the height from the image bottom to the center of the lens projection projection distance a m height H min length max length size inches zooming max zooming min cm 24 6 1 20 5 6 40 1 62 1 95 9 1 60 2 44 2 93 13 8 80 3 25 3 90 18 3 100 4 00 4 88 22 9 150 6 10 7 30 34 3 200 8 10 9 76 45 7 246 10 00 56 2 Operating the remote control Point the remote control toward the ...

Страница 11: ... Blue CB Red CR Conversion adapter BNC pin not supplied Monitor cable Mini D sub 15P BNC not supplied To audio output Audio cable not supplied RGB cable supplied To RGB output Computer Computer DVD video recorder etc Turning the power on and off Operations Connecting the power cord 1 Insert the power cord connector into the AC IN socket of the projector 2 Insert the power cord plug into a wall or ...

Страница 12: ...ctures generated with the DVD software for computers may appear unnatural if it is projected with this projector but it is not a malfunction English French German Italian Spanish Portuguese Russian Swedish Turkish Japanese Chinese simplified Chinese traditional Korean Notes The start up screen will disappear after a moment You can dismiss the start up screen before this by performing any operation...

Страница 13: ...ot adjuster extends Release the button to lock the position w To adjust the horizontal angle use the tilt adjuster To stow the foot adjuster hold up the projector while pressing the foot adjuster release button then slowly lower the projector 6 Adjusting the screen size and focus q Use the zooming lever to adjust the screen size w Use the focusing lever to adjust the focus Readjusting the projecti...

Страница 14: ...r the purpose of your private viewing and listening it may infringe the copyright protected by the copyright laws Remote Control Remote Control Manual adjustments and settings The menu items of the Set up menu vary depending on the input type as shown in the table below Use the buttons to adjust the items in the table below then press the RETURN button when you are finished Select Item Description...

Страница 15: ...US for other languages You can call up on screen menus and conduct a number of adjustments and settings using the operation buttons p 16 on the control panel main unit side and remote control How to use the menus The menu shown below is for operation instructions purposes and might differ from the actual display Using the menus Note Menu adjustments and settings are saved when the power is turned ...

Страница 16: ...mple at high altitude over 1 500 meters above sea level Notes Note that in the event of a power outage but the power is restored afterwards the projector power will come on if Power on is set to Auto When you turn off the projector even if Power on is set to Auto you must press the ON STANDBY button to turn the power off The display setting menu Use this menu to set screen display related items Fu...

Страница 17: ...this happens replace it with a new one WARNING If the projector is mounted on the ceiling it is recommended to use your Toshiba dealership when the lamp has to be exchanged When replacing always use lamp TLPLW3 sold separately CAUTION If you have been using the projector the lamp will be very hot and may cause burn injuries Wait for the lamp to cool for longer than 1 hour before replacing it If th...

Страница 18: ...are to avoid any damage to nails and or tip of your finger s If you have any difficulty in removal you can use a screwdriver or any other smaller tool for your convenience 4 Pull out the lamp Loosen the 2 screws holding the lamp in place and pull up the handle to remove the lamp 5 Mount the new lamp Align the orientation press down until the bottom is reached and lock in place using the two lamp l...

Страница 19: ...and projector Are there any fluorescent or other bright lights shining at the projector s infrared remote sensor The indicator lights inform you of internal abnormalities No power Problem with projector Unplug the power cord and contact your dealer The lamp cover is not properly attached Unplug the power cord and reattach the lamp cover p 34 Lamp went out during use or won t come on Lamp temperatu...

Страница 20: ...08 000 148 500 108 000 135 000 157 500 118 094 162 000 175 500 189 000 202 500 229 500 Note Signals which resolution exceeds the native resolution 1024 768 pixels will be compressed For this reason some information may be lost or image quality may be affected Specifications List of general specifications Item Specification Consumption Power 300 W Weight 2 8 kg External Dimensions 298 101 4 275 4 m...

Страница 21: ...our dealer for control cable and other commands List of supported signals Y PB PR signals Signal format fh kHz fv Hz 480i 525i 60Hz 15 73 59 94 480p 525p 60Hz 31 47 59 94 576i 625i 50Hz 15 63 50 00 576p 625p 50Hz 31 25 50 00 720p 750p 60Hz 45 00 60 00 720p 750p 50Hz 37 50 50 00 1080i 1125i 60Hz 33 75 60 00 1080i 1125i 50Hz 28 13 50 00 1035i 1125i 60Hz 33 75 60 00 1152i 1250i 50Hz 31 25 50 00 List ...

Страница 22: ......

Отзывы: