background image

22

U

s

i

n

g


t

h

e


P

r

o

j

e

c

t

o

r

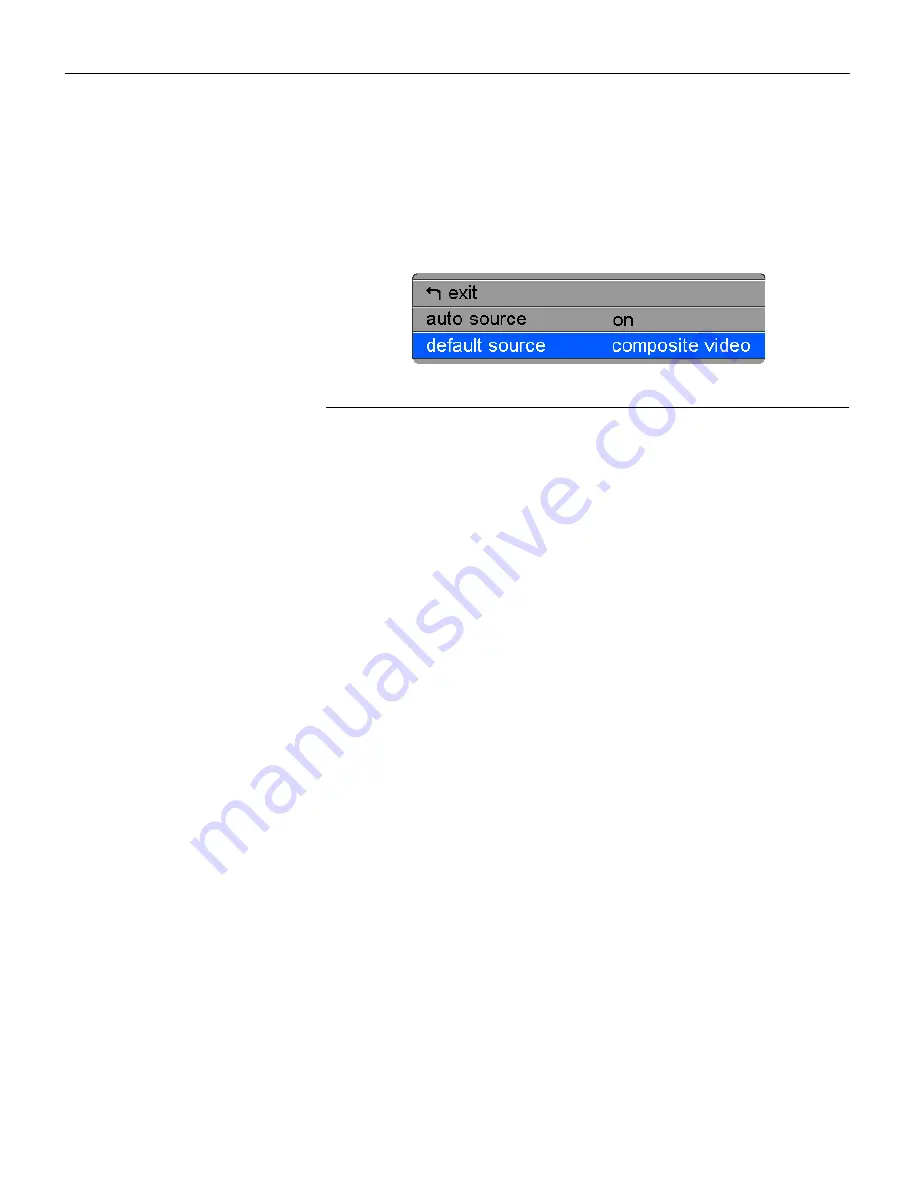
Control Menu

To access the Control menu settings, press the 

MENU

 button to 

display the Main menu, press the 

DECREMENT 

button to highlight 

Control, then press 

SELECT


to access the Control menu.

F

IGURE

 17

Control menu

Auto Source 

When this feature is On, the projector automatically finds the 
active source, checking the default source first. When this feature 
is Off, the projector defaults to the source selected in Default 
Source. To display another source, you must manually select one 
by pressing the 

SOURCE

 button on the keypad or remote. 

Highlight 

Auto source

,


press 

SELECT

, then press the 

INCREMENT

 or 

DECREMENT 

button to turn this feature off and on.

Default Source

This determines which source the projector checks first for active 
video during power-up. Select among Data-Analog, Data-Digital, 
composite video, and S-Video.
Highlight 

Default source

, press 

SELECT

, use the 

INCREMENT

 or 

DECREMENT 

button to cycle through the options, then press 

SELECT

.

Содержание TDP-P4

Страница 1: ...TDP P4 Digital Projector USER S GUIDE ...

Страница 2: ... Projector 9 Using the Projector 11 Basic Image Adjustment 11 Adjusting the Projector 11 Using the Remote Control 12 Using the Keypad and Remote Buttons 14 Using the On Screen Menus 16 Display Menu 17 Image Menu for Computer Sources 19 Image Menu for Video Sources 21 Control Menu 22 Advanced Menu 23 Language Menu 24 Status Menu 25 Maintenance Troubleshooting 27 Cleaning the Lens 27 Replacing the P...

Страница 3: ...ii T a b l e o f C o n t e n t s Appendix 35 Specifications 35 Accessories 36 Portable and Laptop Activation Chart 38 Using Video Mirroring with a PowerBook Computer 43 Projected Image Size 44 Index 45 ...

Страница 4: ...ols Attention For information about usage of a feature please refer to the User s Guide Warning Hot surface Do not touch An arrow pointing to the lamp door on the projector Safety Terms Warning Don t look directly into the lens when the projector is turned on Warning To replace the lamp turn the projector off and unplug the power cord To avoid burns wait 30 min utes before opening the lamp access ...

Страница 5: ... refer to your Toshiba dealer or projectors toshiba com for more information Important Operating Considerations Do not place the projector on a tablecloth or other soft covering that may block the vents In the unlikely event of the bulb ruptur ing thoroughly clean the area in front of the projector and dis card any edible items placed in that area Customer Service Please contact your Toshiba deale...

Страница 6: ...1024 If your computer s screen resolution is higher than 1280x1024 reset it to a lower resolution before you connect the projector Compatibility The projector is compatible with a wide variety of computers and video devices including IBM compatible computers including laptops up to 1280x1024 resolution Apple Macintosh and PowerBook computers up to 1280x1024 resolution NOTE The projector is compati...

Страница 7: ...ing box contents 1 TDP P4 digital projector lens cap 5 Remote control 2 Soft carry case 6 Analog computer cable 3 User s Guide Quick Start card and CD 7 Composite video cable 4 Power cord 8 S video cable 9 Macintosh adapter 1 2 3 4 5 6 7 8 9 ...

Страница 8: ...components Be especially careful not to drop it Avoid leaving the projector in direct sunlight or extreme cold for extended periods of time If this happens allow it to reach room temperature before use Transport the projector in a vendor approved hard or soft case Part numbers for these cases are listed on page 37 If You Need Assistance The first place to look for help is in this manual Be sure to...

Страница 9: ...ection on page 23 to reverse the image 2 Position the projector the desired distance from the screen If the image is too big or too small use the zoom ring to adjust the size or move the projector forward or backward Figure 3 shows three projected image sizes For more infor mation about image size see Projected Image Size on page 44 FIGURE 3 Projected image size at minimum zoom 3 Make sure the pro...

Страница 10: ...ke sure the distance between it and the projector is 6 feet or less FIGURE 4 Connector panel FIGURE 5 Computer cable NOTE If you are connecting an older Macintosh computer that does not have a 15 pin connector use the Mac adaptor between the computer and the projector in video power switch computer power cord to computer video to projector to computer to USB mouse ...

Страница 11: ... exter nal video port Activation com mands for some laptop computers are listed in the Appendix of this manual on page 38 and in the Service section of our website 2 Plug the blue end of the computer cable into the video connec tor on your computer 3 If you want to advance slides in a PowerPoint presentation using the remote plug the USB cable into the USB mouse con nector on your computer FIGURE ...

Страница 12: ...ut connector on your video player Figure 7 This connec tor may be labeled To Monitor If you re using an S video cable plug one end of the S video cable the S video out connector on the video player 2 Plug the other end of the cable into the appropriate video con nector on the projector FIGURE 7 Connecting the projector to a video player using a composite video cable CAUTION Your video player may a...

Страница 13: ...ress the SOURCE button on the keypad or remote to display your video image 5 Turn on your computer The computer image should display on the projection screen If it doesn t press the SOURCE button on the keypad or remote to display your computer s image NOTE With some computers the order in which you power up the equipment is very important Most computers should be turned on last after all other pe...

Страница 14: ... by adjusting its horizontal or vertical position page 20 Be sure the projector is at a 90 degree angle to the screen 3 If the image is out of focus rotate the focus lens page 11 4 If the colors don t look right adjust the brightness contrast tint or color page 17 Adjusting the Projector To focus the image rotate the focus ring Figure 8 until the image is clear To zoom the image rotate the zoom ri...

Страница 15: ...you must connect the mouse connector on the computer cable to the computer See page 7 for details The projector ships with a remote that has four function buttons a disk mouse and two mouse buttons one on the top of the remote and one on the bottom Point the remote control at the projection screen or at the front of the projector not at the computer The range for optimum oper ation is about 25 fee...

Страница 16: ...n See Using the Keypad and Remote Buttons starting on page 14 for a description of the four function buttons If you are creating presentations in Microsoft PowerPoint you can use the remote s mouse buttons to navigate through your presentation while in Slide Show mode To configure PowerPoint for this choose Options from the Tools menu click the View Tab de select the Popup Menu on Right Mouse Clic...

Страница 17: ... source The sources switch in this order data analog data digital S video and composite video Press the MENU button to open the on screen menus Press MENU again while Exit is highlighted to close the menus The menus automatically close after 30 seconds if no buttons are pressed When you close the menus the projector saves any changes you made For more information about the on screen menus see page...

Страница 18: ... the keystone button to reduce the upper part of the image and press the keystone button to reduce the lower part You can also adjust keystone from the Display menu see page 17 for details on the menu FIGURE 12 Adjusting the keystone iNCREMENT DECREMENT buttons Use these buttons to navigate through and make adjustments to the on screen menus See Using the On Screen Menus on page 16 for details inc...

Страница 19: ...buttons and the MENU button to a SELECT button Press the DECREMENT button to move the cursor down and press the INCREMENT button to move the cursor up The selected menu is highlighted FIGURE 13 Main menu To change a menu setting use the INCREMENT and DECREMENT buttons to move the cursor up and down to the item you want to change the selected item is highlighted then press SELECT When an item is se...

Страница 20: ...just the image vertically and make a squarer image See page 15 for details on keystone adjustments 1 Press the DECREMENT button to highlight Keystone then press SELECT Use the INCREMENT and DECREMENT buttons to adjust the keystone setting Press SELECT to accept your changes Brightness Adjusting the brightness changes the intensity of the image 1 Use the INCREMENT and DECREMENT buttons to highlight...

Страница 21: ...ts the red green color balance in the projected image 1 Highlight Tint press SELECT use the INCREMENT and DECRE MENT buttons to adjust the tint then press SELECT to accept your changes Color The color setting adjusts a video image from black and white to fully saturated color 1 Highlight Color press SELECT use the INCREMENT and DECRE MENT buttons to adjust the color then press SELECT to accept you...

Страница 22: ...k bars appear at the top and bottom of the image Enhanced Wide screen also preserves the aspect ratio of the original theater ver sion and is designed to be used with content that is Enhanced for Widescreen TVs This option yields more detail than Widescreen Letterbox Native reduces the Standard size to match the height of Enhanced Widescreen Highlight Resize press SELECT use the INCREMENT or DECRE...

Страница 23: ...y NOTE The Manual Sync Manual Tracking Horizontal Position and Vertical Position options are available only for analog computer sources The projector sets these options automatically for digital computer and video sources with no manual override 1 Turn Auto image off 2 Highlight Manual tracking press SELECT use the INCREMENT and DECREMENT buttons to adjust Manual tracking until the fuzzy vertical ...

Страница 24: ...s This option yields more detail than Widescreen Letterbox Native reduces the Standard size to match the height of Enhanced Widescreen Highlight Resize press SELECT use the INCREMENT or DECRE MENT button to cycle through the options then press SELECT Video Standard video sources only When Video is set to Auto the projector attempts to pick the video standard NTSC NTSC 4 43 PAL or SECAM automati ca...

Страница 25: ...re is Off the projector defaults to the source selected in Default Source To display another source you must manually select one by pressing the SOURCE button on the keypad or remote Highlight Auto source press SELECT then press the INCREMENT or DECREMENT button to turn this feature off and on Default Source This determines which source the projector checks first for active video during power up S...

Страница 26: ...nced menu Rear Projection When you turn Rear Projection on the projector reverses the image so you can project from behind a translucent screen Highlight Rear Projection press SELECT then press the INCRE MENT or DECREMENT button to turn this feature off and on Reset Highlight Reset then press SELECT to reset the options in the menus except Language Video Standard and Rear Projection to their origi...

Страница 27: ...German Spanish Chinese or Japanese 1 Press the MENU button to display the Main menu press the DECREMENT button to highlight Language then press SELECT to access the Language menu 2 Press the INCREMENT or DECREMENT button to highlight the desired language then press SELECT Press SELECT to exit this menu and return to the Main menu ...

Страница 28: ...eplace the bulb when the brightness is no longer accept able See Replacing the Projection Lamp on page 27 for details Computer resolution Shows your computer s resolution setting To change this go to your computer s Control Panel and adjust the resolution in the Display tab See your computer s user s guide for details Source Indicates the active source Data Analog Data Digital Compos ite video or ...

Страница 29: ...ver the lens in a circular motion 3 If you don t intend to use the projector immediately replace the lens cap Replacing the Projection Lamp WARNING To avoid burns allow the projector to cool for at least 30 minutes before you open the lamp access grill Never extract the lamp module while the projector is operating The lamp hour counter in the Status menu counts the number of hours the lamp has bee...

Страница 30: ...tremely careful when removing the lamp module In the unlikely event that the bulb ruptures small glass fragments may be generated The lamp module is designed to contain these fragments but use caution when removing the lamp module FIGURE 21 Disengaging and removing the lamp access grill CAUTION Never operate the projector with the lamp access grill removed This disrupts the air flow and causes the...

Страница 31: ...e screw on the lamp module 6 Grasp the pull tab to pull the lamp module out Dispose of the lamp module in an environmentally proper manner WARNING Do not drop the lamp module or touch the glass bulb The glass may shatter and cause injury FIGURE 24 Removing the lamp module ...

Страница 32: ...om case and sliding the grill in the direction of the arrows on the bottom case 11 Plug in the power cord and press the Power switch to turn the projector back on 12 To reset the lamp hour counter in the Status menu press and hold the RESYNC button then press the MENU button while still holding down the RESYNC button for 10 seconds Verify that the counter was reset by pressing the MENU button and ...

Страница 33: ... and dispose of them in an environ mentally proper manner 4 Install two new AAA alkaline batteries Make sure you install each in the correct direction 5 Insert the hooks on the battery door into the remote and press the tab to re install the door Using the Security Lock NOTE The lamp cannot be removed while the security lock is attached The projector has a security connector for use with a PC Guar...

Страница 34: ...he lamp module Make sure the lamp access grill is installed See Replacing the Projection Lamp on page 27 Problem Only the start up screen displays Verify that the cables are connected correctly See page 7 for connection procedures Make sure that the cables do not have any bent pins Verify that the proper input source is connected See SOURCE on page 14 You might need to turn everything off and powe...

Страница 35: ...the image Reposition the image using the menu Refer to Horizontal Position on page 20 and Vertical Position on page 20 Be sure the projector is at a 90 degree angle to the screen Problem Image is too wide or narrow for screen Adjust the zoom or projector placement Adjust the resolution of your video card if it s greater than 1280x1024 Problem Image is out of focus Turn the projection lens to focus...

Страница 36: ...differences between the computer image and the projected image Adjust the brightness tint and or contrast from the Display menu See Brightness on page 17 Tint on page 18 and Contrast on page 18 Problem Lamp seems to be getting dimmer The lamp begins to lose brightness when it has been in use for a long time Replace the lamp as described in Replacing the Projection Lamp on page 27 Problem Lamp shut...

Страница 37: ...on operating 4 to 158 F 20 to 70 C Altitude Operating 0 to 10 000 feet 3 048 meters Non operating 0 to 20 000 feet 6 096 meters Humidity Operating and non oper 10 to 95 relative humidity non condensing Dimensions 6 25 x 8 25 x 2 inches 15 9 x 21 0 x 5 1 cm Weight 2 9 lbs 1 33 kg unpacked Optics Focus Range 4 9 13 feet 1 5 4 m Lamp Type 120 watt UHP lamp Input Power Requirements 100 120VAC 2A 50 60...

Страница 38: ...dard Accessories ship with the projector Quick Start card User s Guide Soft Case Shipping Box Analog Computer Cable 6 ft 1 8 m Composite RCA Video Cable 6 ft 1 8 m S video Cable 6 ft 1 8 m Remote Projection Lamp Module included in projector Lens Cap Macintosh Adaptor Online User s Guide CD ROM North American Power Cord Australian Power Cord UK Power Cord European Power Cord Japanese Power Cord ...

Страница 39: ...37 Optional Accessories Deluxe Travel Case Executive Leather Case Hard Travel Elite Porter Case Projection Lamp Module Digital Computer Cable PC Guardian Projector Cable Lock ...

Страница 40: ...external video port pressing it again activates both the external and internal ports and pressing it a third time activates the internal port Refer to your computer s documentation for details on your specific model Computer Key command to activate port Key command to de activate port Toshiba Ctrl Alt End Ctrl Alt Home FN End FN Home FN F5 FN F5 setup screen option setup screen option Acer Ctrl Al...

Страница 41: ...or setup option mode for setup option Compuadd automatic automatic Alt F for screen setup option Alt F for screen setup option Data General Ctrl Alt Command Ctrl Alt Command Data General Walkabout 2 CRT X at DOS prompt reboot Datavue Ctrl Shift M Ctrl Shift M DEC FN F5 FN F5 FN F4 FN F4 Dell Ctrl Alt Ctrl Alt Ctrl Alt F10 Ctrl Alt F10 FN F8 CRT LCD FN F8 FN D FN D FN F12 FN F12 Digital automatic r...

Страница 42: ...ot IBM ThinkPad reboot enter setup menu FN F2 FN F7 select choice from setup menu FN F1 select choice FN F5 select choice PS 2 SC select choice CRT LCD etc Infotel FN F12 FN F12 Kaypro boot up monitor plugged in unplug monitor Kris Tech FN F8 FN F8 Leading Edge FN T FN T Mac Portable 100 no video port not compatible Mac PowerBook 140 145 150 170 no video port requires a 3rd party interface 160 165...

Страница 43: ...0 Ctrl Alt Ctrl Alt Panasonic FN F2 FN F2 Prostar Ctrl Alt S at bootup Ctrl Alt S at bootup Samsung setup screen option setup screen option Sanyo setup screen option setup screen option Sharp dip switch to CRT dip switch to LCD Sun SPARC Dataview Ctrl Shift M Ctrl Shift M Tandy Ctrl Alt Insert Ctrl Alt Insert setup screen option setup screen option Tangent FN F5 FN F5 Texas Instru ments setup scre...

Страница 44: ...anufacturers offer more than one key command depend ing on the computer model Twinhead FN F7 FN F7 FN F5 FN F5 Automatic Automatic WinBook Ctrl Alt F10 Ctrl Alt F10 Wyse software driven software driven Zenith FN F10 FN F10 FN F2 FN F2 FN F1 FN F1 Zeos Ctrl Shift D FN F1 Ctrl Shift D FN F1 Computer Key command to activate port Key command to de activate port ...

Страница 45: ...ors control panel again When using video mirroring and high color graphics such as slide shows the projected image occasionally might turn black and white If this happens perform the following steps 1 Turn off video mirroring 2 Open the Monitors control panel 3 Move the white menu bar to Monitor 2 to set the projector as the primary monitor 4 Restart the PowerBook Using SimulScan Some newer PowerB...

Страница 46: ...screen for a given screen size Diagonal Screen Size inches Distance to screen Image Width inches Maximum distance feet Minimum Distance feet 60 48 8 5 6 9 72 58 10 2 8 3 84 67 11 9 9 7 90 72 12 7 10 4 100 80 14 1 11 6 120 96 17 0 13 9 150 120 21 2 17 4 50 100 150 200 250 5 10 0 15 20 25 30 Diagonal Image Size inches Distance to Screen feet maximum image size minimum image size ...

Страница 47: ...e 14 C cables computer cable 2 6 7 ordering 36 power 36 video 8 cases ordering 36 centering the image 12 20 cleaning the projection lens 27 color adjusting 18 colors don t match monitor colors 34 not displayed 33 compatibility IBM compatible 1 Macintosh 1 computer cable 2 6 7 computers compatible 1 connecting 7 connecting computer 7 power cord 9 video player 8 contrast adjusting 18 Control menu op...

Страница 48: ...Image menu options Auto Image 19 Horiz Position 20 Manual Sync 20 Manual Tracking 20 Resize 19 Vert Position 20 Video Standard 21 K keypad 14 keystone adjustment 15 L lamp ordering 36 37 replacing 27 turns off unexpectedly 34 lamp hour counter 25 27 30 Language menu 24 language selecting for menus 24 laptop computers activation sequence to allow secondary display 38 compatibility 7 connecting 7 LE...

Страница 49: ...elines iii security lock 31 37 shutting off the projector 9 SimulScan using with PowerBooks 43 Source button 14 specifications 35 starting up the projector 9 Status menu 25 S video connecting 8 T TDP P4 cases 36 project from behind the screen 23 setting up 5 specifications 35 turning off 9 turning on 9 Technical Support information to have on hand before you call 34 temperature limits 35 text not ...

Страница 50: ...e instruction manual may cause harmful interference to radio communi cations Operation of this equipment in a residential area is likely to cause harm ful interference in which case the user will be required to correct the interference at his own expense Canada This Class A digital apparatus complies with Canadian ICES 003 Cet appareil numérique de la classe A est conforme à la norme NMB 003 du Ca...

Страница 51: ...00 3 2 EN 61000 3 3 Directive 73 23 EEC Amended by 93 68 EEC Safety EN 60950 1992 A1 A2 A3 A4 1997 March 2001 Trademarks Apple Macintosh and PowerBook are trademarks or registered trademarks of Apple Computer Inc IBM and PS 2 are trademarks or registered trademarks of International Business Machines Inc Microsoft PowerPoint and Windows are trademarks or registered trademarks of Microsoft Corporati...

Отзывы: