16
LANGUAGE/
üáúIK
AV2
[AV]
[G]
LANGUAGE/
üáúIK
AV2
[AV]
[K]
Preparation:
• Turn ON the TV and set to the AV input mode.
• Press VCR to select the VCR mode. (The VCR indicator will light.)
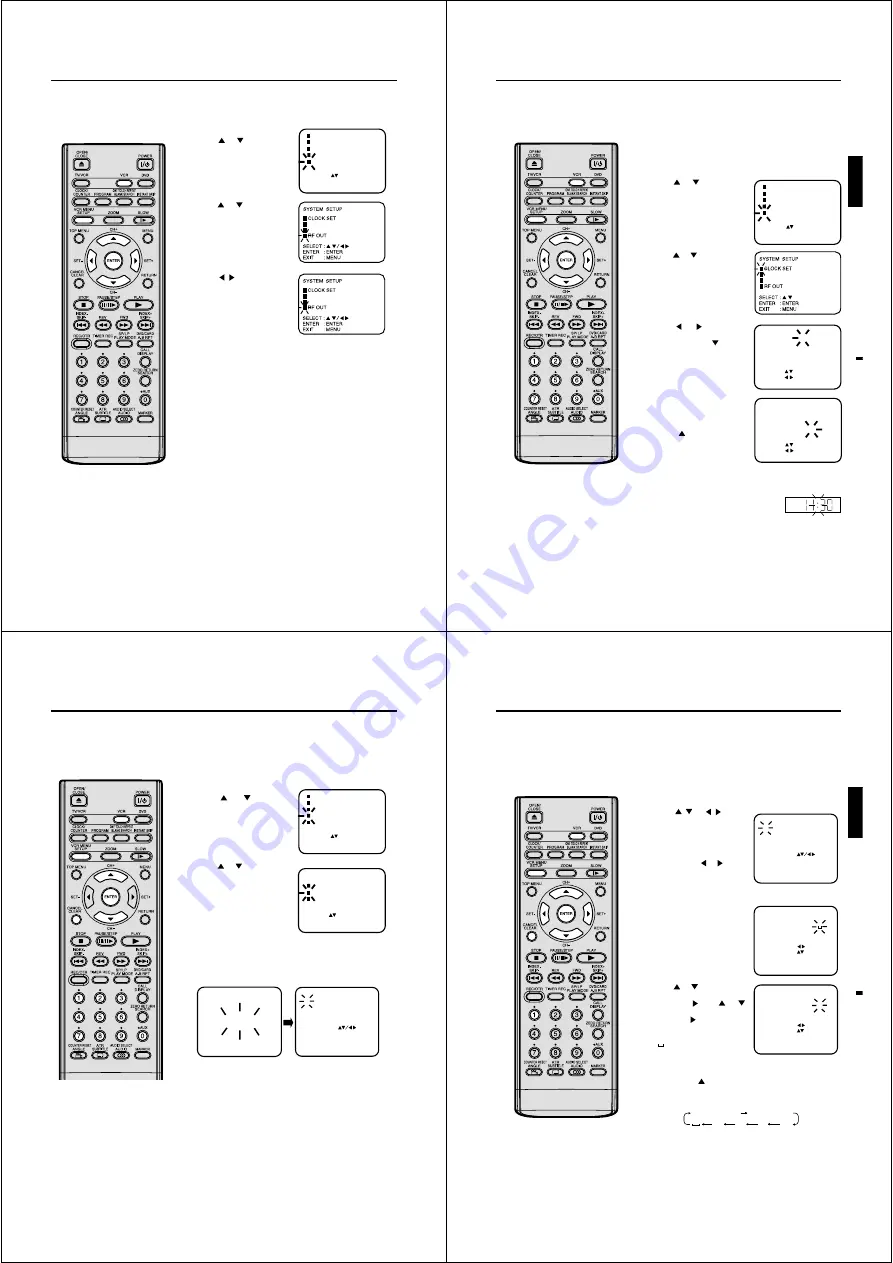
Sound system selection
1
Press VCR MENU.
Press
or
to select
SYSTEM SETUP, then press
ENTER.
2
Press
or
to select RF
OUT.
3
Press
/
or ENTER to se-
lect the Sound System [G], [K]
or [I] according to your TV set.
Set the Sound System according to
your TV set or residential area.
4
Press VCR MENU repeatedly to return to the normal screen.
17
ENGLISH
LANGUAGE/
üáúIK
AV2
[AV]
[K]
4
Clock setting
2
3
1
5
6
CLOCK SET
DAY
SAT
29
MONTH
YEAR
TIME
10
2005
11:30
SELECT :
SET
:
OK
: ENTER
EXIT : MENU
/ 0-9
7
VCR
Your DVD/VCR is fitted with a 24 hour
clock.
You must set the date and time for
timer recordings.
Note:
In case of a power failure, the clock will
continue to operate for another 30 min-
utes with quartz-controlled precision. To
indicate that the power failure has lasted
for an excessive period of time "--:--" will
appear on the display. In this case reset
time and date.
Preparation:
• Turn ON the TV and set to the AV input mode.
• Press VCR to select the VCR mode. (The VCR indicator will light.)
Example: Setting the clock to "11:30" October, 29 (SAT), 2005.
Press VCR MENU. The VCR menu screen will appear.
If the clock is not set, SYSTEM SETUP menu of step 3 will appear
automatically.
Press
or
to select SYS-
TEM SETUP, then press EN-
TER.
Press
or
to select CLOCK
SET, then press ENTER.
Press
or
repeatedly or
number buttons until “29” ap-
pears. Then press
.
Set the month, year, hour and
minute as in step 4.
Then press ENTER.
• In case of an erroneous input,
press
to go back to previ-
ous step and enter again.
Press VCR MENU repeatedly until the TV picture appears on
the screen.
The clock will begin operation.
CLOCK SET
DAY
SAT
29
MONTH
YEAR
TIME
1
2005
0:00
SELECT :
SET
:
OK
: ENTER
EXIT : MENU
/ 0-9
18
3
Automatic TV station presetting
2
1
4
Your DVD/VCR has one built-in tuner
to receive the broadcast. Before you
record any TV-Broadcast, you must
set and preset the whole of the broad-
casts. This DVD/VCR can preset up
to 80 broadcast.
Automatic station presetting
All stations will preset in sequence available in your area.
Preparation:
• Turn ON the TV and set to the AV input mode.
• Press VCR to select the VCR mode. (The VCR indicator will light.)
Press VCR MENU.
Press
or
to select
CHANNEL SETUP. Then
press ENTER.
Press
or
to select AUTO
TUNING.
Press ENTER.
The DVD/VCR will begin searching and storing all the channels
available in your area (VHF-L, VHF-H, UHF). While setting chan-
nels, AUTO TUNING appears. When the automatic scanning has
finished, the CHANNEL MAPPING menu will appear.
Press VCR MENU repeatedly until the TV picture appears on
the screen.
Note: To cancel skipping, select the skipped channel using number
buttons, then press CANCEL. The channel No. will stop blinking,
and the channel No. can be selected again using CH +/–.
To skip a channel position
Unwanted channels can be skipped so that they cannot be called up
by pressing CH +/–. Select the 29, then press CANCEL. This chan-
nel’s number will be flashing. That way you can cancel further chan-
nel one after the other.
Notes:
• TV reception interference or power fail-
ure may result in Automatic station pre-
setting malfunctions. In such a case
repeat the setting procedure from the
beginning.
However, you cannot receive the nec-
essary broadcast yet, try to preset the
broadcast manually. (See page 22.)
• When the unit is in the auxiliary input
mode, you cannot preset channels.
19
ENGLISH
A, B, C, ... X, Y, Z 0, 1, 2, ... 7, 8, 9
– + / •
1
2
3
4
5
Mapping TV stations
Preparation:
• Turn ON the TV and set to the AV input mode.
• Press VCR to select the VCR mode. (The VCR indicator will
light.)
Example: MTV is assigned to station No. 10, but the code “MTV” will
not be displayed and will also not appear in the table.
Select the “CHANNEL MAPPING” in Menu-screen in the same
way as the steps 1 ~ 2 on page 18. Then press ENTER.
Press
/
or
/
repeat-
edly until the station number
position to be named blink.
• If you want to turn over the
page when the blinking spot is
in the left or right edge of on-
screen, press
or
repeat-
edly until the next page's 12
stations appears.
Press number button “1”.
The first display line will change
to “CHANGE BROADCAST
NAME”.
Press
or
repeatedly until
the desired character appears.
Then press
. Use
or
to select the next character.
Then press
. Up to four char-
acters can be used to create a
station name. The character
“ ” stands for a space.Then
press ENTER.
Each press of
will change the screen display as follows.
Press VCR MENU repeatedly until the TV picture appears on
the screen.
Changing TV station names
For a number of TV stations (such as
MTV) no name code will be displayed
because these TV stations do not
provide the necessary information.
You can enter the respective names
yourself. Moreover, unwanted station
codes can be changed by the user.
Note:
When a wrong character is entered,
press CANCEL and enter the correct
character.
Содержание SD46VSR
Страница 111: ......


