background image

43

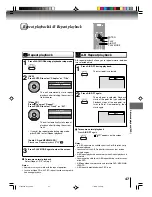
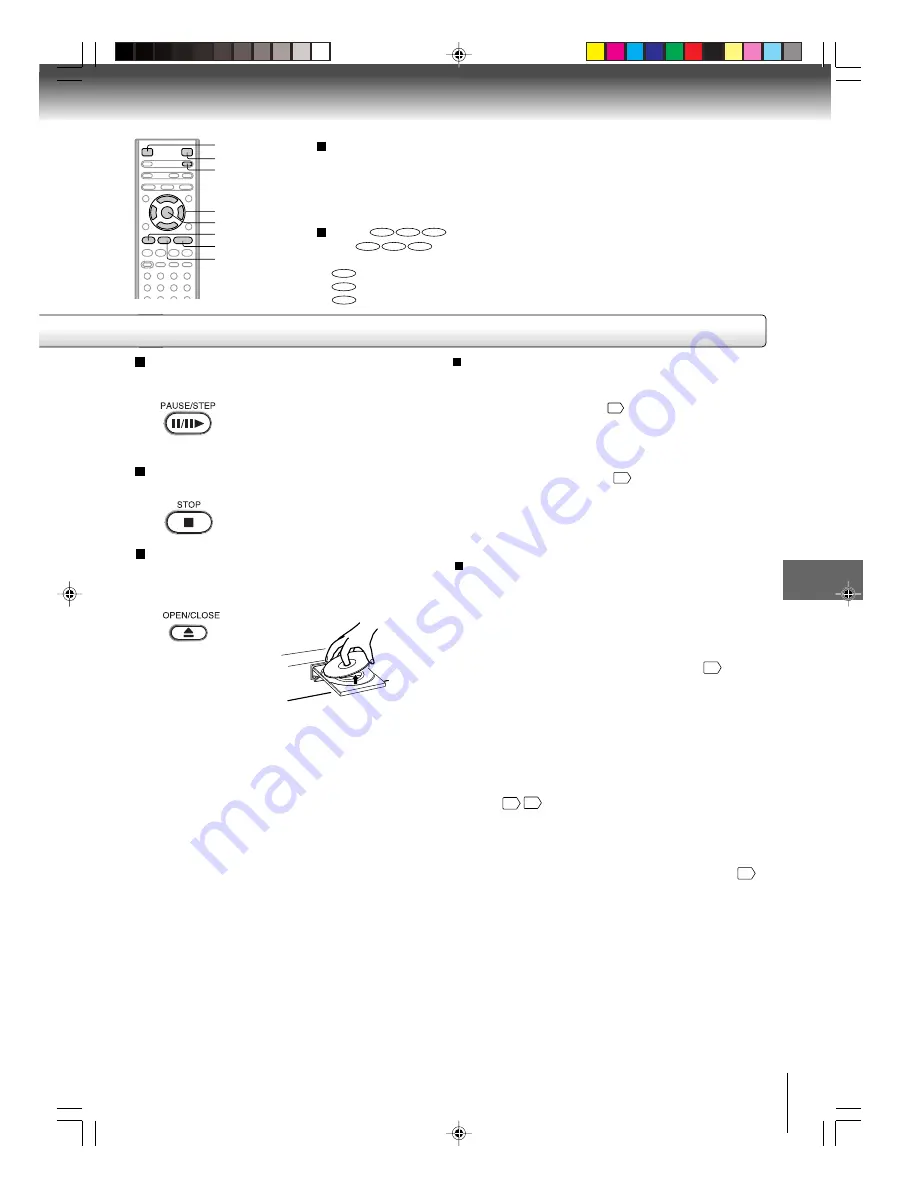
To pause playback (still mode)

Press 

PAUSE/STEP

 during playback.

To resume normal playback, press

PLAY

.

• The sound is muted during still

mode.

To stop playback

Press 

STOP

.

Notes:

• If a non-compatible disc is loaded, “Incorrect Disc”, “Region Code Error” or “Parental Error” will appear on the TV screen

according to the type of loaded disc. In this case, check your disc again 

8


61

.

• Some discs may take a minute or so to start playback.
• When you set a single-faced disc label downwards (i.e. the wrong way up) and press 

OPEN/CLOSE

 or 

PLAY

 on the unit,

“Reading” will appear on the display for a few minutes and then “Incorrect Disc” will continue to be displayed.

Some discs may not work the resuming facility.

• Resuming cannot function when you play a PBC-featured Video CD while the PBC is on. To turn off the PBC, see page 

51

.

• Some playback operations of DVDs may be intentionally fixed by software producers. Since this unit plays DVDs according to

the disc contents the software producers designed, some playback features may not be available. Also refer to the
instructions supplied with the DVDs.

• Do not move the unit during playback. Doing so may damage the disc.
• Use the 

OPEN/CLOSE

 to open and close the disc tray. Do not push the disc tray while it is moving. Doing so may cause the

unit to malfunction.

• Do not push up on the disc tray or put any objects other than discs on the disc tray. Doing so may cause the unit to

malfunction.

• In many instances, a menu screen will appear after playback of a movie is completed. Prolonged display of an on-screen

menu may damage your television set, permanently etching that image onto its screen. To avoid this, be sure to press

POWER

 on your remote control once the movie is completed.

• There may be a slight delay between the button is pressed and the function activates.

To obtain a higher quality picture

Occasionally, some picture noise is not usually visible on the TV screen during a
normal broadcast while playing a DVD video disc. It is because due to high
resolution pictures on these discs which include a lot of information. The amount
of noise depends on the TV you use with this unit. You should generally reduce
the sharpness adjustment on your TV when viewing DVD video discs.

About


DVD

VCD

CD

The 

DVD

VCD

CD

 icons on the heading bar show the playable discs for the

function described under that heading.

DVD

 : You can use this function with DVD video discs.

8+,

 : You can use this function with Video CDs.

CD

 : You can use this function with Audio CDs and CD-R/RW CDs.

Screen saver function

The screen saver operates when you leave the unit in
DVD stop mode for approx. five minutes.
The screen will repeatedly get dark gradually and back
to normal.
Please press any button when you want to return to an
usual screen.
To turn on or off the screen saver, see page 

60

.

OPEN/CLOSE

STOP

PAUSE/STEP

PLAY

To remove the disc

Press 

OPEN/CLOSE

.

Remove the disc after the disc tray
opens completely.

Be sure to press 

OPEN/CLOSE

 to close the disc tray

after you remove the disc.

POWER

ENTER

C

/

D

/

B

/

A

Playing a Disc while the VCR section is recording
or standing by for timer recording

1) Start to record.

Follow steps 1~5 on page 

34

.

• If the DVD/VCR is standing by for recording, turn on

the DVD/VCR.

2) Press 

VCR DVD

 selector to select DVD mode.

3) Play a disc.

Follow steps 3 ~ 5 on page 

.

• Press 

PLAY

 if the DVD/VCR does not start to play a

disc automatically.

4) Stop playback.

Press 

STOP

 to stop playing a disc.

Basic pla

ybac

k (D

VD)

VCR DVD

 2I30201B-En_p42-45

1/13/06, 2:49 PM

43

Содержание SD-KV550

Страница 1: ...KV550SU OWNER S MANUAL 2006 Toshiba Corporation This device does not tape record copy protected DVD Video Discs Connections Basic setup VCR Playback VCR Recording VCR Other functions VCR Basic playback DVD Advanced playback DVD Function setup DVD Others 2I30201B En_cov 1 13 06 2 46 PM 1 ...

Страница 2: ... the dealer or an experienced radio TV technician for help CAUTION Changes or modifications not expressly approved by the partly responsible for compliance with the FCC Rules could void the user s authority to operate this equipment CAUTION THIS DIGITAL VIDEO PLAYER EMPLOYS A LASER SYSTEM TO ENSURE PROPER USE OF THIS PRODUCT PLEASE READ THIS USER S GUIDE CARE FULLY AND RETAIN FOR FUTURE REFERENCE ...

Страница 3: ...and to protect it from overheating These openings must not be blocked or covered The openings should never be blocked by placing the unit on a bed sofa rug or other similar surface This unit should never be placed near or over a radiator or heat source This unit should not be placed in a built in installation such as a bookcase or rack unless proper ventilation is provided and or the manufacturer ...

Страница 4: ... NFPA 70 provides information with respect to proper grounding of the mast and supporting structure grounding of the lead in wire to an antenna discharge unit size of grounding conductors location of antenna discharge unit connection to grounding electrodes and requirements for the grounding electrode EXAMPLE OF ANTENNA GROUNDING AS PER THE NATIONAL ELECTRICAL CODE ANTENNA DISCHARGE UNIT NEC SECTI...

Страница 5: ...ken and may cause serious personal injury and product malfunction 26 NOTE TO CABLE TV SYSTEM INSTALLER This reminder is provided to call the Cable TV system installer s attention to Article 820 40 of the NEC that provides guidelines for proper grounding and in particular specifies that the cable ground shall be con nected to the grounding system of the building as close to the point of cable entry...

Страница 6: ...R If you use a chemical saturated cloth to clean the unit follow that product s instructions Note on moisture condensation Moisture condensation damages the DVD VCR Please read the following carefully Moisture condensation occurs for example when you pour a cold drink into a glass on a warm day Drops of water form on the outside of the glass In the same way moisture may condense on the head drum o...

Страница 7: ...Each title chapter or track is assigned a number which is called title number chapter number or track number respectively There may be discs that do not have these numbers Notes on copyright The unauthorized recording use distribution or revision of television programs videotapes DVDs and other materials is prohibited under the Copyright Laws of the United States and other countries and may subjec...

Страница 8: ...er s manual may not work with some discs Playable discs This DVD VCR can play the following discs You cannot play discs other than those listed above You cannot play discs of DVD RAM DVD ROM Photo CD etc or non standardized discs even if they may be labeled as above Some CD R RWs cannot be played back depending on the recording conditions This DVD VCR uses the NTSC color system and cannot play DVD...

Страница 9: ...k 31 Convenience function 32 Playback VCR Setting the video channel 22 Setting the language 23 Clock setting 24 Tuner setting 27 Basic setup VCR Playing a disc 42 Basic playback DVD Advanced playback DVD Zooming 45 Locating desired scene 45 Marking desired scenes 46 Repeat playback 47 A B Repeat playback 47 Program playback 48 Random playback 48 Changing angles 49 Title selection 49 DVD menu 49 Ch...

Страница 10: ...emote sensor 13 VCR mode indicator DVD mode indicator 42 22 DVD S VIDEO OUT jack 19 DVD AUDIO L R OUT jacks 19 DVD COAXIAL DIGITAL AUDIO OUT jack 20 DVD COMPONENT OUT jacks 19 ANT OUT jack 14 ANT IN jack 14 AUDIO L R VIDEO IN LINE IN1 jacks 40 DVD VCR common AUDIO L R VIDEO OUT jacks 18 AC power cord 5 Cassette loading slot 29 VCR DVD mode selector button 22 STOP button 30 PLAY button 30 REV butto...

Страница 11: ...l appear on the screen as follows To cancel the display press DISPLAY again VCD CHAPTER NO OUTPUT SELECTION Timer Recording indicator VCR Multifunctional indicator Recording indicator VCR Track indicator CD Tape loaded indicator VCR Play indicator VCR indicator VCR Still indicator DVD disc inserted indicator CD inserted indicator AM PM indicator AM is not displayed Progressive indicator Display wi...

Страница 12: ... 45 31 CM SKIP button 45 Direct channel Selection buttons 0 9 Number buttons 0 9 49 45 CANCEL button 26 45 23 34 42 PLAY button 30 44 43 PAUSE STEP button 31 33 23 SETUP button 57 46 32 ANGLE button 49 SP SLP button 34 PLAY MODE button 47 CALL button 11 DISPLAY button 11 A B RPT button 47 OPEN CLOSE button DVD 42 Direction buttons SET buttons CH buttons POWER button INPUT SELECT button DVD MENU bu...

Страница 13: ...ced replace batteries with new ones When necessary to replace batteries in the remote control always replace both batteries with new ones Never mix battery types or use new and used batteries in combination Always remove batteries from remote control if they are dead or if the remote control is not to be used for an extended period of time This will prevent battery acid from leaking into the batte...

Страница 14: ...system you are using and follow the connection diagram If both VHF and UHF antennas have 300 ohm twin lead flat wires use a combiner having two 300 ohm inputs and one 75 ohm output Note Combination VHF UHF Antenna with 75 ohm Coaxial Cable Combination VHF UHF Antenna with 300 ohm Twin Lead Flat Wire Separate VHF and UHF Antennas DVD VCR VHF UHF 300 ohm Twin Lead Flat Wire not supplied Matching Tra...

Страница 15: ... TV with 300 ohm UHF and 75 ohm VHF antenna inputs TV with 300 ohm UHF and 300 ohm VHF antenna inputs After you have connected the antenna to the DVD VCR you must connect the DVD VCR to the TV Below are 3 common methods of connecting your DVD VCR to a TV Find the type of TV you are using and follow the connection diagram This DVD VCR has a single 75 ohm output for connection to a TV If your TV has...

Страница 16: ... the channel selected at the converter box Prevents Recording one channel while watching another Using the DVD VCR tuner to select channels DVD VCR Incoming Cable TV Converter Descrambler Incoming Cable TV TV Note To record from converter descrambler DVD VCR tuner must be tuned to the converter output channel usually channel 3 or 4 DVD VCR DVD VCR Note Whenever a Converter Descrambler box is place...

Страница 17: ... the converter box Prevents Watching scrambled channels while recording another channel Using the DVD VCR tuner to select channels DVD VCR Splitter Converter Descrambler TV DVD VCR Converter Descrambler A B Switch TV Incoming Cable Splitter Allows Recording of nonscrambled channels Recording of one channel while watching another Watching premium channels through the converter while recording nonsc...

Страница 18: ... television set has one audio input connect the left and right audio outputs of the DVD VCR to a Y cable adapter not supplied and then connect to your TV Connect the DVD VCR directly to your TV If you connect the DVD VCR to a VCR TV VCR combination or video selector the playback picture may be distorted as DVD video discs are copy protected TV or monitor with audio video inputs Basic connection No...

Страница 19: ...To wall outlet To audio inputs of the amplifier red white red white To Y VIDEO OUT To PB CB VIDEO OUT To Y video input To PB CB video input Audio system To ANALOG AUDIO OUT To S VIDEO OUT Component video cable not supplied To S video input S video cable not supplied Audio cable not supplied If you connect the DVD VCR to your TV with the DVD OUT jacks select the corresponding video input on your te...

Страница 20: ... Out are trademarks of Digital Theater Systems Inc Amplifier equipped with a Dolby Digital decoder 75 Ω coaxial cable not supplied To COAXIAL type digital audio input Amplifier equipped with a DTS decoder To COAXIAL type digital audio input This selection uses the following reference mark To ANALOG AUDIO OUT To audio input Audio cable not supplied 75 Ω coaxial cable not supplied Dolby Digital Dolb...

Страница 21: ...peaker system right and left front speakers Notes DO NOT connect the COAXIAL DIGITAL AUDIO OUT jack of the DVD VCR to the AC 3 RF input of a Dolby Digital Receiver This input on your A V Receiver is reserved for Laserdisc use only and is incompatible with the COAXIAL DIGITAL AUDIO OUT jack of the DVD VCR Connect the COAXIAL DIGITAL AUDIO OUT jack of the DVD VCR to the COAXIAL input of a Receiver o...

Страница 22: ... right of the display window 2 3 4 5 6 The VCR indicator will appear at the upper left of the display window For a push button TV tuner If CH 3 or 4 corresponding to the video channel cannot be tuned on your TV proceed as follows set the VCR 3 4 channel selector and the TV to CH 3 or 4 play back a prerecorded tape and tune the TV to receive a sharp color picture from the video cassette recorder Re...

Страница 23: ...nch and Spanish for the on screen display 1 2 Press SET or to select the desired language English ENGLISH Spanish ESPAÑOL or French FRANCAIS then press ENTER 3 Press VCR MENU until the MENU screen is cleared 4 Notes Both the VCR and the DVD have their own player menus 57 If no buttons are pressed for more than 60 seconds the VCR MENU screen will return to normal TV operation automatically Preparat...

Страница 24: ...the clock is not set check the antenna condition The AUTO CLOCK may not function properly if the reception condition is not good 6 AUTO CLOCK adjustment To set AUTO CLOCK to off The AUTO CLOCK adjustment will be updated at 6 00 AM 12 00 PM and 6 00 PM everyday when the DVD VCR turned off If you use a cable box and you want AUTO CLOCK adjustment to be performed the cable box must be left on The AUT...

Страница 25: ...HT SAVING TIME then press ENTER 2 Press SET or to select one of the options then press ENTER Press VCR MENU until the MENU screen is cleared 3 Notes When shipped from factory the DAYLIGHT SAVING TIME is set to AUTO position When the clock is not set DAYLIGHT SAVING TIME setting is not available When there is no DAYLIGHT SAVING TIME in your area al ways select OFF position in step 3 When you want t...

Страница 26: ...edly until the item you want to change blinks then press SET or Press SET or to select SYSTEM SETUP then press ENTER 2 Press SET or to select CLOCK SET then press ENTER 3 Press SET or to set the month then press ENTER 4 Set the day year and time as in step 4 5 Clock setting Continued If the AUTO CLOCK process did not set the date and time correctly you must set them manually for timer recording an...

Страница 27: ...E CABLE Ð ENTER MENU AUTO CH MEMORY TV CABLE selection Setting channels automatically Repeat left step 1 and press SET or to select AUTO CH MEMORY 1 Press ENTER Auto tuning will begin The channel dis play will count up and when finished the screen returns to normal 2 0 Note You can t select CH SETUP if you set the channel to L1 or L2 Press ENTER to select the TV or CABLE mode The arrow indicates t...

Страница 28: ...n the screen To delete channels Press ENTER until DELETE appears on the screen The channel number will blink 3 Repeat step 1 and 2 to add or delete other channel Tuner setting Continued Noise elimination When you don t want to receive a weak signal broadcast a Blue back screen can be obtained by selecting the NO NOISE BACK GROUND to ON When the unit is shipped from the factory the NO NOISE BACKGRO...

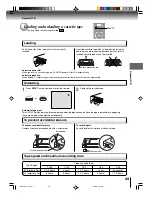
Страница 29: ...t An inverted cassette tape cannot be inserted Automatic playback When loading a cassette tape without an erase prevention tab playback will start automatically Automatic power ON When you insert a cassette tape the DVD VCR power will turn ON automatically 2 Erase prevention tab Adhesive tape Remove the cassette tape Erase prevention tab Unloading To prevent accidental erasure To prevent accidenta...

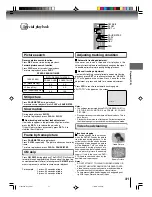
Страница 30: ... To discontinue the tape winding press STOP To switch to playback directly without STOP press PLAY Notes This VCR selects the playback tape speed SP LP or SLP au tomatically The Cassette tape and DVD disc can be played back simulta neously If you press VCR DVD selector the tape playback and DVD playback alternate with each other on the screen via CH3 4 or video connection 2To start playback Playba...

Страница 31: ...ng picture search mode there will be noise bars This is not a defect Playback will commence after approx 5 minutes to protect the video tape against excessive wear during pause mode Press ATR to reactivate automatic tracking again AUTO TR will appear on the screen AUTO TR PICTURE SEARCH SPEED PRESS TWICE TAPE SPEED PRESS ONCE SP Standard Play LP Long Play SLP Super Long Play 5 X 9 X 15 X 3 X 7 X 9...

Страница 32: ...function rewinds the tape to the 00 00 counter position automatically Press CLOCK COUNTER The counter display shows the tape run ning time during playback or recording 1 Press COUNTER RESET at the desired tape position The counter display will be reset to 00 00 position e g the beginning of recording 2 Press STOP when playback or recording is completed Press ZERO RETURN The tape will automatically...

Страница 33: ...old or worn out video tapes INDEX marks may not be found if it is extremely close to the point where the search began During recording if you stop recording temporarily the INDEX mark is not recorded on the tape Video index search system Press CLOCK COUNTER The clock and tape counter alternate with each other in the display window Notes If you rewind the tape beyond 00 00 a minus sign will be disp...

Страница 34: ...HRC IRC 14 36 A W 37 59 AA WW 60 85 AAA ZZZ 86 94 86 94 95 99 A 5 A 1 100 125 100 125 01 5A TV mode direct channel selection All channels can be instantly selected by using two buttons for example to select channel 2 press 0 then 2 If you press only 2 channel selection will be delayed for two seconds For channels 10 and above press the 2 digits in order CABLE mode direct channel selection 1 9 Pres...

Страница 35: ...p recording TV VCR STOP PAUSE STEP This VCR will automatically rewind the tape when the tape has ended except during OTR and timer recording It will also eject the tape Auto Rewind feature Recording one program while watching another While the VCR is recording select your desired channel on the TV When a TV is connected with an antenna cable only press TV VCR to select the TV position The VCR disp...

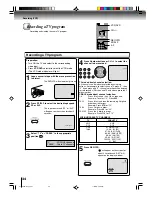
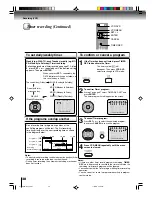
Страница 36: ...TV channels Press Direct channel selection buttons 0 9 or CH to select the channel to be recorded 4 Press REC OTR Recording begins Press the button again to stop recording after 30 minutes Each additional press of REC OTR will increase recording time as shown in the chart below up to a maximum of 6 hours 5 To cancel OTR Press STOP or turn off the power will appear on the screen for about 4 seconds...

Страница 37: ...TIMER REC SET then press ENTER Preparation Press VCR DVD selector to select the VCR mode Load a cassette tape with the erase prevention tab intact Check the time and date are correct 24 Example Program a timer recording for the 26th day channel 125 Cable TV 11 00 11 30 PM on timer program number 1 Tape speed SLP 1 Press SET or to select one of the program line then press ENTER 2 Press SET or to se...

Страница 38: ...an be made continuously until the recording is canceled or the tape reaches the end During timer recording the automatic rewinding mechanism does not function 8 00 11 00 9 00 10 00 Program 1 Prog 1 Deleted Parts Non Recorded Portion Parts Prog 2 Prog 3 Program 2 Program 3 Recording Control Settings ENTER CANCEL MENU DATE START END CH 26 SA 11 00PM 11 30PM125SLP Notes If there are other timer recor...

Страница 39: ... time when you press the button OUTPUT SELECTION display appears on the screen for several seconds Refer to the chart below Output selection Your DVD VCR is fitted with a SAP broadcast system which enables you to switch to a second audio program when view ing a selected channel This function applies only when the program is broadcast in multi languages through the SAP broadcast system When the VCR...

Страница 40: ...th second VCR Connection with Camcorder Press SP SLP to select the desired tape speed SP or SLP It is recommended to set the tape speed to the SP mode on the recording VCR for best results 1 Press INPUT SELECT once or twice to select AUDIO VIDEO input position L1 or L2 will appear in the display 2 Press REC OTR on the recording VCR The duplicating process begins 3Press PLAY on the playback VCR or ...

Страница 41: ...VD CD disc 1 PressVCR DVD selector to select the DVD mode The DVD mode indicator will light 2 Press PLAY to start playback 3 4 Press STOP when you finish recording If you wish to stop a DVD CD disc press VCR DVD selector to change the DVD mode then press STOP 5 Notes You may not be able to record the beginning of the disc Begin VCR recording once program playback commences on the DVD When the scan...

Страница 42: ...on the TV screen if the disc has a menu feature Press or to select title Press ENTER Title is selected and play commences Press STOP to end playback The unit records the stopped point depending on the disc appears on the screen Press PLAY to resume playback from the scene point If you press STOP again or unload the disc appears on the screen the unit will clear the stopped point Press ON STANDBY T...

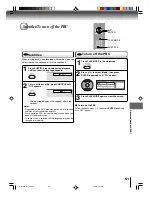
Страница 43: ...re to press POWER on your remote control once the movie is completed There may be a slight delay between the button is pressed and the function activates To obtain a higher quality picture Occasionally some picture noise is not usually visible on the TV screen during a normal broadcast while playing a DVD video disc It is because due to high resolution pictures on these discs which include a lot o...

Страница 44: ... The sound is muted during slow motion playback Press SKIP or repeatedly to display the chapter or track number you want Playback starts from the selected chapter or track To locate succeeding chapters or tracks Playback starts from the beginning of the current chapter or track When you press twice in quick successions playback starts from the beginning of the preceding chapter or track A prohibit...

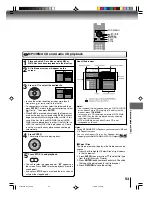
Страница 45: ...oint to play back To check the title chapter and time press DISPLAY 1 4 2 3 Notes In case of the Audio CD and Video CD only Track and Time can be selected In case of the Video CD playback with PBC the JUMP does not work Turn off the PBC 51 C D B A ZOOM 0 9 ENTER DISPLAY CLEAR JUMP In the zoom mode press ZOOM repeatedly to return to a 1 1 view Off Press JUMP during playback or stop mode Press C C C...

Страница 46: ...around the marker may fail to appear To cancel the Marker Follow the above steps 1 2 then press CLEAR DVD VCD DVD VCD ENTER CLEAR MARKER C D Marker2 Marker1 Marker3 27 00 54 Marker2 Marker1 Marker3 27 00 54 16 08 25 31 01 02 Marker2 Marker1 Marker3 27 16 08 54 25 31 00 01 02 Press MARKER during playback Select the blank Marker using C or D Then press ENTER at the desired scene Repeat this procedur...

Страница 47: ...he screen DVD VCD CD D PLAY MODE A B RPT Play Mode Repeat Off Notes Some discs may not work with the repeat operation In case of Video CD with PBC repeat functions are prohib ited during playback DVD Press ENTER to select Chapter or Title The unit automatically starts repeat playback after finishing the current ti tle or chapter Video CD Press D D D D D to select Repeat Press ENTER to select Track...

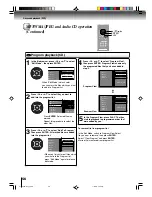
Страница 48: ... playback DVD To change the program 1 Select Mode to Program as step 2 press B A C D to select the track number you want to change then press CLEAR 2 Press Number buttons 0 9 to overwrite the new track number To clear the program one by one Select Mode to Program press B A C D to select the track number Then press CLEAR To clear all the programs In the left column press C D to select Clear Program...

Страница 49: ...ending on the DVD a title menu may simply be called a menu or title in the instructions supplied with the disc 2 Press C C C C C D D D D D B B B B B A A A A A to select the desired item Some DVDs allow you to select the disc contents using the menu When you play back these DVDs you can select the subtitle language and sound track language etc using the menu 1 Press ENTER The menu continues to anot...

Страница 50: ...The on screen display will disappear after a few seconds 1 Setting surround sound This DVD video player equipped with a QSound It can produce the effect of being in a cinema or a concert hall 2 To cancel Surround mode Follow the left steps 1 2 then press B or A to select the Off position Notes The QSound is effective only for the sound of disc The QSound setting can also be changed in the function...

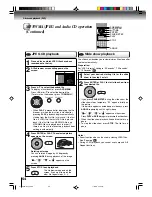
Страница 51: ...D the subtitle may change when you open or close the disc tray In some cases a selected subtitle language may not be changed immediately Subtitles Press SUBTITLE repeatedly during playback until your desired language appears 2 DVD ENTER PLAY MODE C D To turn off the PBC Press to select Mode then press ENTER repeatedly until Off appear 1Press PLAY MODE in the stop mode 2 Press PLAY MODE again to cl...

Страница 52: ...s cannot be used for the purpose of recording If the CD has both audio tracks and MP3 WMA JPEG files only audio tracks are played It may take more than one minute for this unit to read MP3 WMA JPEG files depending on its structure Music recorded by Joliet Recording Specification can be played back the file name is displayed within 15 letters on the screen Long file names will be condensed The musi...

Страница 53: ...MA files have been recorded onto the disc tray 1 A file browser screen will appear on the screen 2 3 Press ENTER The selected file starts playing back 4 Press STOP to end playback The unit records the stopped point appears on the screen Press PLAY to resume playback from the scene point If you press STOP again or unload the disc the unit will clear the stopped point About file browser Notes The th...

Страница 54: ...efly on the picture If the picture appears upside down or sideways press ANGLE repeatedly until it s right side up or appears on the screen Press PLAY or SKIP again to resume the slide show When the slide show playback finished the file list ap pears To stop the slide show press STOP The file list ap pears Slide show playback 1 When PLAY is pressed after displaying the file browser or when the dis...

Страница 55: ... playback after finishing the current track Random playback CD To resume normal playback Select Repeat Off in step 2 In the file browser press B A or C D to select Mode during stop mode Press ENTER to select Random Press PLAY The Random playback will start To resume normal playback Select Mode Off in step 2 Notes The program is canceled when you open the disc tray or turn the power off In case of ...

Страница 56: ...it Mode Folder 1 Folder 2 MP3 1 MP3 2 MP3 3 WMA 1 WMA 2 JPEG Preview Repeat Off Mode Off Edit Mode Folder 1 Folder 2 MP3 1 MP3 2 MP3 3 WMA 1 WMA 2 JPEG Preview Edit Mode Program View Add To Program Program playback CD Press B A or C D to select Program View then press ENTER Program View shows only the programed files that you have added in step 2 In the Program View press PLAY The files start to p...

Страница 57: ...Audio English Parental Off Set Password Output Interlace DivX R VOD DRC Off QSound On Menu English Subtitle English Audio English E B L Off TV Screen On Display On Picture Mode Auto JPEG Interval Off Screen Saver On Repeat steps 3 and 5 to change other option To select another section go back to step 2 by pressing B repeatedly 5 Change the selection using C or D by referring to the corresponding p...

Страница 58: ...ctivate the operational status dis play on the screen To select a preferred picture mode from Video Film or Auto To select a preferred setting for the slide show play back To select On or Off for Screen Saver function To select On or Off for DRC Dynamic Range Con trol To select On or Off for QSound To select a preferred parental level for the parental setting Input 4 digit password to set the pare...

Страница 59: ...ing screen sizes to choose from 4 3 Letter box Select this mode when connecting to a conven tional TV When playing back a wide screen DVD disc it displays the wide picture with black bands at the top and bottom of screen 4 3 Pan scan It displays the wide picture on the whole screen with left and right edges automatically cut off 16 9 Wide Select this mode when connecting to a wide screen TV A wide...

Страница 60: ...l in the progressive output format in an appropriate method Film The DVD player converts film content pictures in the progressive output format appropriately Suitable for playback of film content pictures The progressive output feature will be most effective under this selection Video The DVD player filters video signal and converts it in the progressive output format appropriately Suitable for pl...

Страница 61: ...he password has not been set yet after you purchase this unit it is 0000 3 Then press ENTER Enter New Password will appear Press Number buttons 0 9 to input the new password 4 Press ENTER Now your new password has been set Be sure to remember this number QSound This DVD video player equipped with a QSound It can produce the effect of being in a cinema or a concert hall Off The QSound is disengaged...

Страница 62: ...be seen on a conventional analog display Notes Some discs may not be played back with the progressive scanning mode correctly because of the disc characteris tics or recording condition Once Progressive scan on S video output is disabled Note If each setup pages 59 62 has been completed the unit can always be worked under the same conditions espe cially with DVD discs Each setup will be retained i...

Страница 63: ...the disc is ejected the original rating level will be set again automatically 1 Playback will commence if the entered password was correct 2 4 ENTER PLAY 0 9 OPEN CLOSE If the DVD disc has been designed to tempo rarily cancel the Rating level the screen which follows the Reading screen will change depending on which disc is played If you select YES with the ENTER key password input screen will the...

Страница 64: ...i 3018 Bihari 1218 Hungarian 1831 Oriya 2528 Tibetan 1225 Breton 1228 Icelandic 1929 Panjabi 2611 Tigrinya 3019 Bulgarian 1217 Indonesian 1924 Pashto Pushto 2629 Tonga 3025 Burmese 2335 Interlingua 1911 Persian 1611 Turkish 3028 Byelorussian 1215 Irish 1711 Polish 2622 Turkmen 3021 Cambodian 2123 Italian 1930 Portuguese 2630 Twi 3033 Catalan 1311 Japanese 2011 Quechua 2731 Ukrainian 3121 Chinese 3...

Страница 65: ...ed Some discs may not do some of the functions 42 7 8 No Cable TV reception Check all Cable TV connections Station or Cable TV system problems try another station 16 17 Noise bars on screen Tracking adjustment beyond range of automatic tracking circuit Try Manual tracking adjustment Video heads are dirty The tape is worn or damaged VCR The erase prevention tab of the video cassette is broken off T...

Страница 66: ...pplicable disc Frequency range S N ratio Harmonic distortion Wow and flutter Operating conditions General Input Output DVD VCR Video input 1 0 V p p 75 Ω negative sync pin jack x 2 Video output 1 0 V p p 75 Ω negative sync pin jack x 1 Audio input 8 dBm 50 kΩ negative sync pin jack L R x 2 Audio output 8 dBm 1 kΩ negative sync pin jack L R x 1 DVD S video output Y 1 0 V p p 75 Ω negative sync Mini...

Страница 67: ... the first rental or thirty 30 days after the date of shipment to the rental firm whichever comes first Commercial Units DVD VDR Combinations sold and used for commercial purposes have a limited ninety 90 day warranty for all parts and labor Owner s Manual and Product Registration Card Read this owner s manual thoroughly before operat ing this DVD VCR Combination Complete and mail the enclosed pro...

Страница 68: ...Y IS EXCLUSIVE AND IN LIEU OF ALL OTHER WARRANTIES GUARANTEES AGREEMENTS AND SIMILAR OBLIGATIONS OF TACP WITH RESPECT TO THE REPAIR OR REPLACEMENT OF ANY PARTS IN NO EVENT SHALL TACP BE LIABLE FOR CONSEQUENTIAL OR INCIDENTAL DAMAGES INCLUDING BUT NOT LIMITED TO LOST PROFITS BUSINESS INTERRUPTION OR MODIFICATION OR ERASURE OF RECORDED DATA CAUSED BY USE MISUSE OR INABILITY TO USE THIS PRODUCT No pe...

Страница 69: ...69 Others Memo 2I30201B En_p67 BACK 1 13 06 2 51 PM 69 ...

Страница 70: ...70 Others Memo 2I30201B En_p67 BACK 1 13 06 2 51 PM 70 ...

Страница 71: ...71 Others 2I30201B En_p67 BACK 1 13 06 2 51 PM 71 ...

Страница 72: ...Printed in Thailand ColorStream and ColorStream Pro are registered trademarks of Toshiba America Consumer Products L L C J2I30201B SH 06 02 N 2I30201B En_p67 BACK 1 13 06 2 51 PM 72 ...

Отзывы: