4 Replacement Procedures
4.9 System Board, AC-IN Cable and ODD Extended Board
4.9 System Board, AC-IN Cable and ODD Extended Board
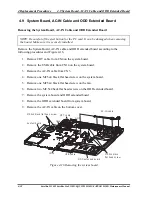
Removing the System Board, AC-IN Cable and ODD Extended Board
NOTE: Be careful of the eject button for the PC card. It can be damaged when removing
the board. Make sure it is securely installed.
Remove the System Board, AC-IN cable and ODD extended board according to the
following procedures and Figure 4-16.
1.
Remove CRT cable from CN4 on the system board.
2.
Remove
the USB cable from CN14 on the system board.
3.
Remove the AC-IN cable from CN3.
4.
Remove one M2.5x4 black flat head screw on the system board.
5.
Remove one M2.5x4 black flat head screw on the fan.
6.
Remove two M2.5x4 back flat head screws on the ODD extended board.
7.
Remove the system board and ODD extended board
8.
Remove the ODD extended board from system board.
9.
Remove the AC-IN cable on the bottom cover.
AC IN cable
-
ODD extended board
M2 5x4 black
flat head screw
.
System board
M2 5x4 black flat head screw
.
CN3
CRT cable
USB cable
CN4
CN14
Figure 4-16 Removing the system board
4-32
Satellite L350D/ Satellite Pro L350D/ EQUIUM L350D/ SATEGO L350D
Maintenance Manual
Содержание Satellite L350D series
Страница 13: ...Chapter 1 Hardware Overview ...
Страница 14: ...1 Hardware Overview ii Satellite L350D Satellite Pro L350D EQUIUM L350D SATEGO L350D Maintenance Manual ...
Страница 63: ...Chapter 3 Diagnostic Programs ...
Страница 66: ......
Страница 130: ...Chapter 4 Replacement Procedures 4 1 ...
Страница 131: ...4 Replacement Procedures 4 ii Satellite L350D Satellite Pro L350D EQUIUM L350D SATEGO L350D Maintenance Manual ...
Страница 193: ...6000 1 次 Appendices ...

