File No. 960-140
4-20
4.8
Display Mask
Removing the Display Mask
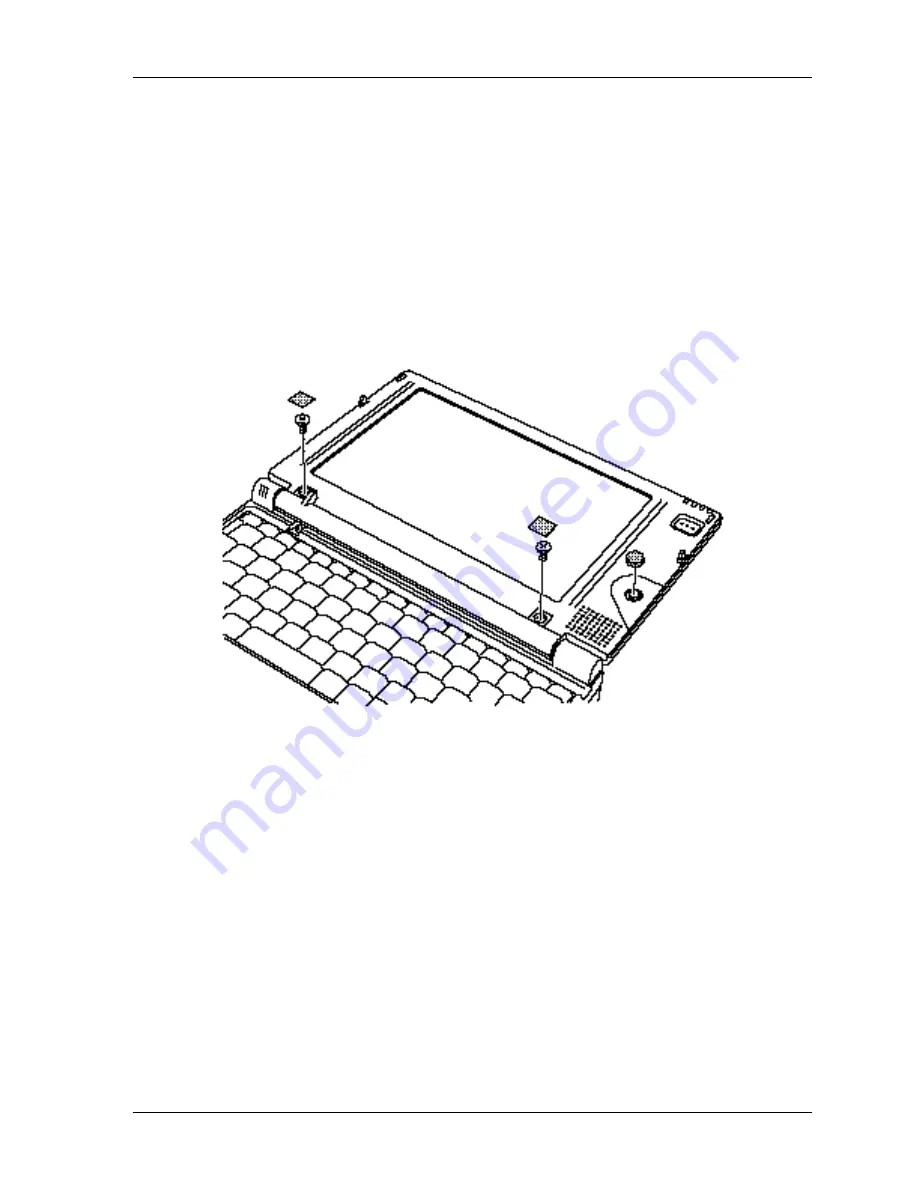
To remove the display mask follow the steps below. (See figures 4-16 to 4-17.)
1.
Remove the
two mask seals
on the right and left in the lower part of the display mask.
2.
Remove
two M2.5x5 screws
that were covered by the seals.
3.
Remove the
AccuPoint cap
.
Figure 4-16 Removing the mask seals
4.
Carefully insert your fingers between the mask and top of the LCD panel and release
the
four latches
at the top of the display mask.
Содержание Libretto 100CT
Страница 8: ...File No 960 140 Chapter 1 Hardware Overview ...
Страница 9: ...File No 960 140 1 ii ...
Страница 29: ...File No 960 140 1 18 ...
Страница 30: ...File No 960 140 Chapter 2 Troubleshooting Procedures ...
Страница 31: ...File No 960 140 2 ii ...
Страница 36: ...File No 960 140 1 3 Figure 2 1 Troubleshooting flowchart 1 2 ...
Страница 72: ...File No 960 140 Chapter 3 Tests and Diagnostics ...
Страница 73: ...File No 960 140 3 ii ...
Страница 147: ...File No 960 140 3 72 ...
Страница 148: ...File No 960 140 Chapter 4 Replacement Procedures ...
Страница 149: ...File No 960 140 4 ii ...
Страница 161: ...File No 960 140 4 10 3 Seat the HDD cover and fasten it with two M2x14 silver screws ...
Страница 189: ...File No 960 140 4 37 Figure 4 32 Removing the I O adapter board ...
Страница 191: ...File No 960 140 Appendices ...
Страница 192: ...File No 960 140 App ii ...
Страница 202: ...File No 960 140 A 6 ...
Страница 204: ...File No 960 140 B 2 B 2 System Board Back View Figure B 2 Board layout back H I J K L M N O P Q R S T A B C D E F G ...
Страница 206: ...File No 960 140 B 4 ...
Страница 228: ...File No 960 140 E 2 E 3 German GR Keyboard Figure E 3 GR keyboard E 4 French FR Keyboard Figure E 4 FR keyboard ...
Страница 229: ...File No 960 140 E 3 E 5 Spanish SP Keyboard Figure E 5 SP keyboard E 6 Italian IT Keyboard Figure E 6 IT keyboard ...
Страница 234: ...File No 960 140 G 2 ...
Страница 236: ...File No 960 140 H 2 ...


