background image

50

Music and Your gigabeat®

Listening to music using a playlist 

3

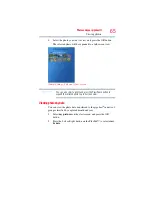
Select quick list, and press the OK button.

(Sample Image) Selecting a quick list

4

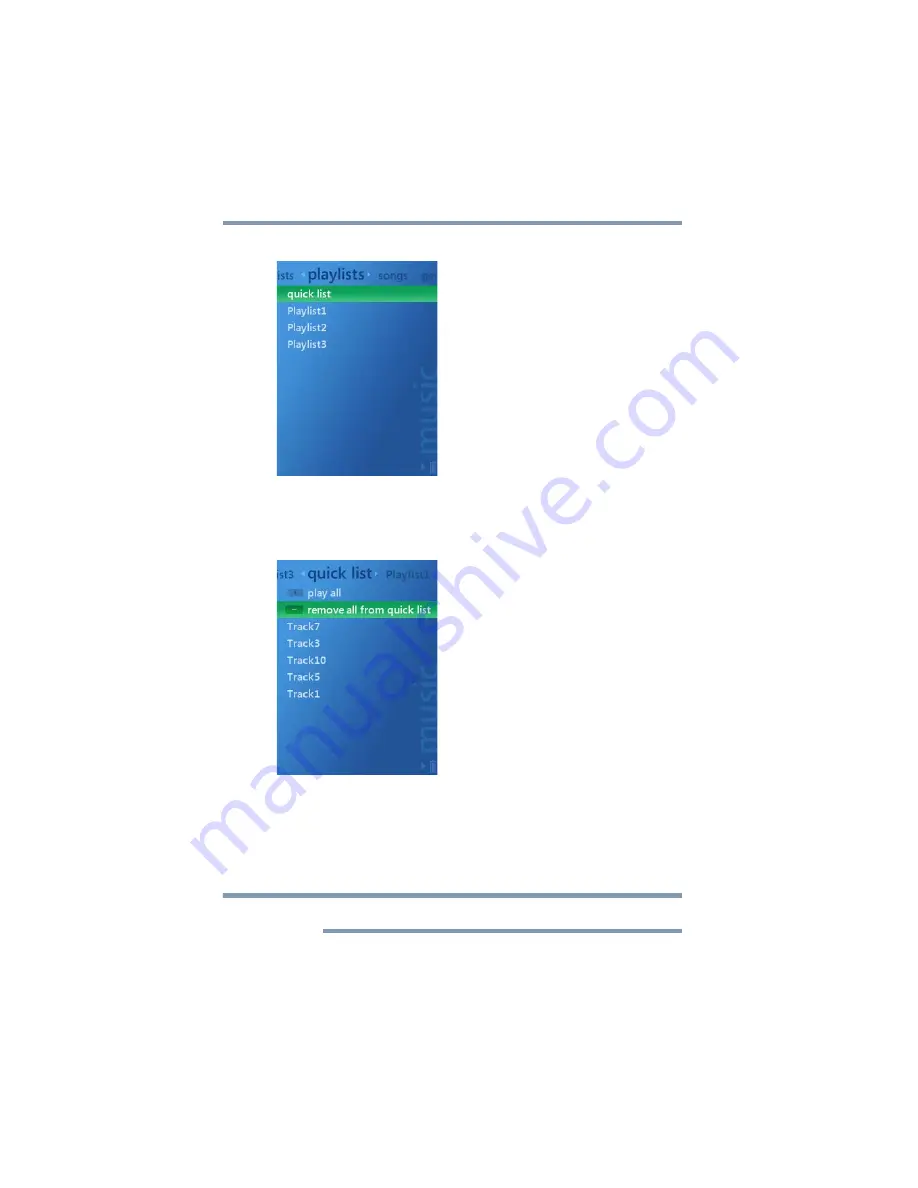
Select remove all from quick list, and press the OK button.

A confirmation message will appear.

(Sample Image) Removing items from a quick list

5

Select yes, and press the OK button. 

A message will appear for several seconds, after which all 
music data currently registered in the quick list will be deleted 
from the quick list. 

You cannot select and delete a specific song from the quick list. 

NOTE

Содержание gigabeat T Series

Страница 1: ...of the document you wish to read below Toshiba Portable Media Player gigabeat T Series User s Guide One 1 Year Standard Limited Warranty for Toshiba Portable Media Players Safety Instruction Guide for Toshiba gigabeat T Series ...

Страница 2: ...GMAD00139010 07 07 Toshiba Portable Media Player gigabeat T Series User s Guide ...

Страница 3: ...esentations warranties or other determinations that ANY use of the software product listed above is legal safe or in any manner recommended or intended while driving or otherwise operating a motor vehicle General Operation Prolonged Views of Screen If you are driving do not access any function requiring a prolonged view of the screen Pull over in a safe and legal manner before attempting to access...

Страница 4: ... separation between the equipment and receiver Connect the equipment into an outlet on a circuit different from that to which the receiver is connected Consult the dealer or an experienced radio TV technician for help Only peripherals complying with the FCC rules class B limits may be attached to this equipment Operation with non compliant peripherals or peripherals not recommended by TOSHIBA is l...

Страница 5: ...nge without notice TOSHIBA CORPORATION AND TOSHIBA AMERICA INFORMATION SYSTEMS INC TOSHIBA PROVIDES NO WARRANTY WITH REGARD TO THIS MANUAL OR ANY OTHER INFORMATION CONTAINED HEREIN AND HEREBY EXPRESSLY DISCLAIMS ANY IMPLIED WARRANTIES OF MERCHANTABILITY OR FITNESS FOR ANY PARTICULAR PURPOSE WITH REGARD TO ANY OF THE FOREGOING TOSHIBA ASSUMES NO LIABILITY FOR ANY DAMAGES INCURRED DIRECTLY OR INDIRE...

Страница 6: ...urpose without a prior permission from their copyright holders The unauthorized recording use distribution or revision of television programs videotapes audio cassettes and CDs DVDs and other materials is prohibited under the Copyright Laws of the United States and other countries and may subject you to civil and or criminal liability You must obtain any required permission from copyright owners t...

Страница 7: ...hiba America Information Systems Inc and or Toshiba Corporation All rights reserved This product is protected under the laws and international treaties on copyrights About Data TOSHIBA shall assume no responsibility for any damage or loss of audio data or other data due to a problem in the product or your computer About This Product This product is protected by certain intellectual property rights...

Страница 8: ...sposal transfer 13 Built in battery 13 Chapter 1 Getting Started with Your gigabeat 14 Computer system requirements1 15 Installing the software 15 Charging the built in battery Connecting your computer and the gigabeat 16 Additional information 19 Removing the gigabeat from your computer 20 Turning ON OFF the power 21 Basic gigabeat operations 22 Names and functions of gigabeat buttons 22 ...

Страница 9: ...ted music 35 Playback screens 38 Playback selection screen 40 Song list screen 40 Settings screen 41 Functions available during playback 42 Adjusting the volume 42 Pausing 42 Returning to the beginning of a song or skipping to the previous or next song 42 Fast rewinding forwarding 43 Displaying the start screen 43 Listening repeatedly changing the play sequence 43 Listening repeatedly 43 Changing ...

Страница 10: ... in 67 Changing the orientation 68 Showing photo information 70 Showing music information 71 Viewing a slide show 71 Playing a slide show 71 Stopping the slide show 73 Changing the slide show interval 73 Play a random slide show 74 Deleting photos 75 Chapter 4 Video and your gigabeat 76 Transferring video data 76 Viewing video 80 Playing selected video data 80 Functions available during playback 8...

Страница 11: ...he backlight off time 88 Changing the screen brightness 91 Adding effects 92 Setting a language region 93 Changing the operation settings 96 Using sound effects 96 Changing the scroll speed 97 Initializing the settings 98 Checking the gigabeat information 99 Menu list 100 Chapter 7 If you have problems 104 Error messages 104 Troubleshooting 105 Resetting the gigabeat 106 Frequently asked questions...

Страница 12: ... can accompany you wherever you go Checking the package contents The gigabeat comes with the following additional items If any items are missing or damaged please contact your dealer immediately Sample Illustration Package contents 1 2 3 4 5 1 Earbuds 2 USB cable 3 Software and Documentation CD ROM 4 Quick Start 5 Important Toshiba gigabeat Information ...

Страница 13: ...avoided may result in property damage Provides important information Safety precautions Important information you must know in order to use the gigabeat correctly to prevent injury to yourself injury to others or damage to property is provided in the Safety Instruction Guide located on the software and documentation CD shipped with your unit Caring for your gigabeat To clean the exterior wipe it g...

Страница 14: ...ate information on the flash memory may be viewed by a third party Built inbattery The built in battery will gradually discharge even when your gigabeat is not being used If the gigabeat is not used for a prolonged period the built in battery may discharge completely If this should happen charge the built in battery before using the gigabeat The recharging time will vary depending on the condition...

Страница 15: ...are illustrated below 1 Display screen color LCD 2 OK button 3 PlusPad 4 Play Pause button 5 Back button 6 Start button 7 Reset switch 8 USB 2 0 connector Plug the USB cable here to connect to a computer 9 Power Lock switch Slide the switch to the ON OFF unlocked position to turn on the power When the switch is in the ON OFF locked position all operation buttons are disabled As a result unwanted o...

Страница 16: ...at a computer pre installed with Windows Vista software includes Windows Media Player 11 If your computer is using Windows Media Player 10 a patch program must be installed You need to install Windows Media Player 10 from the CD ROM again even if it is already installed This way the necessary correction program will also be installed Windows XP Service Pack 1 or above is required to install the pa...

Страница 17: ...nstalled If your computer is installed with Windows XP Service Pack 2 or later or Media Center Edition 2005 Rollup 2 or later Windows Media Player 11 will be installed If your Windows XP Service Pack or Media Center is an earlier version Windows Media Player 10 will be installed To close the installation menu click the Close button Charging the built in battery Connecting your computer and the gig...

Страница 18: ...e built in battery will start to charge Connected will appear on the gigabeat screen as shown below Sample Image gigabeat connection If the gigabeat is connected to a computer that does not have Windows Media Player 11 or 10 installed the Found New Hardware Wizard will start If this wizard starts close it Then install Windows Media Player 11 or 10 following the steps in Installing the software on ...

Страница 19: ... computer your computer may stop before completing the startup process or resumption of operation depending on the specification of your computer In this case remove the gigabeat from your computer and restart the computer If your computer has entered and exited the Standby mode or Sleep mode while gigabeat was still connected the computer may no longer communicate with the gigabeat properly If th...

Страница 20: ...sing a dedicated USB AC adaptor sold separately Charge the battery within the operating temperature range 5 C to 35 C It may not be charged at temperatures above or below the specified range Charge may be stopped temporarily to limit the rise of gigabeat temperature If you encounter this situation wait for a while Charge will resume automatically once the gigabeat temperature drops to a safe level...

Страница 21: ... from the gigabeat While data is being transmitted between your computer and the gigabeat Updating and other messages are shown on the gigabeat screen Do not unplug or plug the USB cable while the screen indicates that processing is still in progress see the image below Unplugging plugging the USB cable in this condition may damage the data stored in your gigabeat The screen may also display Initi...

Страница 22: ...ally turn off when you disconnect the earbuds The backlight of the screen will turn off if the gigabeat has not been operated for a specified time except when video data is playing photo data is being displayed in a slide show or a USB connection is active Otherwise if the gigabeat has not been operated for a specified time the power will turn OFF approximately 10 minutes after the last operation ...

Страница 23: ...on Confirm the selected item and execute the applicable function Play Pause button Play data or pause the data currently playing PlusPad Press the PlusPad button to select a desired menu or item Use the Up or Down button on the PlusPad to increase or decrease the volume Use the Left or Right button on the PlusPad to skip to the previous or next data If the buttons are held down the gigabeat fast r...

Страница 24: ...ate through the selection items Press the Left or Right button on the PlusPad to change the item on the screen where applicable Confirm the selected item Press the OK button and the selected item will be executed my tv Play TV programs recorded and transferred from a computer TV programs recoded using Windows Media Center my music Play music data transferred from a computer my pictures View photo ...

Страница 25: ...t hand corner of the screen Sample Image Battery icons Standby screen The Standby screen appears while the gigabeat is processing The gigabeat cannot be operated while this screen is shown dots are circling Wait for this screen to disappear before operating the gigabeat Sample Image Standby screen Battery icons Recharging Remaining battery power Recharging complete ...

Страница 26: ...gabeat gigabeat is intended for recording downloading storage and or playback of authorized content and any other lawful use Using Windows Media Player 11 1 Set the music CD in the optical drive of your computer 2 Start Windows Media Player 11 3 Click the Rip tab at the top A list of songs in the CD will appear 4 Clear the check boxes of songs you do not want to load When the check box at the top ...

Страница 27: ...ed in your my music folder and can be viewed using the Library function of Windows Media Player 11 You can click below the Rip tab select More Options select Rip Music and change the save location format sound quality etc in the displayed setting screen If your computer is connected to the Internet and the data for the applicable music CD is available on the Microsoft server the album name and tra...

Страница 28: ...er that has Windows Media Player 11 installed A window opens in which you choose the operation performed when the gigabeat is connected Do not connect other devices using an Media Transfer Protocol connection while connecting the gigabeat Connecting other devices at the same time may prevent the computer from recognizing the gigabeat 2 Select Sync digital media files to this device using Windows M...

Страница 29: ... not required 4 When search ends click Next The Name your device window opens Sample Illustration Specifying a device 5 Click Cancel You can select automatic synchronization by clicking Finish at this point However this manual describes how to synchronize transfer the files manually You can select automatic synchronization later by clicking at the bottom of the Sync tab in Windows Media Player 11 ...

Страница 30: ...ation Clicking the Sync tab 7 Right click one of the selected files and select Add to Sync List in the shortcut menu that appears The file is added to the synchronization list on the right side of the window You can also add files to the synchronization list by dragging and dropping them into the synchronization list area on the right Sample Illustration Adding to the Sync List Select a category b...

Страница 31: ...ils see the Windows Media Player 11 help file Licensed DRM protected WMA files may not be transferred to the gigabeat depending on the terms of the applicable license Depending on their format some WMA files may be converted to a gigabeat supporting format when the files are transferred to the gigabeat Large files which exceed 2 GB in size or recording time exceeds 9 hours 6 minutes cannot be play...

Страница 32: ...elect Synchronize media files to this device using Windows Media Player and then click OK To automatically perform the same operation in the future check the Always perform the selected action check box Windows Media Player 10 starts up and the device settings window opens If this screen does not appear launch Windows Media Player 10 manually Sample Illustration Device Settings Window 3 Select Man...

Страница 33: ...ct Add to Sync List in the shortcut menu that appears You can also right click files to be transferred from the list in the center of window and select Add to and then select Sync List The file is added to the synchronization list on the right side of the window Sample Illustration Add to Sync list shortcut menu 7 Click the Start Sync button at the bottom right of the window You can also click the...

Страница 34: ... details see the Windows Media Player 10 help file Licensed DRM protected WMA files may not be transferred to the gigabeat depending on the terms of the applicable license Depending on their format some WMA files may be converted to a gigabeat supporting format when the files are transferred to the gigabeat Large files which exceed 2 GB in size or recording time exceeds 9 hours 6 minutes cannot be...

Страница 35: ...is retrieved you can add your own image as the album artwork Adding album artwork using Windows Media Player 11 To add artwork using Windows Media Player 11 1 Right click the JPEG file on your computer that you want to add as album artwork and select Copy 2 In the Windows Media Player 11 library right click the album you want to add the image to and select Paste Album Art The album artwork is adde...

Страница 36: ... songs genres albums and artists based on the information appended to the music data that has been transferred to the gigabeat Music data not accompanied by any artist name genre or album is classified as unknown under each category Example Selecting a Song by artists 1 Connect the earbuds to the earbud jack and turn on the power Plugging the earbuds into the earbud jack will automatically turn on...

Страница 37: ...lected from the artists screen You can also select the song you want to play from the songs genres albums or playlists screen Sample Image artists screen 4 Select the artist you want to listen to and press the OK button A screen showing a list of albums by the selected artist will appear You can select play all to play all songs Sample Image Selecting artist ...

Страница 38: ... desired song and press the OK button and a screen showing the title of the selected song will appear Sample Image Selecting album 6 Select the song you want to listen to and press the OK button or Play Pause button When the OK button is pressed A screen showing the title of the selected song will appear Press the OK button again and the music will be played When the Play Pause button is pressed T...

Страница 39: ... and connect the gigabeat to and synchronize it with your computer 2 There is a problem with the license for this item This message is displayed when the gigabeat has no more battery power remaining If this message appears connect the gigabeat to your computer via USB and synchronize it with Windows Media Player 11 or 10 The gigabeat should be able to play the data Playback screens While music is ...

Страница 40: ...ings Æ music Æ display time from the start screen The information regarding the music currently playing elapsed or remaining time and album artwork are shown Sample Image playback screen An enlarged view of the album artwork of the music currently playing and elapsed time or remaining time are shown Sample Image playback screen enlarged ...

Страница 41: ...e OK button If you choose settings the settings screen will be displayed If you choose show music and press the OK button the screen will return to the music playback screen Press the Back button on each screen to return to the playback selection screen Song list screen The song list of the music currently playing part of the album artwork and elapsed time are shown Sample Image song list screen ...

Страница 42: ...an press the OK button on the song list screen to play the selected song from the beginning If you select the purchase check box on the music settings screen a web page where you can make online purchases will be displayed on your Internet browser the next time the gigabeat is connected to your computer The album artwork will not be shown unless the photo has been transferred NOTE ...

Страница 43: ... Volume adjustment Pausing Press the Play Pause button Press the button again and the remainder of the music will be played Returningtothebeginningofasongorskippingtothepreviousornext song Press the Left button on the PlusPad The gigabeat will return to the beginning of the song currently playing If no more than 2 seconds of music data has been played since the beginning of the song the gigabeat w...

Страница 44: ...ing the start screen To use a different function display the start screen and select a different menu Press the Start button The start screen will appear while the music is still playing Press the button again and the start screen will disappear Listening repeatedly changing the play sequence Listening repeatedly You can listen to the music data selected by artist genre album or playlist repeatedl...

Страница 45: ...d all songs in the album will be played repeatedly Sample Image Selecting repeat You can also set the repeat playback mode when music is not playing Select settings Æ music Æ repeat from the start screen Changing the play sequence You can listen to the music data selected by artist genre album or playlist randomly 1 While music is playing press the OK button several times to display the playback s...

Страница 46: ...ic You can also set the random playback mode when music is not playing Select settings Æ music Æ shuffle from the start screen Changing the sound quality Changing the equalizer You can select a desired equalizer mode 1 While music is playing press the OK button several times to display the playback selection screen Refer to Playback selection screen on page 40 2 Select the settings and press the O...

Страница 47: ...nd select a desired sound quality mode The equalizer setting will change in the following sequence every time the OK button is pressed None nothing is selected Æ acoustic Æ classical Æ Electronic Æ hip hop Æ jazz Æ pop Æ rock The equalizer mode will be set and the sound quality will change accordingly Sample Image Selecting equalizer mode ...

Страница 48: ...tion is set you can listen to music data loaded from CDs at a level of sound quality close to the original CDs Specifically this function compensates the treble range of 16 kHz or above that was cut off when the data in a music CD was compressed to the WMA or MP3 format This treble range compensation technology H2C Technology was developed jointly by Kyushu Institute of Technology s HIT Developmen...

Страница 49: ...d to when the Harmonics function is turned off This function is effective only with the music data saved in my music The benefits of H2C Technology cannot be recognized unless the sampling frequency of music data is 44 1 kHz or above Listening to music using a playlist Creating a quick list By creating a quick list you can play your favorite music with ease You can also transfer to your gigabeat a...

Страница 50: ...ist you want to add to the quick list 4 Select add all to quick list or add to quick list and press the OK button A message will appear and the music data will be added to the quick list If you have selected an artist or album and selected add all to quick list all songs by the artist or contained in the album will be added to the quick list For information on how to play the quick list you have c...

Страница 51: ...m quick list and press the OK button A confirmation message will appear Sample Image Removing items from a quick list 5 Select yes and press the OK button A message will appear for several seconds after which all music data currently registered in the quick list will be deleted from the quick list You cannot select and delete a specific song from the quick list NOTE ...

Страница 52: ...button on the PlusPad to select playlists 3 Select quick list or any playlist you have transferred using Windows Media Player and press the OK button The registered music will be shown Sample Image Selecting a quick list 4 Select play all and press the OK button The music registered in the quick list or transferred playlist will be played Sample Image Selecting play all ...

Страница 53: ...sic is playing press the OK button several times to display the playback selection screen Refer to Playback selection screen on page 40 2 Select settings and press the OK button 3 Select the line of stars Sample Image settings screen 4 Press the OK button to change the number of stars The number of stars will change every time the OK button is pressed When the music data is synchronized with Windo...

Страница 54: ... a category button and select Music 4 Click the gigabeat T Series library in the tree shown on the left The library in the gigabeat will be shown 5 Right click the music data you want to delete and select Delete in the displayed menu A dialog box to confirm the deletion will appear Sample Image Deleting music data 6 Select yes The selected music data will be deleted from the gigabeat 7 After confi...

Страница 55: ...other lawful use You can transfer photo data from your computer to the gigabeat using Windows Media Player 11 or 10 The following steps assume that Windows Media Player 11 is used If you are using Windows Media Player 10 refer to the Windows Media Player 10 Help file Only JPEG image files can be viewed on the gigabeat 1 Connect your computer and the gigabeat using the USB cable A screen will appea...

Страница 56: ...utomatically start Windows Media Player 11 without showing this screen every time the gigabeat is connected from now on select the Always perform the selected action check box Windows Media Player 11 will start and the device setting screen will appear If this screen does not appear launch Window Media Player 11 manually Sample Image Synchronizing digital media files ...

Страница 57: ...hronization Every time the gigabeat is connected to your computer the two will be synchronized automatically and data will be transferred to the gigabeat This screen will not be displayed if the above setting is already done You can set automatic synchronization by clicking below the Sync tab selecting gigabeat T Series selecting Set up Sync and setting desired items 4 Click the Sync tab in Window...

Страница 58: ...the data to the synchronization list area on the right to add the data to the synchronization list Sample Image Add to Sync List 6 Click the Start Sync button in the bottom right hand corner Synchronization will start While data is being synchronized the Start Sync button changes to the Stop Sync button Once the synchronization is finished the button text will change to Start Sync again Sample Ima...

Страница 59: ... gigabeat to a digital camera Purchase a USB conversion cable of A connector female Mini A connector male type 1 Connect the digital camera and gigabeat using a USB conversion cable sold separately Sample Illustration Connecting a digital camera 2 Turn on the gigabeat and then turn on the digital camera Depending on the digital camera the camera may power up automatically when the gigabeat is turn...

Страница 60: ...d in the available space will be transferred Do not use a USB hub to connect the digital camera and gigabeat Due to the limitation imposed by the gigabeat USB bus power supply function some digital camera models may not be connected to the gigabeat or may cause the USB function of the gigabeat to be disabled temporarily In this case remove the digital camera turn OFF the gigabeat power and then tu...

Страница 61: ...from a digital camera 3 Select Copied from Card or Camera and press the OK button Sample Image view by folder screen 4 Select the folder containing the photo data you want to delete and press the OK button Sample Image Copied from Card or Camera screen ...

Страница 62: ...n Select delete all and all photo data in the folder will be deleted Sample Image Copied items screen 6 Press the OK button to display the photo setting screen 7 Select delete and press the OK button A confirmation message will appear Sample Image Selecting delete 8 Click yes and press the OK button A message will appear indicating that the data has been successfully deleted 9 Press the OK button ...

Страница 63: ...e space for storing photos directly retrieved from a digital camera By allocating this space you ensure that not all of the gigabeat memory is taken up with music or other synched files To indicate the minimum amount of space you want to set aside follow the steps below 1 Select settings on the start screen and press the OK button 2 Select reserve space and press the OK button A confirmation messa...

Страница 64: ... of the total available space and that of the available space reserved for synchronization will be shown Sample Image reserve space screen 4 Select the size of available space you want to reserve and press the OK button You can select a desired size from none 256 MB 512 MB 1 GB 2 GB Sample Image reserve space screen ...

Страница 65: ...ts of folders in which the data is saved 1 Select my pictures on the start screen and press the OK button 2 Press the Left or Right button on the PlusPad to select view by folder 3 Select the folder you want to view and press the OK button The photos contained in the selected folder will be shown in thumbnails Sample Image view by folder screen ...

Страница 66: ...creen You can also select a photo and press the Play Pause button to expand the selected photo to a full screen view Viewing photos by date You can view the photo data transferred to the gigabeat in units of groups classified by captured month and year 1 Select my pictures on the start screen and press the OK button 2 Press the Left or Right button on the PlusPad to select view by date NOTE ...

Страница 67: ... The photos belonging to the selected group will be shown in thumbnails Sample Image view by date screen 4 Select the photo you want to view and press the OK button The selected photo will be expanded to a full screen view Sample Image Selected group screen Photo data of unknown date of capture will be classified under the Unknown Date group NOTE ...

Страница 68: ...y the Up Down buttons on the PlusPad will act as the Left Right buttons on the PlusPad Sample Illustration PlusPad button use Zooming in 1 While a photo is displayed press the OK button to open the photo setting screen 2 Select zoom in and press the OK button Press the OK button again and the photo will return to its original size Sample Image zoom in screen Right Left Right Left portrait landscap...

Страница 69: ...smaller You can press the PlusPad while zooming in on a photo to move the zoomed in area up or down or to the left or right Changing the orientation 1 Press the Start button The start screen will appear 2 Select settings and press the OK button 3 Select pictures and press the OK button Sample Image settings screen NOTE ...

Страница 70: ...play and press the OK button Sample Image pictures screen 5 Select landscape or portrait and press the OK button Sample Image display screen 6 Press the Back button to return to the photo display screen The photo is now displayed in the specified orientation ...

Страница 71: ...d press the OK button The photo information screen will appear Press the OK button again and the display will return to the normal photo display screen The information name and date of the photo currently displayed is shown along with the play pause icon and battery icon If music is currently playing the information of the applicable song is also shown Sample Image Photo information screen ...

Страница 72: ...en will appear If the music is not playing this menu will not appear Pressing the Back button will take you back to the photo viewing screen Sample Image Selecting show music Viewing a slide show Playing a slide show You can view a slide show of photo data you have transferred to the gigabeat A slide show can also be played while music is playing 1 Select my pictures on the start screen and press ...

Страница 73: ...ct play slide show and press the OK button All photos in the selected group will be shown in a slide show Sample Image Selecting play slide show screen You can also select a group and press the Play Pause button to play a slide show of the photos in the selected group Selecting play slide show immediately below view by folder or view by date will play a slide show of all photo data NOTE ...

Страница 74: ...to Changing photos on page 67 Changing the slide show interval You can set how many seconds each photo will be shown in a slide show 1 While a slide show is playing press the OK button to open the photo setting screen 2 Select the transitions line Sample Image Setting transitions 3 Press the OK button and select a desired display time Every time the OK button is pressed the selected time will chan...

Страница 75: ...t sequence in a slide show 1 While a slide show is playing press the OK button to open the photo setting screen 2 Select shuffle and press the OK button The check box will be selected Sample Image Selecting shuffle 3 Select show picture and press the OK button twice The display will return to the previous screen You can also set the random mode when you are not viewing a photo Select settings Æ mu...

Страница 76: ... using the USB cable 2 Start Windows Media Player 11 3 Click the Sync tab click the Select a category button and select Pictures 4 Click the gigabeat T Series library in the tree shown on the left The library in the gigabeat will be shown 5 Right click the photo data you want to delete and select Delete in the displayed menu A dialog box to confirm the deletion will appear Sample Image Deleting ph...

Страница 77: ...ia Player 10 refer to the Windows Media Player 10 Help file 1 Connect your computer and the gigabeat using the USB cable A screen will appear where you can select what will happen when the gigabeat is connected 2 Select Sync digital media files to this device using Windows Media Player and click OK If you want to automatically start Windows Media Player 11 without showing this screen every time th...

Страница 78: ...t you transfer data manually to the gigabeat Proceed to step 4 Clicking the Finish button will start transfer synchronization Every time the gigabeat is connected to your computer the two will be synchronized automatically and data will be transferred to the gigabeat This screen will not be displayed if the above setting is already done You can set automatic synchronization by clicking below the S...

Страница 79: ... view in Windows Media Player 11 5 Right click the data you want to transfer synchronize and select Add to Sync List in the displayed short cut menu The data will be added to the synchronization list on the right side of the screen You can also drag and drop the data to the synchronization list area on the right to add the data to the synchronization list Sample Image Add to Sync List screen ...

Страница 80: ...s item has expired To play the item connect the gigabeat to the computer to sync again The period during which the data can be played has expired and consequently the data cannot be played You must renew the subscription rental on a computer subscribing to the applicable WMV data and connect the gigabeat to and synchronize it with your computer 2 There is a problem with the license for this item T...

Страница 81: ...he video data information that has been transferred to the gigabeat 1 Select my videos on the start screen and press the OK button 2 Press the Left or Right button on the PlusPad to select sort by date sort by source or sort by name 3 Select the video you want to play and press the OK button A screen showing the title of the selected video will appear If station name information is appended to the...

Страница 82: ... the elapsed time bar will be shown for several seconds at the bottom of the playback screen Functions available during playback Adjusting the volume Press the Up or Down button on the PlusPad while the playback screen is displayed The volume will be shown for approximately 1 second The volume will change every time a button is pressed Pausing Press the Play Pause button Or press the OK button Pre...

Страница 83: ...ng and press the OK button or Play Pause button Sample Image video screen Fast rewinding forwarding Press the Left button on the PlusPad The video will return to a position approximately 10 seconds before Press and hold the button and the gigabeat will fast rewind the data Press the Right button on the PlusPad The video will advance to a position approximately 30 seconds ahead Press and hold the b...

Страница 84: ... pause and the start screen will appear 2 Select settings and press the OK button 3 Select video and press the OK button Sample Image settings screen 4 Select display and press the OK button 5 Select landscape or portrait and press the OK button 6 Press the Back button to return to the video playback screen The video will be played in the specified orientation Deleting video data You can delete vi...

Страница 85: ...left The library in the gigabeat will be shown Sample Image video screen 5 Right click the video data you want to delete and select Delete in the displayed menu A dialog box to confirm the deletion will appear Sample Image display screen 6 Select OK The selected video data will be deleted from the gigabeat 7 After confirming that the video data has been deleted unplug the USB cable ...

Страница 86: ...beat the TV programs you have recorded with Windows XP Media Center Edition 2005 or later or Windows Media Center1 The transfer steps are the same as those explained in Transferring video data on page 76 The only difference is that you must select Recorded TV in step 4 4 Click the Sync tab in Windows Media Player 11 click the Select a category button and select Recorded TV ...

Страница 87: ... minutes cannot be played properly on the gigabeat 1 Windows Media Center is included in Windows Vista Home Premium or Windows Vista Ultimate Viewing recorded TV programs Playing a selected TV program You can select a desired TV program by date or by name based on the TV program information that has been transferred to the gigabeat 1 Select my tv on the start screen and press the OK button 2 Press...

Страница 88: ...er videos are registered in my videos To select data you have played before select resume or play from beginning in step 4 If the program is paused in the middle the elapsed time bar will be shown for several seconds at the bottom of the playback screen Functions available during playback The same functions available while a TV program is playing are the same as those available while a video is pl...

Страница 89: ...gth of time before the backlight of the screen will automatically turn OFF if the gigabeat is not operated Since the battery consumes less power when the backlight is turned off the continuous playback time of music and other activities will increase 1 Select settings on the start screen and press the OK button ...

Страница 90: ...89 gigabeat Settings Changing the gigabeat display 2 Select display then press the OK button Sample Image settings screen 3 Select backlight then press the OK button Sample Image display screen ...

Страница 91: ...screen The backlight always remains on while a TV program video or slide show is playing Even when the backlight is set to always on the power will turn OFF if the gigabeat is not operated for approximately 10 minutes However it will remain on when music is playing or the USB connection is active If any button on the gigabeat is pressed while the backlight is turned off the screen will turn on and...

Страница 92: ... Select display and press the OK button 3 Select brightness and press the OK button Sample Image display screen 4 Select the brightness level you want to set and press the OK button You can select from the following levels 1 dim 2 3 4 5 bright To check the actual brightness of each level by press the Up or Down button on the PlusPad to switch to the different levels Sample Image brightness screen ...

Страница 93: ...e out in effect that applies when a music playback screen is displayed from the menu screen and the slide effect that applies when the Left or Right button on the PlusPad is pressed on a music playback screen to change to a different playback screen To add the effects follow these steps 1 Select settings on the Start screen and press the OK button 2 Select effects and press the OK button Sample Im...

Страница 94: ...will be enabled Sample Image screen effects screen Setting a language region To change the language in which the gigabeat screens are displayed follow these steps 1 Select settings on the Start screen and press the OK button 2 Select international and press the OK button Sample Image settings screen ...

Страница 95: ...guage you want to use for the screen display and press the OK button A confirmation message will appear Sample Image language screen 5 Press the Left or Right button on the PlusPad to select yes then press the OK button The gigabeat will restart and the display language will be changed The regional setting standards setting will also change according to the selected language ...

Страница 96: ...t from one region to another 1 Select settings on the start screen and press the OK button 2 Select international and press the OK button 3 Select standards and press the OK button A list of regions will appear Sample Image international screen 4 Select a desired region and press the OK button A confirmation message will appear Sample Image standards screen ...

Страница 97: ...date time and display format will be changed Changing the operation settings Using sound effects You can set the gigabeat to output sound when various operations are performed 1 Select settings on the start screen and press the OK button 2 Select effects and press the OK button Sample Image settings screen 3 Select sounds and press the OK button Sample Image effects screen ...

Страница 98: ...off and press the OK button Sample Image sounds screen Changing the scroll speed You can also change the processing speed of gigabeat operations 1 Select settings on the start screen and press the OK button 2 Select effects and press the OK button 3 Select scrolling speed and press the OK button Sample Image effects screen ...

Страница 99: ...items are selected Sample Image scrolling speed screen Initializing the settings You can clear the settings you have edited from the settings menu and revert all settings to their defaults 1 Select settings on the start screen and press the OK button 2 Select restore original settings and press the OK button A confirmation message will appear Sample Image settings screen ...

Страница 100: ...after which the settings will return to their defaults Checking the gigabeat information To check the current information of your gigabeat follow the steps below Note that you can only check these information and cannot change any of the settings 1 Select settings on the start screen and press the OK button 2 Select information and press the OK button Sample Image settings screen ...

Страница 101: ...at information screens Menu list You can select the following menus on the start screen which is displayed by pressing the Start button The bold items indicate the default setting my tv sort by date sort by name my music playlists songs genres albums artists my pictures view by folder view by date my videos sort by date sort by source sort by name ...

Страница 102: ...tronic hip hop jazz pop rock display time elapsed remaining pictures transitions 3 seconds 5 seconds 7 seconds 10 seconds 15 seconds 30 seconds shuffle off on display landscape portrait video display landscape portrait screen backlight 1 second 5 seconds 15 seconds 1 minute always on brightness 1 dim 2 3 4 5 bright ...

Страница 103: ...e English Japanese standards Danish Dutch Belgium Dutch Netherlands English Canada English United Kingdom English United States French Belgium French Canada French Luxembourg French Switzerland German Austria German Germany German Luxembourg German Switzerland Italian Switzerland Japanese Swedish reserve space none 256 MB 512 MB 1 GB 2 GB ...

Страница 104: ...103 gigabeat Settings Menu list settings restore original settings yes no Information about contents legal Harmonics off professional dynamic ...

Страница 105: ...e the computer or transfer the data to the gigabeat again The license for this item has expired To play the item connectthegigabeat to the computer to sync again The license of the data you are playing has expired Synchronize the computer or transfer the data to the gigabeat again To recover from an error gigabeat will restart and remove all media items When the OK button is pressed formatting wil...

Страница 106: ... your gigabeat are relatively easy to identify and solve This section covers problems you may encounter and suggested actions Problem Cause Action Reference page The gigabeat does not turn on or does not operate when buttons are pressed The remaining battery power is low Connect the gigabeat to a computer using the USB cable and charge the gigabeat battery See Charging the built in battery Connect...

Страница 107: ...lume on page 42 The charging screen does not appear even when the gigabeat is charged The gigabeat is not connected properly Check the connection between the USB cable and gigabeat See Charging the built in battery Connecting your computer and the gigabeat on page 16 The ambient temperature is outside the specified range Charge the gigabeat at an ambient temperature within the specified range See ...

Страница 108: ...be transferred to the gigabeat A Some audio data may not be playable on the gigabeat and cannot be transferred to the gigabeat For the types of audio data playable on the gigabeat refer to Combinations of Sampling Frequencies and Bit Rates Q I have changed the gigabeat display language but I do not know how to change it back to the original setting A Select the previous language by following the s...

Страница 109: ... still need help Toshiba offers the following resources to help you Visit the gigabeat Technical Support site at www gigabeatsupport toshiba com Call the Toshiba Support Center for Portable Media Players Within the U S at 1 877 250 8595 Outside the U S at 1 949 583 3212 ...

Страница 110: ...ows Media Video Image display format JPEG up to 9000 x 6000 Sampling frequency 8 kHz to 48 kHz Bit rate Audio data 4 kbps to 320 kbps Video data 800 kbps or lower The bit rate for video data applies to combination of audio and video data Recording medium 4 GB internal flash memory2 Recording time Audio Approximately 64 hours at 128 kbps Video Approximately 16 hours at 500 kbps ...

Страница 111: ...layback time3 Audio Approximately 16 hours4 When WMA audio data is played at 128 kbps 44 1 kHz and with the backlight turned off This does not apply to content protected by Windows Media DRM10 Video Approximately 5 hours atbrightness level 3 factory setting When WMV video data is played at 500 kbps This does not apply to content protected by Windows Media DRM10 Operating conditions Temperature 5º ...

Страница 112: ...ck time will become significantly shorter compared to when Harmonics is turned off or MP3 or WMA data is played 5 The color LCD is designed and manufactured using high precision technology Some pixels do not turn on or always remain on but this does not indicate malfunction 6 To operate the gigabeat in the USB 2 0 mode a USB 2 0 interface must be pre installed on the computer The gigabeat function...

Страница 113: ... 1 kHz 48 kHz Bit rate Not compressed Eight bit stereo data cannot be played properly at a sampling frequency of 44 1 kHz WMA 9 Lossless Sampling frequency 8 kHz 16 kHz 22 05 kHz 32 kHz 44 1 kHz 48 kHz The design specifications and other aspects of the product are subject to change without notice for the purpose of improvement The illustrations screen shots and other visual expressions provided in...

Страница 114: ...method Portable Media Center An operating system developed by Microsoft Corporation and incorporated into the gigabeat Also called Windows Mobile Software for Portable Media Centers Portable Media Center allows the user to transfer music images video and recorded TV programs to the gigabeat from a computer and play the transferred data Windows Mobile is provided as a platform for mobile devices in...

Страница 115: ...ng to music Various manufacturers offer computers pre installed with Windows XP Media Center Edition 2005 with functionality also linked to Windows Media Player 10 WMA 9 Lossless An audio codec developed by Microsoft Corporation As indicated by its name Lossless this compression method generates no data loss Lossless compressed data can be decoded fully to their original condition but the compress...

Страница 116: ...dby screen 24 start screen 23 button Back 22 OK 22 Play Pause 22 Start 22 G gigabeat buttons 22 caring for 12 display 88 getting started 14 resetting 106 turning ON OFF 21 unplug from computer 20 L listening earbud jack 35 earbuds 35 M music equalizer 45 listening 35 playlist 48 sound quality 45 music data deleting 53 rating 52 O OK button 14 P photos 54 deleting 75 transferring from a computer 54...

Страница 117: ...solving 104 Q Q A 107 quick list creating 48 deleting from 49 S setting up charging the battery 16 computer system requirements 15 software installing 15 Specifications 109 T troubleshooting 105 TV programs transferring from a computer 85 viewing 86 V video deleting 83 viewing 80 video playback functions adjusting volume 81 changing orientation 83 fast rewinding forwarding 82 pausing 81 start scre...

Страница 118: ...ba or Toshiba s authorized dealers and retail locations to a customer within the fifty 50 United States and the District of Columbia for such customer s own use and not for resale Customer This Limited Warranty commences on the date of purchase and expires one 1 year after the date of purchase Limited Warranty Period and covers the Product for warranty service required within the United States Tos...

Страница 119: ...part becomes the property of Toshiba and shall be returned by Customer to Toshiba at Toshiba s expense Customer shall pay Toshiba the retail value of the replacement part if Toshiba does not receive the original part within ten 10 days after Customer s receipt of the replacement part Replacement parts are warranted to be free from defects in materials and workmanship for thirty 30 days or for the ...

Страница 120: ...T INCLUDING THE IMPLIED WARRANTIES OF MERCHANTABILITY AND FITNESS FOR A PARTICULAR PURPOSE AND OR NONINFRINGEMENT OF THIRD PARTY RIGHTS ARE HEREBY DISCLAIMED TOSHIBA EXPRESSLY DISCLAIMS ALL WARRANTIES NOT STATED IN THIS LIMITED WARRANTY ANY IMPLIED WARRANTIES THAT MAY BE IMPOSED BY LAW ARE LIMITED IN DURATION TO THE TERM OF THIS EXPRESS LIMITED WARRANTY SOME JURISDICTIONS DO NOT ALLOW THE EXCLUSIO...

Страница 121: ... STORAGE MEDIA OR 2 ANY DIRECT OR INDIRECT DAMAGES LOST PROFITS LOST SAVINGS OR OTHER SPECIAL INCIDENTAL EXEMPLARY OR CONSEQUENTIAL DAMAGES WHETHER FOR BREACH OF WARRANTY CONTRACT TORT OR OTHERWISE OR WHETHER ARISING OUT OF THE USE OF OR INABILITY TO USE THE PRODUCT AND OR THE ACCOMPANYING USER GUIDES AND OR MANUALS EVEN IF TOSHIBA OR AN AUTHORIZED TOSHIBA REPRESENTATIVE OR DEALER HAS BEEN ADVISED...

Страница 122: ...PRESSLY AND KNOWINGLY WAIVED THOSE RIGHTS AND AGREED TO RESOLVE ANY DISPUTES THROUGH BINDING ARBITRATION IN ACCORDANCE WITH THE PROVISIONS OF THIS PARAGRAPH NOTWITHSTANDING THE FOREGOING SOME JURISDICTIONS DO NOT ALLOW A PRE DISPUTE JURY TRIAL WAIVER OR A WAIVER OF THE RIGHT TO LITIGATE CLAIMS ON A CLASS WIDE OR CLASS ACTION BASIS SO THESE WAIVERS OR LIMITATIONS MAY NOT APPLY TO CUSTOMER Should ei...

Страница 123: ...omer prevails in the arbitration of any Dispute with Toshiba Toshiba will reimburse Customer for any fees Customer actually paid to NAF in connection with the arbitration Any decision or award of the arbitrator rendered in such arbitration proceeding shall be final and binding on each of the parties and may be entered as a judgment in any court of competent jurisdiction This binding arbitration pr...

Страница 124: ... not designed for any critical applications Critical applications means life support systems medical applications connections to implanted medical devices commercial transportation nuclear facilities or systems or any other applications where product failure could lead to injury to persons or loss of life or catastrophic property damage ACCORDINGLY TOSHIBA DISCLAIMS ANY AND ALL LIABILITY ARISING O...

Страница 125: ...abuse neglect improper installation or improper maintenance Replacement of missing parts the provision of retrofits or preventive maintenance Installation or removal of accessory retrofits or peripheral equipment of which the Product may be a part Replacement or fixes of software Repair or replacement of covers plastics or appearance parts such as interior or exterior finishes or trim Service made...

Страница 126: ...ole obligations with respect to software if any distributed with the Product under the Toshiba brand name are set forth in the applicable end user license agreement Unless otherwise stated in writing non Toshiba software is provided on an as is basis by Toshiba However non Toshiba manufacturers suppliers or publishers may offer their own warranties Obtaining Warranty Service In the country of orig...

Страница 127: ...e Information Service provides answers from an extensive technical database Telephone Support Center Portable Media Players In the fifty 50 United States and District of Columbia call 1 877 250 8595 Outside the fifty 50 United States and District of Columbia call 1 949 583 3212 Telephone support is available 24 hours a day 7 days a week Toshiba America Information Systems Inc Digital Products Divi...

Страница 128: ......

Страница 129: ...One 1 Year Standard Limited Warranty for Toshiba Portable Media Players 12 GMA500457011 07 07 ...

Страница 130: ...rtant information about using your gigabeat unit correctly in order to prevent injury and avoid damaging the unit Please read through these safety instructions and familiarize yourself with the information they contain Safety Instruction Guide for Toshiba gigabeat T Series ...

Страница 131: ...and icons highlight these instructions as follows Indicates an imminently hazardous situation which if not avoided will result in death or serious injury Indicates a potentially hazardous situation which if not avoided could result in death or serious injury Indicates a potentially hazardous situation which if not avoided may result in minor or moderate injury Indicates a potentially hazardous sit...

Страница 132: ...iring a prolonged view of the screen Pull over in a safe and legal manner before attempting to access a function of the system requiring prolonged attention Even occasional short scans to the screen may be hazardous if your attention has been diverted away from your driving task at a critical time Volume Setting If you use this product while driving do not raise the volume excessively Keep the vol...

Страница 133: ... and caution when using a gigabeat with headphones or watching the screen while driving Stop using the gigabeat if you are distracted while operating your vehicle Immediately stop using the product or carrying it close to your body outdoors during a thunderstorm or when you hear thunder or see lightning As the product contains metallic material doing so may result in fire electric shock and or ser...

Страница 134: ...r shower Doing so may result in fire possibly resulting in serious injury Do not operate the product while walking jogging or riding a motorcycle You may fall or cause a traffic accident possibly resulting in serious injury You cannot hear sounds from the surrounding environment which may lead to an unexpected accident possibly resulting in serious injury Do not use the product in a place that is ...

Страница 135: ...fterward Do not charge the battery other than by the specified method Doing so may result in fire or explosion possibly resulting in serious injury Do not charge or discharge the product near fire or under the hot sun The battery may leak resulting in ignition or explosion possibly resulting in serious injury Do not place the product in a hot place Placing the product under direct sunlight in a cl...

Страница 136: ...res and malfunctions Do not apply unnecessary force to the product s display surface as it may damage the display Placing the product in a bag along with hard objects may damage the product Do not spray volatile or caustic chemicals on or around the product Also avoid keeping a rubber or PVC product in contact with the product for a long period It may damage or discolor the exterior coating Do not...

Страница 137: ...cal cleaning cloth on your gigabeat If oil or an oil based substance gets on the product use a diluted weak neutral detergent solution and a soft cloth Place the cloth in the diluted solution wring the cloth well then soak the cloth in warm water and wring it well again Use the cloth to wipe the soiled area thoroughly Depending on the substance some surface discoloration may still occur even when ...

Страница 138: ...t Repeated use will gradually decrease the operating time TOSHIBA shall not be liable whatsoever for any corruption or loss of stored data due to the complete discharge of the built in battery Precautions Concerning Data Deletion at the Time of Disposal or Transfer This gigabeat contains built in flash memory When disposing of or reselling the gigabeat please delete all of the data on the flash me...

Отзывы: