background image

- 19 -

USING THE NETWORK SCANNER FUNCTION

2

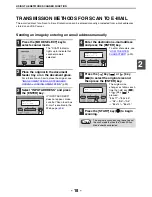
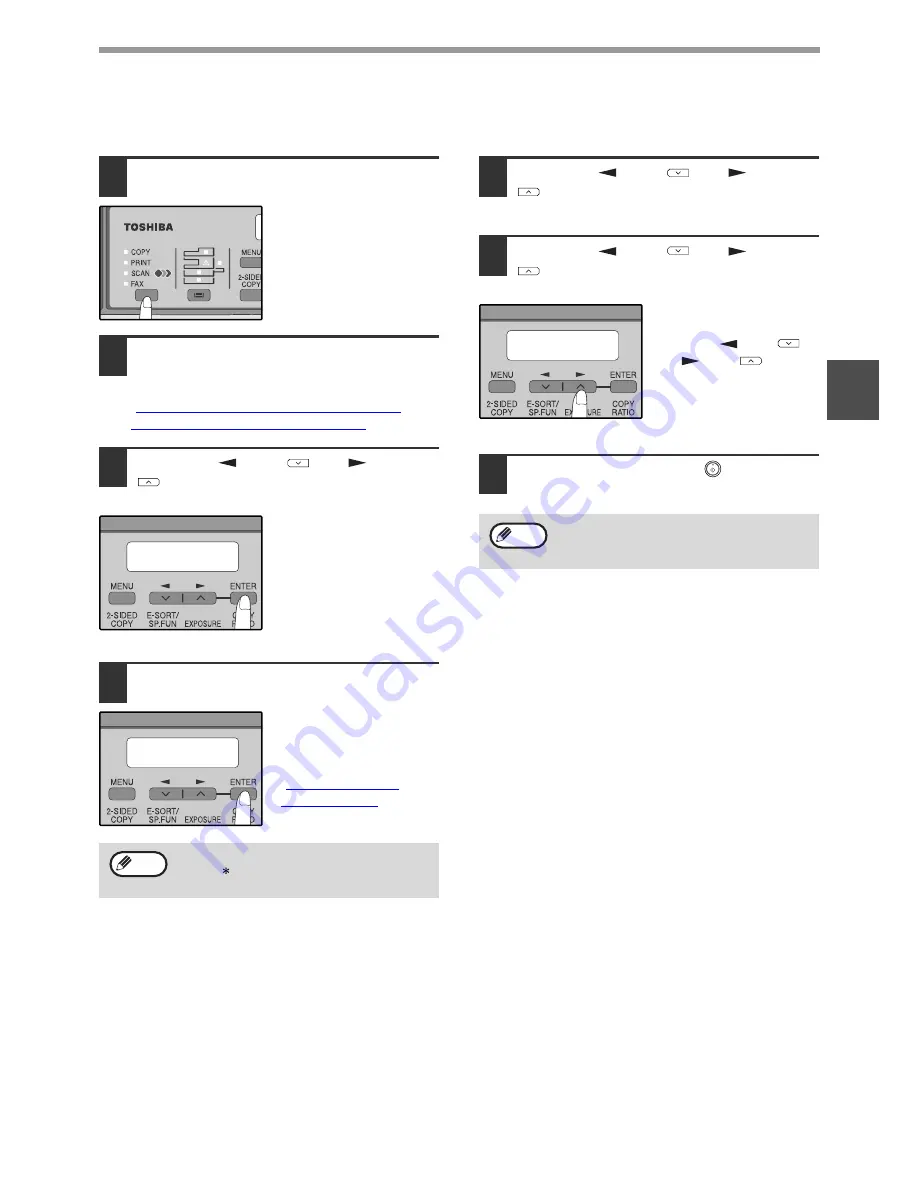
Sending an image by selecting an e-mail address in an LDAP server

To use an LDAP server, the LDAP server settings must be configured in the Web page.

1

Press the [MODE SELECT] key to 
select scanner mode.

The "SCAN" indicator 
lights up to indicate that 
scanner mode is 
selected.

2

Place the original in the document 
feeder tray or on the document glass.

For information on how to place the original, see 
"

IMAGE ORIENTATION AND STANDARD 

ORIGINAL LOADING ORIENTATION

" (p.20).

3

Press the [

] key (

) or [

] key 

(

) to select "GLOBAL ADDRESS" 

and then press the [ENTER] key.

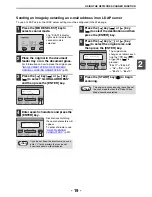
4

Enter search characters and press the 
[ENTER] key.

Destinations matching 
the search characters will 
appear.
To enter characters, see 
"

HOW TO ENTER 

CHARACTERS

" (p.20).

5

Press the [

] key (

) or [

] key 

(

) to select the destination and then 

press the [ENTER] key.

6

Press the [

] key (

) or [

] key 

(

) to select the original size, and 

then press the [ENTER] key.

The original size 
changes as follows each 
time the [

] key (

or [

] key (

) is 

pressed:
"8.5x11"

"8.5x5.5"

"A4"

"B5"

"A5"

"8.5x14"

"8.5x13".

7

Press the [START] key (

) to begin 

scanning.

If you do not know the exact name, you can 
enter " " for characters that you do not 
know to conduct a wildcard search.

SCAN USING:
GLOBAL ADDRESS

GLOBAL ADD. SEARCH
S

Note

The original is scanned using the settings of 
the scan mode that has the "Default Scan 
Mode" checkbox selected.

ORIG. SIZE ENTER
8.5X11

Note

Содержание GA-1330

Страница 1: ...NETWORK EXPANSION KIT Operator s Manual for Network Scanner GA 1330 ...

Страница 2: ...ersion and settings This manual refers to the Reversing Automatic Document Feeder as the RADF Where e STUDIOXXXX appears in this manual please substitute the name of your model Warranty While every effort has been made to make this operation manual as accurate and helpful as possible TOSHIBA TEC CORPORATION makes no warranty of any kind with regard to its content All information included herein is...

Страница 3: ...AN TO E MAIL 18 IMAGE ORIENTATION AND STANDARD ORIGINAL LOADING ORIENTATION 20 HOW TO ENTER CHARACTERS 20 3 TROUBLESHOOTING TROUBLESHOOTING 21 DISPLAY MESSAGES 22 IF YOUR E MAIL IS RETURNED 22 IMPORTANT POINTS WHEN USING SCAN TO E MAIL 23 CHECKING THE IP ADDRESS 24 HOW TO RESET THE NETWORK EXPANSION KIT 24 4 DESKTOP DOCUMENT MANAGER CD ROM for Windows SOFTWARE PROGRAMS 25 DESKTOP DOCUMENT MANAGER ...

Страница 4: ...ry on an FTP server This is called Scan to FTP in this manual When sending a scanned image to an FTP server an e mail message can also be sent to a preset e mail address to inform the recipient of the location of the scanned image data This is called Scan to FTP Hyperlink in this manual 2 A scanned image can be sent to a computer connected to the same network as the machine This is called Scan to ...

Страница 5: ...n the various function settings that can be operated remotely over the network from the machine s Web pages For the settings of each function see the explanations in Help 1 Open the Web browser on your computer Supported browsers Internet Explorer 5 5 or later Windows Netscape Navigator 6 0 or later 2 In the Address field of your Web browser enter the IP address of the machine To check the IP addr...

Страница 6: ...d Network Status Shows general information as well as the status of TCP IP NetWare AppleTalk and NetBEUI 3 Scan Management This is the base screen for storing editing and deleting destination information Destination p 8 Store destinations for Scan to FTP Scan to FTP Hyperlink Scan to Desktop and Scan to E mail You can also edit or delete previously stored destination information Network Scanning T...

Страница 7: ...ct the number of pages per image file ALL Default Scan Mode If you wish to use this scan mode as the default scan mode when storing destinations select the Default Scan Mode checkbox The Default Scan Mode is also used for Scan to E mail when the e mail address is directly entered or selected from an LDAP server Not selected For normal text originals a sufficiently legible image is produced when th...

Страница 8: ...formation click Submit The entries will be stored E mail destination information To perform Scan to E mail the SMTP server settings must first be established p 15 Note Item Description Name Required Enter the name of the destination up to 36 characters Initial Optional Enter initial text for the destination maximum of 10 characters When the destination list is displayed in the destination control ...

Страница 9: ...Optional Enter initial text for the destination maximum of 10 characters When the destination list is displayed in the destination control screen the initial text is used to group the destinations Custom Index Names can be assigned to the custom indexes as desired p 6 allowing convenient grouping of destinations Select a custom index for the destination to be stored Hostname or IP Address required...

Страница 10: ... Submit If there are several destinations that you wish to use on the new machine repeat this procedure as needed If the information entered here differs from the information entered on the host computer transmission reception will not be possible For the settings see the following table Scan to Desktop destination information If you entered a host name in Hostname or IP Address you will need to e...

Страница 11: ...displayed in the destination control screen the initial text is used to group the destinations Custom Index Names can be assigned to the custom indexes as desired p 6 allowing convenient grouping of destinations Select a custom index for the destination to be stored Address es Required Select the address of each destination from the E mail list box Programmed e mail destinations appear in each of ...

Страница 12: ...ts of programmed destinations You can print lists showing the destinations that have been programmed The following lists can be printed Print individual list Shows the information programmed in e mail FTP desktop and group destinations Print group list Shows only the information programmed in group e mail destinations 1 Click Destination in the menu frame of the Web page 2 To print the individual ...

Страница 13: ...tton A password can be set for the administrator and users 3 Clock Adjust This is used to set the time in the machine Make sure the time is set correctly when performing Scan to E mail This setting does not appear on models that have the fax function If your model has the fax function see the Operation manual for facsimile to set the time at the operation panel of the machine 4 Quick Setup p 15 Th...

Страница 14: ...t limit the image file is discarded The limit can be set from 1 MB to 10 MB in increments of 1 MB The factory default setting is Unlimited If you wish to set a limit remove the checkmark from the Unlimited checkbox and enter the desired limit 5 Select the method for assigning a file name to a scanned image Select the method for assigning a file name to a scanned image In File Naming click the item...

Страница 15: ...il addresses are managed on your network by an LDAP server the e mail addresses stored in the LDAP server can be used for Scan to E mail To allow the machine to use the e mail addresses in the LDAP server the LDAP server settings must be configured in the Web page Configuring SMTP DNS and LDAP server settings 1 Click Quick Setup in the menu frame 2 Enter the required information in SMTP DNS and LD...

Страница 16: ...n Password When establishing a password for the first time enter TOSHIBA in Admin Password 3 Enter passwords in User Password and Admin Password A maximum of 7 characters and or numbers can be entered for each password passwords are case sensitive Be sure to enter the same password in Confirm Password as you did in New Password 4 When you have completed all entries click Submit The entered passwor...

Страница 17: ...cters see HOW TO ENTER CHARACTERS p 20 5 Press the key or key to select the destination and then press the ENTER key 6 Press the key or key to select the original size and then press the ENTER key The original size changes as follows each time the key or key is pressed 8 5x11 8 5x5 5 A4 B5 A5 8 5x14 8 5x13 7 Press the START key to begin scanning SCAN USING ADDRESS SEARCH ADDRESS SEARCH S ORIG SIZE...

Страница 18: ...N AND STANDARD ORIGINAL LOADING ORIENTATION p 20 3 Select INPUT ADDRESS and press the ENTER key If INPUT ADDRESS does not appear make sure that Scan to ad hoc E mail is enabled in the Web page p 14 4 Enter the destination e mail address and press the ENTER key To enter characters see HOW TO ENTER CHARACTERS p 20 5 Press the key or key to select the original size and then press the ENTER key The or...

Страница 19: ... key 4 Enter search characters and press the ENTER key Destinations matching the search characters will appear To enter characters see HOW TO ENTER CHARACTERS p 20 5 Press the key or key to select the destination and then press the ENTER key 6 Press the key or key to select the original size and then press the ENTER key The original size changes as follows each time the key or key is pressed 8 5x1...

Страница 20: ...arked above the key The keys used for entering characters are shown below To enter two characters in succession which require using the same key press the key once after entering the first character and then enter the second character If you enter an incorrect character or number follow these steps to correct the mistake 1 Press the key or key to move the cursor to the character immediately follow...

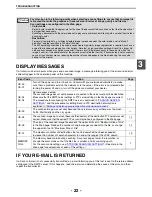
Страница 21: ...cessive Scan to FTP transmissions the second file is not sent The first file may still remain in the cache of the file server client Disable use of the cache in the client software The recipient does not receive transmitted data There is a mistake in the stored destination information or the wrong destination was selected Make sure that the correct destination information is stored If there is a m...

Страница 22: ... reducing the number of scanned pages in the file or reducing the scan size setting for the original Error Code Solution Page CE 00 CE 01 Turn off the power and turn it back on Consult with your network administrator to make sure that no problems exist on the network or in the server If the error is not cleared after turning the power off and on turn off the power and contact your dealer CE 02 CE ...

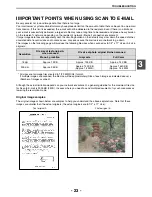
Страница 23: ...oduce the following file sizes when scanned as 8 1 2 x 11 size or A4 size originals All sizes are for image files created in TIFF MMR G4 format If multiple images are scanned the file size will be approximately Size of each image as indicated above x Number of images scanned Although the actual limitation depends on your network environment a general guideline for the maximum file size for Scan to...

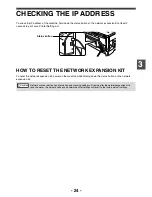
Страница 24: ...ESET THE NETWORK EXPANSION KIT To reset the network expansion kit power on the machine while holding down the status button on the network expansion kit Network scanner destination information and scanning settings will remain after the network expansion kit is reset however the network settings and network printer settings will revert to the factory default settings Status button Caution ...

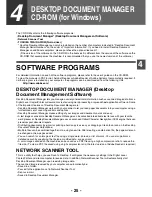
Страница 25: ... works with your scanner to let you read paper documents into your computer using a full featured set of scanning controls and options Desktop Document Manager makes editing of your images and documents quick and easy A text image scanned into Desktop Document Manager can be converted into editable text for use with your favorite word processor Desktop Document Manager uses an advanced Optical Cha...

Страница 26: ...rted USER S GUIDES FOR SOFTWARE PROGRAMS The Manual folder in the CD ROM contains user s guides in PDF format for each of the software programs Desktop Document Manager Installation Guide Desktop Document Manager User s Guide Network Scanner Tool User s Guide TOSHIBA TWAIN AR DM User s Guide In addition to explaining how to use the programs the user s guides also give detailed instructions for ins...

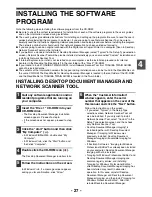
Страница 27: ...der INSTALLING DESKTOP DOCUMENT MANAGER AND NETWORK SCANNER TOOL 1 Quit any software applications and or resident programs that are running on your computer 2 Insert the Disc 1 CD ROM into your CD ROM drive The Desktop Document Manager installation screen appears Proceed to step 6 If the screen does not appear proceed to step 3 3 Click the start button and then click My Computer In Windows 98 Me 2...

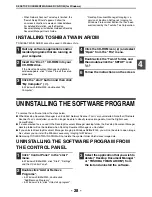
Страница 28: ...w the instructions on the screen UNINSTALLING THE SOFTWARE PROGRAM To remove the software follow the steps below When Desktop Document Manager is uninstalled Network Scanner Tool is also uninstalled Note that if Network Scanner Tool is uninstalled you will no longer be able to directly receive image data from the Digital Laser Copier Printer If a user created file is saved in the Desktop Document ...

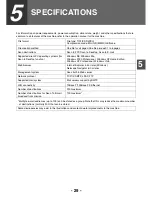
Страница 29: ...ages Scan destinations Scan to FTP Scan to Desktop Scan to E mail Supported client PC operating systems for Scan to Desktop function Windows 98 Windows Me Windows 2000 Professional Windows XP Home Edition Windows XP Professional Windows Vista Web browser Internet Explorer 5 5 or later Windows Netscape Navigator 6 0 or later Management system Uses built in Web server Network protocol TCP IP SMTP LD...

Страница 30: ...GA 1330 OME08009700 ...

Страница 31: ...2 17 2 HIGASHIGOTANDA SHINAGAWA KU TOKYO 141 8664 JAPAN NETWORK EXPANSION KIT Operator s Manual for Network Scanner GA 1330 2008 TOSHIBA TEC CORPORATION All rights reserved R080520F9000 TTEC 2008 07 ...

Отзывы: