background image

 Model No.    

KV-S4085CL / KV-S4085CW
KV-S4065CL / KV-S4065CW

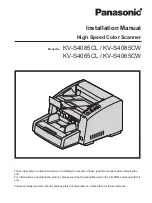
Installation Manual

These instructions contain information on installing the scanner. Please read this manual before installing the 
unit. 
For information on operating the scanner, please read the Operating Manual on the CD-ROM enclosed with this 
unit.

Please carefully read this manual, and keep this documentation in a safe place for future reference.

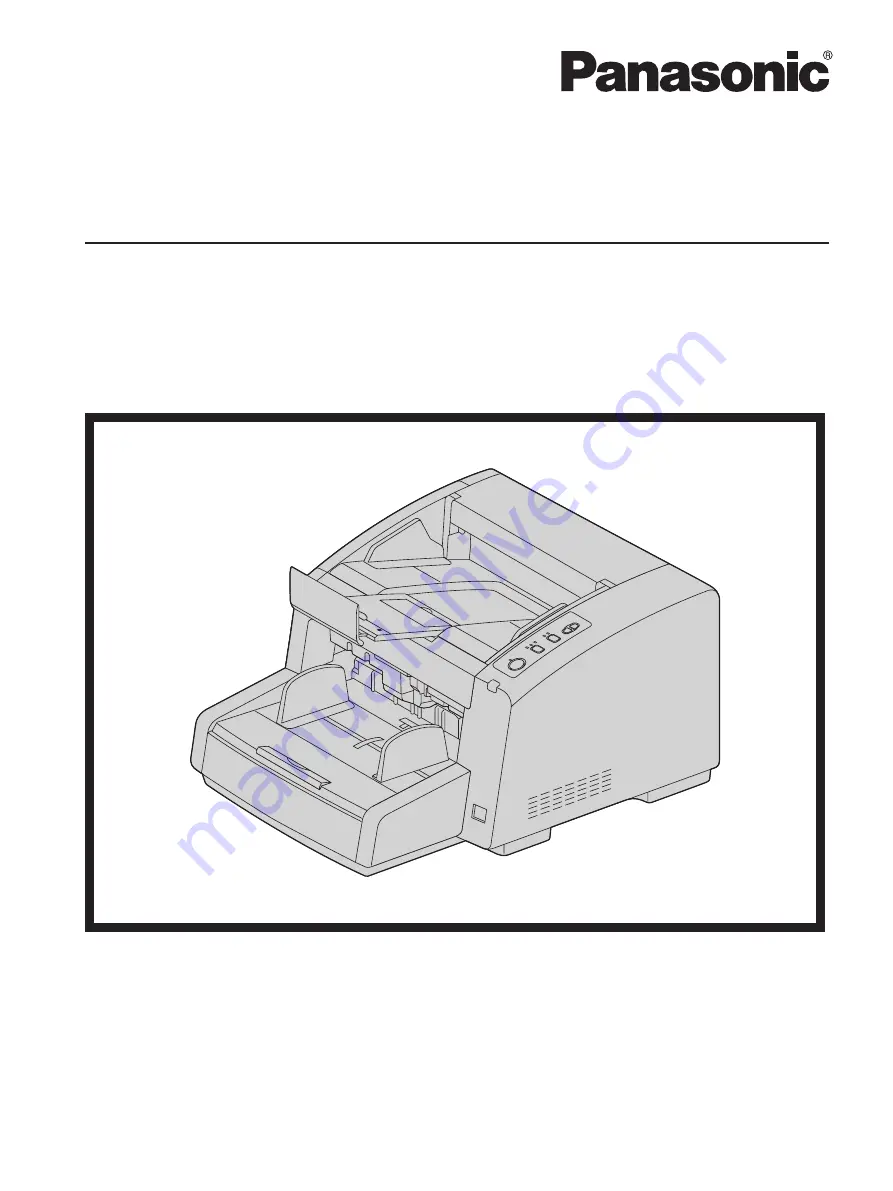
High Speed Color Scanner

Содержание KV-S4085CL

Страница 1: ... on installing the scanner Please read this manual before installing the unit For information on operating the scanner please read the Operating Manual on the CD ROM enclosed with this unit Please carefully read this manual and keep this documentation in a safe place for future reference High Speed Color Scanner ...

Страница 2: ... scanning A4 size paper in portrait orientation Support for High efficiency Scanning Jobs This scanner has a Stapled document detection function which can automatically detect stapled documents and try to stop scanning before any damage is caused to the scanner This scanner is equipped with 3 ultrasonic sensors that can be turn on and off independently They are in 3 different locations left center...

Страница 3: ...ted on the included CD ROM For details on viewing the documentation see Viewing Manuals From the CD ROM page 19 Abbreviations Windows refers to the Microsoft Windows operating system hereafter Windows Windows 2000 refers to the Microsoft Windows 2000 operating system hereafter Windows 2000 Windows XP refers to the Microsoft Windows XP operating system hereafter Windows XP Windows Vista refers to t...

Страница 4: ... frequency energy and if not installed and used in accordance with the instruction manual may cause harmful interference to radio communications Operation of this equipment in a residential area is likely to cause harmful interference in which case the user will be required to correct the interference at his own expense FCC Warning To assure continued FCC compliance the user must use only shielded...

Страница 5: ...ng the Unit 12 Installing Software 16 System Requirements 16 CD ROM Contents 16 Software Installation 17 Uninstalling Software 18 Viewing Electronic Documentation 19 Viewing Manuals From the CD ROM 19 Viewing Manuals Installed On Your Computer 19 Uninstalling Manuals 19 Appendix 20 Troubleshooting 20 Installation Manual 5 Table of Contents ...

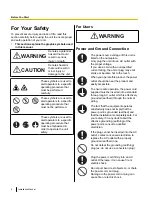
Страница 6: ...an unspecified current rating the unit or plug may emit smoke or become hot to the touch When you operate this product the power outlet should be near the product and easily accessible To ensure safe operation the power cord supplied must be inserted into a standard three prong AC outlet which is effectively grounded earthed through the normal wiring The fact that the equipment operates satisfacto...

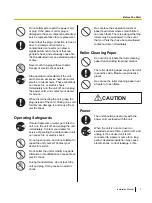
Страница 7: ...ce Operating the contaminated unit can cause fire or electric shock Do not open covers and do not attempt to repair the unit yourself Contact your dealer for service Do not alter the unit or modify any parts Alteration or modification can cause fire or electric shock During thunderstorms do not touch the unit and plug It may cause an electric shock Do not place the separation rollers or paper feed...

Страница 8: ...it by both side grips Dropping the unit can cause injury and damage to the unit Operating Safeguards If the unit falls down or gets damaged turn the unit off and unplug the power cord Otherwise it may cause fire or electric shock Do not place any liquids or heavy items on the unit Accidental spillage of liquid into the unit may cause severe damage If this occurs turn the unit off unplug the power ...

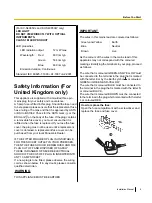
Страница 9: ...YOUR PREMISES THEN THE FUSE SHOULD BE REMOVED AND THE PLUG CUT OFF AND DISPOSED OF SAFELY THERE IS DANGER OF SEVERE ELECTRICAL SHOCK IF THE CUT OFF PLUG IS INSERTED INTO ANY 13 AMP SOCKET If a new plug is to be fitted please observe the wiring cord as shown below If in any doubt please consult a qualified electrician WARNING THIS APPLIANCE MUST BE EARTHED IMPORTANT The wires in this mains lead are...

Страница 10: ... the CD ROM Roller Cleaning Paper Keep the roller cleaning paper out of reach of small children Do not store the roller cleaning paper in direct sunlight or in a place with a temperature over 40 C 104 F Only use the roller cleaning paper to clean the rollers and image sensor covers For details about the roller cleaning paper please refer to the Material Safety Data Sheet MSDS Please ask your Panas...

Страница 11: ...ecks Bank and government bonds and securities Passports licenses official or private documents identification cards and the like Copyright materials or trademarks without the consent of the owner Postage stamps and other negotiable instruments This list is not inclusive and no liability is assumed for either its completeness or accuracy In case of doubt contact your legal counsel Notice Install yo...

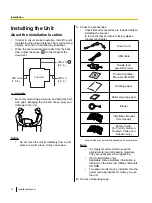
Страница 12: ...that all accessories are included before installing the scanner In the event that an item is missing please contact your dealer Power cord USB cable Double feed prevention roller Drivers Utilities Manuals CD ROM Shading paper Roller cleaning paper Blower Installation Manual this manual Safety Guide 1 for French German Spanish Italian and Russian only 1 Safety Guide may be included depending on cou...

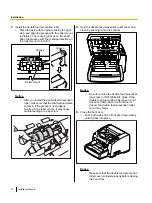
Страница 13: ... the screw Pre imprinter door Screw 4 Close the pre imprinter door Pre imprinter door 5 Pull the front door release towards you Then open the front door Front door release Front door 6 Pull open the double feed prevention roller cover towards you by using the indent Indent Installation Manual 13 Installation ...

Страница 14: ...rted in the roller mount it may cause double feeding or a paper jam 8 Hold the double feed prevention roller cover and close by pushing it into the scanner Notice Be sure to close the double feed prevention roller cover until it clicks into place If the double feed prevention roller cover is not closed correctly when the front door is closed the double feed prevention roller cover may break 9 Clos...

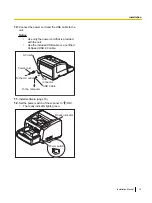
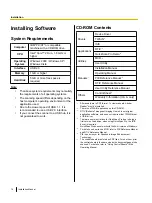
Страница 15: ...nit Use the included USB cable or a certified Hi Speed USB 2 0 cable AC inlet USB connector USB Cable To the computer Power cord To the AC outlet 11 Install software page 16 12 Set the power switch of the scanner to ON The ready indicator lights green Ready indicator Power switch Installation Manual 15 Installation ...

Страница 16: ...Manual PIE Reference Manual 6 RTIV Reference Manual User Utility Reference Manual Others Control Sheet 7 Warranty Information U S A only 1 All manuals are in PDF format To view manuals Adobe Reader must be installed 2 There is no TWAIN application on this CD ROM 3 RTIV Reliable Throughput Imaging Viewer is our original application software and does not require either TWAIN driver or ISIS driver 4 ...

Страница 17: ...included CD ROM into the CD DVD drive on your computer If you have a feature called Autorun activated the installation process will start automatically The setup window will appear Note If the AutoPlay dialog box is displayed in Windows Vista select CDRun exe If the program does not start automatically from My Computer Computer in Windows Vista select the CD DVD drive and then double click CDRun e...

Страница 18: ...not passed Windows Logo testing Uninstalling Software If you want to remove the software that is installed on your computer follow the procedure below to uninstall them 1 In Control Panel open Add or Remove Programs In Windows 2000 select Add Remove Programs and in Windows Vista select Uninstall a program 2 Select the item that you want to uninstall The software is displayed with the program names...

Страница 19: ...load Adobe Reader by clicking the URL below Download Adobe Reader The URL is displayed in the Manuals list on the setup screen Viewing Manuals Installed On Your Computer All manuals installed on your computer can be viewed as follows Note To install manuals on your computer see page 17 You can view the RTIV Reference Manual and the User Utility Reference Manual by clicking the help button on the s...

Страница 20: ...ected to the computer correctly Connect the USB cable correctly The software is not installed correctly Uninstall the software from the computer page 18 and then install the software again page 17 The USB interface of the computer is not installed correctly Check the computer whether the USB interface of your computer is installed correctly using the device manager s property The unit is connected...

Страница 21: ...Installation Manual 21 Notes ...

Страница 22: ...22 Installation Manual Notes ...

Страница 23: ...Installation Manual 23 Notes ...

Страница 24: ... may be able to return your products to your local retailer upon the purchase of an equivalent new product Disposing of this product correctly will help to save valuable resources and prevent any potential negative effects on human health and the environment which could otherwise arise from inappropriate waste handling Please contact your local authority for further details of your nearest designa...

Отзывы: