Notes:
•
A flash drive icon appears on the printer home screen when
a flash drive is inserted.
•
If you insert the flash drive when the printer requires
attention, such as when a jam has occurred, then the printer
ignores the flash drive.
•
If you insert the flash drive while the printer is processing
other print jobs, then
Busy
appears. After these print jobs
are processed, you may need to view the held jobs list to
print documents from the flash drive.
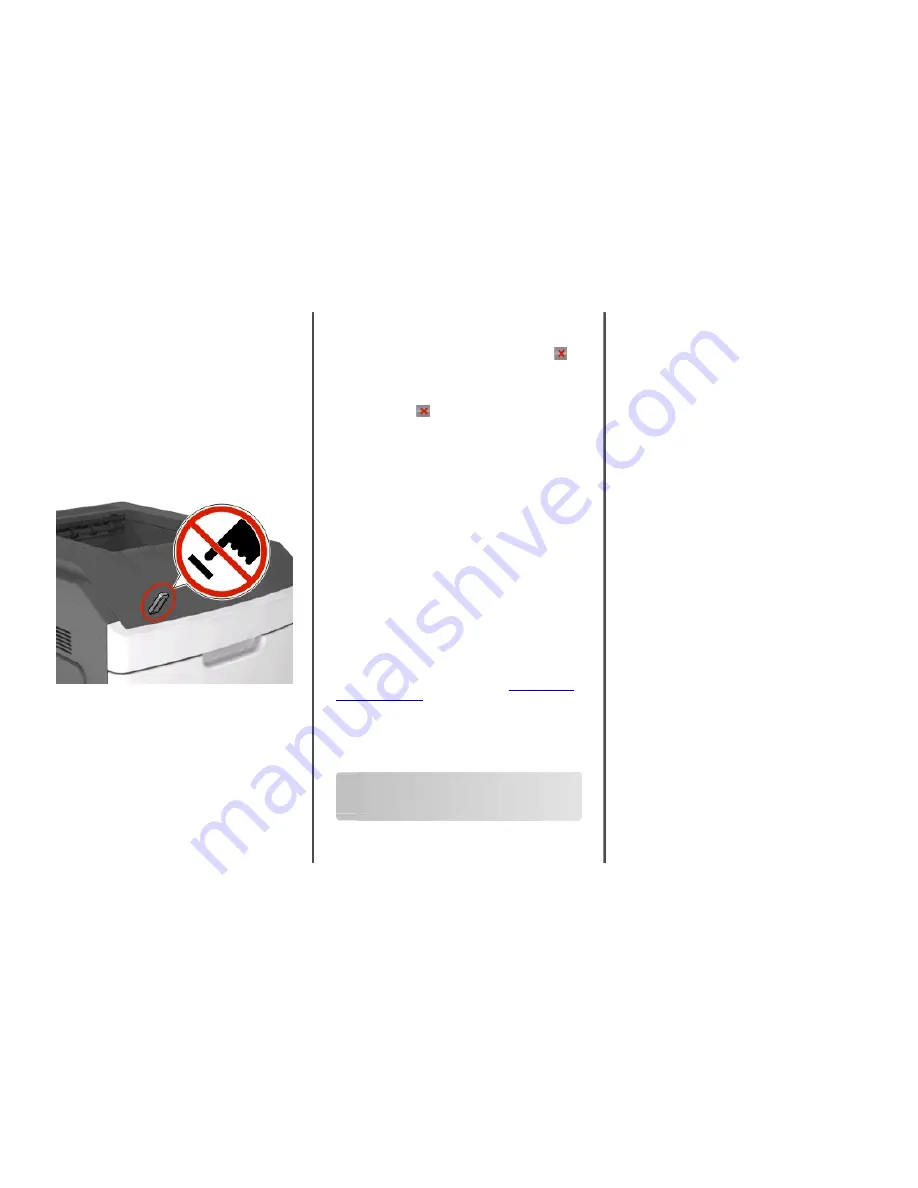
Warning—Potential Damage:
Do not touch the USB cable, any
wireless network adapter, any connector, the memory device, or
the printer in the areas shown while actively printing, reading, or
writing from the memory device. Loss of data can occur.
2
From the printer control panel, touch the document you want to
print.
3
Touch the arrows to specify the number of copies for printing, and
then touch
.
Notes:
•
Do not remove the flash drive from the USB port until the
document has finished printing.
•
If you leave the flash drive in the printer after leaving the
initial USB menu screen, then touch
Held Jobs
on the home
screen to print files from the flash drive.
Canceling a print job from the printer control
panel
1
From the printer control panel, touch
Cancel Job
or press
on
the keypad.
2
Touch the print job you want to cancel, and then touch
Delete
Selected Jobs
.
Note:
If you press
on the keypad, then touch
Resume
to
return to the home screen.
Linking and unlinking trays
1
Open a Web browser, and then type the printer IP address in the
address field.
Notes:
•
View the printer IP address on the printer home screen. The
IP address appears as four sets of numbers separated by
periods, such as 123.123.123.123.
•
If you are using a proxy server, then temporarily disable it to
load the Web page correctly.
2
Click
Settings
>
Paper Menu
.
3
Change the paper size and type settings for the trays you are linking.
•
To link trays, make sure the paper size and type for the tray
match that of the other tray.
•
To unlink trays, make sure the paper size or type for the tray
does not
match that of the other tray.
4
Click
Submit
.
Note:
You can also change the paper size and type settings using the
printer control panel. For more information, see
“Setting the paper
size and type” on page 8
.
Warning—Potential Damage:
Paper loaded in the tray should match
the paper type name assigned in the printer. The temperature of the
fuser varies according to the specified paper type. Printing issues
may occur if settings are not properly configured.
Setting up and using the home
screen applications
Note:
This chapter is applicable only to 4.3- and 7-inch touch screen
printer models.
Finding the IP address of the printer
Note:
Make sure your printer is connected to a network or to a print
server.
You can find the printer IP address:
•
From the top left corner of the printer home screen.
•
From the TCP/IP section in the Network/Ports menu.
•
By printing a network setup page or menu settings page, and then
finding the TCP/IP section.
Note:
An IP address appears as four sets of numbers separated by
periods, such as 123.123.123.123.
Finding the IP address of the computer
For Windows users
1
In the Run dialog box, type
cmd
to open the command prompt.
2
Type
ipconfig
, and then look for the IP address.
For Macintosh users
1
From System Preferences in the Apple menu, select
Network
.
2
Select your connection type, and then click
Advanced
>
TCP/IP
.
3
Look for the IP address.
Accessing the Embedded Web Server
The Embedded Web Server is the printer Web page that lets you view
and remotely configure printer settings even when you are not
physically near the printer.
1
Obtain the printer IP address:
•
From the printer control panel home screen
•
From the TCP/IP section in the Network/Ports menu
•
By printing a network setup page or menu settings page, and
then finding the TCP/IP section
Note:
An IP address appears as four sets of numbers separated
by periods, such as
123.123.123.123
.
2
Open a Web browser, and then type the printer IP address in the
address field.
3
Press
Enter
.
Note:
If you are using a proxy server, then temporarily disable it
to load the Web page correctly.
9


