1
Open a Web browser, and then type the printer IP address in the
address field.
Note:
View the printer IP address on the printer home screen.
The IP address appears as four sets of numbers separated by
periods, such as 123.123.123.123.
2
To export or import a configuration for one application, do the
following:
a
Click
Settings
>
Apps
>
Apps Management
.
b
From the list of installed applications, click the name of the
application you want to configure.
c
Click
Configure
, and then do either of the following:
•
To export a configuration to a file, click
Export
, and then
follow the instructions on the computer screen to save the
configuration file.
Notes:
–
When saving the configuration file, you can type a
unique file name or use the default name.
–
If a "JVM Out of Memory” error occurs, then repeat
the export process until the configuration file is
saved.
•
To import a configuration from a file, click
Import
, and then
browse to the saved configuration file that was exported
from a previously configured printer.
Notes:
–
Before importing the configuration file, you can
choose to preview it first or load it directly.
–
If a timeout occurs and a blank screen appears, then
refresh the Web browser, and then click
Apply
.
3
To export or import a configuration for multiple applications, do
the following:
a
Click
Settings
>
Import/Export
.
b
Do either of the following:
•
To export a configuration file, click
Export Embedded
Solutions Settings File
, and then follow the instructions on
the computer screen to save the configuration file.
•
To import a configuration file, do the following:
1
Click
Import Embedded Solutions Settings File
>
Choose File
, and then browse to the saved
configuration file that was exported from a previously
configured printer.
2
Click
Submit
.
Printing
Printing a document
1
From the printer control panel, set the paper type and size to match
the paper loaded.
2
Send the print job:
For Windows users
a
With a document open, click
File
>
.
b
Click
Properties
,
Preferences
,
Options
, or
Setup
.
c
Adjust the settings, if necessary.
d
Click
OK
>
.
For Macintosh users
a
Customize the settings in the Page Setup dialog:
1
With a document open, choose
File
>
Page Setup
.
2
Choose a paper size or create a custom size to match the
paper loaded.
3
Click
OK
.
b
Customize the settings in the Print dialog:
1
With a document open, choose
File
>
.
If necessary, click the disclosure triangle to see more
options.
2
From the print options pop
‑
up menus, adjust the settings,
if necessary.
Note:
To print on a specific paper type, adjust the
paper type setting to match the paper loaded, or select
the appropriate tray or feeder.
3
Click
.
Canceling a print job from the computer
For Windows users
1
Open the printers folder, and then select your printer.
2
From the print queue, select the print job you want to cancel, and
then delete it.
For Macintosh users
1
From System Preferences in the Apple menu, navigate to your
printer.
2
From the print queue, select the print job you want to cancel, and
then delete it.
Loading paper and specialty
media
Loading the 250
‑
or 550
‑
sheet tray
CAUTION—POTENTIAL INJURY:
To reduce the risk of
equipment instability, load each tray separately. Keep all other
trays closed until needed.
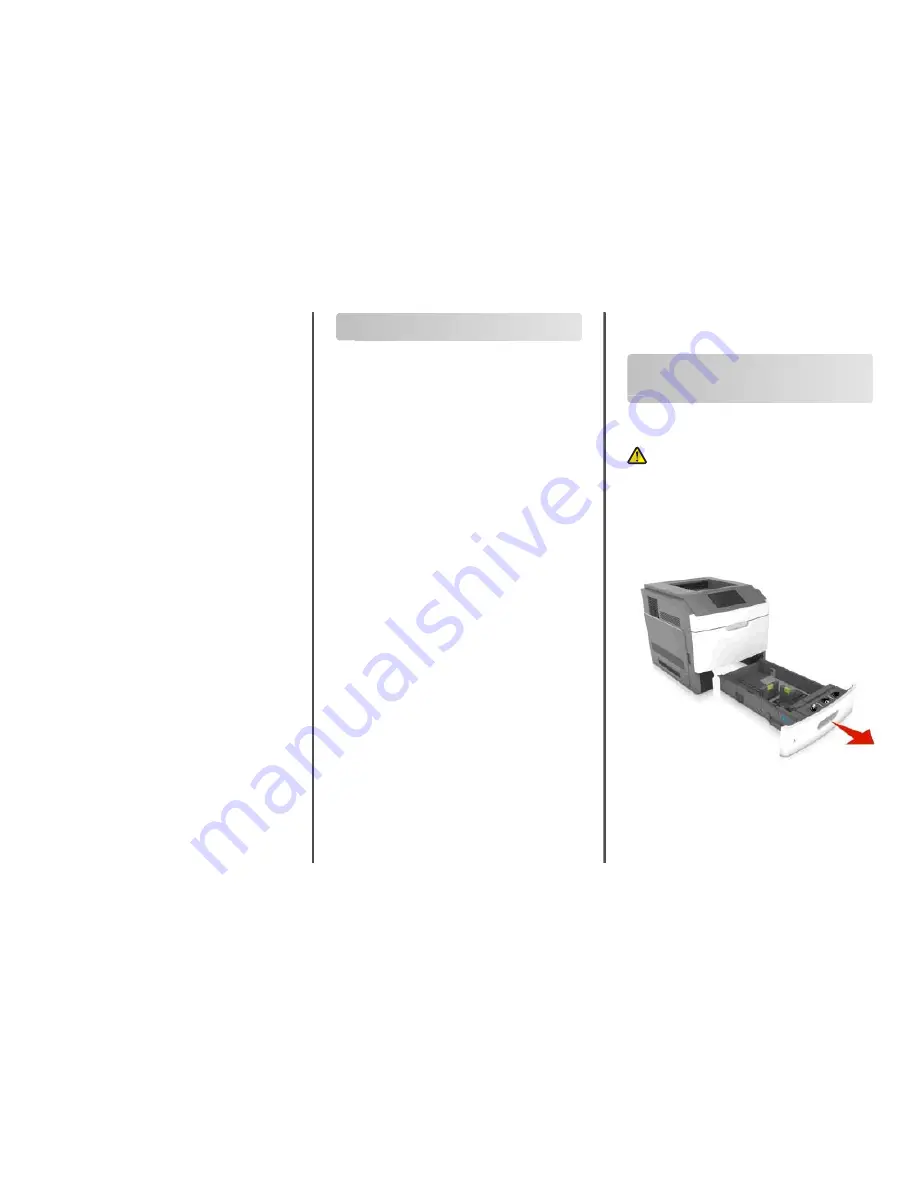
1
Pull out the tray.
Notes:
•
When loading folio
‑
, legal
‑
, or Oficio
‑
size paper, lift the tray
slightly and then pull it out completely.
•
Do not remove trays while a job prints or while
Busy
appears on the display. Doing so may cause a jam.
11


