49
EN
In
tr
od
uct
ion
Con
n
ec
ti
on
s
P
lay
b
a
ck
Ed
it
in
g
O
th
e
rs
Fu
nct
ion
S
e
tu
p
Re
co
rd
in
g
V
H
S
Fu
nc
ti
on
s
Basi
c Se
tu
p /
TV
Vi
ew
Op
eration
1
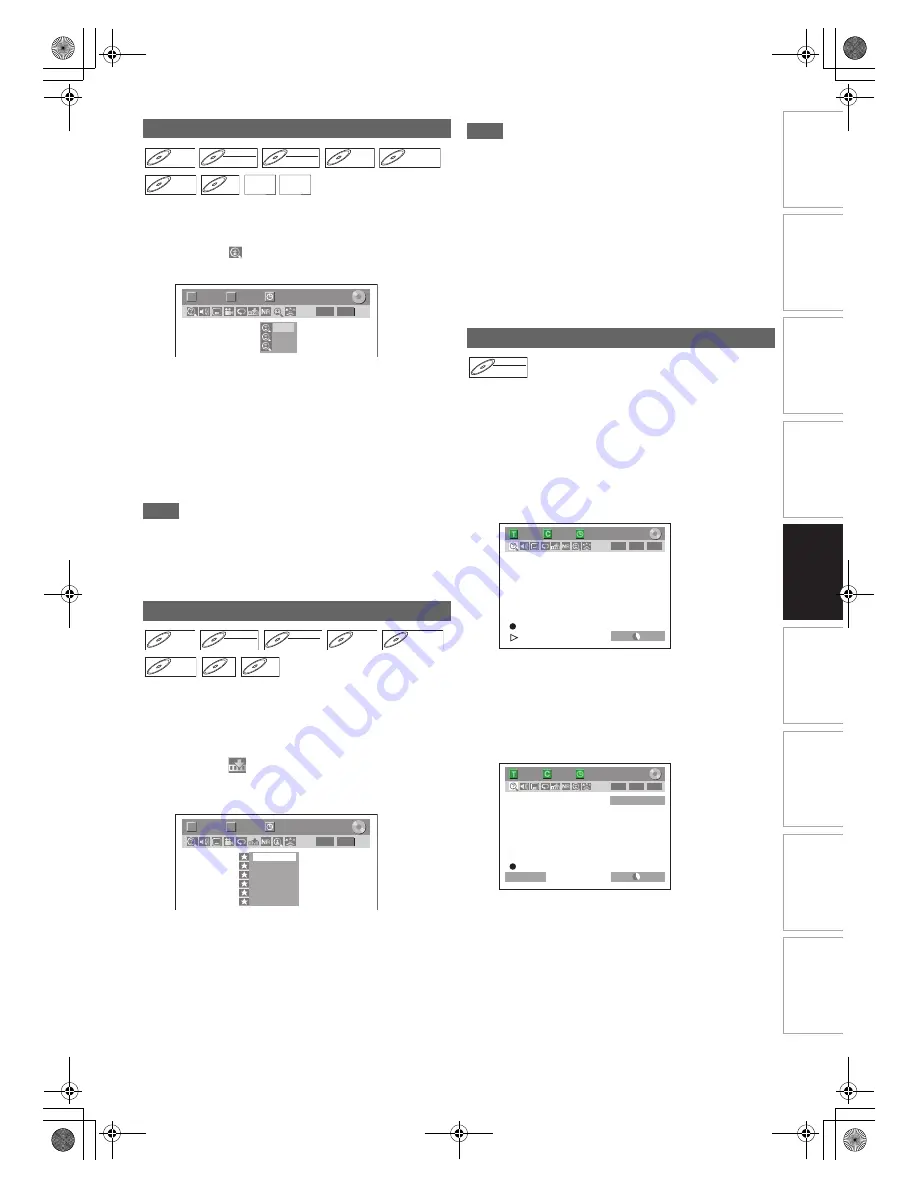
During playback, press [DISPLAY] to bring up
the display menu.
2
Select the
icon using [
0
\
1
] to display the
selection menu.
Four options are available, “x1.0”, “x1.2”, “x1.5” and
“x2.0”. These are displayed excluding the current zoom
rate.
3
Select the desired zoom factor to zoom using
[
K
\
L
], then press [ENTER
\
OK].
The zoom area is displayed.
4
Select the desired zoom position using
[
K
\
L
\
0
\
1
], then press [ENTER
\
OK].
Zoom playback will start.
Note
• To cancel the zoom function, select “x1.0” using
[
K
\
L
]
,
then press
[ENTER
\
OK]
.
• If selecting a smaller factor than that currently selected, the
zoom area is not displayed.
• You cannot slide the zoomed picture on some JPEG files.
You can assign a specific point on a disc to return later.
1
During playback, press [DISPLAY] to bring up
the display menu.
If the display menu is already shown, skip to step
2
.
2
Select the
icon using [
0
\
1
] to display the
marker list.
e.g.) DVD-video
3
Select the desired marker number using [
K
\
L
].
When the disc reaches the desired point, press
[ENTER
\
OK].
The title (track) number and the time are displayed.
4
To return to the marker, select the desired
marker number using [
K
\
L
], then press
[ENTER
\
OK].
Note
• To clear a marker, select the marker number you want to
clear, then press
[CLEAR]
.
• You can mark up to 6 points.
• All markers are erased when you perform the following
operations.
- Opening the disc tray
- Turning off the power
- Making additional recording on the disc (DVD only)
- Editing any title (DVD only)
- Changing the mode between Original and Playlist. (VR
mode DVD-RW disc only)
• Marker setting is not available when you play back the video
CD with PBC function.
You can play back a title being recorded from the beginning
while recording continues. This function works from 1 minute
after the start of the recording. Make sure to use a DVD-RW
disc in VR mode, and the recording mode is set to LP, EP or
SLP.
1
Press [PLAY
B
] during recording.
Playback will start from the beginning of the programme
that you are currently recording.
Screen for the current playback:
If you play the fast forward playback and the playback
reaches the scene recorded 1 minute before, the
forwarding playback will automatically return to the normal
playback.
2
To stop the playback, press [STOP
C
] once.
The resume message will appear.
Screen for the current recording:
To stop recording, press
[STOP
C
]
again.
To cancel the resume, press
[STOP
C
]
again.
Zoom
Marker Setup
DVD-V
DVD-V
DVD-V
DVD-RW
DVD-RW
DVD-RW
Video
DVD-RW
DVD-RW
DVD-RW
VR
DVD-R
DVD-R
DVD-R
DVD+RW
DVD+RW
DVD+RW
DVD+R
DVD+R
DVD+R
VCD
VCD
VCD JPEG
JPEG
JPEG DivX
DivX
®
DivX
®
1/ 5
1/ 5
DVD
0:01:00 / 1:23:45
Video
T
C
× 1.2
× 1.5
× 2.0
DVD-V
DVD-V
DVD-V
DVD-RW
DVD-RW
DVD-RW
Video
DVD-RW
DVD-RW
DVD-RW
VR
DVD-R
DVD-R
DVD-R
DVD+RW
DVD+RW
DVD+RW
DVD+R
DVD+R
DVD+R
CD
CD
CD
VCD
VCD
VCD
(PBC OFF)
1/ 5
1/ 5
DVD
---
---
---
---
---
---
1
2
3
4
5
6
0:01:00 / 1:23:45
Video
T
C
Chasing Playback during Recording
DVD-RW
DVD-RW
DVD-RW
VR
1/ 5
1/ 5
0:01:00 / 1:23:45
-RW
VR
ORG
LP
1:01
1/ 5
1/ 5
0:01:00 / 1:23:45
LP
1:01
Resume ON
-RW
VR
ORG
1
TF1
E9TK5FD_EN.book Page 49 Wednesday, January 13, 2010 10:33 AM


