background image

MULTIFUNCTIONAL DIGITAL COLOR SYSTEMS / 
MULTIFUNCTIONAL DIGITAL SYSTEMS

MFP Management Guide

Содержание DIGITAL Series

Страница 1: ...MULTIFUNCTIONAL DIGITAL COLOR SYSTEMS MULTIFUNCTIONAL DIGITAL SYSTEMS MFP Management Guide ...

Страница 2: ... 2012 2013 TOSHIBA TEC CORPORATION All rights reserved Under the copyright laws this manual cannot be reproduced in any form without prior written permission of TTEC ...

Страница 3: ...the scanning printing function as an option However this optional scanning printing function is already installed in some models Indicates a potentially hazardous situation which if not avoided could result in death serious injury or serious damage or fire in the equipment or surrounding objects Indicates a potentially hazardous situation which if not avoided may result in minor or moderate injury...

Страница 4: ... of Windows 7 is Microsoft Windows 7 Operating System The official name of Windows Server 2003 is Microsoft Windows Server 2003 Operating System The official name of Windows Server 2008 is Microsoft Windows Server 2008 Operating System Microsoft Windows Windows NT and the brand names and product names of other Microsoft products are trademarks of Microsoft Corporation in the US and other countries...

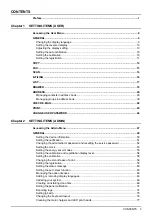
Страница 5: ...in Menu 47 GENERAL 49 Setting the device information 50 Setting the notification 51 Changing the administrator password and resetting the service password 52 Setting the clock 53 Setting the energy saver modes 55 Setting the calibration and registration display level 58 Setting the calibration 58 Changing the smoothness of print 59 Setting the registration 59 Setting the status message 60 Setting ...

Страница 6: ...E 99 E MAIL 100 INTERNET FAX 102 SECURITY 103 Managing certificates 103 Setting secure PDF 109 Performing the integrity check 111 LIST REPORT 113 Setting the report 113 Printing lists 116 PRINTER e FILING 118 WIRELESS SETTING 120 CHANGE USER PASSWORD 121 802 1X SETTINGS 122 Setting IEEE 802 1X authentication 123 Error messages 125 FACTORY DEFAULT 126 Chapter 3 MANAGING COUNTERS COUNTER MENU TOTAL ...

Страница 7: ...eting all department codes 151 Chapter 4 APPENDIX Setting Letters 154 On screen keyboard 154 On screen numeric keypad 155 List Print Format 156 TOTAL COUNTER LIST 156 DEPARTMENT CODE LIST 157 ADDRESS BOOK INFORMATION 158 GROUP NUMBER INFORMATION 159 FUNCTION LIST User 160 NIC configuration page 161 FUNCTION LIST Administrator 163 PS3 font list 182 PCL font list 183 INDEX 185 ...

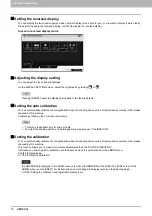
Страница 8: ...6 CONTENTS ...

Страница 9: ...splay 10 Adjusting the display setting 10 Setting the auto calibration 10 Setting the calibration 10 Setting the registration 11 COPY 12 FAX 13 SCAN 14 E FILING 16 LIST 17 DRAWER 18 ADDRESS 20 Managing contacts in address book 20 Managing groups in address book 30 CHECK E MAIL 42 PRINT 43 CHANGE USER PASSWORD 44 ...

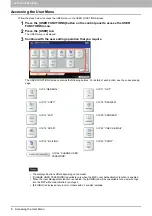
Страница 10: ...the following buttons For details of each button see the corresponding page The displayed buttons differ depending on the model CHANGE USER PASSWORD is available only when the MFP Local Authentication function is enabled When the User Management function is enabled the ADMIN tab will be unavailable for a user who logs into the MFP without administrator privileges E FILING is displayed only in colo...

Страница 11: ...e model Changing the display language You can change the language used on the touch panel to a different one Selecting the desired display language and pressing OK changes the language used on the display to that selected To add a display language see the following page P 63 Adding or removing display languages P 9 Changing the display language P 10 Setting the auto calibration P 10 Setting the re...

Страница 12: ...canned by this machine Calibrate by following the on screen instructions This menu is available only for some models To adjust the shading and hue of the images more precisely use CALIBRATION Setting the calibration You can automatically calibrate the color gradation when the shading and hue are not reproduced accurately in the images scanned by this machine This function allows you to make more p...

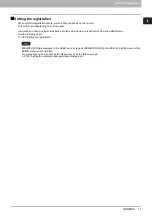
Страница 13: ...tions on how to perform registration are the same as when it is performed from the ADMIN menu See the following page P 59 Setting the registration REGISTRATION is displayed in the USER menu only when REGISTRATION in the DISPLAY LEVEL screen of the ADMIN menu is set to USER For instructions on how to change the display level see the following page P 58 Setting the calibration and registration displ...

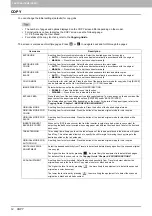
Страница 14: ...der BACK PRINTED The displayed paper types differ depending on the model For details of the paper types refer to the Copying Guide Chapter 1 BEFORE USING EQUIPMENT ORIGINAL MODE A setting item for monochromatic models Press the button of the desired original mode ORIGINAL MODE FOR COLOR A setting item for color models Press the button of the desired original mode for color copies ORIGINAL MODE FOR...

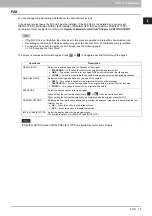
Страница 15: ... based on the fineness of the original STANDARD This option is suitable for an original with regular size text FINE This option is suitable for an original with small size text and fine illustrations U FINE This option is suitable for an original with small size text and detailed illustrations ORIGINAL MODE Select the scanning mode based on the type of the original TEXT This option is suitable for...

Страница 16: ...egrees to the left PREVIEW SETTING Enabling the Preview function allows you to preview the scanned images before saving or E mailing them ON Press this button to enable the function OFF Press this button to disable the function INITIAL PREVIEW TYPE Select the display mode for the preview screen The available options are PAGE FIT and WIDTH FIT OMIT BLANK PAGE ADJUSTMENT Select the desired sensitivi...

Страница 17: ... mode for scans ORIGINAL MODE is not available in Gray Scale mode EXPOSURE Select the desired exposure for scans To set the contrast manually press or and set the desired contrast level To set the contrast automatically in accordance with the original press AUTO BACKGROUND ADJUSTMENT Select the desired background exposure for scans The higher the exposure set by pressing the lighter the background...

Страница 18: ...E FILING screen see the following page P 8 Accessing the User Menu Item name Description GENERAL Press this button to apply proper color quality for printing a general color document PHOTOGRAPH Press this button to apply proper color quality for printing photos PRESENTATION Press this button to apply proper color quality for printing presentation material LINE ART Press this button to apply proper...

Страница 19: ...tem name Description ADDRESS BOOK Press this button to print the ADDRESS BOOK INFORMATION that shows all registered contacts in the equipment ID SORT Press this button to print the ADDRESS BOOK INFORMATION sorted by ID number NAME SORT Press this button to print the ADDRESS BOOK INFORMATION sorted by last name For an output example of ADDRESS BOOK INFORMATION see the following page P 158 ADDRESS B...

Страница 20: ...allows you to automatically set the size of the paper placed in the drawers Press AUTO mm when using A B format paper such as A3 and A4 and AUTO inch when using LT format paper such as LD and LT The displayed buttons differ depending on the model The equipment may fail to detect the paper size and displays the mark if the LT format paper is placed in the drawer for which AUTO mm is set or vice ver...

Страница 21: ...per in the drawer will always be used for copy insertion The displayed buttons differ depending on the model For details of the paper types refer to the Copying Guide Chapter 1 BEFORE USING EQUIPMENT Paper placed in a drawer set with THICKNESS other than PLAIN or RECYCLED PAPER or paper placed in a drawer set with ATTRIBUTE other than NONE is out of the scope of the Automatic Paper Selection APS F...

Страница 22: ...e mail address or both When the FAX Unit is installed you can also specify fax transmission options for each contact such as transmission type ECM quality transmission line select and subaddress settings To send and receive faxes the FAX Unit must be installed Depending on the model you can use E mail addresses registered in the address book as destinations for Scan to E mail or Internet Fax only ...

Страница 23: ...ess this button to enter the last name of the contact This name will appear in the address book list on the touch panel You can enter up to 32 characters FAX NO Press this button to enter the fax number of the contact You can enter a number of up to 128 digits 2ND FAX Press this button to enter the second fax number of the contact When repeated attempts to connect to FAX NO fail fax is sent to 2ND...

Страница 24: ...een numeric keypad is displayed For details of the on screen numeric keypad see the following page P 155 On screen numeric keypad 3 Press OPTION to specify the default settings for fax transmission This step is available only when the FAX Unit is installed For details of the options for fax transmission refer to the Operator s Manual for FAX Unit Chapter 6 SETTING ITEMS 4 Press OK to register the ...

Страница 25: ...ng information can be registered from the Scan Log E mail addresses that were manually entered 1 Press JOB STATUS on the touch panel 2 Press the LOG tab and then SEND or RECEIVE or SCAN The SEND or RECEIVE or SCAN LOG list is displayed 3 Select the job that includes the fax number or E mail address you want to register into the address book and press ENTRY To register E mail addresses specified as...

Страница 26: ...m the USER FUNCTIONS using ADDRESS button 5 Press OPTION to specify the default settings for fax transmission This step is available only when the FAX Unit is installed For details of the options for fax transmission refer to the Operator s Manual for FAX Unit Chapter 6 SETTING ITEMS 6 Press OK to register the contact The contact is registered in the address book ...

Страница 27: ...ou want to edit press to display the next page The search function allows you to quickly search for the contact you want to edit To search for the contact see the following page P 27 Searching for contacts To delete press the contact you want to delete and then DELETE The message Delete OK is displayed on the ATTENTION screen Press YES to delete the contact 2 Edit the contact information For the d...

Страница 28: ...ttings for fax transmission This step is available only when the FAX Unit is installed For details of the options for fax transmission refer to the Operator s Manual for FAX Unit Chapter 6 SETTING ITEMS 4 Press OK to save the contact The edited contact information is saved ...

Страница 29: ...rching for contacts by entering a search string Searching for contacts by ID number 1 On the ADDRESS BOOK screen press KNOWN ID The KNOWN ID screen is displayed 2 Enter the ID Number using the digital keys and press OK 3 The touch panel displays the found contact Press the contact and then EDIT to edit the contact information Or press DELETE to delete the contact For instructions on editing or del...

Страница 30: ...ed For details of the on screen keyboard see the following page P 154 On screen keyboard When you press FAX NO the on screen numeric keypad is displayed For details of the on screen numeric keypad see the following page P 155 On screen numeric keypad Contacts that contain the search string for the specified item will be found 3 Enter the search string and press OK 4 Specify the search string in th...

Страница 31: ...or instructions on editing contacts see the following page P 25 Editing or deleting contacts Press or to display the found contacts on different pages if one page is not enough to display them Pressing or allows you to skip 5 pages If you want to change the results of the search press RESEARCH Then you will be returned to the Step 2 screen specify the search string again ...

Страница 32: ...ress is counted as one destination Therefore if you select a contact that contains both a fax number and an E mail address it results in two destinations in the group To send and receive faxes the FAX Unit must be installed On the GROUP tab of the ADDRESS BOOK menu you can perform the following operations to manage contacts P 30 Creating new groups P 33 Editing or deleting groups P 38 Searching fo...

Страница 33: ...en is displayed 5 Select the contacts that you want to add to the group and press OK To add contacts by selecting each contact manually see the following page P 35 Adding or removing contacts To add contacts by searching for them by ID number see the following page P 35 Adding or removing contacts by searching by ID number To add contacts by searching for them with a search string see the followin...

Страница 34: ...1 SETTING ITEMS USER 32 ADDRESS 6 The new group is created and it appears on the touch panel ...

Страница 35: ...is registered in 1 On the ADDRESS BOOK screen press the group that you want to edit and then EDIT The GROUP NO EDIT screen is displayed If the touch panel does not display the group that you want to edit press to display the next page The following two methods are available to find the group that you want to edit P 38 Searching for groups by ID number P 39 Searching for groups by group name To del...

Страница 36: ... in the group proceed to the next step If you need to change the members in the group see the following pages Adding or removing contacts by selecting each contact manually P 35 Adding or removing contacts Adding or removing contacts by searching for them by ID number P 35 Adding or removing contacts by searching by ID number Adding or removing contacts by searching for them with a search string P...

Страница 37: ... press the contact name To add remove only the fax number of a contact to from the group press in the contact information To add remove only the E mail address of a contact to from the group press in the contact information Press or to display contacts on different pages You can remove all contacts by pressing ALL CLEAR Adding or removing contacts by searching by ID number 1 On the CHECK OF GROUP ...

Страница 38: ...contact to from the group press in the contact information Adding or removing contacts by searching with a search string 1 On the CHECK OF GROUP MEMBER screen press SEARCH The ADDRESS SEARCH screen is displayed 2 Press the button of the item target of the search When you press a button other than FAX NO the on screen keyboard is displayed For details of the on screen keyboard see the following pag...

Страница 39: ...contacts is complete press OK To add remove both the fax number and E mail address of a contact to from the group press the contact name To add remove only the fax number of a contact to from the group press in the contact information To add remove only the E mail address of a contact to from the group press in the contact information Press or to display the found contacts on different pages if on...

Страница 40: ...39 Searching for groups by group name Searching for groups by ID number 1 On the ADDRESS BOOK screen press KNOWN ID The KNOWN ID screen is displayed 2 Enter the ID Number using the digital keys and press OK The touch panel displays the found groups 3 Press the button of the desired group and proceed to the edit or delete operation For instructions on editing or deleting groups see the following pa...

Страница 41: ...up name 1 On the ADDRESS BOOK screen press SEARCH The GROUP SEARCH screen is displayed 2 Press GROUP NAME The on screen keyboard is displayed For details of the on screen keyboard see the following page P 154 On screen keyboard 3 Enter the search string and press OK 4 Press SEARCH ...

Страница 42: ...40 ADDRESS 5 The touch panel displays the found groups Press the desired group and press OK to edit the group information For instructions on editing or deleting groups see the following page P 33 Editing or deleting groups ...

Страница 43: ...confirm the contacts that are registered in a group 1 On the ADDRESS BOOK screen press CONTENTS of the group whose members you want to confirm The contacts registered in the group are displayed In the CONTENTS screen you will see all the fax numbers listed first and then all the E mail addresses ...

Страница 44: ...them from the POP3 server To perform this operation the POP3 server must be configured using TopAccess For instructions on how to configure the POP3 server refer to the TopAccess Guide Chapter 8 Administration Tab Page For instructions on how to display the CHECK E MAIL screen see the following page P 8 Accessing the User Menu The equipment can also automatically check for new E mails Internet Fax...

Страница 45: ...1 SETTING ITEMS USER PRINT 43 PRINT This menu allows you to change the initial settings for the color mode in USB Direct printing ...

Страница 46: ... the following page P 8 Accessing the User Menu 1 Change the password 1 Press OLD PASSWORD to enter the current password 2 Press NEW PASSWORD to enter the new password 3 Press RETYPE NEW PASSWORD to enter the new password again 4 Press OK to save the new password You will be returned to the USER menu screen When you press OLD PASSWORD NEW PASSWORD or RETYPE NEW PASSWORD the on screen keyboard is d...

Страница 47: ... Updating your system 66 Creating or installing clone files 69 Setting the panel calibration 74 Exporting logs 74 Setting job skip 75 Changing the keyboard layout 76 Cleaning the main chargers and LED print heads 77 Setting the pop up messages 77 Setting the option 77 NETWORK 78 Setting the TCP IP protocol IPv4 78 Setting the TCP IP protocol IPv6 80 Setting the IPX SPX protocol 86 Setting the NetW...

Страница 48: ... PDF 109 Performing the integrity check 111 LIST REPORT 113 Setting the report 113 Performing the integrity check 111 PRINTER e FILING 118 WIRELESS SETTING 120 CHANGE USER PASSWORD 121 802 1X SETTINGS 122 Setting IEEE 802 1X authentication 123 Error messages 125 FACTORY DEFAULT 126 ...

Страница 49: ... If you log into the MFP as a user without administrator privileges the ADMIN tab will be unavailable Setting role information allows you to give privileges to users For details of role information refer to the TopAccess Guide Chapter 7 User Management Tab Page 3 Press PASSWORD The on screen keyboard is displayed For details of the on screen keyboard see the following page P 154 On screen keyboard...

Страница 50: ... buttons For details of each button see the corresponding page P 49 GENERAL P 103 SECURITY P 78 NETWORK P 113 LIST REPORT P 96 COPY P 118 PRINTER e FILING P 98 FAX P 120 WIRELESS SETTING P 99 FILE P 126 FACTORY DEFAULT P 100 E MAIL P 121 CHANGE USER PASSWORD P 102 INTERNET FAX P 122 802 1X SETTINGS ...

Страница 51: ...ce information P 59 Setting the registration P 51 Setting the notification P 60 Setting the status message P 52 Changing the administrator password and resetting the service password P 60 Setting the auto clear function P 53 Setting the clock P 60 Managing the option licenses P 55 Setting the energy saver modes P 63 Adding or removing display languages P 58 Setting the calibration and registration...

Страница 52: ... the on screen numeric keypad see the following page P 155 On screen numeric keypad P 74 Exporting logs P 77 Cleaning the main chargers and LED print heads P 75 Setting job skip P 77 Setting the pop up messages P 76 Changing the keyboard layout P 77 Setting the option Item name Description LOCATION Press this button to enter the location of this equipment You can enter up to 64 characters SERVICE ...

Страница 53: ...e To enable this function there must be a SMTP server in your network In addition the settings to enable Internet communication on this equipment must be configured correctly 1 On the NOTIFICATION screen press E MAIL The on screen keyboard is displayed For details of the on screen keyboard see the following page P 154 On screen keyboard 2 Enter the E mail address and press OK You can specify up to...

Страница 54: ...screen for changing the administrator password is displayed If RESET SERVICE PASSWORD has been selected the message Are you sure is displayed on the ATTENTION screen Press YES to reset the service password 2 Press OLD PASSWORD The on screen keyboard is displayed For details of the on screen keyboard see the following page P 154 On screen keyboard 3 Enter the current administrator password and pres...

Страница 55: ...nistrator password You can use alphanumerics and the following symbols _ Setting the clock You can adjust the clock built into this equipment by entering the date and time using the digital keys P 53 Changing the date and time P 54 Changing the date format When the time settings of the equipment are adjusted using the SNTP service the date and time cannot be set manually You can make settings for ...

Страница 56: ...d press OK You will be returned to the CLOCK menu screen When you change either YEAR MONTH or DATE the day of week in the DAY section will be set automatically Changing the date format 1 On the CLOCK screen press DATE FORMAT The DATE FORMAT screen is displayed 2 Press the desired date format button You will be returned to the CLOCK menu screen ...

Страница 57: ...he Sleep or Super Sleep mode power to the unused sections of this equipment is shut off while this equipment is in the standby status Power consumption in the standby status is smallest in the Super Sleep mode followed by the Sleep mode and then by the Auto Power Save mode which is the mode that consumes the most among these three For the types of Energy Saver modes and procedures for entering eac...

Страница 58: ...nto the Sleep or Super Sleep mode for an entire day make settings for the desired day of the week as follows ON 0 00 OFF 24 00 The equipment does not go into the Sleep or Super Sleep mode for an entire day which is activated by the weekly timer function However the equipment automatically goes into the Sleep or Super Sleep mode according to the time value set for SLEEP SUPER SLEEP if it is left in...

Страница 59: ... A POP3 server address is entered 3 An account name is entered ETHERNET in the network settings is set to AUTO 1000MB or 1000BASE FULL Only for the following models e STUDIO456 Series e STUDIO856 Series e STUDIO306LP A particular network protocol is enabled AppleTalk IPX SPX When the equipment is under the above conditions ENABLE or DISABLE of SUPER SLEEP cannot be changed Protocol settings for re...

Страница 60: ...rogress If this does happen calibration cannot be finished properly Interrupt copying is not available during the calibration If the color often deviates call your service technician 1 Place paper in the Large Capacity Feeder if one is installed If not place paper in the uppermost drawer in which A4 or LT has been registered 2 The Reversing Automatic Document Feeder is an option depending on the m...

Страница 61: ... black printing respectively Changing the setting displays the CONFIRMATION screen that asks you whether you want to perform calibration or not Select OK or CANCEL as required Setting the registration When color misregistration occurs you can align the position of each color On the REGISTRATION screen press YES to start the registration This button is available only for some models Whether to allo...

Страница 62: ...creens Managing the option licenses You can view product information such as the license ID for certain options You can also install these options on the equipment if necessary P 60 Viewing product information P 61 Installing an option For installation be sure to follow the service technician s instructions Viewing product information 1 On the LICENSE MANAGEMENT screen select the option for which ...

Страница 63: ...ame License ID License ID Date The date and time of when the option has been installed Installing an option 1 On the LICENSE MANAGEMENT screen press INSTALL The LICENSE INSTALLATION screen is displayed 2 Connect your USB storage device to the USB port on the equipment and press OK The SELECT A FILE screen is displayed For the location of the USB port on the equipment refer to the Quick Start Guide...

Страница 64: ...nsfer is complete Removing the device while data are being transferred could destroy them or cause a malfunction of the equipment 5 When the installation is complete press OK The option which has just been installed is displayed on the LICENSE MANAGEMENT screen If the installation fails the message It failed in the installation Do you retry will be displayed on the CAUTION screen In this case pres...

Страница 65: ...lt language used on the touch panel to a different one P 63 Adding a language P 65 Removing a language P 66 Setting the default language The following language packs are initially installed on the equipment Initially installed only when the hard disk is installed on the equipment When adding a language store the desired language pack in the root directory of your USB storage device in advance For ...

Страница 66: ... port on the equipment refer to the Quick Start Guide Chapter 1 PREPARATIONS 3 Select the language pack that you want to install and press INSTALL The installation confirmation screen is displayed 4 Press YES The installation begins Do not remove the USB storage device until the data transfer is complete Removing the device while data are being transferred could destroy them or cause a malfunction...

Страница 67: ...case press CLOSE and perform the operation again 6 Remove the USB storage device from the USB port on the equipment Removing a language 1 On the LANGUAGES screen select the language pack that you want to remove and press DELETE The deletion confirmation screen is displayed The language packs for English US English UK and the default language cannot be removed 2 Press YES When the language pack is ...

Страница 68: ... to the previous screen Updating your system You can install files for updating the system of your equipment When the hard disk is not installed on the equipment you can confirm the installed system software and version but you will not be able to update the system of your equipment though To obtain the updating files contact your service technician Before performing the operation store the updati...

Страница 69: ... 2 Press INSTALL A message appears prompting you to insert the USB storage device 3 Connect your USB storage device in which the files for updating the system are stored to the USB port on the equipment and press OK The USB LIST screen is displayed For the location of the USB port on the equipment refer to the Quick Start Guide Chapter 1 PREPARATIONS 4 Select the file type and press OK The SYSTEM ...

Страница 70: ...lfunction of the equipment Pressing YES in the above screen while jobs are being processed displays the message Process cannot be performed while Job is processing or Admin function is in progress in the CAUTION screen In this case press CLOSE and wait until the job is complete then perform the operation again 7 When the installation is complete remove the USB storage device from the USB port on t...

Страница 71: ...thers When installing the clone data store the corresponding files in the root directory of your USB storage device in advance For details of the cloning function contact your service representative Installing the clone data 1 On the CLONING screen press INSTALL CLONE DATA The CLONE DATA INSTALLATION screen is displayed 2 Connect your USB storage device in which the clone files are stored to the U...

Страница 72: ...ayed 5 Press PASSWORD The on screen keyboard is displayed For details of the on screen keyboard see the following page P 154 On screen keyboard 6 Enter the password and press OK You will be returned to the PASSWORD REQUEST screen The input password appears as asterisks 7 Press OK The installation confirmation screen is displayed ...

Страница 73: ...he USB storage device until the data transfer is complete Removing the device while data are being transferred could destroy them or cause a malfunction of the equipment 9 When the installation is complete remove the USB storage device from the USB port on the equipment and press OK to reboot the equipment ...

Страница 74: ...S to confirm which data are duplicated 3 Enter the file name set the password and then save the file 1 Press File Name to enter the file name Enter a file name of up to 128 alphanumeric characters Data category Data to be duplicated Security Secure Erase Authentication Default Setting General Copy Scan Fax Internet Fax Fax Internet Fax Received Forward E mail Save as File Printer Notification Log ...

Страница 75: ...g transferred could destroy them or cause a malfunction of the equipment 4 When the creating of the clone files is complete press OK You will be returned to the CLONING screen When creating the cloning files fails the message The File Save Failed will be displayed on the CAUTION screen In this case press CLOSE and perform the operation again When the memory of your USB storage device becomes full ...

Страница 76: ...g performed no other operations can be performed on the touch panel If you open the front cover of the equipment during the panel calibration operation and instructions to replace toner cartridges are displayed close the front cover to complete the panel calibration operation before proceeding to replace the toner cartridges Exporting logs You can export logs of each operation displayed in the LOG...

Страница 77: ... When exporting is complete press OK 4 Remove the USB storage device from the USB port on the equipment Setting job skip You can set to skip a copy or print job that failed due some reason and proceed to others JOB SKIP CONTROL is displayed only when the hard disk is installed on the equipment For instructions on how to resolve the cause of a skipped copy or print job refer to the Copying Guide Ch...

Страница 78: ...ut of the on screen keyboard to a different one On the KEYBOARD LAYOUT screen select the desired keyboard layout and press OK You will be returned to the GENERAL menu 2 2 The keyboard layout is changed as follows When you selected QWERTY When you selected QWERTZ When you selected AZERTY ...

Страница 79: ...y a message regarding the amount of paper that can be placed in the drawer Press ENABLE or DISABLE for each option and press OK Setting the option You can select whether or not to enable hole punching on sheets of tab paper Press ON to enable hole punching on sheets of tab paper and press OK This function is available only when the Hole Punch Unit is installed in the following models e STUDIO856 S...

Страница 80: ...sage disappears Setting the TCP IP protocol IPv4 You can set the TCP IP protocol that is commonly used in most network systems When using Web based utilities such as TopAccess and e Filing or network features of this equipment such as network printing network scanning and Internet Fax you are required to set the TCP IP protocol In the TCP IP setting operation you can select the addressing mode as ...

Страница 81: ... when the equipment is connected to a local area network with a DHCP server and you want to set the TCP IP not using the auto IP addressing function but only the DHCP When NO AUTO IP is selected the IP address subnet mask default gateway primary WINS server address secondary WINS server address POP3 server address and SMTP server address are acquired from the DHCP server and the IP address assignm...

Страница 82: ...ESS The IPv6 address is acquired automatically from the DHCPv6 server and routers In this mode it is possible to register up to nine IPv6 addresses P 82 Setting the IPv6 protocol automatically in a stateless network environment Up to seven IPv6 addresses can be acquired from routers One IPv6 address can be obtained from the DHCPv6 server And one link local address is generated automatically When y...

Страница 83: ...otocol DISABLE Press this button to disable the IPv6 protocol LLMNR ENABLE Press ENABLE to enable the LLMNR Linklocal Multicast Name Resolution protocol DISABLE Press DISABLE to disable the LLMNR protocol ADDRESS MODE Select MANUAL for the IPv6 addressing mode Link Local Address The unique address used in IPv6 is displayed Item name Description ENABLE DHCP OPTIONS Select whether or not to use the ...

Страница 84: ... across a router ENABLE and DISABLE for the LLMNR protocol are available when you select ENABLE for the IPv6 protocol Item name Description IPv6 PROTOCOL ENABLE Press this button to enable the IPv6 protocol DISABLE Press this button to disable the IPv6 protocol LLMNR ENABLE Press ENABLE to enable the LLMNR Linklocal Multicast Name Resolution protocol DISABLE Press DISABLE to disable the LLMNR prot...

Страница 85: ...v6 function Item name Description ENABLE DHCP IP Address ENABLE Press this button to use the IPv6 address issued by the DHCPv6 server DISABLE Press this button to disable the IPv6 address issued by the DHCPv6 server ENABLE DHCP OPTIONS ENABLE Press this button to use the optional information IPv6 address for the DNS server etc other than the IPv6 address for this equipment issued by the DHCPv6 ser...

Страница 86: ... to connect to network places across a router ENABLE and DISABLE for the LLMNR protocol are available when you select ENABLE for the IPv6 protocol Item name Description IPv6 PROTOCOL ENABLE Press this button to enable the IPv6 protocol DISABLE Press this button to disable the IPv6 protocol LLMNR ENABLE Press ENABLE to enable the LLMNR Linklocal Multicast Name Resolution protocol DISABLE Press DISA...

Страница 87: ...6 address issued by the DHCPv6 server ENABLE DHCP OPTIONS ENABLE Press this button to use the optional information IPv6 address for the DNS server etc other than the IPv6 address for this equipment issued by the DHCPv6 server DISABLE Press this button to not use the optional information other than the IPv6 address for this equipment issued by the DHCPv6 server FQDN Option ENABLE Press this button ...

Страница 88: ...tWare file server through the network Item name Description ENABLE IPX SPX ENABLE Press this button to use the IPX SPX protocol in this equipment DISABLE Press this button to disable the IPX SPX protocol FRAME TYPE Press AUTO to automatically detect the appropriate frame type or press a specific frame type button If you do not know the frame type that must be used select AUTO ...

Страница 89: ... enable communication with the NetWare file server in bindery mode DISABLE Press this button to disable communication with the NetWare file server in bindery mode ENABLE NDS ENABLE Press this button to enable communication with the NetWare file server in NDS mode DISABLE Press this button to disable communication with the NetWare file server in NDS mode CONTEXT Press this button to enter the NDS c...

Страница 90: ...the file sharing service using SMB Not selectable when the hard disk is not installed on the equipment NetBIOS NAME Press this button to enter the name by which this equipment will be displayed on the Windows network The NetBIOS name is set to MFP NIC serial number by factory default LOGON Displays the Windows network environment to which this equipment is logged on Workgroup is displayed if this ...

Страница 91: ...MARY and WINS SECONDARY If you enter such an address the equipment cannot communicate with the WINS server If you enter 0 0 0 0 for WINS PRIMARY and WINS SECONDARY this equipment will not use the WINS server When DYNAMIC or NO AUTO IP is selected for ADDRESS MODE in the TCP IP settings this equipment can acquire the IP address for WINS PRIMARY and WINS SECONDARY from the DHCP server Setting the Ap...

Страница 92: ...ble the HTTP network server service This option must be enabled for TopAccess and the e Filing web utility ENABLE SSL Select whether or not to use SSL Secure Sockets Layer ENABLE Press this button to encrypt the data transferred between the equipment and client computers using a private key as a result of operating TopAccess or the e Filing web utility DISABLE Press this button to disable encrypti...

Страница 93: ...ton of a specific speed and mode The following models do not enter the Super Sleep mode even if ENABLE is selected in the SLEEP SUPER SLEEP screen when ETHERNET is set to AUTO 1000MB 1000BASE FULL or 1000BASE e STUDIO456 Series e STUDIO856 Series e STUDIO306LP The current Ethernet speed is displayed above the buttons Link not detected is displayed when links failed to be detected If the network is...

Страница 94: ... must operate using TopAccess For details on how to register the directory service refer to the TopAccess Guide Chapter 8 Administration Tab Page If the LDAP network service is disabled you will not be able to acquire the From Address from the LDAP server during the User Authentication for Scan to E mail for transmitting an E mail Item name Description ENABLE LDAP ENABLE Press this button to use t...

Страница 95: ...s refer to the TopAccess Guide Chapter 8 Administration Tab Page IPsec is available only when the IPsec Enabler is installed Item name Description POLICY NAME The name of the currently applied IPsec policy is displayed ENABLE Press this button to enable IPsec communication DISABLE Press this button to disable IPsec communication FLUSH CONNECTIONS Press this button to manually clear flush the curre...

Страница 96: ...er IPv4 IPv6 Secondary DNS server IPv4 IPv6 Primary WINS server IPv4 Secondary WINS server IPv4 SMTP server IPv4 IPv6 POP3 server IPv4 IPv6 Primary SNTP server IPv4 IPv6 Secondary SNTP server IPv4 IPv6 LDAP server 1 LDAP server 2 LDAP server 3 LDAP server 4 LDAP server 5 Remote server 1 Remote server 2 To designate the desired server manually Enter the server name IPv4 address or IPv6 address manu...

Страница 97: ... performed ping When you performed traceroute When the ping traceroute command can reach a server the IP address is displayed for the check result for the server If the command cannot reach it for some reason the host name is displayed instead of the IP address You will be returned to the NETWORK CHECK screen ...

Страница 98: ...stapled on the upper left corner by default To staple copies the finisher must be installed Item name Description AUTOMATIC CHANGE OF PAPER SOURCE This option allows you to specify whether to enable the function to automatically change the paper source also when the paper source has been manually specified for a copy job Selecting ON makes the equipment feed the same size of paper from a different...

Страница 99: ...nit becomes full OFF Press this button to stop printing when the punch waste tray of the Hole Punch Unit becomes full ORIGINAL OUTSIDE ERASE ON Press this button to use the original outside erase function OFF Press this button to disable the original outside erase function ADF SCAN NOISE REDUCTION NONE Press this button to disable ADF scan noise reduction Scan noise is reduced if it is conspicuous...

Страница 100: ...inals Two print settings are available discard print and reduction print DISCARD ON OFF ON When originals are up to 10 mm larger than the printing area the area of the originals that exceeds the paper printing area is discarded OFF The received original is printed on two sheets of paper if its length exceeds the paper printing area For discard print setting details contact your service technician ...

Страница 101: ...ons on how to display the MAINTENANCE screen see the following page P 47 Accessing the Admin Menu 1 On the MAINTENANCE screen enable the storage maintenance function and complete the setting 1 Press ON 2 Using the digital keys enter the number of days that the system will preserve files before deleting them You can enter 1 to 99 days To correct the value press the CLEAR button on the control panel...

Страница 102: ...nable Scan to E mail you must have an E mail address entered in the FROM ADDRESS box Item name Description FROM ADDRESS Press this button to enter the E mail address of this equipment FROM NAME Press this button to enter the name of this equipment SUBJECT Press this button to set the default E mail subject Pressing this button displays the SUBJECT screen For details of this screen see Operations i...

Страница 103: ...ubject or your own and press OK When you press OK you will be returned to the E MAIL screen Item name Description DEFAULT SUBJECT Press this button to use the factory default subject CUSTOM SUBJECT Press this button to specify your own subject When you press this button the on screen keyboard is displayed Enter a subject using the on screen keyboard and press OK to commit the entry You can enter u...

Страница 104: ... string For instructions on how to display the INTERNET FAX screen see the following page P 47 Accessing the Admin Menu To enable Internet Fax you must have an E mail address entered in the FROM ADDRESS box When you press FROM ADDRESS FROM NAME or BODY the on screen keyboard is displayed For details of the on screen keyboard see the following page P 154 On screen keyboard Item name Description FRO...

Страница 105: ...ng certificates You can import device certificates and CA certificates as well as export device certificates P 103 Importing a certificate P 106 Exporting the device certificate When importing certificates into the equipment store the files that you want to import in the root directory of your USB storage device in advance Importing a certificate 1 On the SECURITY screen press CERTIFICATE MANAGEME...

Страница 106: ...CERTIFICATE the CA CERTIFICATE screen is displayed Select the desired encoding method from PEM and DER 4 Connect the USB storage device in which the certificates are stored to the USB port on the equipment and press OK The screen for choosing a file is displayed For the location of the USB port on the equipment refer to the Quick Start Guide Chapter 1 PREPARATIONS ...

Страница 107: ... certificate will begin Proceed to step 9 Do not remove the USB storage device until the data transfer is complete Removing the device while data are being transferred could destroy them or cause a malfunction of the equipment 6 Press PASSWORD The on screen keyboard is displayed For details of the on screen keyboard see the following page P 154 On screen keyboard 7 Enter the password and press OK ...

Страница 108: ...them or cause a malfunction of the equipment 9 When importing the certificate is complete press OK You will be returned to the SECURITY screen 10 Remove the USB storage device from the USB port on the equipment Exporting the device certificate The file format of the exported device certificate will be PEM extension crt 1 On the SECURITY screen press CERTIFICATE MANAGEMENT The CERTIFICATE MANAGEMEN...

Страница 109: ... and press OK The EXPORT CERTIFICATE screen is displayed For the location of the USB port on the equipment refer to the Quick Start Guide Chapter 1 PREPARATIONS 4 Press DEVICE CERTIFICATE Exporting the certificate begins Do not remove the USB storage device until the data transfer is complete Removing the device while data are being transferred could destroy them or cause a malfunction of the equi...

Страница 110: ...2 SETTING ITEMS ADMIN 108 SECURITY 5 When exporting is complete press OK You will be returned to the SECURITY screen 6 Remove the USB storage device from the USB port on the equipment ...

Страница 111: ...me as user password DISABLE Press this button to use the user password entered in USER PASSWORD above instead of the user authentication user name MASTER PASSWORD Press this button to enter the password required to change the security setting of a secure PDF file No master password is initially set ENCRYPTION LEVEL Select the encryption level for the secure PDF files 128bit AES Press this button t...

Страница 112: ...s available for a password for the encrypted PDF files Due to this if any characters other than ASCII ones are used in the user name and when USE AUTHENTICATION CODE AS PASSWORD is selected the encrypted PDF files cannot be opened since the password becomes incorrect If either EXTRACT or ACCESSIBILITY is selected or deselected when 40bit RC4 is selected both options are enabled or disabled accordi...

Страница 113: ...you sure is displayed on the CONFIRMATION screen 3 Press OK When the integrity check is complete the message The process was finished successfully will be displayed on the CONFIRMATION screen It may take some time to complete the integrity check When you press OK in the above screen while a job is being processed the message Process cannot be performed while Job is processing or Admin function is ...

Страница 114: ...2 SETTING ITEMS ADMIN 112 SECURITY 4 Press OK to reboot the equipment The equipment reboots ...

Страница 115: ...an be exported as a file from TopAccess administrator mode Communication Report P 114 Setting the communication report The communication report allows you to print a report after every transmission You can also select the conditions for printing communication reports for each transmission type Reception List P 114 Setting the communication report The settings for the reception list allows you to s...

Страница 116: ...ption AUTO Press ON to enable printing the transmission and reception journals automatically When you enable this option the transmission and reception journals will be printed when the specified numbers of transactions are completed TX JOURNAL Press the number button that specifies the number of transmissions you want to be printed in the transmission journal RX JOURNAL Press the number button th...

Страница 117: ... you want to print the communication report by adding the first page of the sent document Press NO when not Setting the reception list 1 On the LIST REPORT menu press REPORT SETTING The REPORT SETTING screen is displayed Item name Description MEMORY TX DIRECT TX MULTI TX POLLING RELAY ORIGINATION RELAY STATION RELAY DESTINATION OFF Press this button to disable printing of communication report ALWA...

Страница 118: ...el For an output example of each list see the following page P 156 List Print Format 1 On the LIST REPORT menu press LIST The LIST screen is displayed Item name Description RELAY STATION Select ON to print the reception list when a relay transmission has been received from an originator LOCAL Select ON to print the reception list when a local document has arrived to the mailbox on the equipment RE...

Страница 119: ...2 SETTING ITEMS ADMIN LIST REPORT 117 2 SETTING ITEMS ADMIN 2 Press the button of the list that you want to print The selected list is printed ...

Страница 120: ...om a different drawer when the specified drawer becomes empty during a print job SUSPEND PRINTING IF STAPLER EMPTY Select whether to stop printing when the stapler is empty during stapling in other than the saddle stitch mode ON Press this button to stop printing OFF Press this button to continue printing without stapling If the stapler is empty in the saddle stitch mode printing stops ENFORCEMENT...

Страница 121: ...s and Hold Print jobs on login to this equipment OFF Press this button to require touch panel operation For details of Private Print jobs and Hold Print jobs refer to the following chapters of the Printing Guide Chapter 2 PRINTING FROM WINDOWS Chapter 3 PRINTING FROM Macintosh Chapter 4 PRINTING FROM UNIX Linux Chapter 5 MANAGING PRINT JOBS FROM THE CONTROL PANEL This option is available when the ...

Страница 122: ... make settings for the Wireless LAN Module For details of wireless LAN settings refer to the Operator s Manual for Wireless LAN Module Chapter 1 SETTING UP WIRELESS NETWORK This button is displayed only in some models For instructions on how to display the WIRELESS SETTING screen see the following page P 47 Accessing the Admin Menu ...

Страница 123: ...to display the CHANGE USER PASSWORD screen see the following page P 47 Accessing the Admin Menu 1 On the CHANGE USER PASSWORD screen set a new password and complete the setting 1 Press USER NAME to enter the user name for which the password is to be changed 2 Press NEW PASSWORD to enter the new password 3 Press RETYPE NEW PASSWORD to enter the new password again 4 Press OK The password is now chan...

Страница 124: ...he certificates that must be installed are as follows 1 The CA certificate must be installed in this equipment before the settings for IEEE 802 1X authentication are performed 2 The user certificate must be installed in this equipment before the settings for IEEE 802 1X authentication are performed For instructions on how to install certificates refer to the TopAccess Guide Chapter 8 Administratio...

Страница 125: ... ENABLE Press this button to use IEEE 802 1X authentication DISABLE Press this button to disable IEEE 802 1X authentication When changing IEEE802 1X authentication from ENABLE to DISABLE press Next and on the Confirm the following settings screen that appears press APPLY NOW to complete the setting CHECK SETTINGS Press this button to confirm the options currently selected CHECK SETTINGS is availab...

Страница 126: ...ing page P 154 On screen keyboard When you selected PEAP When you selected EAP TTLS When you selected other than EAP TLS When you selected EAP TLS Item name Description EAP USER NAME Press this button to enter the EAP user name PASSWORD Press this button to enter the authentication password RETYPE PASSWORD Press this button to enter the authentication password again Use Username from Common Name i...

Страница 127: ... following error messages may be displayed on the touch panel Message Cause 802 1X Auth Server Switch couldn t be contacted The RADIUS server service is stopped Configuration for the RADIUS server is not correct The IEEE 802 1X switch has problem 802 1X Authentication failed The username or password that the user entered is not correct The certificates uploaded are wrong Certificate verification F...

Страница 128: ... All the settings are reset to the factory defaults Network Copy Fax Scan to File E mail Internet Fax Printer e Filing Printer Print Service Security User Data Remarks User Management User Account When the user management data are cleared the LDAP mapping information will be also cleared Group Management Role Management Department Management Quota Management Counter User Counter The data are clear...

Страница 129: ...setting data and user data before initialization use the cloning function to create clone files For details of the cloning function see the following page P 69 Creating or installing clone files When the initialization fails the message The process failed will be displayed In this case press CLOSE and perform the operation again 2 Press OK to reboot the equipment The equipment reboots ...

Страница 130: ......

Страница 131: ... code list 140 Enabling department codes 140 Registering a new department code 141 Editing department codes 143 Deleting department codes 145 Resetting the counters for each department 146 Setting output limitations for all departments 147 Setting the No Limit Black function 148 Setting the registered quota 149 Resetting all department counters 150 Deleting all department codes 151 ...

Страница 132: ...List counter Indicates the number of sheets printed by system page print jobs Scan counter Displays the total number of originals scanned by this equipment The scan counter contains the following counters Copy counter Indicates the number of originals scanned by copy jobs Fax counter Indicates the number of originals scanned by fax and Internet Fax transmissions Network counter Indicates the numbe...

Страница 133: ...unter 1 Press PRINT COUNTER The PRINT COUNTER screen is displayed 2 Select the button of the counter you want to check Only for color print models The displayed items differ between the color print models and the other ones Displaying scan counter 1 Press SCAN COUNTER The SCAN COUNTER screen is displayed ...

Страница 134: ...3 MANAGING COUNTERS COUNTER MENU 132 TOTAL COUNTER 2 Select the button of the counter you want to check ...

Страница 135: ... menu 2 Press PRINT OUT TOTAL COUNTER When the Department Management function is disabled TOTAL COUNTER LIST is printed When the Department Management function is enabled the screen to input the department code is displayed Enter the department code using the digital keys and press OK to print TOTAL COUNTER LIST For an output example of TOTAL COUNTER LIST see the following page P 156 TOTAL COUNTER...

Страница 136: ...nter scan list counter for department code can be disabled individually For details refer to the TopAccess Guide Chapter 8 Administration Tab Page Scan counter for department code This counter allows you to display the value of the scan counter for each department code The scan counter contains the following counters Copy counter Indicates the number of originals scanned by copy jobs Fax counter I...

Страница 137: ... the following page P 154 On screen keyboard 4 Enter the department code and press OK You will be returned to the DEPARTMENT CODE screen 5 Press OK The COUNTER screen is displayed 6 Continue with the operation that you require P 136 Displaying print counter for department code P 136 Displaying scan counter for department code P 137 Displaying fax communications counter for department code ...

Страница 138: ...reen for the specified department code is displayed 2 Select the button of the counter you want to check Only for color print models The displayed items differ between the color print models and the other ones Displaying scan counter for department code 1 Press SCAN COUNTER The SCAN COUNTER screen for the specified department code is displayed ...

Страница 139: ...R 137 3 MANAGING COUNTERS COUNTER MENU 2 Select the button of the counter you want to check Displaying fax communications counter for department code 1 Press FAX COMMUNICATION The FAX COMMUNICATION screen for the specified department code is displayed ...

Страница 140: ...trator If the User Management function is enabled and you log in using a user name with Account Manager privileges you are not required to enter the administrator password to display the DEPARTMENT MANAGEMENT menu 1 Press the COUNTER button on the control panel to access the COUNTER menu 2 Press DEPARTMENT MANAGEMENT The ADMINISTRATOR PASSWORD screen is displayed 3 Press PASSWORD The on screen key...

Страница 141: ...ting department codes P 146 Resetting the counters for each department P 147 Setting output limitations for all departments P 148 Setting the No Limit Black function P 149 Setting the registered quota P 150 Resetting all department counters P 151 Deleting all department codes Menus other than DEPARTMENT MANAGEMENT and DEPARTMENT REGISTRATION will be available after you register a department code a...

Страница 142: ...nters that can be individually managed by department codes see the following page P 134 DEPARTMENT COUNTER DEPARTMENT MANAGEMENT will be available after one or more department codes are registered Before enabling the Department Management function register the required department codes P 141 Registering a new department code When the print jobs from computers are also managed by department using T...

Страница 143: ... on how to display the DEPT MANAGEMENT menu screen see the following page P 138 Logging on as administrator 2 Press an undefined button to create a new department and then ENTRY The on screen keyboard is displayed For details of the on screen keyboard see the following page P 154 On screen keyboard If the touch panel does not display an undefined department code press to display the next page 3 En...

Страница 144: ...quipment cannot stop the job immediately Item name Description Quota Management Quota management is enabled or disabled by pressing ON or OFF To enable it press ON and set the quota and the default quota value In color print models set the color and the black quota respectively QUOTA Displays the remaining number of available copies prints for this department code The number entered in the DEFAULT...

Страница 145: ...ss the department button that you want to edit and then EDIT The message This department code is already registered Do you wish to replace this code is displayed on the CONFIRMATION screen If the touch panel does not display the desired department code press to display the next page 3 Press YES The on screen keyboard is displayed For details of the on screen keyboard see the following page P 154 O...

Страница 146: ... DEPARTMENT CODE screen You can enter a department code of up to 63 characters Characters you can enter are as follows Alphanumerics _ and If you want to clear the code to retype it press Clear on the on screen keyboard or the CLEAR button on the control panel 7 Press OK The QUOTA screen is displayed 8 Set the quota of this department code as required and press OK For the description of each item ...

Страница 147: ...screen is displayed For instructions on how to display the DEPT MANAGEMENT menu screen see the following page P 138 Logging on as administrator 2 Press the department button that you want to delete and then DELETE The message Delete OK is displayed on the CONFIRMATION screen If the touch panel does not display the desired department code press to display the next page 3 Press YES The department co...

Страница 148: ... is displayed For instructions on how to display the DEPT MANAGEMENT menu screen see the following page P 138 Logging on as administrator 2 Press the department button whose counters you want to reset and then RESET COUNTERS The message CLEAR OK is displayed on the CONFIRMATION screen If the touch panel does not display the desired department code press to display the next page 3 Press YES The cou...

Страница 149: ... P 143 Editing department codes 1 On the DEPT MANAGEMENT menu screen press ALL LIMIT The ALL LIMIT screen is displayed For instructions on how to display the DEPT MANAGEMENT menu screen see the following page P 138 Logging on as administrator 2 Enable or disable the All Limit function and then press OK The All Limit function is enabled or disabled by pressing ON or OFF In color print models set th...

Страница 150: ...t When you enable it the equipment will not count the number of black and white copies prints for each department code This option is available only for color print models When User Management function is enabled the No Limit Black function cannot be enabled 1 On the DEPT MANAGEMENT menu screen press NO LIMIT BLACK The NO LIMIT BLACK COPY PRINT screen is displayed For instructions on how to displa...

Страница 151: ...lt ones in a single operation 1 On the DEPT MANAGEMENT menu screen press SET REGISTERED QUOTA The message Are you sure is displayed on the CONFIRMATION screen For instructions on how to display the DEPT MANAGEMENT menu screen see the following page P 138 Logging on as administrator 2 Press YES The quotas for all departments are now returned to the default ones Press NO to cancel the operation ...

Страница 152: ...nters You cannot clear the total counter 1 On the DEPT MANAGEMENT menu screen press RESET ALL COUNTERS The message CLEAR OK is displayed on the CONFIRMATION screen For instructions on how to display the DEPT MANAGEMENT menu screen see the following page P 138 Logging on as administrator 2 Press YES All department counters are now cleared Press NO to cancel the clear operation ...

Страница 153: ...istered department codes 1 On the DEPT MANAGEMENT menu screen press DELETE ALL The message Delete OK is displayed on the CONFIRMATION screen For instructions on how to display the DEPT MANAGEMENT menu screen see the following page P 138 Logging on as administrator 2 Press YES All department codes are now deleted Press NO to cancel the deletion ...

Страница 154: ......

Страница 155: ... numeric keypad 155 List Print Format 156 TOTAL COUNTER LIST 156 DEPARTMENT CODE LIST 157 ADDRESS BOOK INFORMATION 158 GROUP NUMBER INFORMATION 159 FUNCTION LIST User 160 NIC configuration page 161 FUNCTION LIST Administrator 163 PS3 font list 182 PCL font list 183 ...

Страница 156: ...es On screen keyboard Item name Description Basic Press this to access the basic keys Symbol Press this to access the symbol keys Other Press this to access the special keys Caps Lock Press this to switch capital letters and small letters Shift Press this to enter capital letters Space Press this to enter a space Press these to move the cursor Back Space Press this to delete the letter before the ...

Страница 157: ...enu is suitable with the connected keyboard P 76 Changing the keyboard layout The supported keyboards are as follows 101 keyboard QWERTY layout 102 105 keyboard QWERTZ layout 102 105 keyboard AZERTY layout There is no guarantee that all keyboards will function properly On screen numeric keypad Whenever a fax number needs to be entered the following screen is displayed Press Pause to enter One in a...

Страница 158: ...PRINTER 99999 99999 99999 299996 LIST 99999 99999 99999 299996 1199988 COPY FULL COLOR SMALL 16667 LARGE TOTAL 16667 33334 TWIN MONO COLOR 16666 16665 33331 BLACK 16667 16667 33334 TOTAL 399996 399996 99999 FAX FULL COLOR SMALL 16667 LARGE TOTAL 16667 33334 TWIN MONO COLOR 16666 16665 33331 BLACK 16667 16667 33334 TOTAL 399996 399996 99999 PRINTER FULL COLOR SMALL 16667 LARGE TOTAL 16667 33334 TWI...

Страница 159: ... SMALL 99999 199998 LARGE 99999 199998 199998 399996 TOTAL PRINT 99999 99999 199998 DEPT NO PRINT COUNTER FULL COLOR DEPARTMENT D 2 02 TWIN MONO COLOR COPY 199998 LARGE 99999 199998 199998 399996 TOTAL LIMIT PRINT 99999 99999 199998 COPY SMALL 99999 199998 LARGE 99999 199998 199998 399996 TOTAL PRINT 99999 99999 199998 FAX 99999 99999 199998 PRINT 99999 99999 199998 LIST 99999 99999 199998 799992 ...

Страница 160: ...003 User03 OFF MEMORY OFF 0 00000000003 user03 example com 004 User04 OFF MEMORY OFF 0 00000000004 user04 example com 005 User05 OFF MEMORY OFF 0 00000000005 user05 example com 006 User06 OFF MEMORY OFF 0 00000000006 user06 example com 007 User07 OFF MEMORY OFF 0 00000000007 user07 example com 008 User08 OFF MEMORY OFF 0 00000000008 user08 example com 009 User09 OFF MEMORY OFF 0 00000000009 user09...

Страница 161: ...2011 05 10 20 47 FAX NO 1 99999999999 FAX NO 2 99999999990 NAME MFP_00000183 NO NAME ADDRESS BOOK 001 Group01 001 007 014 019 001 008 014 019 002 008 015 020 003 009 015 020 004 009 016 005 010 016 005 010 017 006 011 017 006 012 018 007 013 018 003 Group03 005 005 006 007 008 009 002 Group02 005 007 009 015 060 065 Fax Number E mail Address ...

Страница 162: ...IRECTION DISABLE BYPASS FEED PLAIN ORIGINAL MODE FOR COLOR TEXT PHOTO ORIGINAL MODE FOR BLACK TEXT PHOTO ORIGINAL MODE FOR AUTO COLOR TEXT PHOTO OMIT BLANK PAGE ADJUSTMENT 0 ACS ADJUSTMENT 2 SCAN COLOR MODE BLACK COMPRESS MID B W ADJUSTMENT IN ACS 3 ROTATION 0 SINGLE 2 SIDED SCAN SINGLE IMAGE QUALITY FOR BLACK STANDARD PREVIEW SETTING OFF INITIAL PREVIEW TYPE PAGE FIT OMIT BLANK PAGE ADJUSTMENT 0 ...

Страница 163: ...of this equipment Unit Serial No CME000034 Version XXXXXXXXXXXX Network Address 00 40 af 7e 28 55 Network Topology Ethernet Connector RJ45 Network Mode Auto Novell Network Information enabled Print Server Name MFP_04998820 Password Defined Search Root not defined Directory Services Tree ORG Directory Services Context dept1 org Scan Rate 5 Frame Type Auto Sense TCP IP Network Information for IPv4 e...

Страница 164: ...k Type The AppleTalk printer type of this equipment Novell Connection Information File System Server Name The NetWare file system server name to which this equipment is connected Queue Name The NetWare queue name to which this equipment is connected AppleTalk Connection Information AppleTalk Printer Name The AppleTalk printer name of this equipment Raw Socket Connection Information Port Number The...

Страница 165: ...er size for drawer 4 YES DRAWER LARGE CAPACITY FEEDER 3 Shows the paper size for the large capacity feeder YES DRAWER EXTERNAL LARGE CAPACITY FEEDER 4 Shows the paper size for the large capacity feeder YES GENERAL TOTAL COUNTER 9999 MAIN PAGE MEMORY SIZE 2048 MB 512 MB DRAWER 1 LT DRAWER 2 LD DRAWER 3 LT R DRAWER 4 A4 AUTO CLEAR 45 ENERGY SAVER WEEKLY TIMER ON OFF TIMER SUNDAY 00 00 00 24 00 00 TI...

Страница 166: ...CAL HDD Shows whether the Save as Local HDD function is enabled or disabled NO FUNCTIONS E FILING Shows whether the e Filing function is enabled or disabled NO FUNCTIONS EMAIL SEND Shows whether the E mail transmission is enabled or disabled NO FUNCTIONS SAVE AS FTP Shows whether the Save as FTP function is enabled or disabled NO FUNCTIONS SAVE AS FTPS Shows whether the Save as FTPS function is en...

Страница 167: ...ows whether the thick 1 set pop up is enabled or disabled NO MENU SETTING DEFAULT MENU SCREEN SETTING Shows the default screen for a menu NO COPY Function Description User EXPOSURE FOR COLOR 1 Shows the default exposure setting for color copies YES EXPOSURE FOR BLACK 1 Shows the default exposure setting for black copies YES EXPOSURE 2 Shows the default exposure setting for copies YES COLOR MODE 1 ...

Страница 168: ...continues printing when punch dust becomes full NO ORIGINAL OUTSIDE ERASE Shows whether the original outside erase function is enabled or disabled NO ADF SCAN NOISE REDUCTION Shows the setting of the ADF scan noise reduction function NO SCAN Function Description User COLOR MODE Shows the default color mode for scan YES COMPRESS Shows the default compression setting YES B W ADJUSTMENT IN ACS Shows ...

Страница 169: ...n YES TX TYPE 1 Shows the default transmission type YES TTI Shows whether the TTI is enabled or disabled NO RTI Shows whether the RTI is enabled or disabled YES ECM 1 Shows whether the ECM is enabled or disabled YES PREVIEW SETTING 3 Shows whether the preview function is enabled or disabled NO INITIAL PREVIEW TYPE 3 Shows the default preview type NO INITIAL SETUP MONITOR VOLUME 1 Shows the monitor...

Страница 170: ...ed NO FAX RECEIVED FORWARD LINE2 AGENT2 1 Shows the agent type of line 2 if the Fax Received Forward is registered NO SECURE RECEIVE TIMER 1 Shows the time to enter the secure receive mode ON time and the time to exit the secure receive mode OFF time for each day Sunday to Saturday NO SECURE RECEIVE ENABLE SECURE RECEIVE 1 Shows whether the secure receive is enabled or disabled NO E FILING Functio...

Страница 171: ...s enabled NO URL TRANSMISSION SETTINGS SEARCH INTERVAL TO DELETE THE EXPIRED DOWNLOAD FILE Shows the interval for monitoring the expiration of the file preservation period when URL transmission is enabled NO INTERNET FAX Function Description User FRAGMENT PAGE SIZE KB Shows the fragment page size that applies to an Internet Fax transmission NO BODY STRING TRANSMISSION Shows whether the body string...

Страница 172: ...TION LIST RELAY STATION Shows whether a reception list will be printed or not after receiving a relay transmission from an originator as a relay hub NO PRINTER E FILING Function Description User AUTOMATIC CHANGE OF PAPER SOURCE Shows whether the Automatic Change of Paper Source function is enabled or disabled NO PAPER OF DIFFERENT DIRECTION Shows whether the Paper of Different Direction function i...

Страница 173: ... ENABLE IPv6 Shows whether the IPv6 protocol is enabled or disabled NO LLMNR Shows whether the LLMNR Linklocal Multi cast Name Resolution is enabled or disabled NO ADDRESS MODE Shows the IPv6 address mode NO LINK LOCAL ADDRESS Shows the link local address of this equipment NO IP ADDRESS Shows the IPv6 address of this equipment NO PREFIX LENGTH Shows the prefix length of the IPv6 address NO DEFAULT...

Страница 174: ...TATEFUL FOR IP ADDRESS Shows whether the stateful usage IP address acquisition is enabled or disabled NO USE STATEFUL FOR OPTIONS Shows whether the stateful usage optional information acquisition is enabled or disabled NO NETWORK SETTING NETWORK IPX SPX Function Description User ENABLE IPX SPX Shows whether the IPX SPX protocol is enabled or disabled NO FRAME TYPE Shows the frame type to be select...

Страница 175: ... Description User ENABLE DDNS Shows whether the DDNS is enabled or disabled NO HOST NAME Shows the host name of this equipment NO DOMAIN NAME Shows the domain name of this equipment NO SECURITY METHOD Shows the security method of this equipment NO PRIMARY LOGIN NAME Shows the primary log in name if GSS TSIG is selected for the security method NO SECONDARY LOGIN NAME Shows the secondary log in name...

Страница 176: ...r Bonjour NO SERVICE NAME Shows the service name of this equipment for Bonjour NO NETWORK SETTING SESSION LLTD SESSION Function Description User ENABLE LLTD Shows whether the LLTD Link Layer Topology Discovery protocol is enabled or disabled NO DEVICE NAME Shows the device name displayed on the Network Map NO NETWORK SETTING SESSION SLP SESSION Function Description User ENABLE SLP Shows whether SL...

Страница 177: ...R Shows the port number to be used for receiving Internet Faxes using the SMTP protocol NO ENABLE OFFRAMP GATEWAY Shows whether the offramp gateway is enabled or disabled NO ENABLE OFFRAMP SECURITY Shows whether offramp security is enabled or disabled NO ENABLE OFFRAMP PRINT Shows whether offramp print is enabled or disabled NO E MAIL ADDRESS Shows the e mail address of this equipment if the SMTP ...

Страница 178: ...or disabled NO SSL PORT NUMBER Shows the SSL port number to be used for accessing the FTP server NO NETWORK SETTING NETWORK SERVICE WEB SERVICES SETTING Function Description User ENABLE SSL Shows whether SSL for Web Services is enabled or disabled NO FRIENDLY NAME Shows the display name of this equipment NO WEB SERVICES PRINTER Shows whether Web Service print is enabled or disabled NO PRINTER NAME...

Страница 179: ... Shows whether the NTP authentication is enabled or disabled NO NETWORK SETTING NETWORK SERVICE TELNET SERVICE Function Description User ENABLE TELNET Shows whether the TELNET service is enabled or disabled NO PORT NUMBER Shows the port number to be used for the TELNET service NO USER NAME Shows the user name for the TELNET service NO NETWORK SETTING NETWORK SERVICE FILTERING Function Description ...

Страница 180: ...RVER NAME Shows the print server name of this equipment NO PASSWORD Shows the password for the NetWare file server NO PRINT QUEUE SCAN RATE Shows how often the equipment scans the queue on NetWare file server in second NO NETWORK SETTING PRINT SERVICE SETTING E MAIL PRINT Function Description User ENABLE PRINT HEADER Shows whether the header will be printed or not for e mail printing NO ENABLE PRI...

Страница 181: ...isabled NO DEPARTMENT MANAGEMENT PRINT Shows whether the department code management print is enabled or disabled NO DEPARTMENT MANAGEMENT SCAN Shows whether the department code management scan is enabled or disabled NO DEPARTMENT MANAGEMENT LIST Shows whether the department code management list is enabled or disabled NO SECURITY SETTING AUTHENTICATION USER AUTHENTICATION SETTING Function Descripti...

Страница 182: ...d NO NUMBER OF RETRY Shows the number of retry for entering the password NO LOCKOUT TIME Shows the lockout time minute NO AVAILABLE PERIOD Shows whether the password valid period setting is enabled or disabled NO EXPIRATION DAY S Shows the password valid period day NO SECURITY SETTING PASSWORD POLICY POLICY FOR ADMINISTRATOR AUDITOR Function Description User MINIMUM PASSWORD LENGTH Shows the minim...

Страница 183: ...ng is enabled or disabled NO NUMBER OF RETRY Shows the number of retry for entering the password NO LOCKOUT TIME Shows the lockout time minute NO SECURITY SETTING PASSWORD POLICY POLICY FOR E FILING TEMPLATE GROUPS TEMPLATES SECURE PDF SNMP V3 CLONING SECURE RECEIVE Function Description User ...

Страница 184: ...4 APPENDIX 182 List Print Format PS3 font list Output example of the PS3 Font List ...

Страница 185: ...4 APPENDIX List Print Format 183 4 APPENDIX PCL font list Output example of the PCL Font List ...

Страница 186: ......

Страница 187: ...ORMATION 50 CONTEXT 87 COPY 12 58 96 CORP 21 Creating clone files 72 Creating new contacts 20 Creating new groups 30 Creating or installing clone files 69 CUSTOM SUBJECT 101 D DEFAULT 59 DEFAULT MODE OF AUTO COLOR 96 DEFAULT SUBJECT 101 Deleting all department codes 151 Deleting department codes 145 DEPARTMENT CODE LIST 157 DEPARTMENT COUNTER 134 DEPARTMENT MANAGEMENT 138 DEPT 21 DESIRED ZONE 89 D...

Страница 188: ...ic keypad 155 ORIGINAL MODE 12 13 15 ORIGINAL MODE FOR AUTO COLOR 12 ORIGINAL MODE FOR BLACK 12 ORIGINAL MODE FOR COLOR 12 ORIGINAL OUTSIDE ERASE 97 P PAPER EMPTY MESSAGE 60 PAPER MISFEED RECOVERY 77 PAPER OF DIFFERENT DIRECTION 96 118 PCL font list 183 PEAP 122 Performing the integrity check 111 PHOTOGRAPH 16 POLICY NAME 93 POLLING 115 PREFIX 81 PRESENTATION 16 PREVIEW SETTING 13 14 PRIMARY PORT ...

Страница 189: ...etting the No Limit Black function 148 Setting the notification 51 Setting the option 77 Setting the panel calibration 74 Setting the pop up messages 77 Setting the reception list 115 Setting the registered quota 149 Setting the registration 11 59 Setting the report 113 Setting the reversed display 10 Setting the Sleep or Super Sleep mode 57 Setting the SMB protocol 88 Setting the status message 6...

Страница 190: ...188 INDEX ...
Страница 191: ...0C 6540C 6550C FC 2040C 2540C 3040C 3540C 4540C DP 2095 2530 3020 3590 4590 5010 DP 5560 6560 7560 8560 FC 2050C 2550C FC 2051C 2551C FC 2555C 3055C 3555C 4555C 5055C DP 3030 FC 5560C 6560C 6570C OME120016D0 ...

Страница 192: ... SHINAGAWA KU TOKYO 141 8562 JAPAN MULTIFUNCTIONAL DIGITAL COLOR SYSTEMS MULTIFUNCTIONAL DIGITAL SYSTEMS MFP Management Guide 2012 2013 TOSHIBA TEC CORPORATION All rights reserved R120120K9704 TTEC Ver04 F 2013 12 ...

Отзывы: