2. PRINTER SETUP
ENGLISH VERSION EO1-33099
2.4 Connecting the Cables to the Printer
E2-
4
2.4 Connecting Cables
to the Printer
This section details how to connect communication cables to the printer
from your host computer or other devices. There are three different
means of connection that can be used on the printer. These are:
An Ethernet cable connection can be used to connect to a network
or directly to your host computer’s Ethernet port.
NOTE:
▪
Use an Ethernet cable conforming to the standard.
10BASE-T: Category 3 or greater
100BASE-TX: Category 5 or greater
Cable length: Up to 100 m segment length
▪ In some environments communication errors may be caused by
electromagnetic interference on the cable. If this occurs you
may need to use a shielded cable (STP).
A USB cable connection between the printer’s USB interface port
and one of your host computer’s USB ports.
NOTE:
▪ When disconnecting the USB cable from the host computer,
follow the “Safely remove hardware” procedure on the host
computer.
▪ Use a USB cable conforming to V2.0 or greater and with a Type
B plug on one end.
A serial cable connection between the printer’s RS-232C serial
port and one of your host computer’s COM ports.
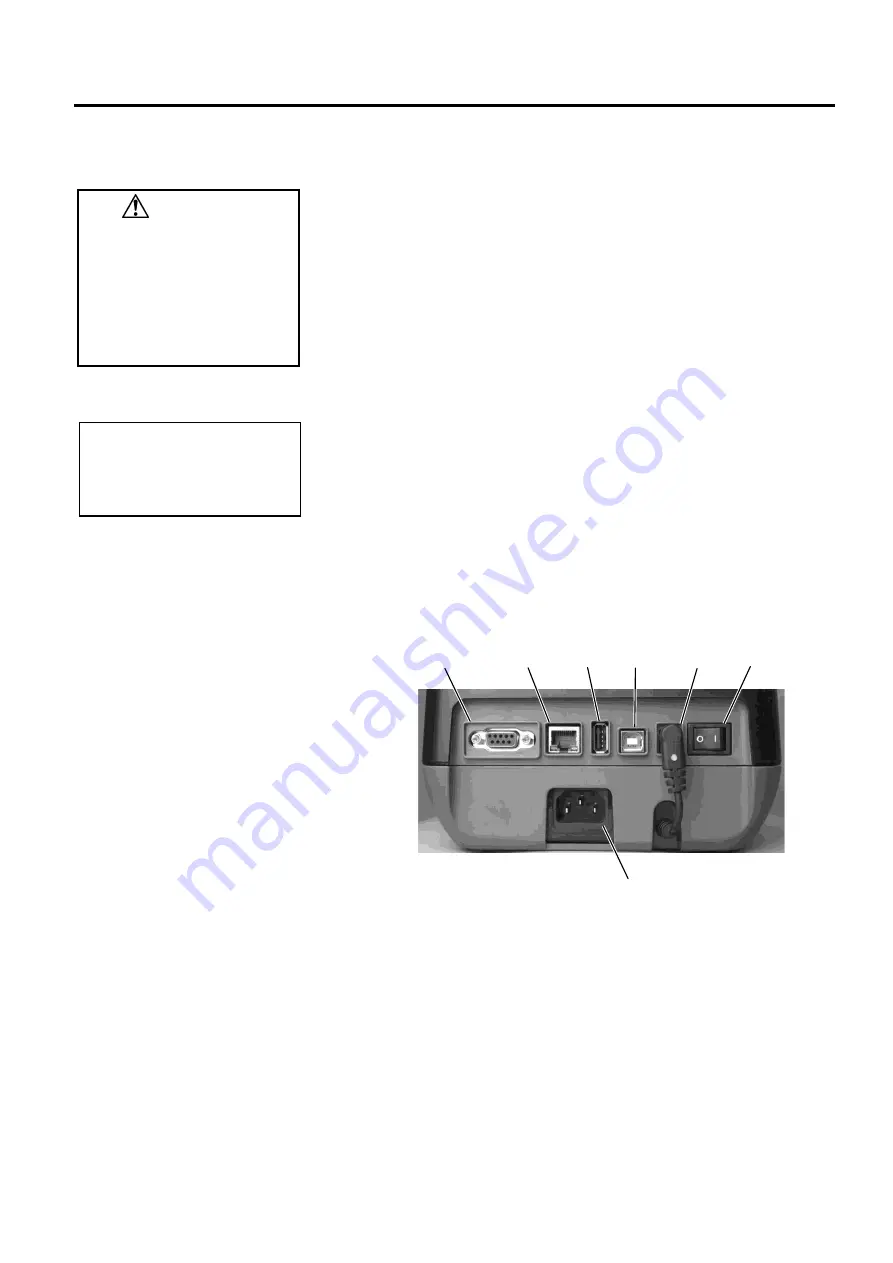
The diagrams below show all the possible cable connections to the
current versions of the printer.
Power Switch
Power Jack
Remark
:
Make sure that the Power Jack is connected to the printer
as shown above.
USB Interface for connecting a host computer
USB Interface for connecting a USB memory
Ethernet Interface
Serial Interface (RS-232C)
AC Power Inlet
NOTE:
For the specifications of the
serial interface cable, refer to
APPENDIX 2, INTERFACE
.
CAUTION!
Be sure to connect the serial
cable while the printer and the
host computer are in a
powered-off state. Failure to
do this may cause electric
shocks, short-circuits, or
damage to the printer or Host
computer.


